Are your favorite pants dragging on the floor? Pants that are too long are not only a fashion faux pas, but they can also quickly become worn and damaged. Instead of letting ill-fitting pants languish in your closet or spending money on professional tailoring, you can easily learn How To Hem Pants yourself at home. This guide will walk you through two simple methods – hemming by hand and using a sewing machine – so you can achieve a perfect pant length with confidence, even if you’re a complete beginner.
What You’ll Need: Essential Supplies for Hemming Pants
Before you start hemming your pants, gather these basic supplies to make the process smooth and efficient:
- Pants that need hemming
- Pins for marking the hem
- Iron and ironing board for crisp creases
- Sharp scissors or a rotary cutter and mat for precise fabric cutting
- Tailor’s chalk or a fabric marking pencil to mark the hemline
- Needle and thread that matches your pants, or a sewing machine for faster hemming
- Tape measure, clear acrylic ruler, or a hem gauge for accurate measurements
- A full-length mirror, if possible, to visualize the final length
If you are hemming jeans, you’ll also want to have:
- A heavy-duty ‘jeans’ needle for your sewing machine (if using a machine)
- Thread that matches the topstitching color on your jeans for a professional finish
Finding the Perfect Pant Length: Tailoring to Your Style and Shoes
Determining the correct pant length is crucial for both comfort and style. The ideal hem depends on the type of pants, the shoes you plan to wear with them, and your personal preference. Generally, dress pants and casual pants should just barely clear the floor to prevent wear and tear on the hems.
A good rule of thumb for dress pants and casual styles is to aim for the back of the pant hem to be about ½ inch (1.3 cm) above the floor when you are wearing your regular shoes. However, personal style varies. For example, some prefer jeans to slightly graze the floor, especially when wearing heels.
To ensure you get the length just right, wear the shoes you’ll typically pair with the pants and stand in front of a full-length mirror. This will allow you to accurately assess and adjust the hem to your desired length. Consider unfolding the original hem with a seam ripper to remove bulk and creases, which can help in pinning a clean, new hem.
Step-by-Step Guide to Hemming Pants: Achieving a Professional Finish
Follow these steps for both hand sewing and machine sewing methods to prepare your pants for hemming:
Step 1: Pinning Your Pants to the Ideal Length
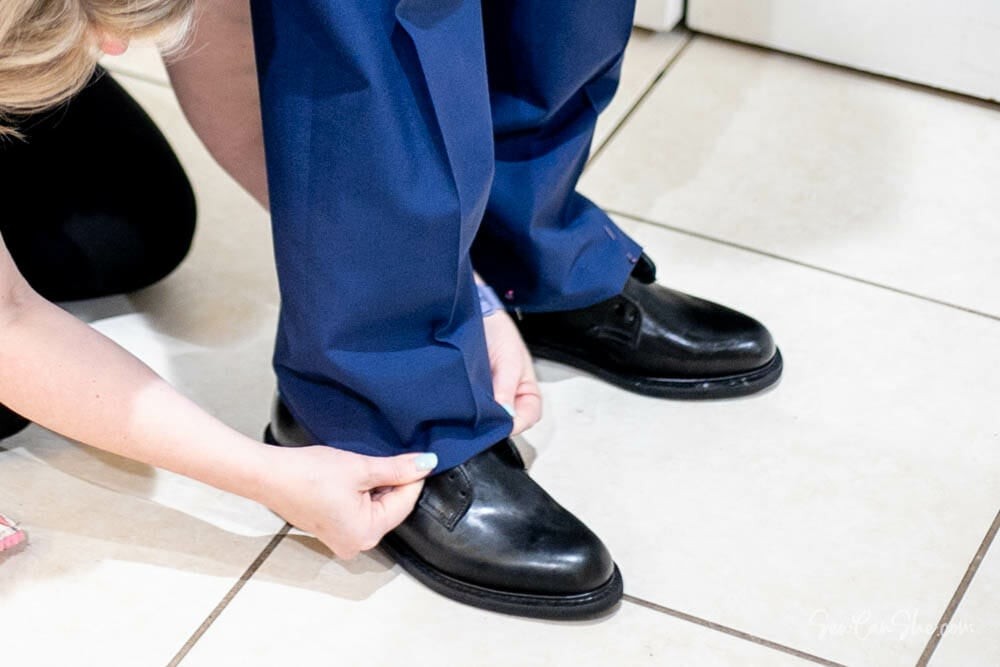
The most accurate way to determine your hem is while wearing the pants. Put on the pants along with the shoes you intend to wear with them. Stand in front of a mirror, ideally a full-length one.
Carefully fold the pant leg up to your desired length. Have someone help you pin the hem in place, or carefully pin it yourself, ensuring the fold is even around the leg. It’s best to place the pinheads downwards, making them easier to remove later when the pants are turned inside out.
Once pinned, take off the pants and lay them flat. Compare both legs to ensure the pinned hem is at the same height on both sides. Minor adjustments are normal. For extra assurance, you can try the pants on again to double-check the length before proceeding.
Step 2: Measuring and Marking the Hemline
After pinning, turn your pants inside out. Now you need to measure and mark where you’ll create the new hem. The standard hem width for dress pants and khakis is typically 1 inch (2.5 cm), while for jeans, a ½ inch (1.3 cm) hem is common.
Using a tape measure or hem gauge, measure up from the pinned fold line. For a 1-inch hem, measure 2 inches (5 cm) above the pinned fold. For a ½ inch hem on jeans, measure 1 inch (2.5 cm) above the fold. This accounts for folding the fabric over twice to create a clean hem.
Mark this measurement around the circumference of the pant leg using tailor’s chalk or a fabric marking pencil. This marked line will be your cutting line.
Step 3: Cutting the Excess Fabric
Turn the pants right side out again. Using sharp fabric scissors or a rotary cutter, carefully cut along the chalked line you just marked. Precise cutting here will ensure an even hem.
If you own a serger, you can use it to finish the raw edge of the fabric to prevent fraying, especially for fabrics that are prone to unraveling. However, serging is not essential for hemming pants, as the hem will be folded and sewn, enclosing the raw edge.
Step 4: Pressing the Hem for a Crisp Finish
Turn the pants inside out again and take them to your ironing board. Fold the raw cut edge up towards the inside of the pants by 1 inch (or ½ inch for jeans), aligning it with the original pinned fold line. Press this fold firmly with a hot iron. A hem gauge can be very helpful to ensure a uniform hem width as you press.
Next, fold the edge up again by the same measurement, encasing the raw edge within the fold. Press this second fold thoroughly. The pressed hem creates a clean, professional edge and makes sewing much easier and more accurate.
Two Hemming Methods: Hand Sewing vs. Sewing Machine
Once your hem is pinned and pressed, you can choose to sew it by hand or with a sewing machine. Both methods are effective, and the best choice depends on your preference and the type of pants.
Method 1: Hand Hemming Pants with a Blind Hem Stitch
Hand hemming is an excellent option, especially for dress pants, as it creates an almost invisible hem on the outside. The blind hem stitch is ideal for this purpose.
Thread a needle with polyester thread that matches the color of your pants. Polyester thread is strong and has a slight stretch, making it durable for clothing hems. Tie a knot at the end of the thread.
With the pants still inside out, start at an inseam or side seam. Secure the thread by making a small knot close to the edge of the hem, being careful not to catch the outer layer of the pants.
To create the blind hem stitch, insert the needle through the folded edge of the hem and take a stitch about ½ inch to 1 cm long, running the needle within the folded hem edge.
Then, make a tiny stitch on the main pant leg fabric, catching only a few threads. Alternate between a longer stitch within the hem fold and a very small stitch on the pant leg. Repeat this process all the way around the hem. Avoid pulling the thread too tightly to prevent puckering.
When you reach your starting point, secure the hem by taking a few overlapping stitches in the same place, again ensuring the stitches remain hidden on the outside. The beauty of the blind hem stitch is its near invisibility from the right side of the garment.
Method 2: Machine Hemming Pants for Speed and Efficiency
For a quicker hemming process, especially suitable for jeans and casual pants, using a sewing machine is highly efficient. The preparation steps – measuring, cutting, pressing, and pinning – remain the same as outlined earlier.
Set up your sewing machine with a straight stitch and a medium stitch length. If hemming jeans, use a jeans needle and matching thread.
With the pants still inside out, utilize the free arm of your sewing machine (if available, by removing the extension table). Slide the pant leg around the free arm, which makes it easier to sew in a circular motion. Stitch close to the inner folded edge of the hem, sewing all the way around the pant leg.
Machine hemming is significantly faster than hand sewing, often taking just minutes to complete the stitching once the prep work is done.
Conclusion: Mastering Pant Hemming at Home
Whether you choose to hem your pants by hand or with a sewing machine, the key to a successful and professional-looking hem lies in careful measuring and precise pressing. By following these step-by-step instructions, you can confidently hem pants of any style and achieve the perfect length, saving time and tailoring costs. With a little practice, you’ll be able to customize your pants and enjoy a perfectly tailored fit every time.