Screenshots have become an indispensable tool in our digital lives. Whether you’re a student, professional, or simply navigating the online world, capturing what’s on your screen is a fundamental skill. From preserving important information to sharing online content or even documenting technical issues, knowing how to take a screenshot on your PC is essential. This guide will walk you through various methods to easily capture screenshots on both Windows and macOS operating systems, ensuring you’re equipped to grab your screen whenever needed.
Understanding Screenshots: Capturing Your Digital World
A screenshot, also known as a screen capture or screen grab, is essentially a digital photograph of your computer screen display. It’s a static image that records exactly what’s visible on your monitor at a given moment. This simple yet powerful function has numerous applications:
- Information Retention: Quickly save important information from websites, documents, or online chats for later reference, even offline.
- Sharing Visual Information: Easily share what you see on your screen with others, whether it’s a funny meme, a website design, or an error message for technical support.
- Creating Tutorials and Guides: Illustrate steps and instructions visually, making guides and tutorials clearer and easier to follow.
- Documenting Issues: Capture error messages, software glitches, or online evidence for troubleshooting or reporting purposes.
- Cyberbullying Evidence: As highlighted, screenshots are crucial for safely recording instances of cyberbullying, providing concrete evidence for reporting and intervention.
Knowing how to take screenshots efficiently enhances your digital literacy and empowers you to interact more effectively with your computer. Let’s explore the methods for capturing your screen on both Windows and macOS.
How to Screenshot on Windows PC
Windows offers several built-in tools and keyboard shortcuts to take screenshots, catering to different needs and preferences.
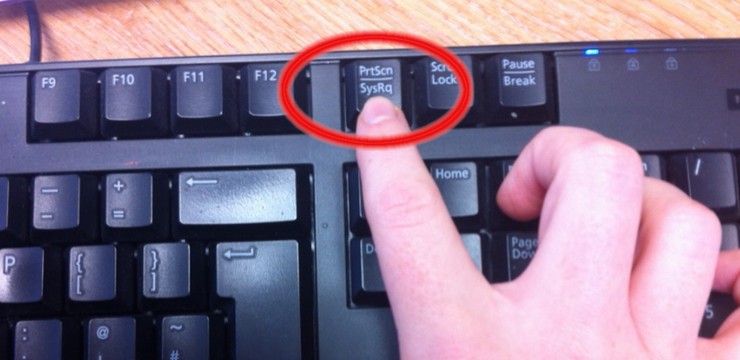
Using the Print Screen Key (PrtScn) for Full Screen Captures
The most straightforward method for capturing your entire screen on Windows is using the Print Screen (PrtScn) key. Typically located in the top-right area of your keyboard, pressing this key instantly copies an image of your entire display to your clipboard.
Steps to take a full screenshot using PrtScn:
- Ensure that the content you want to capture is visible on your screen.
- Locate the PrtScn key on your keyboard. It might also be labeled as Print Scrn or similar.
- Press the PrtScn key once. You might not see any visual confirmation, but the screenshot is now copied to your clipboard.
- Open an image editing program like Paint, Microsoft Word, or any other application that accepts image pasting (like image editing software, messaging apps, etc.).
- Paste the screenshot by using the keyboard shortcut Ctrl + V (hold down the Ctrl key and press V) or by right-clicking and selecting “Paste”.
- The full screenshot will appear in the program, where you can then view, edit, save, or share it.
Capturing Only the Active Window:
If you only want to capture the currently active window (the window you are currently working in), use the following shortcut:
- Make sure the window you want to capture is active (click on it).
- Press and hold the Alt key, then press the PrtScn key while still holding Alt.
- Paste the screenshot into an application as described in steps 4-6 above.
Utilizing the Snipping Tool for Selective and Annotated Screenshots
For more control over what you capture and the ability to annotate screenshots, Windows provides the Snipping Tool. This built-in utility allows you to capture specific portions of your screen and add simple annotations.
How to use the Snipping Tool:
- Open the Snipping Tool by typing “Snipping Tool” in the Windows search bar (usually located in the bottom-left corner) and selecting it from the search results.
- In the Snipping Tool window, click on New. The screen will dim slightly.
- Select the type of snip you want to take from the dropdown menu next to “Mode” (e.g., Rectangular Snip, Free-form Snip, Window Snip, Full-screen Snip).
- Click and drag your mouse cursor to select the area you want to capture for Rectangular Snip or Free-form Snip. For Window Snip, simply click on the window you want to capture. For Full-screen Snip, the entire screen will be captured automatically.
- Once you release the mouse, the selected area will be captured and displayed in the Snipping Tool window.
- Use the Pen and Highlighter tools within the Snipping Tool to annotate your screenshot if desired.
- Click the Save icon (diskette icon) to save your screenshot as an image file (PNG, JPG, GIF, etc.). Choose a location and filename for your screenshot.
The Snipping Tool provides a user-friendly way to capture and quickly edit screenshots directly, without needing to paste into another program first.
How to Screenshot on macOS
macOS also offers convenient keyboard shortcuts and a built-in utility called Grab (though newer versions might emphasize the Screenshot app which combines Grab functionality) for capturing screenshots.
Keyboard Shortcuts for Screenshots on macOS
macOS keyboard shortcuts provide quick ways to take different types of screenshots.
Capturing the Entire Screen:
- Ensure the content you want to capture is visible on your screen.
- Press and hold the Command (⌘) key and the Shift key, then press the 3 key. (Command + Shift + 3)
- You will hear a camera shutter sound, and a screenshot of your entire screen will be automatically saved as a PNG file on your desktop.
Capturing a Selected Area:
- Press and hold the Command (⌘) key and the Shift key, then press the 4 key. (Command + Shift + 4)
- Your cursor will change to a crosshair.
- Click and drag to select the rectangular area you want to capture.
- Release the mouse button to take the screenshot. The screenshot will be saved as a PNG file on your desktop.
Capturing a Specific Window:
- Press and hold the Command (⌘) key and the Shift key, then press the 4 key, and then press the Space bar. (Command + Shift + 4 + Spacebar)
- The cursor will change to a camera icon.
- Click on the window you want to capture.
- The screenshot of the selected window will be saved as a PNG file on your desktop.
Using the Grab Utility (or Screenshot App) on macOS
While keyboard shortcuts are efficient, macOS also includes the Grab utility (or the newer Screenshot app, depending on your macOS version) which offers more options and control.
Using Grab (or Screenshot App):
- Open Grab by going to Applications > Utilities > Grab (or search for “Screenshot” using Spotlight Search – Command + Spacebar).
- In the Grab menu bar (or Screenshot app interface), click on Capture.
- Choose the type of screenshot you want to take: Selection, Window, Screen, or Timed Screen.
- Follow the on-screen prompts to capture your screenshot based on your chosen option.
- The screenshot will open in a new window. You can then save it from the File menu.
The Grab utility (or Screenshot app) provides similar functionality to the Windows Snipping Tool, offering various capture modes and saving options.
Conclusion: Mastering the Art of the Screenshot
Taking screenshots on your PC is a fundamental skill that significantly enhances your digital productivity and communication. Whether you’re using Windows or macOS, the methods outlined above provide you with the tools to capture your screen effectively. Practice these techniques to become proficient in taking screenshots and unlock their full potential in your daily computer usage. From saving important information to sharing visual content and documenting digital interactions, mastering screenshots will undoubtedly prove to be a valuable asset in your digital toolkit.