Creating a beautiful bow with ribbon can elevate the look of gifts, decorations, and crafts. Whether you’re adding a finishing touch to a bridesmaid gift, crafting a decorative accent, or simply want to master this classic skill, tying a perfect bow is easier than you might think. This comprehensive guide breaks down the process into simple, easy-to-follow steps, ensuring you achieve flawless bows every time.
Initially inspired by requests for a tutorial on crafting perfect bows after a bridesmaid gift post, this guide expands on the original instructions to provide even greater detail and optimization for a broader audience seeking to learn “How To Tie A Bow With Ribbon.” Let’s dive in and discover the secrets to creating professional-looking bows.
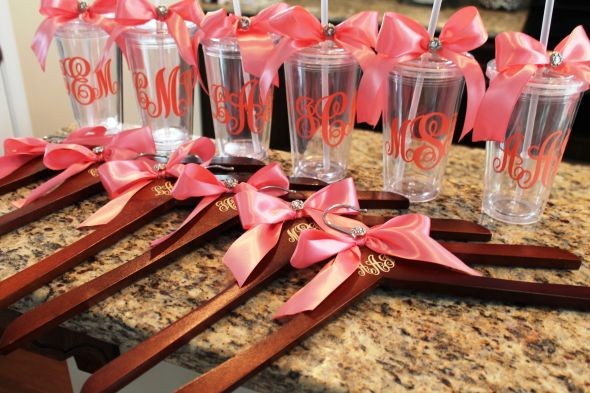
For this tutorial, we’ll be using a one-sided 5/8 inch satin ribbon to clearly illustrate each step. Keep in mind that the techniques apply to various ribbon widths and materials, though wider ribbons like 1 ½ inch might be preferable for larger bows, such as those for gift hangers or decorative cups. The key is understanding the foundational steps.
One crucial aspect often overlooked is ribbon length. Avoid the common mistake of underestimating how much ribbon you’ll need. For 1 ½ inch ribbon, allocate approximately 2 to 2.5 feet per bow. For the 5/8 inch ribbon used here, slightly less will suffice, but it’s always better to have a little extra to work with.
Another fundamental tip for tying a perfect bow is setting up your initial knot correctly. This ensures that your loops gracefully sit atop the knot and the tails cascade elegantly downwards. A proper start prevents crooked bows with awkward loop placements.
Let’s begin the step-by-step process to master the art of ribbon tying.
Step-by-Step Guide to Tying a Flawless Ribbon Bow
1. Starting the Knot: The Foundation of Your Bow
Begin by positioning your ribbon behind the item you are tying it around. In our example, we’re using a wooden hanger, a popular choice for personalized bridesmaid gifts. Ensure the satin side of your ribbon is facing down initially, so the non-shiny side is facing you. This is particularly important for single-sided ribbons to ensure the prettier side is outward in the final bow.
Note: If you are using double-sided ribbon, the orientation isn’t as critical, but for clarity, this tutorial focuses on single-sided ribbon.
Next, cross the left side of the ribbon over the right side. This seemingly simple step is vital for ensuring the bow loops correctly in the subsequent steps.
Why left over right? This specific crossing sets up the ribbon to naturally form a loop on the top right of the knot that stands upright, rather than drooping downwards. Remember: left over right is the golden rule for a well-structured bow. Going right over left will likely result in a skewed and less aesthetically pleasing bow.
2. Forming the First Loop
Take the end of the ribbon that is now on top (originally the left side) and loop it under the bottom ribbon. As you bring it underneath, ensure the ribbon is shiny side down and the non-shiny side is facing upwards, as shown in the image below.
This orientation is crucial because it prepares the ribbon to loop forward, creating the bow’s right loop. If the shiny side were facing forward at this stage, it would result in an inside-out loop, disrupting the bow’s symmetry.
3. Tightening the Knot and Ribbon Orientation
As you tighten the initial knot, maintain both ribbons with their shiny sides facing DOWN. You might need to slightly twist the bottom ribbon while tightening to ensure it stays in the correct orientation. Let the tightening knot secure the ribbon so its shiny side remains down. Ideally, the bottom ribbon should be slightly longer than the top one at this point.
Why the bottom ribbon should be longer? The ribbon on the top right side of the knot is poised to become the top right loop and the left tail of your bow. The ribbon currently on the bottom left, however, needs to wrap around further to form its loop and tail.
How much longer should the bottom ribbon be? This depends on what you are tying around. For a hanger, about ½ an inch of extra length is usually sufficient. Add more length if you are tying around a thicker object.
Now, tighten your knot so the top ribbon points upwards to the right, and the bottom ribbon points straight down, as illustrated.
4. Creating the Bow Loops and Tails
Now, we’ll distinguish between the ribbons as Ribbon 1 (the top ribbon) and Ribbon 2 (the bottom ribbon) for clarity in the next steps.
Take Ribbon 1 and fold it down and to the left, positioning it over itself with the shiny side facing up. This fold forms your top right loop and your LEFT tail.
Crucially: The end of Ribbon 1 (the part that becomes your left tail) must be on the LEFT SIDE of Ribbon 2. This positioning is essential for the tail to hang correctly when the bow is complete, preventing it from sticking out awkwardly and making the bow look uneven.
5. Forming the Second Loop
Next, take Ribbon 2 and bring it up and over Ribbon 1 and the original knot. Wrap Ribbon 2 around the loop of Ribbon 1, similar to how you would begin tying a standard shoelace bow.
6. Completing the Bow Knot
Fold Ribbon 2 so that after it passes the knot, the shiny side is facing up. To create the knot of the bow, push this fold in Ribbon 2 through the loop you just created with Ribbon 2. This step mirrors the final knotting motion in tying shoelaces.
Remember to pay attention to the ribbon’s orientation throughout this process to ensure the shiny side remains outwards.
7. Tightening and Adjusting for Perfection
Now, gently pull the new loop of Ribbon 2 through a bit further and carefully begin tightening the bow. The key to tightening evenly is to pull on the BACK of each loop. Pulling on the front of the loops will shorten your tails. Pulling from the back tightens the knot and maintains loop size.
For a polished look, you can hold the tails down while tightening the knot. This prevents the tails from getting caught and sticking out sideways from the knot. Using an object like the hanger itself to hold down the tails can be helpful, especially when learning.
For the final touch, perform a final tug, pulling both loops upwards from the back and both tails downwards. This action ensures the knot is secure and the bow is symmetrically balanced.
Finishing Touches
For added security, especially on items like hangers or decorative cups, consider hand-sewing a rhinestone bead or similar embellishment to the bow directly through the knot. This prevents the bow from untying and adds a decorative element.
With practice, tying perfect bows with ribbon will become second nature. Experiment with different ribbon types, widths, and colors to further enhance your crafting and gift-wrapping skills. Happy bow making!