Are you ready to learn How To Draw Spongebob SquarePants? This fun and easy tutorial will guide you through creating your own drawing of everyone’s favorite sponge from Bikini Bottom, just like you see him on TV! SpongeBob is a super popular cartoon character, and now you can learn to draw him yourself with these simple steps.
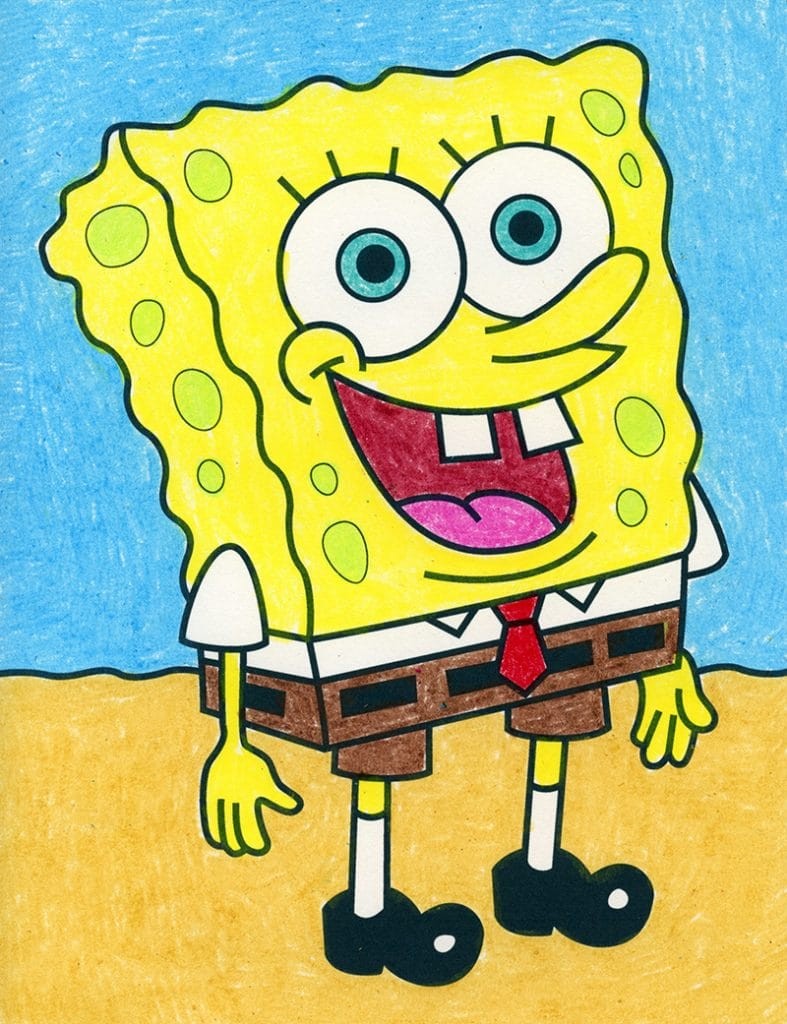
SpongeBob SquarePants Drawing
SpongeBob SquarePants Tutorial Video
For those who love to learn visually, here’s a helpful video tutorial that shows you how to draw SpongeBob. Watching someone draw can sometimes make it even easier to understand each step! This video will help you capture all of SpongeBob’s goofy and fun details. Starting with basic shapes and lines, then adding those signature wavy edges, is the key to making your SpongeBob look perfectly spongey.
Did you know the amazing story behind SpongeBob? The creator of SpongeBob SquarePants was actually a marine science educator! Stephen Hillenburg, with his background in marine biology, brought a unique and educational twist to this animated comedy.
Born in 1961, Stephen Hillenburg initially taught marine biology after graduating from Humboldt State University. Later, he pursued his passion for animation, earning a degree from the California Institute of Arts. Before creating SpongeBob, he worked on Nickelodeon’s “Rocko’s Modern Life.” SpongeBob SquarePants finally premiered on May 1, 1999, and has been making kids and adults laugh ever since!
How to Get Started Drawing SpongeBob
To make drawing easier, especially for beginners, using guides can be incredibly helpful. Think of them as your personal roadmap for drawing!
In all the drawing tutorials here, you’ll notice dashed lines in the center of each step, both horizontally and vertically. If you lightly draw these lines on your paper before you start, they will act as reference points.
For example, in Step 1 below, you’ll see that the top left corner of SpongeBob’s body begins near the top of the paper and to the left of the center vertical line. The body then extends to the right, taking up most of the upper half of your drawing space.
Drawing is all about understanding placement and proportion. These guide lines help you visualize where each part of SpongeBob should go, making it easier to draw accurately. They are a fantastic way to improve your drawing skills and learn how to better judge spacing on your page.
Preview of the Step by Step SpongeBob Tutorial
SpongeBob Coloring Page
After you’ve drawn SpongeBob, why not bring him to life with color? Coloring is a fantastic way to relax and get even more creative with your artwork.
Open SpongeBob Coloring Page
Save to Your Pinterest Board!
Keep this tutorial handy by saving it to your Pinterest board! It’s a great way to organize your favorite drawing guides and come back to them whenever you want to draw SpongeBob again.
Materials You’ll Need
Before we begin, let’s gather our supplies. You won’t need much to start drawing SpongeBob:
- Paper
- Pencil
- Eraser
- Black marker (optional, for tracing)
- Crayons, colored pencils, or markers for coloring (optional)
How to Draw SpongeBob Step by Step
Time needed: 45 minutes
Let’s break down how to draw SpongeBob SquarePants into 9 easy steps. Follow along, and you’ll have your own SpongeBob drawing in no time!
-
Start with a tilted square shape. This will be the main body of SpongeBob. Imagine a square leaning slightly to one side.
-
Add the angled side panel. On the right side of your square, draw an angled line to create the side of SpongeBob’s body, giving it a 3D look.
-
Extend lines down for the shirt and pants. From the bottom of the square and side panel, draw lines straight down to start forming SpongeBob’s shirt and pants.
-
Draw the face and erase inside lines. Sketch in SpongeBob’s cheerful face with big eyes, nose, and smile. Once you’re happy with the face, carefully erase any unnecessary lines inside the face area to clean up your drawing.
-
Add shirt and belt details. Draw a collar and tie for his shirt, and don’t forget his belt! These details bring SpongeBob’s outfit to life.
-
Draw the legs and shoes below. Under the pants, add two simple legs and his signature black shoes with white stripes.
-
Add the two arms. Draw SpongeBob’s arms extending from the sides of his body. You can pose them waving or just hanging by his side.
-
Add wavy lines and spots. Erase straight lines. Now for the sponge texture! Draw wavy, uneven lines around the edges of SpongeBob’s body to make him look sponge-like. Add random spots all over his body. After this, erase all the initial straight guide lines you drew, leaving only the wavy sponge outline.
-
Trace with marker and color your SpongeBob masterpiece! Go over your pencil lines with a black marker to make your drawing stand out. Finally, color SpongeBob in his bright yellow, white, brown, red, and blue colors. Get creative and have fun with it!
More Fun Cartoon Drawing Projects
Want to draw more cartoon characters? Here are a few more fun and easy drawing tutorials to try after you’ve mastered SpongeBob!
Mickey Mouse
Iron Man
Batman