Screen recording on a Mac is an incredibly useful feature, whether you’re creating tutorials, capturing gameplay, or simply wanting to share something visually with colleagues or friends. Apple has conveniently built in two primary methods to record your screen without needing to download any third-party applications: using the Screenshot app and QuickTime Player. This guide will walk you through both methods, ensuring you can easily capture your Mac screen for any purpose.
Method 1: Utilizing the Screenshot App for Screen Recording
Introduced with macOS Mojave 10.14, the Screenshot app provides a straightforward and feature-rich way to record your Mac screen. Here’s how to use it:
-
Launch the Screenshot Toolbar: Begin by pressing Shift, Command, and 5 keys simultaneously. This will bring up the Screenshot app toolbar at the bottom of your screen.
-
Choose Your Recording Mode: The toolbar presents several options for screen capture and recording. For video recording, you’ll see two specific controls:
- Record Entire Screen: This option will record everything visible on your entire display.
- Record Selected Portion: This allows you to drag and select a specific area of your screen that you want to record. You can adjust the selected area by dragging the borders of the selection box as needed.
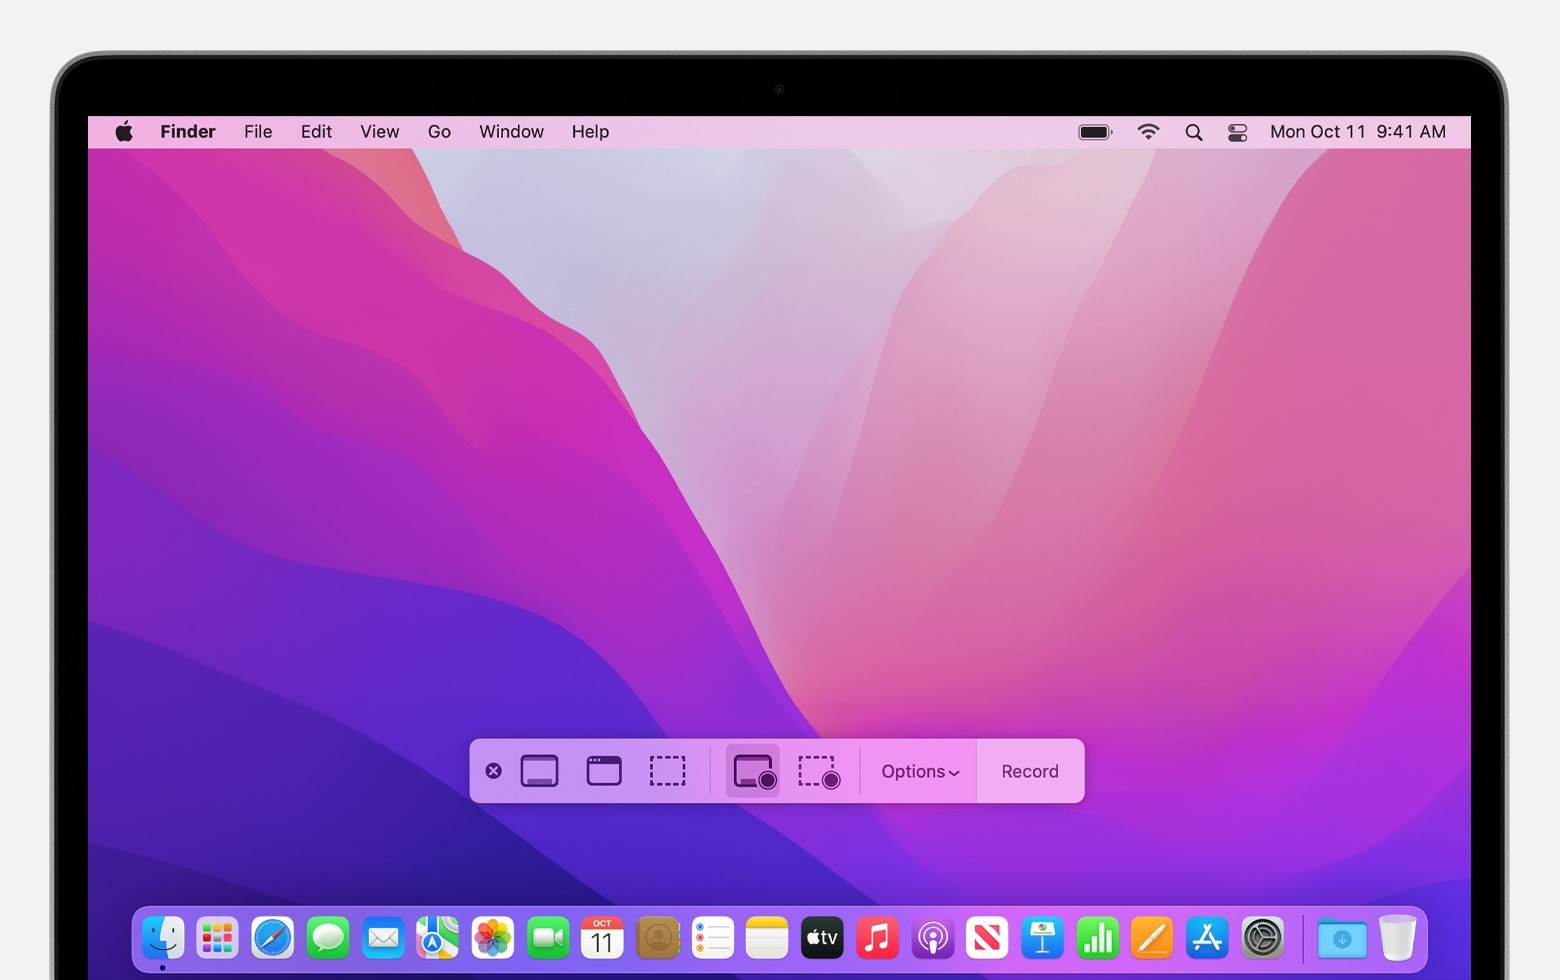 Screenshot app toolbar on macOS Monterey, showing options to capture still images and record video of the screen.
 -
Configure Recording Options: Before you hit record, click on the Options menu within the toolbar. This menu allows you to customize your recording:
- Microphone Selection: To include your voice or any other audio along with your screen recording, choose your desired microphone from the dropdown menu. This is perfect for adding narration to tutorials or walkthroughs.
- Show Mouse Clicks: Selecting “Show Mouse Clicks” will display a black circle around your cursor every time you click. This can be very helpful for viewers to follow your actions on screen.
- Timer: Set a recording timer to give yourself a few seconds to prepare before the recording starts. This is useful if you need to set up your screen or application before capturing.
- Save To Location: Choose where your screen recording will be saved once it’s complete. By default, recordings are saved to your desktop for easy access, but you can select other folders as needed.
-
Start Recording: Once you have configured your desired settings, click the Record button on the Screenshot toolbar. The recording will begin either immediately or after the timer countdown if you set one.
-
Stop Recording: To stop the screen recording, click the Stop button located in the menu bar at the top of your screen. Alternatively, you can use the keyboard shortcut Command-Control-Esc (Escape).
-
Edit and Save: After stopping the recording, a thumbnail preview will briefly appear in the corner of your screen. Click on this thumbnail to quickly edit the recording using the Quick Look feature, where you can trim the beginning or end of the video. If you miss the thumbnail, don’t worry – the recording will automatically save to your chosen “Save to” location.
Method 2: Using QuickTime Player for Screen Recording
QuickTime Player, a standard application on macOS, also offers a screen recording feature. This method is available on older macOS versions as well as newer ones. Here’s how to record your screen using QuickTime Player:
-
Open QuickTime Player: Navigate to your Applications folder and open QuickTime Player.
-
Initiate New Screen Recording: In the QuickTime Player menu bar at the top of your screen, go to File and select New Screen Recording. You can also use the shortcut Control-Command-N.
-
Check for Screenshot App Toolbar (If Applicable): In newer macOS versions, selecting “New Screen Recording” in QuickTime Player might still launch the Screenshot app toolbar described in Method 1. If this happens, simply follow the steps outlined in the Screenshot App section.
-
QuickTime Player Recording Controls: If QuickTime Player’s screen recording window appears (a small window with a record button and an arrow), you are using QuickTime Player’s native recording feature.
-
Configure QuickTime Player Settings: Click the arrow next to the Record button to access the settings:
- Microphone: Choose a microphone to record audio with your screen capture. You can also adjust the volume slider to monitor audio levels. Be cautious of audio feedback; lower the volume or use headphones if you experience feedback.
- Show Mouse Clicks in Recording: Enable “Show Mouse Clicks in Recording” to make mouse clicks visible in the final video.
-
Start QuickTime Recording: Click the red Record button. You will then be prompted to:
- Record the Entire Screen: Click anywhere on your screen to start recording the full display.
- Record a Selected Area: Drag your cursor to select a specific rectangular area of the screen, and then click “Start Recording” within that selected area.
-
Stop QuickTime Recording: To stop recording, click the Stop button in the menu bar, or use the keyboard shortcut Command-Control-Esc (Escape).
-
Edit, Play, and Share: Once you stop recording, QuickTime Player will automatically open the recorded video. From here, you can play back the recording, trim unwanted sections, and share your screen recording as needed.
Additional Information and Tips
- File Naming: By default, your Mac names screen recordings as “Screen Recording [date] at [time].mov”. You can easily rename these files after saving.
- Canceling Recording: If you decide not to record, you can cancel the process in both Screenshot app and QuickTime Player by pressing the Esc key before clicking the Record button.
- Opening Recordings: Screen recordings (.mov files) can be opened and edited with QuickTime Player, iMovie, and other video editing applications.
- App Recording Limitations: Be aware that some applications may prevent screen recording of their windows due to security or content protection measures.
- Recording on iPhone and iPad: If you need to record the screen on your mobile devices, Apple also provides a built-in screen recording feature for iPhone and iPad.
Whether you choose the Screenshot app for its modern features or QuickTime Player for its simplicity and broader compatibility, recording your screen on a Mac is a straightforward process. Experiment with both methods to find which best suits your needs and start creating engaging screen recordings today!