The Photos app on your iPhone, iPad, Mac, or Apple Vision Pro offers a surprisingly robust set of tools to quickly edit your videos. Whether you need to shorten a clip, add a filter, or adjust the speed, you can do it all directly from your Apple device. This guide will walk you through the simple steps to enhance your videos and make them perfect for sharing.
Trimming Your Videos on iPhone
Sometimes, you only need a specific portion of a video. Trimming allows you to cut the beginning and end of your video, making it shorter and focusing on the key moments. This is especially useful for sharing on social media or sending via messaging apps where brevity is appreciated.
Step-by-Step Guide to Trimming Videos on Your iPhone or iPad
-
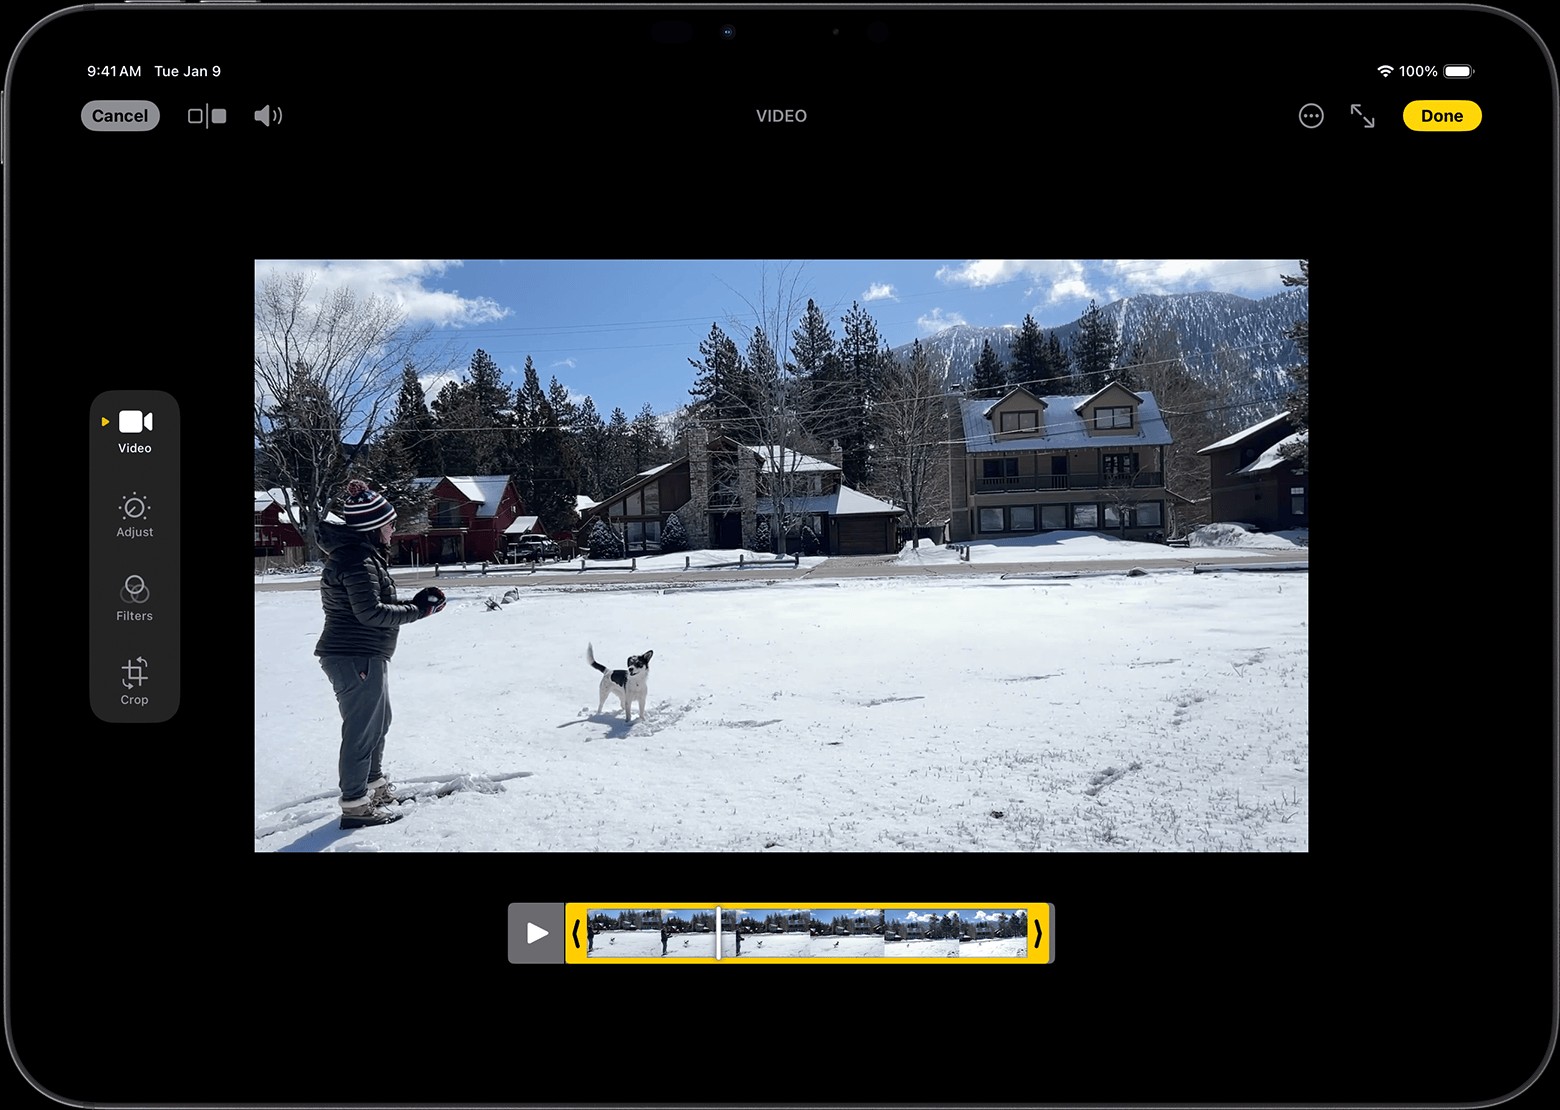
Open Photos: Launch the Photos app on your iPhone or iPad and locate the video you wish to edit. Tap on the video to open it.
-
Enter Edit Mode: Tap the “Edit” button located in the top right corner of the screen. This will bring you to the video editing interface.
-
Adjust the Timeline: At the bottom of the screen, you’ll see the video timeline with sliders at both ends. Drag these sliders inwards to set new start and stop points for your video. The section between the sliders is the part that will be kept. To preview your trimmed video, simply tap the Play button, which is the triangle icon.
-
Save Your Trimmed Video: Once you are satisfied with your trim, tap “Done” in the top right corner. You will then be presented with two saving options: “Save Video” or “Save Video as New Clip”.
- Save Video: This option overwrites the original video with the trimmed version, keeping only the edited clip.
- Save as New Clip: This option saves the trimmed video as a new, separate clip in your library, while preserving the original, unedited video. This is ideal if you want to keep the full original video and have a trimmed version.
Trimming Videos on Your Mac
The process for trimming videos on your Mac is very similar to iPhone and iPad, ensuring a consistent user experience across Apple devices.
- Open in Photos: Open the Photos app on your Mac and double-click the video you intend to edit to open it.
- Click Edit: Click the “Edit” button, usually located in the top right corner, to enter the editing mode.
- Use Timeline Sliders: Just like on iPhone and iPad, use the sliders on both sides of the video timeline to adjust the start and end points for trimming. Preview your edit by clicking the Play button.
- Save or Save as New Clip: Click “Done” and then choose between “Save Video” to replace the original or “Save as New Clip” to keep both versions.
Trimming Videos on Apple Vision Pro
Editing videos on Apple Vision Pro follows the familiar pattern, making it easy to edit in this immersive environment.
- Access Photos App: Open the Photos app on your Apple Vision Pro and tap on the video you want to trim.
- Tap More and Trim: Tap the “More” button (represented by three dots), and then select “Trim” from the options.
- Adjust Sliders: Move the timeline sliders to trim the video to your desired length. Preview using the Play button.
- Save Your Changes: Tap “Done,” followed by your choice of “Save Video” or “Save Video as New Clip”.
Undoing a Trim: Reverting to the Original
Mistakes happen, or you might change your mind about a trim. Fortunately, reverting to the original video is straightforward on all devices.
On iPhone or iPad:
- Open the trimmed video in the Photos app.
- Tap “Edit”.
- Tap “Revert” and then “Revert to Original.” This will restore your video to its original, untrimmed state. Note that if you used “Save Video as New Clip,” reverting only undoes other edits like filters, not the trim itself.
On Mac:
- Open the trimmed video in Photos.
- Click “Edit”.
- Click “Revert to Original.” Alternatively, you can manually drag the timeline sliders back to the very beginning and end of the video and click “Done.”
On Vision Pro:
- Open the trimmed video.
- Click “Edit”.
- Manually move the sliders back to the start and end of the timeline and click “Done.”
Adding Filters and Rotating Videos
Beyond trimming, the Photos app allows you to enhance the visual appeal of your videos with filters and rotation adjustments.
Applying Filters and Rotation:
-
Open your video in the Photos app and tap “Edit.”
-
Look for the filter icon (usually represented by overlapping circles) and the rotate icon (a square with a curved arrow).
-
Tap the filter icon to browse and apply various filters to change the color and mood of your video.
-
Use the rotate icon to rotate your video if it was recorded in the wrong orientation.
On Mac: The process is similar. Open the video in Photos, click “Edit,” and find the filter and rotate options within the editing tools.
If you don’t like the changes you’ve made, you can always tap “Cancel” on iPhone/iPad or “Revert to Original” or “Reset Adjustments” on Mac to go back to the original video.
Adjusting Video Playback Speed for Slow Motion Effects
To create dramatic slow-motion effects, especially for videos captured at higher frame rates (above 30FPS), you can easily adjust the playback speed within the Photos app on iOS 18, iPadOS 18, and macOS Sequoia.
- Open and Edit: Open your video in the Photos app and tap or click “Edit.”
- Find Speed Control: Look for the “Speed control” button, which is typically represented by a gauge icon.
- Select Playback Speed: Tap or click the Speed control button and choose a slower playback speed option to create the slow-motion effect.
Customizing Slo-Mo Video Sections
For videos recorded in slo-mo mode or after adjusting playback speed, you can refine exactly which parts of your video play in slow motion.
-
Edit Slo-Mo Video: Open your slo-mo video in Photos and tap or click “Edit.”
-
Adjust Slo-Mo Timing: In the video timeline, you will see vertical white lines. Drag these lines to define the start and end points of the slow-motion section. The parts between these lines will play in slow motion, while the rest of the video plays at normal speed.
Editing Audio Mix for Enhanced Sound (iPhone 16 Models)
On iPhone 16 models and later, if you capture videos with Spatial Audio, you have advanced audio mixing options to refine the sound in your videos.
How to Edit Audio Mix on iPhone or iPad
- Open and Edit Video: Open the Photos app and select your video. Tap the “Edit” button.
- Access Audio Mix: Tap “Audio Mix.”
- Choose Audio Mix Option: Select from the following audio mix presets:
- Standard: Preserves the original recorded audio.
- In-Frame: Reduces sounds from sources outside the video frame, focusing on what’s visible.
- Studio: Minimizes background noise and reverb for a cleaner, studio-like sound.
- Cinematic: Puts voices on a front-facing track and keeps environmental noises in surround, similar to movie audio.
- Adjust Intensity: Use the intensity slider below the video to fine-tune the effect and background noise levels.
- Save Changes: Tap “Done” to apply your audio mix settings.
Expanding Editing with Third-Party Apps
While the built-in Photos app offers a great range of editing tools, for more advanced video editing, you can explore third-party apps available on the App Store for your iPhone or iPad. Similarly, Mac users can utilize third-party photo editing extensions for more features beyond the Photos app.
Conclusion
Editing videos on your iPhone and other Apple devices has never been easier. From basic trimming and filters to advanced features like speed adjustments and audio mixing, the Photos app provides a powerful and user-friendly platform for enhancing your videos. Whether you’re a casual user or a content creator, these tools empower you to make your videos look their best, right from your Apple device. Experiment with these features and unleash your video editing potential today!