Frying an egg might seem simple, but mastering it is a fundamental kitchen skill. Whether you crave the classic sunny-side up with a runny yolk or prefer a fully cooked over-hard egg, knowing How To Fry An Egg to perfection opens up a world of breakfast, lunch, and dinner possibilities. This guide will walk you through each style – sunny-side up, over-easy, over-medium, and over-hard – and even how to achieve those coveted crispy edges. With just a few simple steps, you’ll be frying eggs like a pro in no time.
The Simple Joy of a Perfectly Fried Egg
Many of us have childhood memories tied to a perfectly fried egg. For me, it was learning to make a sunny-side up egg just right. There’s nothing worse than an overcooked egg – rubbery whites and a dry yolk are a breakfast tragedy! But a golden-edged egg, cooked in butter or oil, with tender whites and a luscious runny yolk? That’s pure comfort food. Whether it’s topping avocado toast, complementing a hearty breakfast platter, or adding protein to a simple salad, the fried egg is a versatile and delicious staple.
What Makes a Fried Egg “Perfect”?
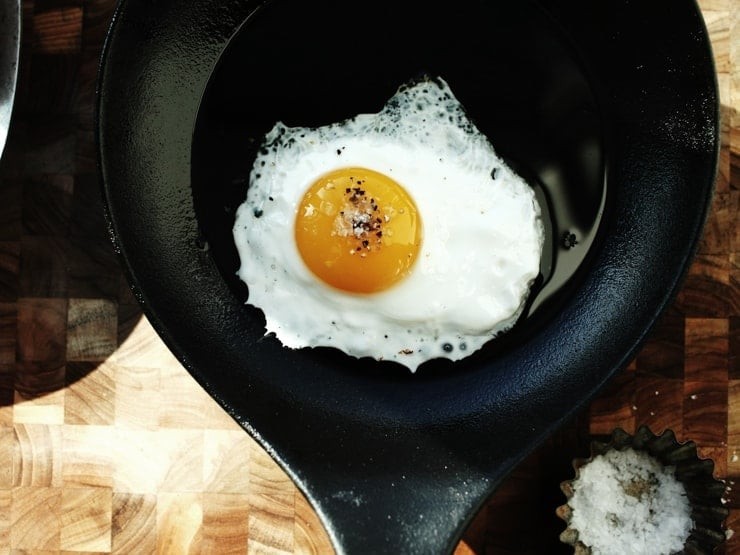
What exactly defines a perfect fried egg? For many, it’s the sunny-side up style: a glistening, runny yolk with tender, set whites, all cooked in butter or oil without any burnt or chewy edges. Perhaps a sprinkle of black pepper, or cooked in flavorful bacon fat, elevates it further. Learning to consistently fry eggs perfectly is a cornerstone of cooking, especially if you enjoy eggs regularly. They are quick to prepare, but the key is attention – eggs cook rapidly, so staying present during the process is crucial.
Essential Ingredients and Tools for Frying Eggs
To fry the perfect egg, you don’t need much, but quality ingredients and the right tools make a difference.
Ingredients:
- Fresh Eggs: Freshness is key for the best texture and flavor. Chicken eggs are most common, but duck or quail eggs also fry beautifully using these methods. Avoid eggs that have been in the refrigerator for weeks for optimal results.
- Cooking Fat: Choose your preferred fat – unsalted butter is a classic for its flavor, but cooking oil, bacon grease, or even duck or goose fat can be used. Each fat imparts a unique flavor and texture. For instance, bacon grease adds a smoky depth, while butter creates a rich, delicate flavor.
Choosing the Right Cooking Fat:
The type of fat significantly impacts the final egg. Butter lends a rich, soft edge, while oils like olive oil can create crispier edges. Ghee, or clarified butter, combined with oil, is another excellent option, offering a nutty flavor and preventing butter from burning at higher temperatures. This combination, often used by experienced cooks, results in eggs with beautifully set whites and a perfectly runny yolk.
How Long to Fry an Egg?
The frying time depends on your desired level of doneness. For a classic sunny-side up egg, 2 to 3 minutes is usually sufficient to set the whites while keeping the yolk runny. Adjust the cooking time based on whether you prefer over-easy, over-medium, or over-hard eggs.
Flipping vs. Not Flipping: Different Egg Styles
Whether or not you flip the egg determines the final style. Sunny-side up eggs are never flipped, while over-easy, over-medium, and over-hard eggs require flipping to cook the yolk to varying degrees of firmness.
Exploring Egg Doneness: From Sunny-Side Up to Over-Hard
- Sunny-Side Up: Cooked on one side only. The white is fully set, but the yolk remains liquid and runny. This is for those who love a dippable, liquid gold yolk.
- Over-Easy: Flipped briefly. The yolk is runny, but a very thin film of cooked white covers it. Perfect for those who want a slightly less runny yolk than sunny-side up.
- Over-Medium: Flipped and cooked longer. The yolk is partially set – firm around the edges but still soft and slightly runny in the center. A great balance between runny and cooked yolk.
- Over-Hard: Flipped and cooked until fully cooked. Both the white and yolk are completely set and firm, with no runniness at all. Ideal for those who prefer a fully cooked yolk.
The Best Pan for Frying Eggs: Your Skillet Matters
The right pan is crucial for frying eggs without sticking and achieving even cooking.
For most home cooks, a non-stick skillet is the best choice. It requires less fat and makes cleanup a breeze. Non-stick pans are perfect for beginners and those who want a hassle-free cooking experience.
However, for those seeking crispy edges, cast-iron or carbon steel skillets are excellent. These pans retain heat exceptionally well and can achieve high temperatures necessary for crisping. They do require more oil and a bit more technique, but the result is a deeply flavorful, crispy-edged egg.
Stainless steel pans are generally not recommended for frying eggs, as eggs tend to stick easily, leading to frustration and less-than-perfect results. If you must use stainless steel, you’ll need to use a generous amount of fat and maintain a careful watch to prevent sticking.
Quick Guide to Best Pans:
- Non-Stick Skillet: Best for easy cooking, minimal oil, and quick cleanup. Ideal for beginners and everyday frying.
- Cast-Iron or Carbon Steel: Best for crispy edges and deep flavor, requires more oil and attention. Perfect for achieving restaurant-quality crisp.
- Stainless Steel Skillet: Not recommended due to sticking issues unless shallow-frying with plenty of fat.
Choosing a Non-Stick Skillet: Quality Over Price
When selecting a non-stick skillet, prioritize quality and durability. While non-stick pans have a limited lifespan, a well-made one will last longer and perform better. Look for a pan that feels sturdy and has a good non-stick coating. The size should also be appropriate for your burner – an 8-inch to 10-inch skillet is versatile for frying eggs and other small dishes, ensuring even heat distribution.
While high-end brands exist, excellent affordable options are available. Brands like Farberware and Rachael Ray offer reliable non-stick skillets that are widely used in homes and even professional kitchens. Investing in a mid-range non-stick skillet will provide a good balance of performance and value.
Step-by-Step: How to Fry an Egg Sunny-Side Up
Mastering the sunny-side up egg is the foundation for all other fried egg styles.
Instructions for Sunny-Side Up Eggs:
- Heat the Pan: Place a non-stick skillet over medium-low heat. Allow the pan to heat gradually to prevent hot spots and ensure even cooking.
- Add Fat: Once the pan is heated, add about a tablespoon of butter or oil. Let the butter melt completely or the oil heat up slightly.
- Crack the Egg: Crack the egg into a separate small bowl first. This allows you to check for shell fragments and makes it easier to gently slide the egg into the pan.
- Cook Covered: Gently slide the egg from the bowl into the hot pan. Immediately cover the skillet with a lid. The lid traps steam, which helps cook the top of the egg white without needing to flip it, ensuring a runny yolk. Cook for 2 to 3 minutes.
- Season and Serve: Once the egg white is fully set but the yolk is still jiggly and runny, carefully remove the egg from the pan with a spatula. Season with salt and pepper to taste and serve immediately.
Frying Eggs in Cast Iron or Carbon Steel for Crispy Edges
For those who love crispy-edged eggs, cast iron or carbon steel pans are the way to go. These pans require a slightly different technique, often involving shallow frying to achieve that desirable crisp.
Instructions for Crispy Fried Eggs in Cast Iron or Carbon Steel:
- Heat Oil Generously: Pour about 1/8 inch of cooking oil into your cast iron or carbon steel skillet. Heat over medium-low heat until the oil is hot and shimmering. The generous amount of oil is crucial for achieving crispy edges.
- Crack the Egg: Crack the egg into a small bowl.
- Shallow Fry: Gently slide the egg into the hot oil. The oil should sizzle immediately.
- Spoon Hot Oil: Tilt the skillet slightly and use a spoon to continuously baste the top of the egg with the hot oil. This helps cook the egg white from the top while keeping the yolk runny and creating crispy edges where the white meets the hot pan.
- Cook to Desired Doneness: Continue spooning hot oil over the egg until the whites are cooked to your liking. For over-easy, over-medium, or over-hard, simply continue basting with hot oil until the yolk reaches your preferred level of doneness. Flipping is generally not necessary with this method.
- Season and Serve: Remove the crispy fried egg from the pan, drain excess oil briefly, and season with salt and freshly ground black pepper. Serve immediately to enjoy the crispy texture.
How to Make Eggs Over-Easy: A Gentle Flip
Over-easy eggs are perfect when you want a yolk that’s still runny but slightly more cooked than sunny-side up.
Instructions for Over-Easy Eggs:
- Start Sunny-Side Up: Begin by cooking the egg as you would for sunny-side up, until the white is set and the yolk is runny.
- Gentle Flip: Once the white is set, carefully flip the egg over using a thin spatula. Be gentle to avoid breaking the yolk.
- Cook Briefly: Cook for about 20 seconds on the flipped side. This short cooking time sets the very top layer of the yolk while keeping the center runny.
- Remove and Serve: Quickly remove the egg from the pan and serve immediately to maintain the runny yolk.
How to Make Eggs Over-Medium: Slightly Firmer Yolk
Over-medium eggs offer a yolk that is partially cooked, with a firmer edge and a still-soft center.
Instructions for Over-Medium Eggs:
- Start Sunny-Side Up: Cook the egg sunny-side up until the white is set.
- Flip Gently: Flip the egg over carefully.
- Cook a Little Longer: Cook for about 35 seconds after flipping. The white should be fully cooked, and the yolk should be slightly firm but still a bit runny in the middle.
- Remove and Serve: Remove from the pan and serve.
Perfecting Eggs Over-Hard: Fully Cooked Yolk
For those who prefer a completely cooked yolk, over-hard eggs are the way to go.
Instructions for Over-Hard Eggs:
- Start Sunny-Side Up: Begin by cooking the egg sunny-side up until the white is set.
- Flip and Cook: Flip the egg over.
- Cook Thoroughly: Cook for 1 to 2 minutes on the flipped side, pressing gently on the yolk with your spatula to break it. Continue cooking until the yolk is fully cooked through and firm.
- Remove and Serve: Remove from the pan and serve. The yolk will be completely solid.
Crispy Fried Eggs (Kai Dao or Huevos Fritos Con Puntilla): Extra Crunch
Crispy fried eggs, known as kai dao in Thai cuisine and huevos fritos con puntilla in Spanish, take fried eggs to another level with their lacy, crispy edges and runny yolks. This style requires generous oil and higher heat.
Instructions for Crispy Fried Eggs:
- Heat Generous Oil: Use enough oil to almost shallow fry the egg – about ¼ to ½ inch in the pan. Heat the oil over medium-high heat until it is shimmering and very hot.
- Crack and Fry: Carefully crack the egg directly into the hot oil (no need for a bowl in this method).
- Fry Until Crispy Edges: The edges will start to sizzle and crisp up immediately. Cook until the edges are deeply golden brown and lacy, spooning hot oil over the yolk to cook the white while keeping the yolk runny.
- Serve Immediately: Serve crispy fried eggs immediately while they are hot and crispy. They are delicious with bread, bagels, parathas, or scallion pancakes.
Essential Tips for Frying Eggs Perfectly Every Time
- Use Fresh Eggs: Fresher eggs hold their shape better and have a richer flavor.
- Choose the Right Fat: Experiment with butter, oil, ghee, bacon fat, or duck fat to discover your preferred flavor profile and texture.
- Control the Heat: Medium-low heat is generally best for even cooking without burning. For crispy eggs, you can increase the heat slightly.
- Don’t Overcrowd the Pan: Fry eggs in batches if needed to avoid lowering the pan temperature and steaming the eggs.
- Season After Cooking: Seasoning with salt and pepper after cooking helps prevent the salt from drawing moisture out of the egg during cooking.
Frying eggs perfectly is a rewarding skill that elevates everyday meals. With a little practice and these techniques, you’ll be able to create perfect fried eggs in any style you desire, every single time.
More Cooking Basics to Explore
Prep Time: 1 minute
Cook Time: 3 minutes
Additional Time: 1 minute
Total Time: 5 minutes
Ingredients:
- 1 large egg
- 1 tablespoon oil or butter, or your choice of fat
- Salt, to taste
- Pepper, to taste
Instructions
How to Fry an Egg in Butter or Oil in a Non-Stick Skillet:
- Crack an egg into a small bowl, checking for any shell pieces.
- Heat a non-stick skillet over medium-low heat. Add butter to the hot pan, allowing it to melt.
- Gently slide the egg into the skillet. Cover the pan and cook until the egg white is set.
- Continue cooking to your desired level of doneness (sunny-side up is typically achieved at this point). Remove from the pan and season with salt and pepper. Adjust salt if using salted butter.
How to Fry an Egg in Oil in a Cast-Iron Skillet (for Crispy Edges):
-
Crack an egg into a small bowl, ensuring no shell is present.
-
Heat about 1/8 inch of oil in a cast-iron skillet over medium-low heat for 1-2 minutes, until shimmering.
-
Gently place the egg in the hot oil. Let it set for a few seconds. Tilt the skillet and repeatedly spoon hot oil over the egg, cooking the white until puffed and the yolk remains runny.
-
For over-easy, over-medium, or over-hard, continue basting with hot oil until desired doneness is reached, avoiding the need to flip.
-
Serve seasoned with salt and freshly ground black pepper.
Notes: Other Egg Frying Techniques
- How to Fry an Egg Over-Easy: After cooking sunny-side up, gently flip the egg and cook for about 20 seconds for a runny yolk with a set white.
- How to Fry an Egg Over-Medium: After flipping, cook for about 35 seconds for a set white and a slightly firm, slightly runny yolk center.
- How to Fry an Egg Over-Hard: After flipping, cook for 1-2 minutes until the white is puffy and the yolk is firm and fully cooked.
Nutrition Information:
Yield: 1 Serving Size: 1 Egg
Amount Per Serving: Calories: 173, Total Fat: 16g, Saturated Fat: 9g, Trans Fat: 0g, Unsaturated Fat: 6g, Cholesterol: 217mg, Sodium: 162mg, Carbohydrates: 0g, Fiber: 0g, Sugar: 0g, Protein: 6g