Determining How Much Oil For Oil Change is crucial for your vehicle’s engine health, and HOW.EDU.VN offers the expert insights you need to get it right. Using the correct engine oil capacity ensures optimal lubrication and cooling, preventing potential engine damage and extending the lifespan of your car; explore this guide to understand your vehicle’s specific requirements and maintain peak performance. Explore the importance of motor oil grades, synthetic oil benefits, and high mileage oil advantages.
1. Why Is The Right Amount Of Oil Important For An Oil Change?
The correct oil level and type are crucial for optimal engine performance and longevity. Too little oil can lead to engine damage due to insufficient lubrication, while too much oil can cause issues like frothing and reduced lubrication efficiency.
Oil serves several critical functions within your engine:
- Lubrication: Oil reduces friction between moving parts, preventing wear and tear.
- Cooling: It helps dissipate heat, keeping the engine at a safe operating temperature.
- Cleaning: Oil carries away dirt and debris, preventing buildup and maintaining engine cleanliness.
- Sealing: It helps seal the gaps between piston rings and cylinder walls, ensuring proper compression.
Maintaining the correct oil level and using the appropriate type of oil ensures that these functions are performed effectively, contributing to the overall health and performance of your vehicle. According to a study by the American Automobile Association (AAA), neglecting regular oil changes can lead to a buildup of sludge and deposits, reducing engine efficiency and potentially causing costly repairs. The study emphasized the importance of adhering to the manufacturer’s recommended oil change intervals and using the correct oil type for optimal engine protection.
 Checking Oil Levels with Dipstick
2. How Much Oil Does Your Car Need?
Most engines typically require between five and eight quarts of oil, but this can vary depending on the engine size and design. Smaller engines, such as 4-cylinder engines, usually need around five quarts, while larger 6-cylinder engines may require six quarts or more. Always refer to your vehicle’s owner’s manual for the precise amount and type of oil recommended by the manufacturer.
Here’s a breakdown of typical oil capacities based on engine type:
- 4-Cylinder Engines: Generally require around 5 quarts of oil.
- 6-Cylinder Engines: Usually need about 6 quarts of oil.
- 8-Cylinder Engines: Can require between 7 and 8 quarts of oil, depending on the size and design.
Engine size isn’t the only factor that influences oil capacity. Some vehicles with larger oil pans may require more oil to ensure adequate lubrication and cooling. Always consult your owner’s manual for the exact specifications.
3. Where To Find The Correct Oil Capacity For Your Car
Finding the correct oil capacity for your car is essential to ensure proper engine lubrication and prevent potential damage. Here are the primary resources you can use to determine the right amount of oil for your vehicle:
3.1. Consult Your Vehicle’s Owner’s Manual
The owner’s manual is the most reliable source of information regarding your car’s specific oil requirements. It typically includes details on the type of oil to use, the recommended viscosity, and the exact amount needed for an oil change. The manual is designed to provide all the necessary information for maintaining your vehicle according to the manufacturer’s specifications.
- Location: The owner’s manual is usually found in the glove compartment of your car.
- Information Included: Look for sections on “Engine Oil,” “Maintenance,” or “Fluid Specifications.” These sections will provide the exact oil capacity for your engine.
- Example: “Engine Oil Capacity: 5.5 quarts (5.2 liters) with filter change.”
Alt: Vehicle owner’s manual indicating engine oil capacity
3.2. Check The Product Manual
The product manual can give you a lot of information about whether oil is best for your car. Motor oil typically shows two numbers, making it a multi-grade oil. The first number reveals the viscosity or thickness at lower temperatures. If the number is lower, oil moves well in colder weather.
The second number shows how well the oil performs in higher temperatures. In warmer temperatures, oils can become thinner. Therefore, finding oil that can still adequately lubricate your engine in hot climates is critical.
Knowing the grade of oil and combining this with the information in your owner’s manual can help you determine the amount of oil you need — especially in a specific climate.
3.3. Consult Online Databases And Vehicle-Specific Forums
Several online databases and forums dedicated to specific car makes and models can offer accurate information on oil capacity. These resources often compile data from various sources, including owner’s manuals, technical service bulletins, and user experiences.
- Popular Databases: Websites like AutoZone, Advance Auto Parts, and similar automotive resources often have vehicle lookup tools that provide oil capacity information based on your car’s year, make, and model.
- Vehicle Forums: Online forums dedicated to your car model can be a great place to find information and ask questions. Experienced owners and mechanics often share their knowledge and can provide insights into specific oil requirements.
- Example: Searching “[Your Car Make and Model] oil capacity” on a reputable automotive website or forum can yield quick and reliable results.
3.4. Consult With A Professional Mechanic
If you are unsure about the correct oil capacity for your vehicle, consulting with a professional mechanic is always a good idea. Mechanics have access to comprehensive vehicle databases and diagnostic tools, allowing them to provide accurate information and expert advice.
- Benefits: A mechanic can not only tell you the correct oil capacity but also recommend the best type of oil for your vehicle based on its age, mileage, and driving conditions.
- Where to Find: Visit a local auto repair shop or contact a certified mechanic for assistance.
3.5. Check Under The Hood
In some cases, the oil capacity may be indicated on a sticker or label located under the hood of your car. This label is typically placed near the engine or on the hood itself and provides quick reference information for essential fluids and maintenance specifications.
- Location: Look for a sticker or label near the engine, on the hood, or on the radiator support.
- Information Included: The label may include information on oil type, oil capacity, and other fluid specifications.
- Example: The label might read, “Engine Oil: SAE 5W-30, Capacity: 5.0 quarts.”
By using these resources, you can confidently determine the correct oil capacity for your car and ensure that your engine is properly lubricated and protected.
4. Understanding Oil Types And Viscosity
Choosing the right type of oil and viscosity is crucial for your engine’s health. The viscosity of oil refers to its thickness and ability to flow at different temperatures. Your vehicle’s owner’s manual will specify the recommended viscosity grade, such as 5W-30 or 10W-40. The “W” stands for winter, indicating the oil’s performance in cold temperatures, while the second number represents its performance at higher temperatures.
- Conventional Oil: Made from refined crude oil, suitable for older vehicles with simple engine designs.
- Synthetic Oil: Engineered with advanced additives for enhanced performance, better protection against wear, and improved fuel efficiency. Ideal for high-performance vehicles or those operating in extreme conditions.
- Synthetic Blend: A mixture of conventional and synthetic oils, offering a balance of performance and cost-effectiveness.
- High-Mileage Oil: Formulated with additives to help reduce leaks, clean sludge, and protect older engines with over 75,000 miles.
Selecting the right oil type depends on your vehicle’s age, engine type, driving conditions, and the manufacturer’s recommendations. Synthetic oils generally offer superior protection and performance compared to conventional oils, but they also come at a higher cost.
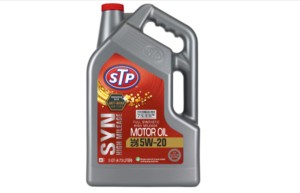
Alt: Assortment of motor oil types including synthetic, conventional, and high-mileage
5. Step-by-Step Guide To Checking Your Car’s Oil Level
Regularly checking your car’s oil level is essential to ensure proper engine lubrication and prevent potential damage. Here’s a step-by-step guide on how to check your oil level accurately:
5.1. Gather Your Supplies
Before you begin, gather the following supplies:
- Gloves: To keep your hands clean.
- Paper Towels or Rag: For wiping the dipstick.
- Flashlight (Optional): For better visibility, especially in low-light conditions.
5.2. Park On Level Ground
Ensure your vehicle is parked on a level surface. This will provide an accurate oil level reading. If the car is on a slope, the oil will pool to one side, giving you a false reading.
5.3. Let The Engine Cool
Allow the engine to cool down for at least 10-15 minutes before checking the oil. This prevents burns from hot engine components and allows the oil to settle back into the oil pan for an accurate reading.
5.4. Locate The Dipstick
- Consult Your Owner’s Manual: If you’re unsure where the dipstick is located, refer to your vehicle’s owner’s manual.
- Typical Location: The dipstick is usually a brightly colored handle (often yellow or orange) and is located near the engine. It is marked with an oil can symbol.
5.5. Remove The Dipstick
Pull the dipstick out of its tube. Be careful not to touch any hot engine parts.
5.6. Clean The Dipstick
Wipe the dipstick clean with a paper towel or rag. This removes any oil residue and allows you to get an accurate reading on the next insertion.
5.7. Reinsert The Dipstick
Push the dipstick all the way back into its tube until it is fully seated. Ensure it is properly inserted to get an accurate reading.
5.8. Remove And Read The Dipstick
Pull the dipstick out again and observe the oil level. The dipstick has markings indicating the “minimum” and “maximum” (or “full”) levels. The oil level should be between these two marks.
- Minimum Level: If the oil level is at or below the minimum mark, you need to add oil immediately.
- Maximum Level: If the oil level is above the maximum mark, you may have too much oil in the engine, which can be harmful.
- Ideal Level: The oil level should be somewhere between the minimum and maximum marks.
5.9. Check The Oil’s Condition
While checking the oil level, also observe the oil’s condition. The oil should appear clean and light brown or amber in color. If the oil is dark, sludgy, or contains particles, it may be time for an oil change.
5.10. Reinsert The Dipstick Securely
After checking the oil level and condition, reinsert the dipstick fully into its tube. Make sure it is securely in place to prevent any dirt or debris from entering the engine.
5.11. Add Oil If Necessary
If the oil level is low, add the correct type and amount of oil as specified in your owner’s manual. Use a funnel to avoid spills and check the level again after adding oil to ensure you don’t overfill.
5.12. Clean Up
Wipe up any spills with a paper towel or rag. Dispose of used paper towels and gloves properly.
By following these steps, you can accurately check your car’s oil level and ensure your engine is properly lubricated. Regular oil checks, along with timely oil changes, are crucial for maintaining your vehicle’s performance and longevity.
Alt: Person checking engine oil level with a dipstick
6. What Happens If You Use Too Much Or Too Little Oil?
Using the correct amount of oil is vital for your engine’s health. Both overfilling and underfilling can lead to significant problems.
6.1. Consequences Of Using Too Little Oil
- Insufficient Lubrication: Low oil levels can result in inadequate lubrication of engine components, leading to increased friction and wear.
- Overheating: Oil helps dissipate heat. Insufficient oil can cause the engine to overheat, potentially leading to severe damage.
- Engine Damage: Prolonged operation with low oil levels can cause significant engine damage, including seized pistons, damaged bearings, and scored cylinder walls.
- Reduced Engine Life: Consistent low oil levels can shorten the lifespan of your engine and result in costly repairs.
6.2. Consequences Of Using Too Much Oil
- Increased Pressure: Overfilling the engine with oil can create excessive pressure in the crankcase, leading to oil leaks from seals and gaskets.
- Frothing: Too much oil can cause the crankshaft to churn the oil, creating air bubbles and reducing its lubricating properties.
- Reduced Fuel Efficiency: Overfilled oil can increase the load on the engine, reducing fuel efficiency.
- Catalytic Converter Damage: Excess oil can make its way into the combustion chamber, leading to deposits on the spark plugs and damage to the catalytic converter.
6.3. Recommended Oil Level
- Ideal Range: The oil level should always be between the minimum and maximum marks on the dipstick.
- Regular Checks: Check your oil level regularly, ideally at least once a month or before long trips, to ensure it is within the recommended range.
Maintaining the correct oil level is a simple but crucial aspect of vehicle maintenance. By understanding the consequences of using too much or too little oil, you can take the necessary steps to protect your engine and keep your car running smoothly.
7. Signs Your Car Needs An Oil Change
Recognizing the signs that your car needs an oil change is essential for maintaining engine health and preventing costly repairs. Here are some key indicators to watch out for:
7.1. Oil Change Indicator Light
- Dashboard Warning: Many modern vehicles are equipped with an oil change indicator light on the dashboard. This light will illuminate when the car’s computer detects that the oil has deteriorated and needs to be replaced.
- Check Your Manual: The system may use different algorithms to determine when to illuminate the light, so check your owner’s manual for specifics.
7.2. Dark, Dirty Oil
- Visual Inspection: Check the oil’s appearance by removing the dipstick and examining the oil. Clean, fresh oil should be light brown or amber in color.
- Contamination: If the oil appears dark, thick, or contains visible particles, it is likely contaminated and needs to be changed.
7.3. Noisy Engine
- Unusual Sounds: Oil provides lubrication to the engine’s moving parts. If the oil is old or low, you may hear knocking or grinding noises coming from the engine.
- Increased Friction: These noises indicate increased friction and wear, which can lead to serious engine damage if not addressed promptly.
7.4. Decreased Fuel Efficiency
- Reduced MPG: Old or dirty oil can reduce fuel efficiency as the engine has to work harder to overcome increased friction.
- Monitor Fuel Economy: If you notice a significant drop in your car’s gas mileage, it may be a sign that your oil needs to be changed.
7.5. Rough Idling
- Unstable Engine: If your engine idles roughly or vibrates excessively when the car is stopped, it could be due to deteriorated oil.
- Oil’s Role: Fresh oil helps to stabilize the engine and ensure smooth operation.
7.6. Excessive Exhaust Smoke
- Blue or Gray Smoke: If you notice blue or gray smoke coming from the exhaust pipe, it could indicate that oil is burning in the engine.
- Potential Causes: This can be caused by worn piston rings, valve seals, or other engine issues, but it’s often exacerbated by old or low-quality oil.
7.7. Mileage or Time Interval
- Regular Intervals: Most manufacturers recommend changing your oil every 3,000 to 7,500 miles, or every 3 to 6 months, depending on the vehicle and driving conditions.
- Check Your Manual: Refer to your owner’s manual for the recommended oil change intervals for your specific vehicle.
By paying attention to these signs and following your manufacturer’s recommendations, you can ensure that your car’s engine remains properly lubricated and protected, preventing costly repairs and extending its lifespan.
Alt: Comparison of dirty, used engine oil and clean, new engine oil
8. Tools And Materials Needed For An Oil Change
Performing an oil change at home can save you money and ensure that your vehicle receives the care it needs. Here are the essential tools and materials you’ll need:
8.1. Required Tools
- Wrench Set: For removing the oil drain plug and oil filter. Make sure you have the correct size wrench for your vehicle.
- Oil Filter Wrench: A specialized wrench designed to grip and remove the oil filter.
- Oil Drain Pan: To collect the old oil as it drains from the engine. Choose a pan with a capacity of at least 6-8 quarts.
- Funnel: To pour new oil into the engine without spilling.
- Jack and Jack Stands (or Ramps): To safely lift the vehicle and provide access to the oil drain plug and filter.
- Gloves: To protect your hands from dirty oil.
- Safety Glasses: To protect your eyes from splashes.
8.2. Necessary Materials
- New Engine Oil: The correct type and amount of oil as specified in your vehicle’s owner’s manual.
- New Oil Filter: A high-quality oil filter that matches your vehicle’s specifications.
- New Drain Plug Washer (if applicable): Some vehicles require a new washer for the oil drain plug to ensure a tight seal.
- Rags or Paper Towels: For cleaning up spills and wiping parts.
- Wheel Chocks: To secure the wheels that are not being lifted.
8.3. Optional But Helpful Items
- Torque Wrench: To tighten the oil drain plug and filter to the manufacturer’s specified torque.
- Oil Filter Cap Wrench: An alternative to the oil filter wrench, providing a more secure grip.
- Latex or Nitrile Gloves: For better dexterity and oil resistance.
- Cardboard or Drop Cloth: To protect your garage floor from oil spills.
8.4. Safety Precautions
- Work in a Well-Ventilated Area: Ensure adequate ventilation to avoid breathing harmful fumes.
- Use Jack Stands: Never work under a vehicle supported only by a jack. Always use jack stands for safety.
- Handle Hot Oil Carefully: Used oil can be very hot. Allow the engine to cool down before draining the oil.
- Dispose of Used Oil Properly: Take used oil to a recycling center or auto parts store for proper disposal. Never pour it down the drain or onto the ground.
By gathering these tools and materials and following proper safety precautions, you can perform an oil change at home with confidence and save money on vehicle maintenance.
Alt: Collection of tools and materials needed for a DIY oil change
9. Step-by-Step Guide To Changing Your Oil
Changing your oil is a straightforward process that can save you money and help maintain your vehicle. Here’s a detailed, step-by-step guide to performing an oil change:
9.1. Preparation
- Gather Supplies: Ensure you have all the necessary tools and materials on hand, including the correct type and amount of oil, a new oil filter, wrenches, an oil drain pan, a funnel, jack and jack stands (or ramps), gloves, and safety glasses.
- Warm Up the Engine: Run the engine for a few minutes to warm the oil, making it flow more easily. However, be careful not to overheat the engine.
- Park on Level Ground: Park your vehicle on a level surface to ensure accurate oil drainage.
9.2. Safety Measures
- Engage Parking Brake: Engage the parking brake to prevent the vehicle from rolling.
- Use Wheel Chocks: Place wheel chocks behind the wheels that will remain on the ground for added safety.
- Wear Safety Gear: Put on gloves and safety glasses to protect your skin and eyes from oil splashes.
9.3. Lift the Vehicle
- Position Jack: Consult your owner’s manual for the proper jacking points on your vehicle. Place the jack under the designated jacking point.
- Lift and Secure: Lift the vehicle to a safe working height and secure it with jack stands. Never work under a vehicle supported only by a jack.
- Alternative: Ramps: If you have ramps, drive the vehicle onto the ramps slowly and carefully.
9.4. Locate the Oil Drain Plug
- Under the Engine: The oil drain plug is typically located on the bottom of the oil pan, under the engine.
- Consult Manual: If you’re unsure of its location, consult your vehicle’s owner’s manual.
9.5. Drain the Old Oil
- Position Drain Pan: Place the oil drain pan directly under the oil drain plug.
- Remove Drain Plug: Use the correct size wrench to loosen and remove the drain plug. Be careful, as the oil may be hot.
- Allow Complete Drainage: Let the oil drain completely into the pan. This may take 15-20 minutes.
9.6. Replace the Oil Filter
- Locate Oil Filter: The oil filter is typically located near the engine block. Consult your owner’s manual if needed.
- Remove Old Filter: Use an oil filter wrench to loosen and remove the old oil filter. Be prepared for some oil spillage.
- Lubricate New Filter: Lightly lubricate the rubber gasket on the new oil filter with fresh oil.
- Install New Filter: Screw the new oil filter into place by hand until the gasket makes contact, then tighten it an additional ¾ turn, or as specified by the filter manufacturer.
9.7. Replace the Drain Plug
- Clean Drain Plug: Clean the oil drain plug and replace the drain plug washer if necessary.
- Reinstall Drain Plug: Reinstall the drain plug by hand, then tighten it with a wrench to the manufacturer’s specified torque. Do not overtighten.
9.8. Lower the Vehicle
- Remove Jack Stands: Carefully lower the vehicle by removing the jack stands and then slowly lowering the jack.
- Ensure Level Ground: Make sure the vehicle is resting securely on the ground.
9.9. Add New Oil
- Locate Oil Fill Cap: Find the oil fill cap on top of the engine. It is usually marked with an oil can symbol.
- Use Funnel: Place a funnel into the oil fill opening.
- Add Correct Amount: Pour in the correct amount of new oil as specified in your vehicle’s owner’s manual.
- Check Oil Level: After adding the oil, wait a few minutes for it to settle, then check the oil level using the dipstick. Add more oil if needed to reach the “full” mark.
9.10. Start the Engine
- Run for a Few Minutes: Start the engine and let it run for a few minutes.
- Check for Leaks: Check for any oil leaks around the drain plug and oil filter.
- Turn Off Engine: Turn off the engine and recheck the oil level after a few minutes.
9.11. Reset Oil Life Indicator (If Applicable)
- Consult Manual: If your vehicle has an oil life indicator, reset it according to the instructions in your owner’s manual.
9.12. Dispose of Used Oil Properly
- Collect Used Oil: Pour the used oil from the drain pan into a sealed container.
- Recycle: Take the used oil to a local recycling center or auto parts store for proper disposal. Do not pour it down the drain or onto the ground.
By following these steps carefully, you can successfully change your oil at home, saving money and ensuring your vehicle’s engine remains in good condition.
Alt: Hands changing oil filter on a car engine
10. How Often Should You Change Your Oil?
Determining how often to change your oil depends on several factors, including the type of oil you use, your vehicle’s make and model, and your driving conditions. Here are some general guidelines:
10.1. Manufacturer Recommendations
- Owner’s Manual: The most reliable source of information is your vehicle’s owner’s manual. It will provide the manufacturer’s recommended oil change intervals based on your vehicle’s specific needs.
- Normal vs. Severe Conditions: The manual may also differentiate between “normal” and “severe” driving conditions, with shorter intervals recommended for severe conditions.
10.2. General Guidelines
- Conventional Oil: Typically, oil changes are recommended every 3,000 to 5,000 miles or every 3 to 6 months, whichever comes first.
- Synthetic Oil: Synthetic oil can often last longer, with oil changes recommended every 7,500 to 10,000 miles or every 6 to 12 months, depending on the vehicle and driving conditions.
10.3. Driving Conditions
- Severe Conditions: If you frequently drive in severe conditions, such as stop-and-go traffic, extreme temperatures, towing heavy loads, or off-road driving, you may need to change your oil more frequently.
- Normal Conditions: If you primarily drive on highways with consistent speeds and moderate temperatures, you may be able to extend your oil change intervals.
10.4. Oil Life Monitoring Systems
- Advanced Systems: Many modern vehicles are equipped with oil life monitoring systems that use algorithms to estimate the oil’s condition based on factors such as mileage, driving habits, and engine temperature.
- Follow System’s Recommendations: If your vehicle has an oil life monitoring system, follow its recommendations for oil changes, but be sure to check the oil level and condition regularly.
10.5. Visual Inspection
- Check Oil’s Appearance: Regularly check the oil’s appearance by removing the dipstick and examining the oil. If the oil appears dark, dirty, or contains particles, it is time for an oil change, regardless of the mileage or time interval.
10.6. Recommendations Summary
Here’s a quick summary of oil change frequency recommendations:
| Oil Type | Mileage Interval | Time Interval |
|---|---|---|
| Conventional | 3,000-5,000 miles | 3-6 months |
| Synthetic | 7,500-10,000 miles | 6-12 months |
| Severe Conditions | Shorter Intervals | Shorter Intervals |
By considering these factors and following your manufacturer’s recommendations, you can determine the optimal oil change frequency for your vehicle, ensuring its engine remains properly lubricated and protected.
11. The Role Of Oil Filters In Maintaining Engine Health
Oil filters play a crucial role in maintaining engine health by removing contaminants from the engine oil. Over time, oil can become contaminated with dirt, debris, metal particles, and sludge, which can cause wear and damage to engine components.
11.1. How Oil Filters Work
- Filtration Process: Oil filters are designed to capture these contaminants as the oil circulates through the engine. The filter consists of a porous material, such as paper or synthetic fibers, that traps particles while allowing the clean oil to flow through.
- Bypass Valve: Most oil filters also have a bypass valve that opens if the filter becomes clogged, allowing oil to continue circulating through the engine, albeit unfiltered. This prevents oil starvation but also means that contaminants will not be removed.
11.2. Types Of Oil Filters
- Spin-On Filters: These are the most common type of oil filter, featuring a metal canister with a threaded base that screws onto the engine.
- Cartridge Filters: These filters consist of a replaceable filter element that fits inside a housing on the engine. They are often used in modern vehicles.
11.3. Benefits Of Using High-Quality Oil Filters
- Efficient Filtration: High-quality oil filters use advanced filtration materials that can capture smaller particles and more contaminants, providing better protection for your engine.
- Durable Construction: They are built with sturdy materials and robust designs to withstand the high pressures and temperatures inside the engine.
- Extended Lifespan: High-quality filters often have a longer service life, allowing them to effectively filter oil for a longer period before needing to be replaced.
11.4. Importance Of Regular Filter Replacement
- Preventing Clogging: Over time, oil filters become clogged with contaminants, reducing their ability to filter oil effectively.
- Maintaining Oil Pressure: A clogged filter can restrict oil flow, leading to reduced oil pressure and potential engine damage.
- Optimal Engine Performance: Replacing the oil filter at every oil change ensures that the engine receives clean, filtered oil, promoting optimal performance and longevity.
11.5. Recommendations For Oil Filter Replacement
- Replace at Every Oil Change: It is generally recommended to replace the oil filter at every oil change to ensure optimal engine protection.
- Follow Manufacturer’s Guidelines: Consult your vehicle’s owner’s manual for the manufacturer’s recommended oil filter replacement intervals.
By understanding the role of oil filters and regularly replacing them with high-quality filters, you can help maintain your engine’s health and prevent costly repairs.
Alt: Comparison of a new oil filter and a used, dirty oil filter
12. Seeking Expert Advice For Your Car’s Oil Change Needs
While this guide provides comprehensive information on determining how much oil for oil change, understanding oil types, and performing oil changes, there may be times when seeking expert advice is beneficial. HOW.EDU.VN offers access to a network of experienced professionals who can provide personalized recommendations and guidance tailored to your vehicle’s specific needs.
12.1. Benefits Of Consulting Experts
- Personalized Recommendations: Experts can assess your vehicle’s make, model, age, and driving conditions to recommend the best type of oil and oil filter for your specific needs.
- Troubleshooting: If you encounter any issues or have concerns about your engine’s performance, experts can help diagnose the problem and provide solutions.
- Preventative Maintenance: Experts can offer guidance on preventative maintenance measures to keep your engine running smoothly and prevent costly repairs down the road.
- Peace of Mind: Knowing that you are receiving advice from knowledgeable professionals can provide peace of mind and ensure that your vehicle is in good hands.
12.2. When To Seek Expert Advice
- Unsure About Oil Type: If you are unsure about which type of oil is best for your vehicle, consult with an expert for guidance.
- Engine Performance Issues: If you notice any unusual noises, decreased fuel efficiency, or other performance issues, seek expert advice to diagnose the problem.
- Complex Repairs: If you are not comfortable performing an oil change or other maintenance tasks yourself, entrust the work to qualified professionals.
12.3. How HOW.EDU.VN Can Help
HOW.EDU.VN connects you with a team of experienced PhDs and professionals who can provide expert advice on all aspects of vehicle maintenance, including oil changes. Our experts can:
- Answer Your Questions: Provide answers to your specific questions about oil types, oil filters, oil change intervals, and more.
- Offer Personalized Recommendations: Assess your vehicle’s needs and recommend the best products and services.
- Provide Troubleshooting Assistance: Help diagnose and resolve any engine performance issues you may be experiencing.
By leveraging the expertise available through HOW.EDU.VN, you can ensure that your vehicle receives the best possible care and enjoy peace of mind knowing that you are making informed decisions about its maintenance.
Don’t let uncertainty compromise your vehicle’s performance. Contact the experts at HOW.EDU.VN today for personalized advice and guidance on all your oil change needs.
13. Frequently Asked Questions (FAQ)
13.1. How Do I Know How Much Oil My Car Needs?
Consult your car’s owner’s manual or visit the manufacturer’s website to research the amount of motor oil needed for your engine.
13.2. How Many Liters Of Oil Does My Car Need?
Typically, cars require between 4.7 and 7.5 liters of motor oil, but each engine is different, so it’s best to look at your owner’s manual.
13.3. How Much Oil Does It Take To Fill Car?
Most cars take between five and eight quarts, but the exact number will depend on your engine size.
13.4. How Much Oil Does A 4-Cylinder Engine Take?
A 4-cylinder engine typically takes five quarts of oil.
13.5. How Much Oil Should Be On A Dipstick?
Dipsticks typically have two lines on them. One is the minimum level, and the other is the full level. Your oil should be in between these two markings.
13.6. Can I Put Too Much Oil In My Car?
Yes, too much oil can damage your engine. Excessive pressure can build up inside the crankcase, causing seals to leak or blow out.
13.7. What Type of Oil Should I Use?
Refer to your owner’s manual. It usually depends on your car’s make, model, and the climate you live in.
13.8. Can I Mix Different Brands of Oil?
It’s generally not recommended. Always stick to one brand and type of oil for consistency.
13.9. What Happens If I Don’t Change My Oil Regularly?
Neglecting oil changes can lead to sludge buildup, reduced engine efficiency, and potential engine damage.
13.10. Where Can I Dispose Of Used Oil?
Most auto parts stores and recycling centers accept used oil for proper disposal.
Conclusion
Knowing how much oil for oil change is essential for maintaining your vehicle’s engine health and performance. By following the guidelines and recommendations provided in this guide, you can ensure that your engine is properly lubricated and protected. Remember to consult your owner’s manual for specific information about your vehicle, use high-quality oil and filters, and seek expert advice when needed. Regular oil changes, combined with proper maintenance practices, will help keep your car running smoothly for years to come.
Are you facing challenges in determining the right oil for your vehicle or encountering engine performance issues? Do you want personalized advice from experienced professionals? HOW.EDU.VN connects you with a team of over 100 renowned PhDs and experts ready to provide tailored solutions for your specific needs.
Don’t wait any longer to ensure your vehicle receives the best possible care. Contact our experts today and experience the peace of mind that comes with professional guidance.
- Address: 456 Expertise Plaza, Consult City, CA 90210, United States
- WhatsApp: +1 (310) 555-1212
- Website: HOW.EDU.VN
Let how.edu.vn be your trusted partner in vehicle maintenance and performance optimization. Reach out now and discover the difference expert advice can make.