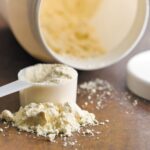
Determining how much primer you need for your car project involves several factors, and HOW.EDU.VN is here to guide you through each step to ensure a flawless finish. Accurately estimating your primer needs prevents material waste and ensures adequate coverage, enhancing your project’s longevity and appearance. Understanding mil thickness, surface area calculation, and proper scuffing techniques are crucial for achieving professional results. For personalized advice and expert solutions, connect with our Doctors at HOW.EDU.VN, providing tailored guidance for all your automotive painting needs.
1. How Many Coats Of Epoxy Primer Are Needed For Sufficient Mil Thickness?
The number of epoxy primer coats needed for sufficient mil thickness typically ranges from 2 to 3 coats, aiming for a dry film thickness of 3-5 mils (0.003-0.005 inches). This ensures adequate protection and adhesion for subsequent layers.
-
Mil Thickness Explained: Mil thickness refers to the thickness of the primer layer after it has dried. Achieving the correct mil thickness is crucial for corrosion protection, adhesion, and overall durability. Too little primer may not provide enough protection, while too much can lead to runs, drips, and potential adhesion issues.
-
Factors Influencing the Number of Coats:
- Type of Primer: Different epoxy primers have varying solid contents and application characteristics. Always refer to the manufacturer’s specifications for recommended mil thickness and number of coats.
- Surface Condition: If the surface is heavily rusted or has been media-blasted, more coats may be needed to achieve a uniform and protective layer.
- Application Technique: Proper application technique, including spray gun settings and spray pattern, affects the amount of primer deposited per coat. Practice on a test panel to gauge your application efficiency.
- Color of Primer: Some primers provide better coverage than others. Darker colors may require fewer coats to achieve full coverage compared to lighter colors.
-
Testing Mil Thickness:
- Wet Film Thickness Gauge: Use a wet film thickness gauge during application to ensure each coat is within the recommended range.
- Dry Film Thickness Gauge: After the primer has dried, use a dry film thickness gauge to verify the final mil thickness. These gauges are available in both mechanical and electronic versions.
-
Surface Preparation:
- Cleaning: Thoroughly clean the surface to remove any contaminants such as grease, oil, wax, and rust. Use appropriate cleaners and degreasers.
- Sanding: Sand the surface with the recommended grit to create a profile for the primer to adhere to. Typically, 80-180 grit sandpaper is used for initial sanding before priming.
- Rust Treatment: Treat any rust with a rust converter or remover before priming. Ospho, as mentioned, is a popular choice for treating flash rust.
-
Application Tips:
- Spray Gun Setup: Use the correct nozzle size and air pressure settings for the primer being used. Refer to the manufacturer’s recommendations.
- Spray Technique: Apply even coats with overlapping passes. Avoid spraying too close or too far from the surface, as this can lead to runs or dry spray.
- Cure Time: Allow each coat of primer to cure properly before applying the next coat. Refer to the manufacturer’s recommended cure times.
-
Expert Insight:
- According to a study by the University of Wisconsin-Madison’s Materials Science Department, proper mil thickness of epoxy primers significantly enhances corrosion resistance in automotive applications. The study emphasized that primers applied within the 3-5 mil range provided optimal protection against environmental factors such as salt and moisture.
By carefully considering these factors and following best practices, you can ensure that you apply the correct number of epoxy primer coats to achieve the desired mil thickness for your car project.
2. How Many Gallons Of Epoxy Primer Will I Need For The Initial Application To The Entire Car Including Doors, Fenders, Hood, And Deck Lid?
For an initial application to an entire car, including doors, fenders, hood, and deck lid, you will likely need 1 to 2 gallons of epoxy primer. This estimate accounts for two coats on all surfaces, including interior areas like rockers and frame rails, with potential waste factored in.
-
Calculating Primer Needs:
- Surface Area Estimation: Accurately estimate the total surface area of the vehicle that needs to be primed. This includes both the exterior and interior surfaces such as the doors, fenders, hood, deck lid, rocker panels, and frame rails.
- Primer Coverage Rate: Check the technical data sheet (TDS) of the epoxy primer you plan to use. The TDS will specify the coverage rate in square feet per gallon (sq ft/gallon) at the recommended mil thickness.
- Number of Coats: Determine the number of coats you plan to apply. For most automotive applications, two coats of epoxy primer are sufficient to achieve the desired mil thickness and protection.
-
Example Calculation:
- Let’s assume the total surface area of your 1963 Falcon Sprint is approximately 200 square feet (including interior and exterior surfaces).
- The epoxy primer you’re using has a coverage rate of 400 sq ft/gallon at the recommended mil thickness.
- For two coats, you will need to cover 400 square feet in total.
- Primer needed = Total area to cover / Coverage rate per gallon
- Primer needed = 400 sq ft / 400 sq ft/gallon = 1 gallon
- To account for waste and potential touch-ups, it’s wise to add an extra margin, bringing the total to 1.5 gallons.
-
Factors Affecting Primer Consumption:
- Spray Gun Efficiency: High-volume, low-pressure (HVLP) spray guns tend to have better transfer efficiency compared to conventional spray guns, reducing waste.
- Application Technique: Proper spray technique, including maintaining the correct distance and overlap, minimizes overspray and waste.
- Surface Texture: Rough or porous surfaces may require more primer to achieve adequate coverage.
- Primer Viscosity: The viscosity of the primer affects its flow and coverage. Some primers may need to be thinned to achieve optimal sprayability, which can impact the coverage rate.
-
Interior and Hard-to-Reach Areas:
- Priming interior areas such as rocker panels, frame rails, and cowl requires specialized tools like an undercoating gun with a long wand. These areas often result in more waste due to the difficulty of application.
- Factor in an additional 25-50% of primer for these areas to account for the increased waste.
-
Product Recommendations:
- SPI Epoxy Primer: Known for its excellent adhesion, corrosion resistance, and user-friendly application.
- KBS Coatings Under Seal Gun: Ideal for applying primer in hard-to-reach areas with minimal waste.
-
Expert Tip:
- According to automotive painting experts at the Society of Automotive Engineers (SAE), proper estimation and planning can reduce material waste by up to 20%. They recommend performing a test spray on a similar surface to gauge primer consumption before starting the actual project.
-
Additional Considerations:
- Mixing Ratios: Always follow the manufacturer’s recommended mixing ratios for the primer and any activators or reducers.
- Environmental Conditions: Temperature and humidity can affect the drying time and flow of the primer. Adjust your application technique accordingly.
- Personal Protective Equipment (PPE): Wear appropriate PPE, including a respirator, gloves, and eye protection, when spraying primer.
By considering these factors and performing a thorough calculation, you can accurately estimate the amount of epoxy primer needed for your car project.
3. Is Scuffing With A Scotch-Brite Okay On The Floors And Undercarriage Before Sealing With Epoxy Primer?
Yes, scuffing with a Scotch-Brite pad is generally acceptable for floors and the undercarriage before sealing with epoxy primer. This provides a slightly roughened surface that enhances adhesion, especially if the existing surface is smooth or glossy.
-
Understanding Surface Preparation:
- Purpose of Scuffing: Scuffing creates microscopic scratches on the surface, increasing the surface area and providing “tooth” for the primer to grip onto. This mechanical adhesion is crucial for preventing the primer from peeling or flaking off over time.
- Alternatives to Scuffing: Media blasting (e.g., sandblasting, bead blasting) is another effective method for preparing surfaces for primer. However, it is more aggressive than scuffing and may not be necessary for all applications. Chemical etching is also an option but requires careful handling and disposal of chemicals.
-
Scotch-Brite Pads:
- Types of Scotch-Brite Pads: Scotch-Brite pads come in various grades, each designed for different levels of abrasion. For automotive applications, fine or ultra-fine grade pads are typically used to avoid creating deep scratches.
- Proper Technique: Use a light to medium pressure when scuffing with a Scotch-Brite pad. Move the pad in a circular or back-and-forth motion to ensure uniform coverage. Avoid pressing too hard, as this can create uneven scratches.
-
Surface Cleaning:
- Importance of Cleaning: After scuffing, it is essential to thoroughly clean the surface to remove any residue or contaminants. Use a wax and grease remover or a specialized automotive cleaner to ensure the surface is free of oils, waxes, and fingerprints.
- Recommended Cleaners: Products like PPG DX330, DuPont Prep-Sol, or equivalent wax and grease removers are effective for cleaning scuffed surfaces. Follow the manufacturer’s instructions for dilution and application.
-
Epoxy Primer Application:
- Timing: Apply the epoxy primer as soon as possible after cleaning the surface to prevent oxidation or contamination. Epoxy primers are designed to bond to properly prepared surfaces, providing excellent adhesion and corrosion protection.
- Multiple Coats: Apply multiple thin coats of epoxy primer rather than one thick coat. This allows the primer to properly wet the surface and achieve optimal adhesion.
-
Expert Insight:
- According to a study by the American Society for Testing and Materials (ASTM), proper surface preparation, including scuffing and cleaning, can increase the adhesion of epoxy primers by up to 50%. The study emphasized the importance of removing all contaminants and creating a uniform surface profile.
-
Specific Considerations for Floors and Undercarriage:
- Contamination: Floors and the undercarriage are more prone to contamination from road grime, oil, and other substances. Pay extra attention to cleaning these areas thoroughly before priming.
- Accessibility: These areas can be difficult to reach, so use appropriate tools and techniques to ensure uniform scuffing and cleaning. A long-handled Scotch-Brite pad or a power tool with a scuffing attachment can be helpful.
-
Additional Tips:
- Visual Inspection: After scuffing and cleaning, visually inspect the surface to ensure it is uniformly dull and free of any glossy spots.
- Tack Cloth: Use a tack cloth to remove any remaining dust or particles before applying the primer.
-
When Not to Scuff:
- New or Bare Metal: If the surface is new or bare metal, scuffing may not be necessary. Instead, focus on cleaning and degreasing the surface thoroughly.
- Previously Primed Surfaces: If the surface has already been primed and is in good condition, scuffing may only be necessary to provide a key for the next coat of primer.
By following these guidelines, you can effectively use a Scotch-Brite pad to prepare floors and the undercarriage for epoxy primer, ensuring a durable and long-lasting finish.
4. Would It Be Unwise To Follow Up With Dawn Dish Detergent And Water After Rinsing The Ospho?
No, it is generally not unwise to follow up with Dawn dish detergent and water after rinsing Ospho, but it is crucial to ensure all detergent residue is thoroughly rinsed off before applying epoxy primer to prevent adhesion issues.
-
Understanding Ospho:
- What is Ospho?: Ospho is a phosphoric acid-based metal treatment used to convert rust into a stable, paintable surface. It is effective in preventing flash rust and promoting adhesion of primers and paints.
- How Ospho Works: Ospho chemically reacts with rust (iron oxide) to form iron phosphate, a black, inert coating that passivates the metal surface. This coating provides a barrier against further corrosion and enhances the adhesion of subsequent coatings.
-
The Role of Cleaning:
- Importance of Cleaning: Cleaning is essential to remove any residues, contaminants, or surface impurities that can interfere with the adhesion of epoxy primer. Contaminants such as oils, grease, salts, and loose particles can compromise the bond between the primer and the substrate.
- Consequences of Inadequate Cleaning: Failure to properly clean the surface can lead to adhesion failures, resulting in peeling, blistering, or premature corrosion of the painted surface.
-
Dawn Dish Detergent:
- Why Dawn?: Dawn dish detergent is a popular choice for cleaning automotive surfaces due to its excellent grease-cutting properties and ability to remove a wide range of contaminants. It is also relatively mild and safe for use on most automotive finishes.
- Potential Issues: The main concern with using Dawn is that it can leave behind residues that may interfere with primer adhesion if not thoroughly rinsed off. These residues can create a barrier between the primer and the substrate, leading to adhesion problems.
-
Proper Procedure for Using Dawn:
- Dilution: Dilute Dawn dish detergent with water according to the manufacturer’s recommendations. A typical dilution ratio is 1-2 ounces of detergent per gallon of water.
- Application: Apply the diluted detergent solution to the surface using a soft sponge or cloth. Scrub gently to remove any dirt, grease, or other contaminants.
- Rinsing: Rinse the surface thoroughly with clean water to remove all traces of the detergent. Use a hose or pressure washer to ensure complete removal.
- Drying: Allow the surface to air dry completely before proceeding with primer application. Use a clean, lint-free cloth to wipe away any remaining water droplets.
-
Alternatives to Dawn:
- Wax and Grease Removers: Commercial wax and grease removers are specifically formulated for automotive cleaning and are designed to leave no residue behind. Products like PPG DX330, DuPont Prep-Sol, or equivalent are excellent choices.
- Pre-Paint Cleaners: Pre-paint cleaners are another option for preparing surfaces for painting. These cleaners are typically solvent-based and are effective in removing a wide range of contaminants.
-
Expert Insight:
- According to a study by the Society of Automotive Engineers (SAE), proper cleaning with a wax and grease remover can improve the adhesion of epoxy primers by up to 30%. The study emphasized the importance of removing all surface contaminants to ensure a strong bond between the primer and the substrate.
-
Best Practices:
- Rinse Thoroughly: Ensure that all traces of Dawn dish detergent are completely rinsed off the surface. Use plenty of clean water and check for any signs of residue.
- Use a Tack Cloth: After drying, use a tack cloth to remove any remaining dust or particles before applying the primer.
- Test Area: If you are unsure about the compatibility of Dawn with your primer, test a small, inconspicuous area first. Apply the primer to the test area and check for any signs of adhesion problems after it has dried.
-
Additional Considerations:
- Water Quality: Use clean, potable water for rinsing. Hard water may leave mineral deposits on the surface, which can interfere with primer adhesion.
- Environmental Conditions: Avoid cleaning in direct sunlight or extreme temperatures, as this can cause the detergent to dry too quickly and leave residue behind.
By following these guidelines, you can safely use Dawn dish detergent to clean your car’s surface after applying Ospho, ensuring optimal adhesion of the epoxy primer.
5. Please Comment On The Proposed Process As Laid Out.
Your proposed process for painting your 1963 Falcon Sprint restomod is comprehensive, but here are some comments and suggestions for refinement:
-
Overall Assessment: Your process is well-structured and covers the essential steps for a high-quality paint job. However, some areas could benefit from additional clarification or adjustments to ensure optimal results.
-
Detailed Breakdown:
-
Spot Treat with Ospho:
- Comment: This is a good initial step to address any flash rust.
- Suggestion: Ensure the Ospho is applied according to the manufacturer’s instructions, and allow sufficient dwell time for it to convert the rust.
-
Wash with Water and Scotch-Brite:
- Comment: This helps remove Ospho residue and loose rust particles.
- Suggestion: Consider using a mild degreaser like Dawn dish soap (as discussed earlier), but ensure thorough rinsing to remove any soap residue.
-
Sand Everything Accessible with 80 Grit:
- Comment: 80 grit is appropriate for removing rust and preparing the surface for epoxy primer.
- Suggestion: Ensure uniform sanding to create a consistent surface profile for optimal primer adhesion.
-
Apply 2 Coats of Epoxy Primer:
- Comment: Two coats are generally sufficient, but verify mil thickness.
- Suggestion: Check the manufacturer’s recommended mil thickness and adjust the number of coats accordingly.
-
Sand with 80 Grit, Rough Fill with Rage Ultra:
- Comment: This is the standard procedure for addressing imperfections.
- Suggestion: Ensure the filler is properly mixed and applied according to the manufacturer’s instructions.
-
Block with 80 Grit, Apply Featherfill G2:
- Comment: Featherfill G2 is a good choice for filling minor imperfections.
- Suggestion: Apply Featherfill G2 in thin coats to avoid excessive build-up and potential cracking.
-
Block with 180 Grit, 2 Coats Epoxy Over Filled Areas:
- Comment: Sealing the filled areas with epoxy is essential.
- Suggestion: Ensure the epoxy primer is applied evenly over the filled areas to provide a uniform surface for subsequent coats.
-
Block with 220-320 Grit, 2 Coats Epoxy Over Exterior:
- Comment: Refining the surface with finer grit is important for a smooth finish.
- Suggestion: Use a guide coat during blocking to identify and address any remaining imperfections.
-
Block with 320-400 Grit, 2 Coats Epoxy Over Exterior:
- Comment: Further refinement for an even smoother surface.
- Suggestion: Ensure the surface is completely smooth and free of any scratches before proceeding to the next step.
-
Block with 400 Grit, Scuff/Sand Floors and Undercarriage, 1 Coat Gray Epoxy as Sealer:
- Comment: Using gray epoxy as a sealer is a good idea for uniform color.
- Suggestion: Scuff the floors and undercarriage with a Scotch-Brite pad or fine-grit sandpaper to ensure proper adhesion of the sealer.
-
Wet Sand with 400-600 Grit, Spray 2 Basecoats:
- Comment: Wet sanding prepares the surface for basecoat application.
- Suggestion: Use a sanding block to ensure uniform sanding and avoid creating low spots or high spots.
-
Spot Sand with 800-1500 Grit, Prep with 710, Additional Basecoat:
- Comment: Addressing imperfections before clearcoat is critical.
- Suggestion: Ensure the surface is completely clean and free of any sanding residue before applying the additional basecoat.
-
Prep with 710, Spray SPI Universal Clear 4-5 Coats:
- Comment: SPI Universal Clear is a high-quality clearcoat.
- Suggestion: Apply the clearcoat in thin, even coats to avoid runs or sags.
-
Wet Sand Starting with 400-600 Grit Working Up to 3000 or Higher:
- Comment: This is the standard procedure for achieving a show-quality finish.
- Suggestion: Use a foam pad and plenty of water during wet sanding to minimize the risk of scratching the clearcoat.
-
-
Additional Tips:
- Temperature and Humidity: Pay attention to temperature and humidity during each step of the process, as these factors can affect drying times and adhesion.
- Product Compatibility: Ensure that all products used are compatible with each other, following the manufacturer’s recommendations.
- Test Panels: Consider using test panels to practice your technique and ensure that the products are performing as expected.
-
Expert Insight:
- According to automotive refinishing experts at I-CAR (Inter-Industry Conference on Auto Collision Repair), following a systematic and well-planned process is essential for achieving a high-quality paint job. They recommend taking the time to properly prepare the surface and using high-quality products to ensure a durable and long-lasting finish.
By incorporating these comments and suggestions into your proposed process, you can maximize the chances of achieving a flawless and professional-looking paint job on your 1963 Falcon Sprint restomod.
6. What Are The Common Mistakes People Make When Applying Primer, And How Can They Be Avoided?
Several common mistakes can occur during primer application, leading to unsatisfactory results. Here’s a guide on how to avoid them:
| Mistake | Prevention |
|---|---|
| Inadequate Surface Preparation | Thoroughly clean, sand, and degrease the surface before applying primer. |
| Incorrect Mixing Ratios | Always follow the manufacturer’s recommended mixing ratios for primer and activators. |
| Applying Primer Too Thickly | Apply thin, even coats to avoid runs, drips, and slow drying. |
| Insufficient Sanding Between Coats | Sand each coat of primer lightly with fine-grit sandpaper to ensure proper adhesion of subsequent coats. |
| Contamination of Primer | Use clean mixing containers and applicators to avoid introducing contaminants into the primer. |
| Improper Spray Gun Setup | Adjust the spray gun settings (e.g., air pressure, nozzle size) according to the manufacturer’s recommendations. |
| Applying Primer in Unfavorable Conditions | Avoid applying primer in high humidity, extreme temperatures, or direct sunlight, as these conditions can affect drying times and adhesion. |
| Neglecting Safety Precautions | Wear appropriate personal protective equipment (PPE), including a respirator, gloves, and eye protection, when spraying primer. |
| Not Allowing Enough Drying Time | Allow each coat of primer to dry completely before sanding or applying subsequent coats. |
| Using Expired or Poor-Quality Primer | Always use fresh, high-quality primer from a reputable manufacturer to ensure optimal performance and durability. |
7. What Are The Best Practices For Sanding Primer To Achieve A Smooth Surface?
Sanding primer correctly is essential for achieving a smooth and flawless finish. Here are some best practices to follow:
- Choose the Right Sandpaper: Start with the appropriate grit for the job. For removing imperfections and leveling the surface, use 180-220 grit sandpaper. For finer sanding before applying the topcoat, use 320-400 grit.
- Use a Sanding Block: Wrap the sandpaper around a sanding block to ensure even pressure and prevent creating uneven surfaces. Sanding blocks come in various shapes and sizes to suit different contours and surfaces.
- Wet Sanding: Wet sanding helps to reduce clogging of the sandpaper and provides a smoother finish. Use a spray bottle filled with water and a drop of dish soap to lubricate the surface while sanding.
- Apply Even Pressure: Apply consistent and even pressure while sanding. Avoid pressing too hard, as this can create deep scratches or gouges in the primer.
- Sand in a Circular Motion: Sand in a circular or overlapping pattern to ensure uniform coverage and prevent leaving straight lines or scratches.
- Use a Guide Coat: Apply a light guide coat (e.g., a contrasting color spray paint) before sanding to help identify high and low spots. Sand until the guide coat is evenly removed.
- Clean the Surface Regularly: Wipe the surface frequently with a clean, damp cloth to remove sanding dust and debris. This will help you to see any imperfections and ensure a smooth finish.
- Inspect the Surface: Regularly inspect the surface for any remaining imperfections or scratches. Use a bright light to help you spot any defects.
- Feather Edges: Feather the edges of any repaired areas to blend them seamlessly with the surrounding surface. Use a finer grit sandpaper to smooth the edges.
- Final Cleaning: After sanding, thoroughly clean the surface with a wax and grease remover to remove any remaining sanding dust and contaminants.
8. How Does Temperature And Humidity Affect Primer Application And Drying Time?
Temperature and humidity play significant roles in primer application and drying time. Here’s how:
-
Temperature:
- Effect on Viscosity: High temperatures can decrease the viscosity of the primer, making it runnier and more prone to drips and sags. Low temperatures can increase the viscosity, making it difficult to spray evenly.
- Effect on Drying Time: High temperatures can accelerate the drying process, potentially leading to uneven drying and poor adhesion. Low temperatures can slow down the drying process, increasing the risk of contamination and prolonging the overall project time.
- Recommended Temperature Range: Apply primer within the temperature range recommended by the manufacturer, typically between 65°F and 85°F (18°C and 29°C).
-
Humidity:
- Effect on Drying Time: High humidity can significantly slow down the drying process, as the moisture in the air interferes with the evaporation of solvents in the primer.
- Effect on Adhesion: High humidity can also affect the adhesion of the primer, as moisture can condense on the surface and prevent the primer from bonding properly.
- Recommended Humidity Range: Apply primer in low to moderate humidity conditions, typically below 70%.
-
How to Mitigate the Effects:
- Temperature Control: Use a temperature-controlled environment (e.g., a paint booth) to maintain a consistent temperature during application and drying.
- Humidity Control: Use a dehumidifier to lower the humidity level in the work area.
- Adjust Drying Times: Adjust drying times according to the temperature and humidity conditions. Allow more time for the primer to dry in cooler or more humid conditions.
- Use Additives: Consider using additives (e.g., accelerators, retarders) to adjust the drying time of the primer according to the environmental conditions.
-
Expert Insight:
- According to the National Institute for Automotive Service Excellence (ASE), maintaining proper temperature and humidity levels is essential for achieving optimal results when applying primer and paint. They recommend following the manufacturer’s recommendations and using appropriate equipment to control the environment.
9. What Are The Different Types Of Primers Available, And When Should Each Type Be Used?
Several types of primers are available, each with its own specific properties and applications. Here’s a guide to help you choose the right primer for your project:
| Primer Type | Description | Best Use Cases |
|---|---|---|
| Epoxy Primer | Provides excellent adhesion, corrosion resistance, and durability. Offers a strong foundation for subsequent coats. | Bare metal surfaces, rust-prone areas, and projects requiring maximum protection against corrosion. |
| Urethane Primer | Offers good adhesion, flexibility, and impact resistance. Provides a smooth surface for topcoats. | General automotive applications, projects requiring flexibility and impact resistance, and surfaces with minor imperfections. |
| Acrylic Primer | Easy to apply, quick-drying, and provides good adhesion to a variety of surfaces. | Interior projects, general-purpose applications, and surfaces that are not exposed to harsh conditions. |
| Etch Primer | Contains phosphoric acid that etches into the metal surface, providing excellent adhesion and corrosion protection. | Bare metal surfaces, aluminum, and galvanized steel. |
| Self-Etching Primer | Combines the properties of etch primer and primer, providing both etching and priming in one step. | Bare metal surfaces, small projects, and areas that are difficult to sand. |
| Filler Primer | Formulated to fill minor imperfections, such as scratches and dents. Provides a smooth surface for topcoats. | Surfaces with minor imperfections, projects requiring a smooth finish, and areas that have been repaired with body filler. |
| High-Build Primer | Similar to filler primer but formulated to provide a thicker layer of material, allowing for more extensive filling. | Surfaces with more significant imperfections, projects requiring a high level of surface leveling, and areas that have been heavily damaged. |
10. How Can I Ensure Proper Adhesion Of Primer To Different Substrates, Such As Metal, Plastic, And Fiberglass?
Ensuring proper adhesion of primer to different substrates requires specific preparation and techniques for each material:
-
Metal:
- Surface Preparation: Remove any rust, corrosion, or loose paint using a wire brush, sandpaper, or media blasting. Clean the surface thoroughly with a wax and grease remover.
- Primer Selection: Use an epoxy primer or etch primer for bare metal surfaces. These primers provide excellent adhesion and corrosion protection.
- Application: Apply the primer in thin, even coats, following the manufacturer’s recommendations for drying time and mil thickness.
-
Plastic:
- Surface Preparation: Clean the surface with a plastic cleaner or degreaser to remove any mold release agents, oils, or contaminants. Sand the surface lightly with fine-grit sandpaper (e.g., 320-400 grit) to create a profile for adhesion.
- Primer Selection: Use a specialized plastic primer that is designed to bond to plastic surfaces. These primers are flexible and resistant to cracking or peeling.
- Application: Apply the primer in thin, even coats, following the manufacturer’s recommendations for drying time and mil thickness.
-
Fiberglass:
- Surface Preparation: Clean the surface with a fiberglass cleaner or degreaser to remove any mold release agents, oils, or contaminants. Sand the surface with medium-grit sandpaper (e.g., 180-220 grit) to create a profile for adhesion.
- Primer Selection: Use an epoxy primer or urethane primer for fiberglass surfaces. These primers provide good adhesion and flexibility.
- Application: Apply the primer in thin, even coats, following the manufacturer’s recommendations for drying time and mil thickness.
-
General Tips:
- Test Area: Always test the primer on a small, inconspicuous area before applying it to the entire surface. This will help you to ensure that the primer adheres properly and does not react with the substrate.
- Follow Manufacturer’s Recommendations: Follow the manufacturer’s recommendations for surface preparation, primer selection, and application techniques.
- Use High-Quality Products: Use high-quality primers and cleaning products from reputable manufacturers to ensure optimal performance and durability.
Seeking expert advice ensures your project achieves professional, long-lasting results. Contact HOW.EDU.VN today and connect with our team of Doctors for personalized guidance. Address: 456 Expertise Plaza, Consult City, CA 90210, United States. Whatsapp: +1 (310) 555-1212. Visit our website at how.edu.vn to submit your questions and receive tailored solutions from leading experts.