Grilled corn on the cob is synonymous with summer. There’s nothing quite like biting into the sweet, juicy kernels with a hint of smoky char from the grill. Whether you’re hosting a backyard BBQ or simply looking for a flavorful side dish, knowing how to perfectly grill corn on the cob is a must. This guide will walk you through two easy methods – grilling in the husk and grilling without – so you can achieve corn on the cob perfection every time. Get ready to enjoy the taste of summer!
Two Fantastic Ways to Grill Corn on the Cob
There are two primary techniques for grilling corn on the cob: in the husk and out of the husk. Neither is inherently better than the other; the best method depends on your desired outcome and personal preference. Do you prefer incredibly juicy and tender kernels, or do you crave those beautiful char marks and a more intense smoky flavor? Let’s explore both approaches to help you decide which is perfect for your next cookout.
Method 1: Grilling Corn in the Husk for Maximum Juiciness
Grilling corn on the cob in the husk is like a natural steaming process. The husks act as a protective barrier, trapping moisture and gently cooking the corn. This results in incredibly juicy, plump kernels that are bursting with sweetness. If you prioritize tenderness and moisture, this method is your go-to.
Here’s a simple step-by-step guide to grilling corn in the husk:
- Prepare the Corn: Begin by peeling back the husks of each corn cob, without fully detaching them at the base. Remove the corn silk as thoroughly as possible. This is crucial to prevent burning and unwanted flavors.
- Soak the Husks (Important!): This step is key to preventing the husks from catching fire and ensuring they steam the corn effectively. Pull the husks back up to enclose the corn and submerge the cobs in a large bowl or sink filled with cold water for at least 10 minutes, and up to 30 minutes. This saturation will create steam during grilling.
- Grill the Corn: Preheat your grill to medium-high heat (around 375-450°F or 190-230°C). Remove the corn from the water, shake off excess water, and pat the husks lightly dry. Place the corn cobs directly on the grill grates.
- Cook and Rotate: Grill the corn, rotating the cobs every 3 to 5 minutes to ensure even cooking. You’ll know it’s cooking when you hear sizzling and the husks start to char and steam.
- Check for Doneness: Grilling time will vary depending on your grill and heat, but typically it takes around 15-20 minutes to grill corn in the husk. The husks will be browned and slightly charred, and the corn inside will be tender. You can test for doneness by carefully peeling back the husks of one cob and piercing a kernel with a fork – it should be tender and easily pierced.
- Serve: Once cooked, remove the corn from the grill. You can tie back the husks to create a natural handle for easier eating. Be careful as steam will release when you open the husks – allow them to cool slightly before handling.
Method 2: Grilling Corn Without the Husk for Smoky Char
If you love those appealing grill marks and a smoky, slightly charred flavor on your corn, grilling corn without the husk is the method for you. This direct heat approach caramelizes the natural sugars in the corn, creating a delightful smoky sweetness and textural contrast.
Follow these steps for grilling corn without the husk:
- Shuck the Corn: Completely remove the husks and silk from each ear of corn. Make sure to remove all the silk strands for the best eating experience.
- Preheat Grill: Preheat your grill to medium-high heat, just as you would for the husk method.
- Grill Directly: Place the shucked corn cobs directly onto the hot grill grates.
- Grill and Rotate Frequently: Grill the corn, turning every 3 to 5 minutes. This frequent rotation is key to achieving even char marks and preventing burning. Keep a close eye on the corn as it cooks directly over the heat.
- Watch for Char and Color: You’re aiming for light char marks and bright yellow kernels. Overcooking can lead to dry corn. Grilling time is generally around 10-15 minutes, but it’s more important to watch for visual cues.
- Don’t Overcook: It’s crucial to avoid overcooking corn when grilling without the husk. As soon as you see light char marks and the kernels look cooked (bright yellow and slightly softened), remove the corn from the grill. Over-grilling will dry out the kernels and make them tough.
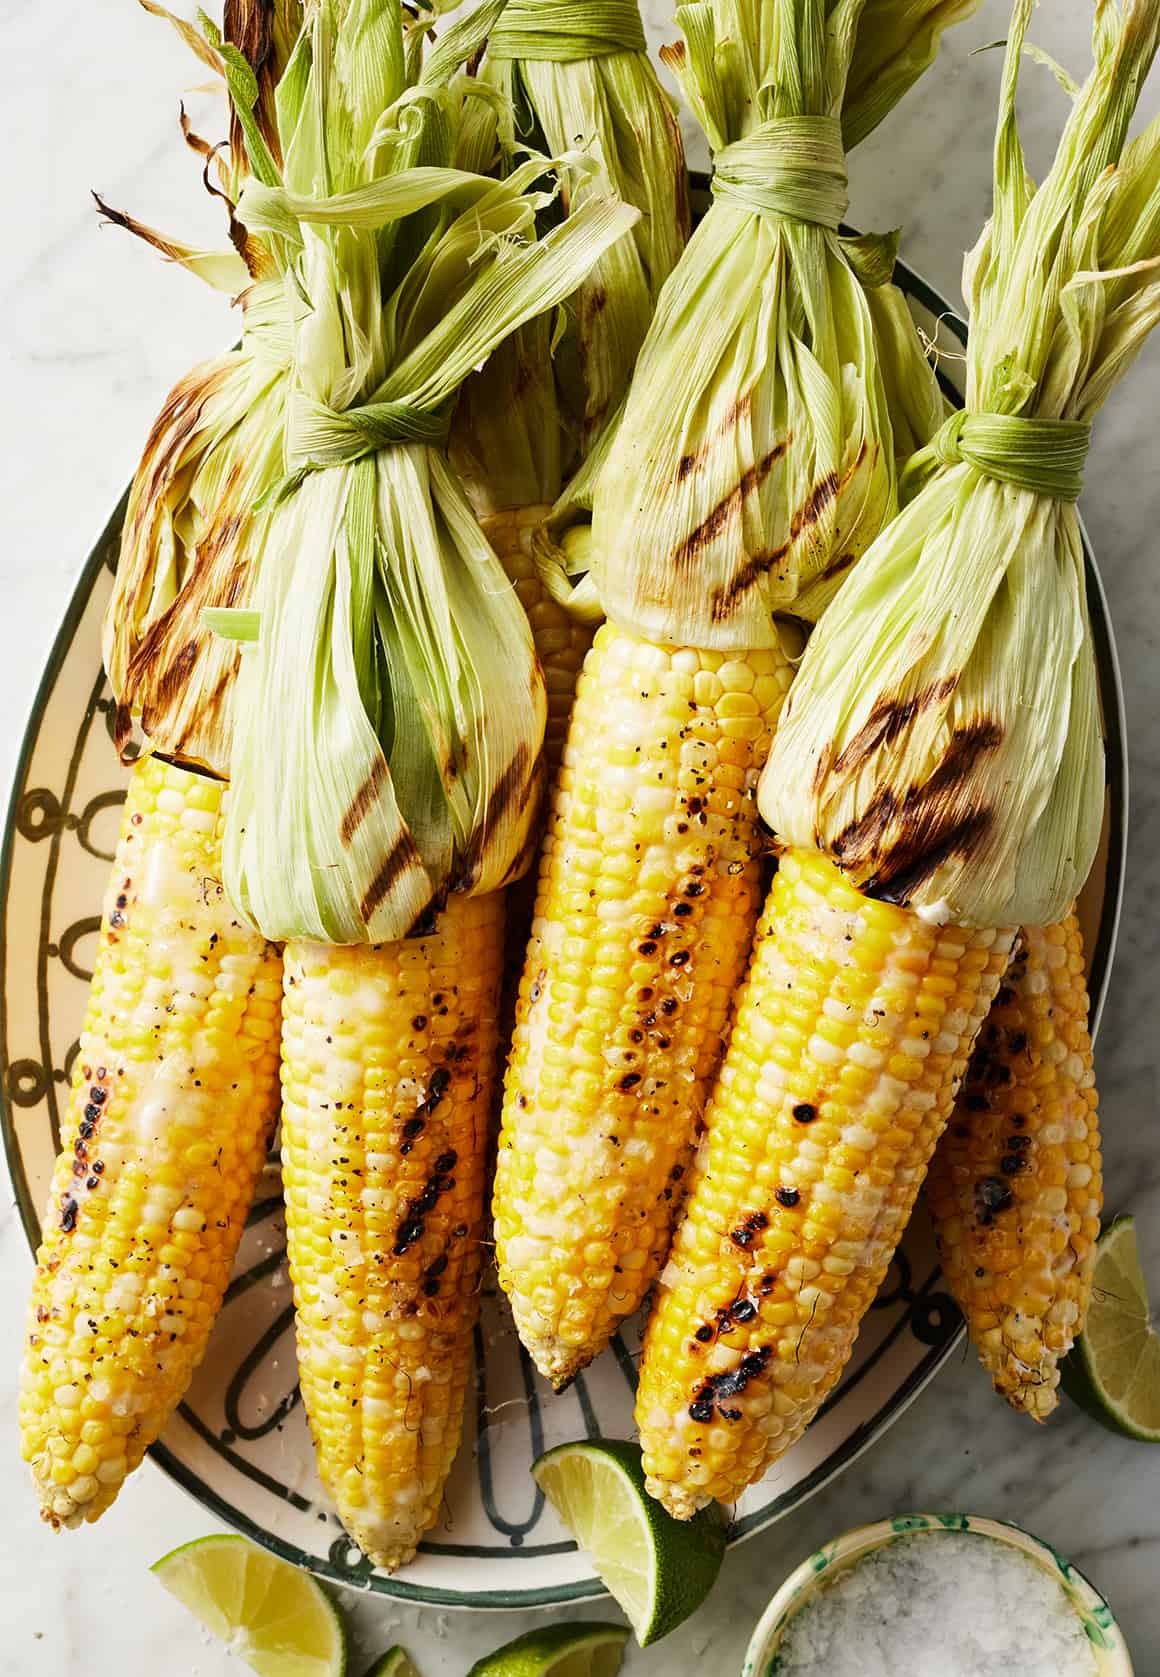
Hybrid Approach: Tied Husks for Best of Both Worlds
Want the visual appeal of grilled corn with husks tied back but prefer the slightly smoky flavor of direct grilling? You can combine elements of both methods!
- Tie Back Husks: Shuck the corn, then loosely tie back the husks at the base of the cob using kitchen twine or strips of husk.
- Soak (Optional but Recommended): Soaking for 10 minutes is still a good idea to prevent husks from burning excessively and to add a touch of moisture.
- Grill as Usual: Grill the corn directly on the grates, rotating frequently, until you achieve the desired char and the corn is cooked through. The tied-back husks will act as a handle and add a touch of visual flair.
Serving Suggestions for Grilled Corn on the Cob
Grilled corn on the cob is incredibly versatile and pairs well with a wide array of dishes. It’s a classic side for any summer BBQ, perfect alongside:
- Burgers and Hot Dogs: Veggie burgers, classic beef burgers, black bean burgers, or your favorite hot dogs – grilled corn is the ideal accompaniment.
- Salads: Pasta salad, broccoli salad, coleslaw, or a fresh summer salad with tomatoes and cucumbers.
- Grilled Meats and Fish: Grilled chicken, steak, ribs, or fish – corn on the cob complements almost any main course.
For simple seasoning, you can’t beat classic butter, salt, and freshly ground black pepper. But don’t be afraid to get creative!
Spice it Up: Mexican Street Corn (Elote)
Transform your grilled corn into flavorful Mexican street corn, or elote:
- Slather with Mayo or Mexican Crema: While the corn is still hot, coat it generously with mayonnaise or Mexican crema.
- Seasoning: Sprinkle with chili powder, cotija cheese (or crumbled feta), and a squeeze of fresh lime juice.
- Optional Heat: Add a pinch of cayenne pepper or a dash of hot sauce for extra spice.
You can also slice the grilled kernels off the cob to make a vibrant Mexican grilled corn salad, perfect as a side dish or topping for tacos and bowls.
Elevate the Flavor: Flavored Butters for Grilled Corn
Take your grilled corn to the next level with flavored butters, also known as compound butters. These are easy to make and add a burst of flavor.
Consider these delicious options:
- Herb Butter: Mix softened butter with chopped fresh herbs like parsley, chives, thyme, or rosemary.
- Garlic Butter: Combine softened butter with minced garlic, roasted garlic, or garlic powder for a savory kick.
- Cilantro Lime Butter: A zesty and refreshing option! Mix softened butter with finely chopped cilantro, lime zest, and a pinch of salt.
To make compound butter, simply combine softened butter with your chosen ingredients, mix well, and then you can roll it into a log using parchment paper for easy storage in the refrigerator until ready to use.
Enjoy More Corn Recipes
Now that you’ve mastered how to grill corn on the cob, explore these other delicious corn recipes:
[Link to related corn recipes on how.edu.vn – if applicable]
Grilling corn on the cob is a simple pleasure of summer. Whether you choose the husk-on method for ultimate juiciness or the husk-off method for smoky char, you’re in for a treat. Experiment with both techniques and find your favorite way to cook this seasonal delight. Happy grilling!