Baking a ham might seem like a daunting task, reserved only for holiday feasts. But the truth is, making a delicious, juicy baked ham at home is remarkably simple. This guide will walk you through a straightforward method to bake a ham that’s perfect for any occasion, without any complicated steps like scoring or studding with cloves. We’ll focus on a moist heat cooking approach to keep the ham tender, finished with a high-heat caramelization for a beautifully flavorful crust. Get ready to impress your guests with a ham that’s both easy to make and utterly delicious!
The Secret to a Truly Great Baked Ham? It Starts with the Ham Itself
Let’s be honest, the most crucial factor in baking a fantastic ham isn’t some secret technique or elaborate glaze. It’s the quality of the ham you choose. Think of it this way: if you start with a flavorful, well-cured ham, your baking process is really about gently heating it through and enhancing its natural taste. No amount of fancy cooking methods or glazes can salvage a poor-quality ham.
For years, I’ve been a big fan of Dakin Farm hams (and no, this isn’t sponsored – just genuine appreciation!). Growing up, my aunt and uncle in Vermont always had Dakin Farm ham on hand, and it was consistently amazing. Whether it’s a whole or half ham, their quality is undeniable. A half ham is generously sized, easily feeding 12 or more people, making it a surprisingly affordable centerpiece for gatherings.
My mother always advised against spiral-cut or frozen hams. One year, ignoring her advice, I opted for a frozen, spiral-cut ham from a supposedly reputable source. It looked stunning coming out of the oven, but the taste was a major letdown – dry and lacking in flavor. Lesson learned: Mom knows best when it comes to ham!
So, before we even get to baking, remember: choose a good quality, cooked ham as your starting point. This simple step is the real secret to baking ham that everyone will rave about.
Simple Steps for Baking a Perfectly Moist Ham
This method focuses on simplicity and maximizing moisture, ensuring your ham is tender and flavorful without any unnecessary fuss. Forget scoring patterns and clove decorations – we’re keeping it easy and delicious.
Why This Method Works: Moist Heat and Caramelization
The key to this recipe is a two-stage cooking process:
- Moist Heat (Low Temperature): Baking the ham covered in foil with a little water in the pan for most of the cooking time creates a moist environment. This gentle, moist heat prevents the ham from drying out as it reheats.
- High Heat Finish (Caramelization): Removing the foil and increasing the oven temperature for the last 30 minutes allows the glaze to caramelize beautifully on the ham’s surface. This high heat creates a lovely burnished crust and enhances the flavor without drying out the inside, as the ham is already heated through.
This combination ensures a ham that is both incredibly juicy and has a delicious, slightly sweet and savory caramelized exterior.
Step-by-Step Baking Instructions
Follow these simple steps to bake your ham to perfection:
-
Preheat your oven to 325°F (160°C).
-
Calculate your cooking time: The rule of thumb is to cook the ham for approximately 10 minutes per pound at 325°F. However, we’ll adjust this slightly for the glaze. For the initial cooking time (before glazing), subtract 30 minutes from your total calculated cooking time. For example, a 12-pound ham would typically cook for 120 minutes (10 minutes x 12 pounds). Subtracting 30 minutes gives you 90 minutes for the first stage of cooking.
-
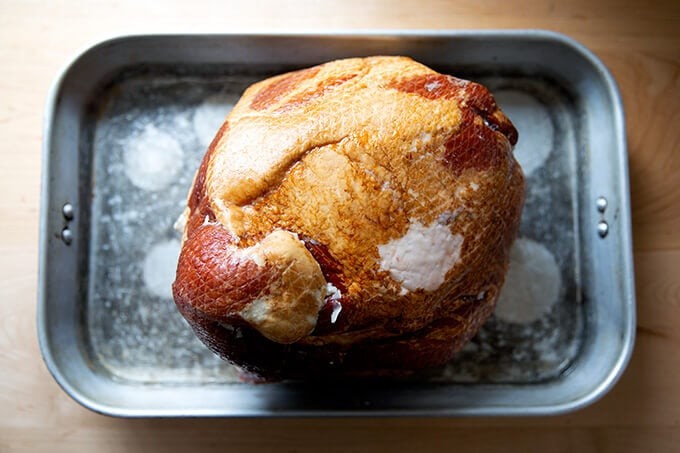
Prepare the ham for baking: Place the ham fat-side up in a large roasting pan. Add about 2 cups of water to the bottom of the pan, or enough to reach about 1/2 inch up the sides.
-
Cover and bake: Cover the roasting pan tightly with heavy-duty foil. This is crucial for trapping the moisture. Transfer the pan to your preheated oven and bake for the initial cooking time you calculated (e.g., 90 minutes for a 12-pound ham).
-
Prepare the glaze while the ham is baking. (Recipe follows below).
-
Glaze and finish baking: After the initial cooking time, remove the ham from the oven and increase the oven temperature to 425°F (220°C). Carefully remove the foil. Brush the ham generously with the prepared glaze, ensuring you coat all sides.
-
Caramelize the glaze: Return the ham to the oven, uncovered, and bake for 15 minutes. Remove it again and brush with another layer of glaze. Bake for a final 15 minutes to caramelize the glaze and achieve a beautiful burnished color. If you have any glaze leftover, you can pour it over the ham during the last few minutes of baking.
-
Rest before carving: Remove the baked ham from the oven.
Transfer it to a cutting board and let it rest for at least 20 minutes before carving. This resting period is essential as it allows the juices to redistribute throughout the ham, resulting in a more tender and flavorful final product.
-
Carve and serve: After resting, carve the ham. Start by removing large sections of meat from the bone, then slice those pieces for serving.
Transfer the carved ham to a serving platter and get ready to enjoy! Don’t forget to save the bone for soup!
Brown Sugar Maple Ham Glaze Recipe
A simple glaze is all you need to elevate your baked ham. This brown sugar maple glaze is quick to make and provides the perfect touch of sweetness and caramelization.
Why This Glaze?
This glaze uses a combination of brown sugar and maple syrup for a rich sweetness that complements the savory ham. The orange juice adds a touch of acidity and brightness, balancing the flavors and enhancing the caramelization process in the high heat of the oven.
Glaze Ingredients:
- 1/4 cup brown sugar, packed
- 1/4 cup maple syrup (pure maple syrup is best for flavor)
- 1/4 cup freshly squeezed orange juice
(Halve this recipe if you are baking a half ham)
Glaze Instructions:
Simply whisk together the brown sugar, maple syrup, and orange juice in a small bowl until the brown sugar is mostly dissolved. That’s it! Your glaze is ready to brush onto the ham.
Baked Ham Best Practices: Quick Tips for Success
- Ham Quality Matters: As emphasized earlier, start with a good quality, cooked ham.
- Don’t Overcook: Ham is already cooked, so you’re just reheating it. Overcooking will dry it out. Stick to the recommended cooking times.
- Use a Meat Thermometer (Optional): If you want to be absolutely precise, use a meat thermometer. The internal temperature of the ham should reach 140°F (60°C) when it’s heated through.
- Resting is Key: Don’t skip the resting time! It makes a noticeable difference in the ham’s tenderness and juiciness.
- Save the Bone: The ham bone is gold for making flavorful soups like split pea soup. Freeze it if you’re not using it right away.
Serving Suggestions
Baked ham is incredibly versatile. It’s fantastic as a centerpiece for holiday dinners, but also perfect for Sunday suppers or special occasions.
-
Classic Sides: Serve your baked ham with classic sides like mashed potatoes, scalloped potatoes, green beans, roasted vegetables, or a fresh salad.
-
Mustard Sauce: Consider serving it with a delicious mustard sauce, like Grandmother’s Mustard Sauce, for a tangy counterpoint to the sweetness of the ham.
-
Leftovers: Leftover baked ham is amazing! Use it in sandwiches, omelets, quiches, casseroles, or diced in salads. You can also make ham salad or add it to pasta dishes.
Baking a ham doesn’t have to be complicated. With this simple method and delicious glaze, you can create a show-stopping centerpiece that’s sure to impress. Enjoy!