Embroidery, the art of decorating fabric with needle and thread, might seem intricate, but it’s wonderfully accessible for beginners. If you’re curious about learning How To Embroider and don’t know where to begin, you’ve come to the right place. Many people worldwide have been introduced to this rewarding craft through hand embroidery guides and video tutorials. Hand embroidery is a deeply satisfying and creative hobby, and this comprehensive guide will break down the essentials into easy-to-follow lessons. With just a few basic supplies and some fundamental stitches, you’ll be amazed at how quickly you can start creating beautiful, personalized pieces of art.
Why Learn to Embroider?
Embroidery offers a fantastic way to unwind, express your creativity, and add a personal touch to clothing, home décor, and gifts. Beyond its artistic appeal, hand embroidery is surprisingly easy to learn and doesn’t require a huge investment in supplies or time. It’s a craft that allows you to slow down, focus, and create something beautiful with your own hands. Whether you’re looking for a new hobby, a way to personalize items, or simply a relaxing activity, embroidery is a perfect choice.
Essential Embroidery Supplies for Beginners
Before you embark on your embroidery journey, gathering the right supplies is key. Fortunately, starting with hand embroidery is quite affordable and requires just a few essential items. Here’s what you’ll need to get started:
-
Fabric: The foundation of your embroidery. For beginners, cotton or linen fabrics are excellent choices due to their tight weave and ease of handling. These fabrics hold stitches well and are readily available. You can embroider on almost any fabric you can pass a needle through, but starting with these will make the learning process smoother.
-
Embroidery Floss (Thread): This is the colorful thread specifically designed for embroidery. Cotton embroidery floss is the most common type and comes in a vast array of colors. It’s typically made up of six strands that can be separated, allowing you to adjust the thickness of your thread for different effects.
-
Embroidery Needles: These needles are designed with a larger eye to accommodate embroidery floss and a sharp point to easily pass through fabric. Crewel or embroidery needles are specifically made for this purpose and come in various sizes. A size 7 or 9 needle is a good starting point for most beginner projects.
-
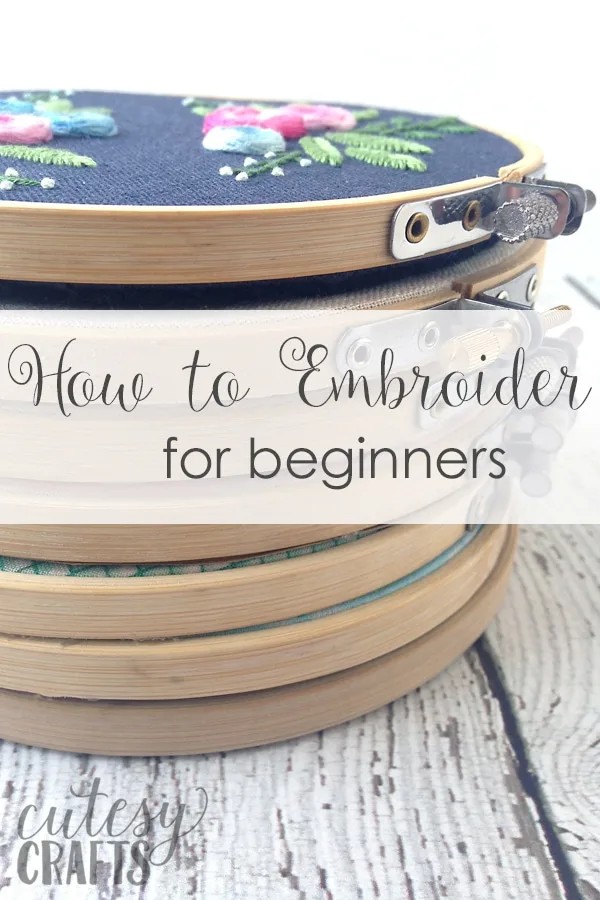
Embroidery Hoop: This tool is essential for keeping your fabric taut while you stitch, which prevents puckering and makes stitching easier and more even. Hoops come in different sizes and materials like wood or plastic. For starting out, a 6-inch wooden hoop is a versatile and manageable size.
-
Tracing Supplies: You’ll need a way to transfer your chosen embroidery pattern onto your fabric. Options include water-soluble pens or markers, transfer paper, or even tracing with a pencil if your fabric is light enough. Water-soluble markers are particularly convenient as the marks disappear with water.
-
Scissors: Small, sharp scissors are crucial for trimming threads neatly. Embroidery scissors are designed with fine points for precise cutting in tight spaces.
Mastering Basic Embroidery Stitches
Embroidery is built upon a foundation of stitches. While there are many decorative and complex stitches, you can create a wide range of designs using just a few basic ones. Let’s explore some essential stitches for beginners:
The Easiest Stitches to Start With
-
Running Stitch: This is the most fundamental stitch in embroidery, and it’s incredibly simple. Bring the needle up through the fabric, and then down a short distance away, creating a dashed line. The running stitch is perfect for outlines, simple details, and creating dashed lines.
-
Backstitch: Another essential stitch for outlines and creating solid lines. Bring the needle up, stitch forward a short distance, then bring the needle back down. Come up again a short distance ahead of your first stitch, and then bring the needle back down into the end of the previous stitch. This creates a continuous, solid line.
Expanding Your Stitch Repertoire
-
Split Stitch: Similar to the backstitch but creates a slightly thicker and textured line. Bring the needle up, take a stitch forward, and then bring the needle back up through the center of the previous stitch, splitting the thread.
-
Stem Stitch: Ideal for creating smooth, curved lines, especially for flower stems and outlines. Bring the needle up, take a stitch forward at a slight angle, and then bring the needle up again alongside the previous stitch, keeping the thread to one side of the needle consistently.
-
Satin Stitch: Used to fill in shapes with solid blocks of color. Bring the needle up on one side of the shape, and then down on the opposite side, creating long, parallel stitches that lay close together to completely fill the area.
-
French Knot: A decorative stitch that creates small, textured dots. Bring the needle up, wrap the thread around the needle a couple of times, hold the wraps with your finger, and insert the needle back down close to where it came up, pulling the knot tight to the fabric surface.
Choosing the Right Fabric for Your Embroidery Project
Selecting the appropriate fabric is crucial for a successful embroidery project. While cotton and linen are excellent starting points, understanding fabric types can enhance your embroidery experience:
-
Cotton: A versatile and widely available choice. Cotton calico, muslin, or quilting cotton are all great for beginners. They are stable, easy to stitch on, and come in various weights and colors.
-
Linen: Known for its beautiful texture and durability, linen is another fantastic option. Embroidery linen is specifically woven for this craft and offers a slightly more refined look.
-
Blends: Cotton-linen blends offer a good balance of both materials’ qualities.
-
Other Fabrics: As you become more experienced, you can explore embroidering on denim, felt, wool, and even knit fabrics, each requiring slightly different techniques and considerations.
Transferring Your Embroidery Pattern
Once you’ve chosen a pattern, you need to get it onto your fabric. Here are common pattern transfer methods:
-
Tracing (for light fabrics): If your fabric is thin and light-colored, you can simply tape your pattern to a window or light box, place your fabric over it, and trace the design with a water-soluble pen or pencil.
-
Iron-on Transfer Pens/Pencils: Draw or trace your pattern onto paper, then iron it onto your fabric using a special transfer pen or pencil. The heat transfers the ink to the fabric.
-
Water-Soluble Stabilizer: Print or draw your pattern onto water-soluble stabilizer, stick it to your fabric, stitch through it, and then dissolve the stabilizer in water, leaving only your embroidery. This is great for darker fabrics where tracing is difficult.
-
Transfer Paper (Carbon Paper): Place transfer paper between your pattern and fabric, and trace over the pattern with a pen or pencil. The pressure transfers the design to the fabric.
Beginner Embroidery Patterns to Get You Started
Choosing a beginner-friendly pattern is essential when you’re learning how to embroider. Look for patterns that:
- Use basic stitches: Focus on patterns that utilize running stitch, backstitch, stem stitch, and satin stitch.
- Have simple designs: Start with patterns that have clear, bold lines and less intricate details.
- Offer manageable sizes: Smaller patterns are quicker to complete and less overwhelming for beginners.
Many free embroidery patterns are available online specifically designed for beginners. Starting with a sampler pattern that incorporates different basic stitches is an excellent way to practice and build your skills.
Finishing and Caring for Your Embroidery
Once you’ve completed your embroidery, finishing and proper care will ensure your work looks its best and lasts longer:
-
Finishing the Back: To keep the back of your embroidery neat, you can trim excess fabric and secure loose threads. For hoop art, you can glue or stitch felt to the back to cover the raw edges.
-
Washing: Hand washing is the gentlest method for cleaning embroidery. Use cold water and a mild detergent. Be mindful that some floss colors might bleed, so rinse thoroughly and avoid letting it soak for too long. A color catcher sheet can be helpful if you’re concerned about color bleeding.
-
Drying: Line drying is recommended to prevent shrinkage or damage. Gently roll your embroidery in a towel to remove excess water and then lay it flat to dry, away from direct sunlight.
-
Pressing: Avoid ironing directly over your embroidery stitches, as this can flatten them. If necessary, iron your piece face down on a padded surface, like a thick towel, to protect the stitches. Use a pressing cloth for added protection and gently press, lifting the iron rather than dragging it.
Conclusion
Learning how to embroider is a rewarding journey that starts with the basics and blossoms into a world of creative possibilities. Don’t be intimidated if your first stitches aren’t perfect – practice and patience are key. Embrace the process, experiment with different stitches and patterns, and most importantly, enjoy the relaxing and fulfilling art of hand embroidery. So, gather your supplies, choose a simple pattern, and start stitching your way to beautiful handmade creations!