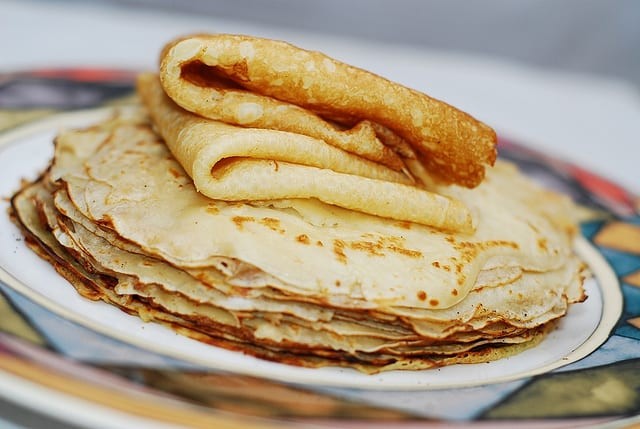
Crepes, those delicate and versatile pancakes, are a delightful treat enjoyed worldwide. Often associated with French cuisine, they are surprisingly easy to make in your own kitchen with just a few simple ingredients and a regular skillet. This guide will walk you through the process of making perfect French-style crepes from scratch, ensuring they are thin, soft, and ready to be filled with your favorite sweet or savory toppings. Whether you’re a beginner or looking to refine your crepe-making skills, this step-by-step tutorial will provide you with all the “Crepe How To” knowledge you need.
My journey with crepes started years ago, inspired by childhood memories of weekend breakfasts filled with these thin pancakes and homemade sour cherry preserves. Making crepes became a regular kitchen activity, turning me into the unofficial “crepe expert” of my family. While the title might not come with grand perks, it has given me extensive experience in perfecting the crepe-making process. The recipe and techniques shared here are honed from years of practice, designed to help you achieve delicious, French-style crepes effortlessly.
The beauty of crepes lies in their simplicity. The batter comes together quickly, and the cooking process is straightforward. The trickiest part, if any, is mastering the flip and ensuring the crepes don’t stick to the pan. For beginners, a non-stick pan is highly recommended as it significantly simplifies the process. However, for those seeking a slightly superior crepe texture, a stainless steel skillet can be used, though it requires a bit more attention to heat control to prevent sticking.
The key to exceptional crepes is in the batter’s consistency. It should be thin enough to spread easily in the pan, creating those signature paper-thin pancakes, but not so thin that they become fragile and difficult to flip. Finding this balance is crucial. This guide provides precise measurements and visual cues to help you achieve the ideal batter thickness every time. These measurements are the foundation of my easy crepe recipe, consistently delivering slightly sweet, soft, and pliable crepes that are perfect for folding, rolling, or stacking.
Ingredients for Easy Crepe Batter
This simple crepe batter recipe uses everyday ingredients you likely already have in your pantry. Here’s what you’ll need to get started on your crepe-making adventure:
- 2 cups milk
- 1 ⅓ cup all-purpose flour
- 1 large egg
- 1 tablespoon vegetable oil
- ½ teaspoon baking powder
- 2 tablespoons granulated sugar
Step-by-Step Guide: How to Make Crepes
Let’s break down the crepe-making process into easy-to-follow steps. From mixing the batter to flipping the crepes like a pro, this guide will cover each stage in detail.
1. Prepare the Crepe Batter
The first step is creating a smooth, lump-free crepe batter. Follow these simple instructions:
- Combine Dry Ingredients: In a large mixing bowl, whisk together the flour, baking powder, and sugar. This ensures the baking powder and sugar are evenly distributed throughout the flour.
- Add Wet Ingredients: Make a well in the center of the dry ingredients. Crack the egg into the well, then pour in the milk and vegetable oil.
- Whisk Until Smooth: Using a whisk, gradually incorporate the wet ingredients into the dry ingredients. Start whisking from the center, slowly drawing in the flour mixture from the sides of the bowl. Continue whisking until the batter is smooth and free of lumps. It’s okay if the batter appears thin; that’s exactly how it should be for crepes.
- Rest the Batter (Optional but Recommended): For an even smoother texture, let the batter rest for about 15-20 minutes at room temperature. This allows the flour to fully absorb the liquid and the gluten to relax, resulting in more tender crepes.
2. Cooking the Crepes
Now comes the fun part – cooking the crepes! Follow these steps for perfectly cooked, thin crepes every time:
- Heat the Skillet: Place a regular skillet (non-stick or stainless steel) over medium-high heat. Allow the skillet to heat up completely. A hot skillet is essential for preventing the crepes from sticking and achieving a slightly golden-brown color.
- Grease the Skillet (For the First Crepe): For the first crepe only, lightly grease the hot skillet. You can use a little vegetable oil or butter. For subsequent crepes, greasing is usually not necessary, especially with a non-stick pan. If using stainless steel, you might need to lightly grease it for each crepe or every few crepes, depending on your pan and heat control.
- Pour the Batter: Once the skillet is hot and lightly greased (if needed), lift the skillet off the heat and pour a small amount of crepe batter into the center using a ladle or measuring cup (about ¼ cup, depending on your skillet size).
- Swirl the Pan: Immediately swirl the skillet in a circular motion to spread the batter evenly into a thin, round layer covering the bottom of the pan. Work quickly as the batter starts to cook as soon as it hits the hot surface.
- Cook the First Side: Return the skillet to the heat. Cook the crepe for 1-3 minutes on the first side, or until the edges look slightly dry and the top is set and bubbly. The cooking time will vary depending on your skillet and heat.
- Flip the Crepe: Slide a thin metal spatula gently under the edge of the crepe to loosen it from the pan. Once loosened, carefully flip the crepe over to the other side.
- Cook the Second Side: Cook the crepe for another minute or two on the second side, until it is lightly golden brown. The second side usually cooks faster than the first.
- Remove and Stack: Slide the cooked crepe onto a plate. If you are making a stack of crepes, you can place parchment paper between them to prevent sticking, or brush each crepe with a little melted butter as you stack them for added flavor and to prevent sticking.
- Repeat: Repeat steps 3-8 with the remaining batter, adjusting the heat as needed. As the skillet gets hotter with each crepe, you may need to lower the heat slightly and reduce the cooking time per side.
Tips for Perfect Crepes
- Batter Consistency: If your batter seems too thick, add a tablespoon or two of milk to thin it out. It should be the consistency of heavy cream.
- Skillet Temperature: Maintaining the right skillet temperature is crucial. If the skillet is not hot enough, the crepes will be pale and may stick. If it’s too hot, they will brown too quickly and may burn. Adjust the heat as needed as you cook.
- Flipping Technique: Be gentle when flipping crepes. Using a thin, flexible spatula helps. Loosen the edges first and then flip quickly and smoothly.
- Practice Makes Perfect: Don’t be discouraged if the first crepe or two isn’t perfect. Crepe making gets easier with practice. Use the first few crepes as testers to adjust your heat and batter pouring technique.
Serving Suggestions
Crepes are incredibly versatile and can be enjoyed in countless ways.
- Sweet Crepes: Fill them with Nutella, fresh fruit (berries, bananas, peaches), whipped cream, jams, lemon and sugar, or pastry cream.
- Savory Crepes: Try fillings like ham and cheese, spinach and ricotta, mushrooms and Gruyere, or smoked salmon and cream cheese.
Enjoy your homemade French crepes! With this “crepe how to” guide, you’re now equipped to make delicious crepes in your own kitchen, perfect for breakfast, brunch, dessert, or any special occasion.