Screenshots, also known as screen captures, have become an indispensable skill in today’s digital age. Whether you’re a student, professional, or simply a casual computer user, knowing how to take a screenshot on your computer is essential. From quickly sharing what’s on your screen with tech support to preserving important online information, screenshots offer a fast and effective way to capture and share visual data. In this guide, we’ll walk you through various methods to effortlessly take screenshots on both Windows and macOS operating systems, ensuring you’re equipped with the knowledge to capture your screen whenever you need to.
Taking Screenshots on Windows: Multiple Methods Unveiled
Windows offers several built-in tools and keyboard shortcuts to cater to different screenshot needs. Here’s a breakdown of the most common and effective methods:
Using the Print Screen (PrtScn) Key for a Full-Screen Capture
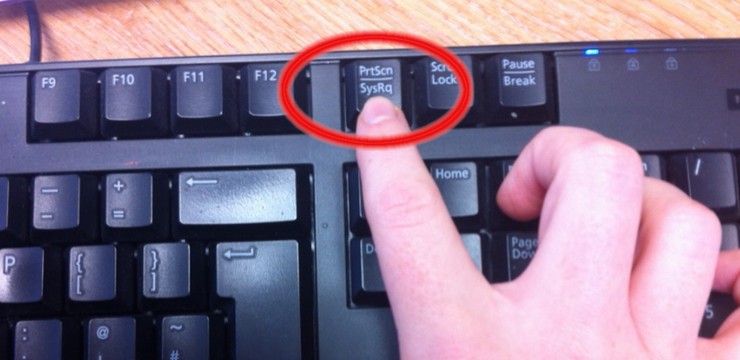
The simplest and most widely known method is using the Print Screen (PrtScn) key, usually located in the top right area of your keyboard.
- Locate the PrtScn Key: Find the “PrtScn,” “Print Scrn,” or similar abbreviation key on your keyboard.
- Press the PrtScn Key: Pressing this key will capture an image of your entire screen and copy it to your clipboard. You won’t see any visual confirmation, but the screenshot is now saved in your computer’s temporary memory.
- Paste the Screenshot: To view and save the screenshot, you need to paste it into an application that supports images, such as:
- Paint: A basic image editing program included in Windows. Open Paint and press Ctrl + V (or right-click and select “Paste”). You can then edit, crop, and save the image.
- Word or other Document Editors: You can also paste the screenshot directly into a Word document, email, or other applications that accept image input.
Capturing Just the Active Window with Alt + PrtScn
If you only need to capture the currently active window (the window you are currently working in), use the following shortcut:
- Press Alt + PrtScn: Hold down the Alt key and then press the PrtScn key while still holding Alt.
- Paste the Screenshot: Open an image editor or document editor (like Paint or Word) and paste the screenshot using Ctrl + V. Only the active window will be captured in the screenshot.
Utilizing the Snipping Tool: Precision and Annotation
For more control over your screenshots and the ability to annotate them, Windows provides the Snipping Tool. This handy utility offers various capture modes and basic editing features.
- Open Snipping Tool:
- Click on the Start Menu (Windows icon in the bottom left corner).
- Type “Snipping Tool” and select it from the search results.
- Choose a Capture Mode: In the Snipping Tool window, click on “Mode” to select from different capture types:
- Free-form Snip: Draw a freehand shape around the area you want to capture.
- Rectangular Snip: Drag a rectangle to select the area to screenshot (most common).
- Window Snip: Capture a specific window by clicking on it.
- Full-screen Snip: Capture the entire screen (similar to PrtScn key).
- Take the Screenshot:
- Click “New” in the Snipping Tool.
- Your screen will dim slightly. Use your mouse to select the area you want to capture based on the mode you chose.
- Once you release the mouse, the screenshot will open in the Snipping Tool window.
- Annotate and Save:
- Use the pen and highlighter tools in the Snipping Tool to annotate your screenshot.
- Click the “Save Snip” button (disk icon) to save the screenshot as an image file (PNG, JPG, GIF, etc.) to your desired location.
Windows Key + Print Screen: Saving Screenshots Directly as Files
For a quicker way to save screenshots directly as image files without needing to paste them first, use this shortcut:
- Press Windows Key + PrtScn: Hold down the Windows key (the key with the Windows logo) and press the PrtScn key.
- Locate the Screenshot: Your screen will briefly dim, and the screenshot will be automatically saved as a PNG file in the “Screenshots” folder within your “Pictures” library. You can access it through File Explorer > Pictures > Screenshots.
Taking Screenshots on macOS: Simple and Efficient Methods
macOS provides equally intuitive and efficient ways to take screenshots, primarily through keyboard shortcuts:
Command + Shift + 3: Full-Screen Screenshot to Desktop
The quickest way to capture your entire screen on a Mac is using this shortcut:
- Press Command + Shift + 3: Hold down the Command (⌘) key, the Shift (⇧) key, and then press the 3 key.
- Screenshot Saved to Desktop: You’ll hear a camera shutter sound, and a screenshot of your entire screen will be automatically saved as a PNG file on your desktop.
Command + Shift + 4: Selected Area Screenshot
To capture a specific portion of your screen:
- Press Command + Shift + 4: Hold down the Command (⌘) key, the Shift (⇧) key, and then press the 4 key.
- Select Area to Capture: Your cursor will change to a crosshair (+). Click and drag to draw a rectangle around the area you want to screenshot.
- Screenshot Saved to Desktop: Release the mouse button, and a screenshot of the selected area will be saved as a PNG file on your desktop.
Command + Shift + 5: Screenshot Toolbar for More Options
For more advanced screenshot options and screen recording capabilities, macOS offers the Screenshot toolbar:
- Press Command + Shift + 5: Hold down the Command (⌘) key, the Shift (⇧) key, and then press the 5 key.
- Screenshot Toolbar Appears: A small toolbar will appear at the bottom of your screen with various options:
- Capture Entire Screen: Takes a screenshot of the whole screen.
- Capture Selected Window: Allows you to click on a window to capture it.
- Capture Selected Portion: Lets you draw a rectangle to select an area.
- Record Entire Screen: Starts screen recording of the entire display.
- Record Selected Portion: Starts screen recording of a selected area.
- Options: Provides settings for saving location, timer, and showing mouse clicks.
- Choose Your Option: Select your desired screenshot or screen recording option from the toolbar and follow the on-screen instructions. Screenshots and screen recordings will be saved based on your chosen settings (default is desktop).
Using Grab Utility: An Alternative Screenshot Tool on Mac
Similar to Windows’ Snipping Tool, macOS has the Grab utility, although it’s less commonly used now with the improved keyboard shortcuts and Screenshot toolbar.
- Open Grab:
- Open Finder > Applications > Utilities > Grab.
- Choose Capture Type: In the Grab menu bar, click on “Capture” and select from:
- Selection: Capture a selected area (similar to Command + Shift + 4).
- Window: Capture a specific window.
- Screen: Capture the entire screen (similar to Command + Shift + 3).
- Timed Screen: Capture the entire screen after a 10-second delay.
- Take the Screenshot: Follow the prompts based on your chosen capture type.
- Save the Screenshot: Once captured, the screenshot will open in a new Grab window. Go to File > Save (or Command + S) to save the screenshot as a TIFF file.
Quick Guide for Smartphones and Tablets
While this guide focuses on computers, taking screenshots on smartphones and tablets is also straightforward. Generally, on most Android and iOS devices, you can take a screenshot by simultaneously pressing the Power button and the Volume Down button (or sometimes the Home button). The screenshot is usually saved to your device’s photo gallery. For specific instructions for your phone or tablet model, a quick online search for “[your device model] take screenshot” will provide detailed steps.
Conclusion: Mastering Screenshots on Your Computer
Knowing how to take a screenshot on your computer is a valuable digital skill. Whether you’re using Windows or macOS, the methods outlined above will empower you to capture your screen with ease and efficiency. From simple full-screen captures to precise area selections and annotations, mastering these techniques will enhance your productivity and communication in countless digital scenarios.