How Do You Make a sourdough starter? This comprehensive guide from HOW.EDU.VN simplifies the process of creating a thriving sourdough starter, transforming simple flour and water into the heart of your baking adventures. Unlock the secrets to homemade sourdough with our expert advice and start crafting delectable sourdough creations today.
1. Understanding Sourdough Starter: The Foundation of Baking
Sourdough isn’t just a recipe; it’s a journey into understanding fermentation. A sourdough starter is a vibrant culture, teeming with life, born from the simple combination of flour and water. Given the right conditions – time, temperature, and care – this mixture ferments, cultivating wild yeasts that naturally exist in our surroundings. These yeasts are the powerhouse that leavens your bread, eliminating the need for commercial yeast. It might seem like alchemy, but the magic of sourdough lies in harnessing these naturally occurring yeasts.
1.1 The Magic of Wild Yeast
Wild yeast is all around us, residing in flour, floating in the air, and even on our hands. While invisible, these microscopic organisms are constantly at work. They’re the key to sourdough’s unique flavor and texture. Embrace the “magic” of these natural yeasts as they transform your simple starter into a baking powerhouse. Understanding the microbial processes enhances the baking experience.
1.2 Time Commitment: The Sourdough Starter Timeline
Creating a sourdough starter from scratch requires time and patience, typically taking seven days or more. There are no shortcuts! The initial stage involves mixing whole wheat flour and water to kickstart fermentation. Subsequently, regular feedings with all-purpose or bread flour nurture the wild yeasts and beneficial bacteria. Once established, the starter requires ongoing care and feeding, detailed expertly by HOW.EDU.VN’s team of experts, to maintain its vitality.
2. When Is My Sourdough Starter Ready to Use?
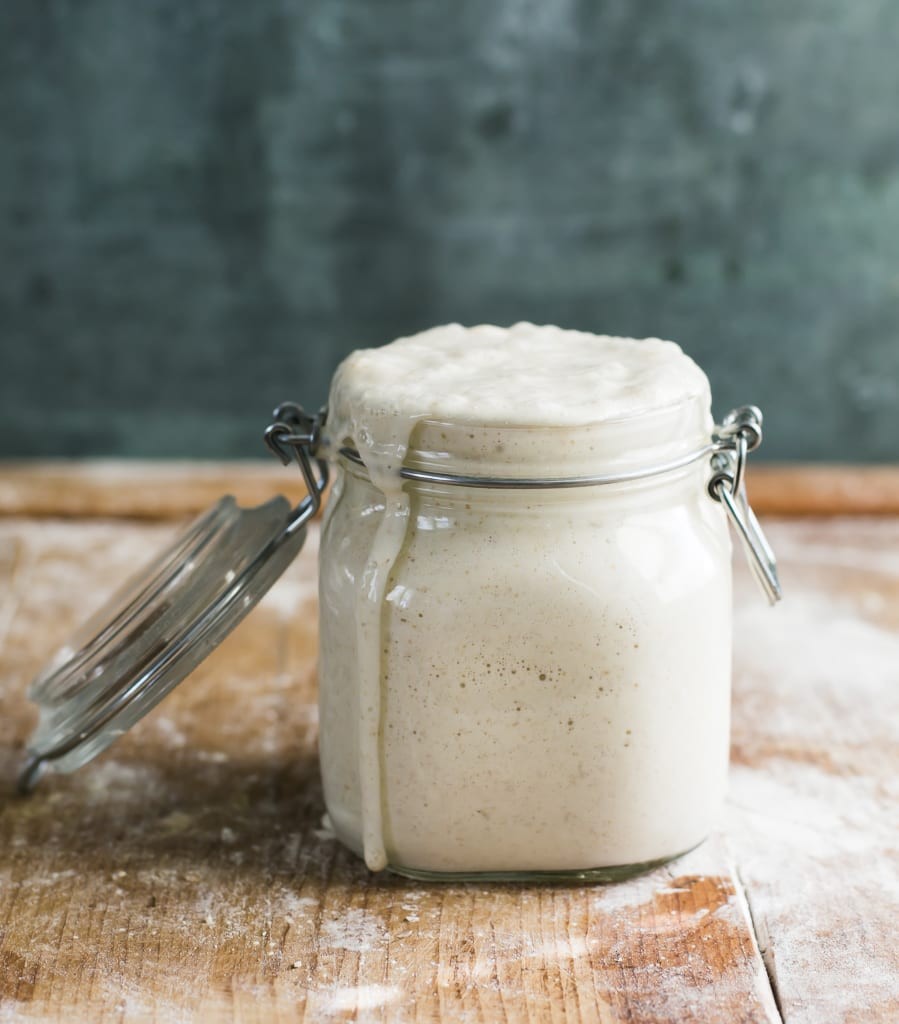
Your sourdough starter is ready when it doubles in size after feeding, displaying abundant bubbles on the surface and throughout the culture. This indicates a thriving population of yeast and bacteria, ready to leaven your bread. The aroma should be pleasantly tangy, not off-putting.
2.1 The Importance of Patience
It can take up to two weeks or even longer for a starter to become reliably active. Factors like ambient temperature and the type of flour used can influence the fermentation process. Be patient and consistent with your feedings, and your starter will eventually reach its peak.
2.2 Avoiding Common Pitfalls
Don’t overthink the process. While extensive information about sourdough is available, stick to reliable tutorials like this one from HOW.EDU.VN. Follow the steps carefully and resist the temptation to experiment prematurely. Consistency and patience are key.
3. Essential Supplies and Ingredients for Sourdough Starter
Before diving into the process, gather the necessary supplies and ingredients. These include a jar, a digital scale, and the right kind of flour and water. Quality tools and ingredients will set you up for success.
3.1 Essential Supplies
- Jar: A 3/4 L jar provides ample space for the starter to grow.
- Digital Scale: Accurate measurements are crucial for successful sourdough baking.
- Small Rubber Spatula: This tool is helpful for mixing and scraping down the sides of the jar.
3.2 Choosing the Right Ingredients
- Flour: Initially, use whole wheat flour to jumpstart fermentation. For subsequent feedings, opt for unbleached all-purpose or bread flour.
- Water: Filtered or tap water is suitable, provided it’s relatively free of chemicals like chlorine.
3.3 Flour Recommendations
For optimal results, consider using flour from reputable brands such as King Arthur Flour (KAF). While organic flour can be used, it may require some experimentation to achieve the desired results.
4. Step-by-Step Guide: Making Your Sourdough Starter
Follow this detailed, step-by-step guide to create your own thriving sourdough starter. Consistency and attention to detail are key to success.
4.1 Day 1: Mixing the Initial Culture
- Download and print a sourdough starter feeding chart to track your progress.
- In your jar, combine 60g (1/2 cup) of whole wheat flour with 60g (1/4 cup) of water.
- Mix thoroughly with a fork until smooth, forming a thick, pasty consistency.
- Cover the jar with plastic wrap or a lid and let it rest in a warm spot (around 75°F or 24°C) for 24 hours.
4.2 Maintaining Optimal Temperature
Temperature plays a critical role in the fermentation process. If it’s too cold, your starter will struggle to rise. Consider these tips:
- Place the starter on a cookie sheet in a turned-off oven with the light on for a few hours.
- Use a proofing box set to the desired temperature.
- Utilize a microwave with the door ajar and the light on.
4.3 Day 2: Observing Initial Fermentation
Check for small bubbles on the surface of the mixture. These bubbles indicate fermentation, a positive sign. If no bubbles are visible, don’t worry; they may have appeared and dissolved overnight. Stir the mixture once or twice to oxygenate it.
4.4 Dealing with “Hooch”
A dark liquid, known as “hooch,” may appear on the surface of the starter. This is a sign that the starter is hungry and needs feeding. The liquid has a distinct smell, similar to rubbing alcohol. Pour off the hooch before proceeding with the next feeding.
4.5 Days 3-7: Feeding Your Sourdough Starter
Whether bubbles are visible or not, start the daily feeding process. As the natural yeasts develop, the starter will rise and bubbles will form. Eventually, the starter will fall back down, indicating it’s time to feed it again. The goal is to increase the total quantity to about 236g (1 cup) following the specific feeding ratio outlined below each day.
4.6 Establishing a Feeding Schedule
Feed your starter at the same time each day to train it to rise and fall predictably. Consider feeding it in the morning upon waking up.
4.7 Tracking Growth
Place a rubber band or piece of masking tape around the jar to measure the starter as it rises. When it falls, you’ll see streaks of starter on the sides of the jar.
4.8 Maintaining Cleanliness
Use a small rubber spatula to scrape down the sides of the jar to prevent mold growth.
4.9 Practicing Patience
Remember, this is a slow, gradual process. Temperature (75°F) and consistency (daily feedings at approximately the same time each day) are key.
4.10 Day 3: First Feeding
- Remove and discard half (60g) of the sourdough starter from the jar.
- Add 60g (1/2 cup) of all-purpose flour and 60g (1/4 cup) of water to the jar. Mix until smooth, scraping down the sides.
- Cover and let rest in a warm spot (70-75°F) for 24 hours.
- Total yield: 180g starter.
4.11 Day 4: Second Feeding
- Remove and discard half (90g) of the sourdough starter.
- Add 60g (1/2 cup) of all-purpose flour and 60g (1/4 cup) of water to the jar. Mix well, scraping down the sides.
- Cover and let rest in a warm spot for 24 hours.
- Total yield: 210g starter.
4.12 Slowing Growth
The growth of your starter might appear to slow down on Days 3-4 after switching to all-purpose or bread flour. This is normal. Your starter needs more time to adjust. Be patient.
4.13 Day 5: Third Feeding
- Remove and discard half (105g) of the sourdough starter.
- Add 60g (1/2 cup) of all-purpose flour and 60g (1/4 cup) of water to the jar. Mix well.
- Cover and let rest in a warm spot for 24 hours.
- Total yield: 225g starter.
4.14 Day 6: Fourth Feeding
- Remove and discard half (112g) of the starter.
- Add 60g (1/2 cup) of all-purpose flour and 60g (1/4 cup) of water to the jar. Mix well, scraping down the sides.
- Cover and let rest in a warm spot for 24 hours.
- Total yield: 232.5g starter.
4.15 Day 7: Fifth Feeding
- Remove and discard half (116.25g) of the sourdough starter.
- Add 60g (1/2 cup) of all-purpose flour and 60g (1/4 cup) of water to the jar. Mix well, scraping down the sides.
- Cover and let rest in a warm spot for 24 hours.
- Total yield: 236g starter.
4.16 Days 7-8: A Sourdough Starter Is Born
By now, your sourdough starter should have doubled in size. You should see plenty of bubbles, both large and small. The texture will be spongy, fluffy, and similar to roasted marshmallows. It should also smell pleasant and not like stinky gym socks. If these conditions are met, your starter is now active.
4.17 Final Steps
- Transfer your sourdough starter to a nice, clean jar if necessary.
- Name your sourdough starter.
5. Ongoing Sourdough Starter Care and Maintenance
Once your sourdough starter is active, it requires ongoing care to maintain its strength and vitality. Regular feedings and proper storage are essential.
5.1 Feeding Your Sourdough Starter
Feed your starter every time before making bread dough and to maintain it. This ensures it remains strong and capable of leavening your bread.
5.2 Storage Options
- Room Temperature: If you bake frequently (a few times a week), store your starter at room temperature. This will speed up fermentation. Room temperature starters should be fed one to two times a day.
- Refrigeration: If you don’t bake often, store your starter in the fridge. You’ll only need to feed it about once a week. When ready to bake, feed your starter at room temperature to wake it back up.
5.3 Reviving a Neglected Sourdough Starter
Even if your starter has been neglected, it’s often possible to revive it. Discard all but a tablespoon of the starter, then feed it as usual. Repeat this process over several days until the starter becomes active again.
5.4 Dealing with Mold
If you notice mold growing in your sourdough starter, it’s best to discard it. Mold can produce harmful toxins. Prevent mold growth by keeping your jar clean and ensuring proper ventilation.
6. Troubleshooting Common Sourdough Starter Issues
Even with careful attention, you may encounter challenges along the way. Here are some common issues and their solutions.
6.1 Starter Not Rising
If your starter isn’t rising, ensure the temperature is warm enough. Also, make sure you’re using the correct ratio of flour and water. Inconsistent feedings can also hinder growth.
6.2 Unpleasant Odor
A starter with an unpleasant odor may indicate the presence of undesirable bacteria. Discard most of the starter and feed it fresh flour and water. If the odor persists, it may be necessary to start over.
6.3 Slow Fermentation
Slow fermentation can be caused by low temperatures or weak yeast activity. Try increasing the temperature and ensuring regular feedings.
7. Exploring Sourdough Recipes
Once your sourdough starter is active and healthy, you can use it to bake a variety of delicious treats. From classic sourdough bread to pancakes and pizza crust, the possibilities are endless.
7.1 Sourdough Bread
Sourdough bread is the quintessential sourdough creation. The tangy flavor and chewy texture are unmatched. Experiment with different flours and hydration levels to create your perfect loaf.
7.2 Sourdough Pancakes
Sourdough pancakes are a delightful way to use sourdough discard. They have a unique flavor and a light, airy texture.
7.3 Sourdough Pizza Crust
Sourdough pizza crust adds a distinctive tang to your homemade pizza. The fermentation process also contributes to a crispier crust.
8. Expert Insights from HOW.EDU.VN’s Team of PhDs
At HOW.EDU.VN, we understand the challenges individuals face when seeking expert advice. Many struggle to find qualified professionals, and the cost and time associated with traditional consulting can be prohibitive. Furthermore, concerns about privacy and trust can deter individuals from seeking the help they need.
8.1 Connecting You with Leading Experts
HOW.EDU.VN offers a unique solution by connecting you directly with a network of over 100 distinguished PhDs from around the globe. These experts provide in-depth, personalized consultations tailored to your specific needs.
8.2 Saving You Time and Money
Our platform streamlines the process of finding expert advice, saving you valuable time and money. You can access high-quality consultations without the exorbitant fees and lengthy commitments often associated with traditional consulting.
8.3 Ensuring Privacy and Trust
We prioritize your privacy and ensure the confidentiality of your consultations. Our platform provides a secure environment for you to discuss your concerns and receive trusted advice from leading experts.
8.4 Addressing Your Specific Needs
Whether you’re seeking guidance on complex challenges, strategic advice for your business, or personal advice on career, finance, or health, our team of PhDs is equipped to provide the insights and solutions you need.
8.5 Transforming Challenges into Opportunities
Let HOW.EDU.VN connect you with the expertise you need to overcome challenges and achieve your goals. Our personalized consultations empower you to make informed decisions and unlock your full potential.
9. FAQs About Sourdough Starter
Here are some frequently asked questions about sourdough starters, answered by the experts at HOW.EDU.VN.
9.1 Can I make a sourdough starter with all-purpose flour only?
Yes, but the process may take longer.
9.2 Can I make a sourdough starter with bread flour only?
Yes. Add more water if the texture is too thick.
9.3 Can I make a sourdough starter with whole wheat, spelt, or rye flour only?
Yes. Like bread flour, whole grain flour absorbs more water than all-purpose flour, so adjust the texture with additional water if your starter is too thick.
9.4 Can sourdough starter be made with bleached flour?
Yes, but it’s not recommended. The chemicals can throw off the fermentation process.
9.5 Why use whole wheat flour at the beginning?
Whole wheat flour jumpstarts the fermentation process.
9.6 Why does growth slow down on Days 3 & 4?
Growth slows down when you switch to all-purpose or bread flour because the starter needs time to adjust to the new flour. This is normal.
9.7 Are equal parts flour and water by volume or weight?
Equal parts refers to feeding by weight only, not measuring cups.
9.8 Can I use the sourdough discard from Day 1-7 for something else?
It’s generally not recommended to use the discard in the beginning, as it may be smelly and discolored.
9.9 How do I know when my starter is ready to use?
Your starter is ready to use when it has doubled in size, with plenty of bubbles on the surface and throughout the culture.
9.10 What do I do if my starter develops mold?
Discard the starter immediately and start a new one.
10. Ready to Elevate Your Baking? Connect with HOW.EDU.VN Today
Don’t let the complexities of sourdough baking hold you back. At HOW.EDU.VN, we connect you with leading experts who can provide personalized guidance and support.
10.1 Access Expert Guidance
Our team of over 100 PhDs is ready to answer your questions and provide tailored advice to help you master sourdough baking.
10.2 Save Time and Money
Our platform offers a cost-effective alternative to traditional consulting, saving you valuable time and money.
10.3 Enjoy Peace of Mind
We prioritize your privacy and ensure the confidentiality of your consultations.
10.4 Take the Next Step
Visit HOW.EDU.VN today to connect with our team of experts and unlock the secrets to sourdough success.
Unlock the full potential of your sourdough baking journey with expert guidance from HOW.EDU.VN. Whether you’re a beginner or an experienced baker, our team of PhDs can provide the insights and support you need to create exceptional sourdough creations.
Ready to transform your baking? Contact us today:
Address: 456 Expertise Plaza, Consult City, CA 90210, United States
WhatsApp: +1 (310) 555-1212
Website: HOW.EDU.VN
Let how.edu.vn be your trusted partner in achieving sourdough mastery. Our experts are dedicated to empowering you with the knowledge and skills you need to excel in the world of sourdough baking.