Have you ever wondered, “How Do You Make Pasta from scratch?” Making homemade pasta might seem like a daunting task, but it’s surprisingly simple and incredibly rewarding. In fact, with just four basic ingredients and a little bit of time, you can create fresh, flavorful pasta that far surpasses anything you can buy at the store. Lately, diving into kitchen projects has become a favorite pastime for many, from baking bread to crafting elaborate dishes. Among these culinary adventures, homemade pasta stands out as a particularly enjoyable and delicious endeavor. It’s a fantastic activity to share with someone special, and the result is a plate of chewy, perfectly al dente noodles that will elevate any meal.
This guide focuses on a straightforward homemade pasta recipe that utilizes common pantry staples. While some recipes call for specialized equipment or flours, this method proves that exceptional pasta is achievable with minimal ingredients and tools. Whether you’re equipped with a pasta maker attachment for a stand mixer or a traditional hand-crank pasta machine, this recipe is adaptable to your kitchen setup. So, if you’re looking for a fun and satisfying way to spend an afternoon, learning how to make pasta at home is an excellent choice. Prepare to be amazed by the incredible taste and texture of fresh pasta and the simple process of creating it yourself.
The Magic of 4 Ingredients: What You Need to Make Pasta
One of the best things about homemade pasta is its simplicity. You only need four key ingredients, chances are you already have them in your kitchen:
- All-Purpose Flour: Forget the myth that you need special 00 flour or semolina flour for fantastic fresh pasta. Regular all-purpose flour works wonders, creating wonderfully chewy and bouncy noodles every time. It’s the reliable foundation of our pasta dough.
- Eggs: Eggs are the binding and enriching agent in pasta dough. They add moisture, richness, and that signature golden color to your homemade pasta. They are essential for creating a supple and workable dough.
- Olive Oil: A drizzle of olive oil, along with the eggs, brings moisture to the dough and helps it come together smoothly. It also adds a subtle depth of flavor to the pasta.
- Salt: Don’t underestimate the power of salt! Adding salt to both the dough and the pasta cooking water is crucial for enhancing the overall flavor of your pasta. It seasons the pasta from the inside out.
For detailed measurements, refer to the complete recipe at the end of this guide.
Step-by-Step: Mastering How to Make Pasta Dough
Ready to dive in and learn how to make pasta dough? Follow these simple steps to create the base for your fresh pasta:
Step 1: Create the Flour Nest
Begin by pouring the all-purpose flour directly onto a clean, dry work surface. Shape the flour into a mound and then create a well, or “nest,” in the center. This nest will be where you add your wet ingredients. Make sure the walls of your flour nest are sturdy to prevent the eggs from escaping too soon!
Step 2: Incorporate Wet Ingredients
Carefully crack the eggs into the well in the center of the flour. Add the olive oil and salt to the eggs. Using a fork, gently whisk the eggs, olive oil, and salt together within the well. Slowly begin to incorporate the flour from the inner walls of the nest into the egg mixture. Continue mixing gently with the fork until a shaggy dough starts to form.
Step 3: Kneading the Dough
Once the dough becomes shaggy, it’s time to get your hands involved! Use your hands to bring the dough together into a ball. At this stage, the dough might feel somewhat dry and crumbly – don’t worry, this is normal. Begin kneading the dough by pressing it away from you with the heel of your hand, folding it back over itself, and turning it. Continue kneading for 8-10 minutes. Initially, it might not seem like it will come together, but persevere! As you knead, the gluten in the flour will develop, and the dough will transform into a smooth, elastic ball.
If, after several minutes of kneading, the dough still feels too dry, lightly dampen your fingertips with water and continue kneading to incorporate the moisture. If the dough becomes too sticky, dust your work surface with a little extra flour. The goal is to achieve a dough that is smooth, elastic, and slightly tacky but not sticky.
Step 4: Resting the Dough
Once your dough is kneaded, shape it into a smooth ball. Wrap the dough ball tightly in plastic wrap. Allow the dough to rest at room temperature for at least 30 minutes. Resting allows the gluten to relax, making the dough easier to roll out and resulting in more tender pasta.
Rolling and Shaping: From Dough to Noodles
After your pasta dough has rested, it’s time for the exciting part: rolling and shaping it into noodles!
Step 1: Prepare the Dough for Rolling
Unwrap the rested dough and place it on a lightly floured surface. Slice the dough ball into 4 equal pieces. Working with one piece at a time (keep the others wrapped to prevent drying), gently flatten it into an oval disk using your hand or a rolling pin. This makes it easier to feed into the pasta maker.
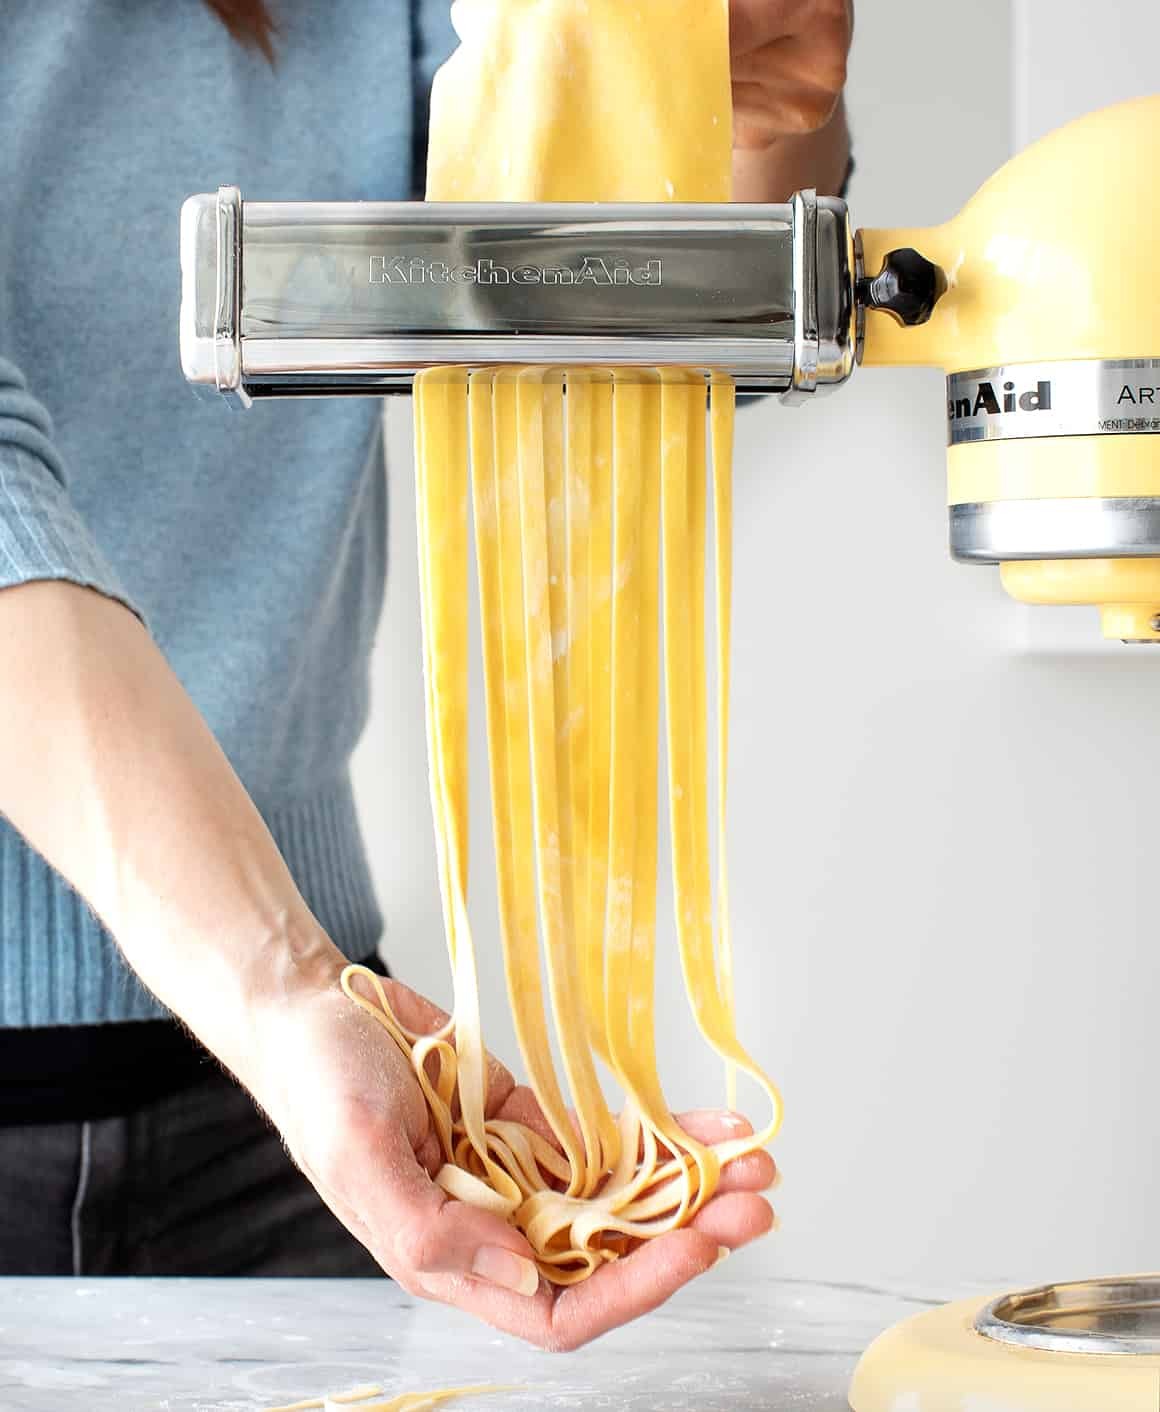
Step 2: Using a Pasta Maker
If you’re using a pasta maker, whether it’s a KitchenAid attachment or a standalone machine, start with the widest setting. Feed the flattened dough disk through the rollers. Run the dough through the widest setting 2-3 times, folding it in half after each pass. This helps to further develop the gluten and create a smoother pasta sheet.
Step 3: Folding for Rectangular Sheets (Optional)
For longer, more uniform pasta strands, consider folding the dough. After the initial passes on the widest setting, lay the dough sheet flat. Fold both short ends of the rectangle inwards to meet in the center, and then fold the dough in half lengthwise, creating a smaller rectangle. This step is optional but helps create more even pasta sheets.
Step 4: Achieving Your Desired Thickness
Begin decreasing the pasta maker setting notch by notch, rolling the dough through each setting. For KitchenAid attachments, start at setting 1 and gradually move towards thinner settings like 2, 3, 4, 5, and 6. The thinner you roll the pasta, the more delicate it will be. For most pasta shapes, setting 5 or 6 on a KitchenAid is ideal. Roll the dough through each setting once or twice until you reach your desired thickness.
Step 5: Cutting the Pasta
Once you have rolled out your pasta sheets to the desired thickness, switch to the pasta cutter attachment on your machine. Run the pasta sheets through the cutter to create your chosen pasta shape, such as fettuccine or spaghetti. Alternatively, you can hand-cut the pasta sheets into squares for ravioli or tagliatelle.
As you cut the pasta, gently drape the strands onto a lightly floured baking sheet or pasta drying rack. Dust the pasta with flour to prevent sticking. Repeat the rolling and cutting process with the remaining pieces of dough.
Cooking and Serving Your Fresh Homemade Pasta
Fresh pasta cooks much faster than dried pasta. Bring a large pot of salted water to a rolling boil. Add the fresh pasta and cook for just 1-2 minutes, or until it floats to the surface and is al dente (tender but firm to the bite). Drain the pasta immediately.
Fresh homemade pasta is incredibly flavorful on its own and pairs beautifully with simple sauces. Try it tossed with:
- Marinara Sauce: A classic and comforting choice.
- Pesto: For a vibrant and herby flavor.
- Alfredo Sauce: A rich and creamy indulgence.
- Olive Oil, Garlic, and Parmesan: A simple yet elegant way to enjoy fresh pasta.
Homemade pasta is a delightful culinary experience that’s easier to master than you might think. With just a few ingredients and steps, you can enjoy the unparalleled taste and texture of fresh pasta made in your own kitchen. So, why not try making pasta at home and taste the difference for yourself?
Homemade Pasta Recipe
rating: 4.97 from 1411 votes
Prep Time: 30 minutes
Cook Time: 2 minutes
Resting Time: 30 minutes
Total Time: 1 hour 2 minutes
Serves: 3-4 people
Save Recipe Print Recipe
This homemade pasta recipe is incredibly easy and yields the most delicious fresh pasta! Serve it simply or with your favorite pasta sauce.
Equipment
- Pasta maker or rolling pin
- Large pot
- Baking sheets
Ingredients
- 2 cups all-purpose flour, plus more for dusting
- 3 large eggs
- 1 tablespoon olive oil
- 1/2 teaspoon salt
Instructions
- Mound the flour on a clean work surface and create a well in the center. Crack the eggs into the well, then add the olive oil and salt.
- Using a fork, gently whisk the eggs, oil, and salt together in the well. Gradually incorporate the flour from the inner walls of the well into the egg mixture until a shaggy dough forms.
- Use your hands to bring the dough together into a ball. Knead the dough for 8-10 minutes until it becomes smooth and elastic. If the dough is too dry, lightly dampen your fingertips with water while kneading. If too sticky, dust your work surface with flour.
- Shape the dough into a ball, wrap it in plastic wrap, and let it rest at room temperature for 30 minutes.
- Lightly flour two baking sheets.
- Slice the rested dough into 4 pieces. Flatten one piece into an oval disk and feed it through the widest setting of your pasta maker 2-3 times, folding it in half after each pass.
- Optional: Fold the dough rectangle by bringing the short ends to the center, then folding in half lengthwise.
- Decrease the pasta maker setting notch by notch, rolling the dough through each setting until you reach your desired thickness (setting 5 or 6 on KitchenAid).
- Lay the pasta sheet on a floured baking sheet, dust with flour, and fold in half. Repeat with remaining dough.
- Switch to the pasta cutter attachment and cut the pasta sheets into your desired shape.
- Cook the fresh pasta in a pot of boiling salted water for 1-2 minutes until al dente. Drain and serve immediately.
Recipe Notes
- Fresh pasta can be stored in the refrigerator, wrapped in plastic wrap, for up to 2 days.
- Recipe adapted from Serious Eats.