Chicken breast is a lean protein staple in many kitchens, prized for its versatility and health benefits. However, the line between perfectly cooked, juicy chicken and dry, rubbery disappointment is surprisingly thin. One of the most common questions for home cooks is: How Long To Cook Chicken Breast On Stove? Getting this timing right is crucial for a delicious and safe meal. This guide will walk you through everything you need to know to pan-sear chicken breast to perfection, ensuring it’s flavorful, tender, and cooked just right every time.
Why Choose the Stovetop for Cooking Chicken Breast?
While ovens and grills are popular for cooking chicken, pan-searing chicken breast on the stove offers several distinct advantages:
- Speed and Efficiency: Stovetop cooking is generally much faster than oven baking, making it ideal for quick weeknight meals. You can have perfectly cooked chicken breast in under 20 minutes, start to finish.
- Beautiful Browning: The direct heat of a skillet allows for a beautiful golden-brown crust to develop on the outside of the chicken, enhancing both flavor and texture. This Maillard reaction simply isn’t as easily achieved in the gentler heat of an oven.
- Versatility: You have precise control over the heat on the stovetop, allowing you to adjust cooking based on the thickness of the chicken and your desired level of browning. It’s also easy to incorporate pan sauces and glazes directly in the same skillet after cooking the chicken.
- Meal Prep Hero: Pan-seared chicken breast is excellent for meal prepping. Cook a batch at the beginning of the week and easily add sliced or diced chicken to salads, pasta dishes, wraps, and more for quick and healthy meals throughout the week.
Key Factors Influencing Chicken Breast Cooking Time
The exact cooking time for chicken breast on the stove isn’t set in stone. Several factors play a crucial role, and understanding these will help you achieve consistent results:
Thickness of the Chicken Breast
This is arguably the most significant factor. Thicker chicken breasts naturally require longer cooking times to ensure the center is cooked through without burning the outside. Conversely, thinner breasts cook much faster.
- Thick Chicken Breasts (1 inch or more): These will need more time at a lower heat to cook evenly.
- Thin Chicken Breasts (1/2 inch or less): These cook quickly at a slightly higher heat to still achieve browning without drying out. You can buy chicken breasts pre-cut thinly, fillet them yourself, or pound thicker breasts to an even thinner thickness.
Heat Level
The heat of your stovetop burner is critical. Too high, and the outside will burn before the inside is cooked. Too low, and the chicken will simmer instead of sear, resulting in pale, less flavorful meat.
- Medium-Low Heat: Ideal for thicker chicken breasts, allowing them to cook through evenly.
- Medium Heat: Better suited for thinner chicken breasts, providing enough heat for browning without overcooking the inside.
Type of Pan
The type of skillet you use also impacts cooking time and browning.
- Heavy-Bottomed Skillets (Cast Iron, Stainless Steel): These pans retain heat well and distribute it evenly, leading to better searing and consistent cooking. Cast iron in particular gets very hot and is excellent for creating a flavorful crust.
- Thinner Skillets: These pans heat up quickly but can also have hot spots and may not retain heat as well, potentially leading to uneven cooking.
Starting Temperature of the Chicken
While not as impactful as thickness or heat, the starting temperature of your chicken can slightly affect cooking time.
- Room Temperature Chicken: Chicken that has been allowed to sit at room temperature for 20-30 minutes before cooking will cook slightly more evenly and quickly than chicken straight from the refrigerator. This is because the internal temperature is already starting to rise. However, for food safety reasons, don’t leave chicken at room temperature for longer than 2 hours.
Step-by-Step Guide: How to Cook Chicken Breast on the Stove
Follow these steps for perfectly cooked, juicy chicken breast every time:
1. Prepare the Chicken Breast
- Pound for Even Thickness (Optional but Recommended): Place chicken breasts between two sheets of plastic wrap or in a zip-top bag. Use a meat mallet or rolling pin to gently pound the thicker end of the chicken breast to a more even thickness. This ensures even cooking and reduces cooking time.
- Season Generously: Pat the chicken breasts dry with paper towels (this helps with browning). Season liberally on all sides with your favorite seasonings. Salt and pepper are essential, but feel free to get creative! Consider using:
- Steak seasoning
- Smoked paprika and sweet paprika
- Garlic powder and onion powder
- Italian herbs
- Cajun seasoning
- Lemon pepper
2. Heat the Pan and Oil
- Choose Your Skillet: A large, heavy-bottomed skillet (cast iron or stainless steel) is ideal.
- Heat the Skillet: Place the skillet over medium-low heat for thick breasts or medium heat for thin breasts. Allow the skillet to heat up completely before adding oil. This is crucial for preventing sticking and achieving a good sear.
- Add Oil: Add about 1 tablespoon of cooking oil with a high smoke point, such as canola oil, vegetable oil, or avocado oil. Swirl the oil to coat the bottom of the pan evenly. You can also add a tablespoon of butter along with the oil for extra flavor and browning, but be mindful that butter can burn at higher temperatures.
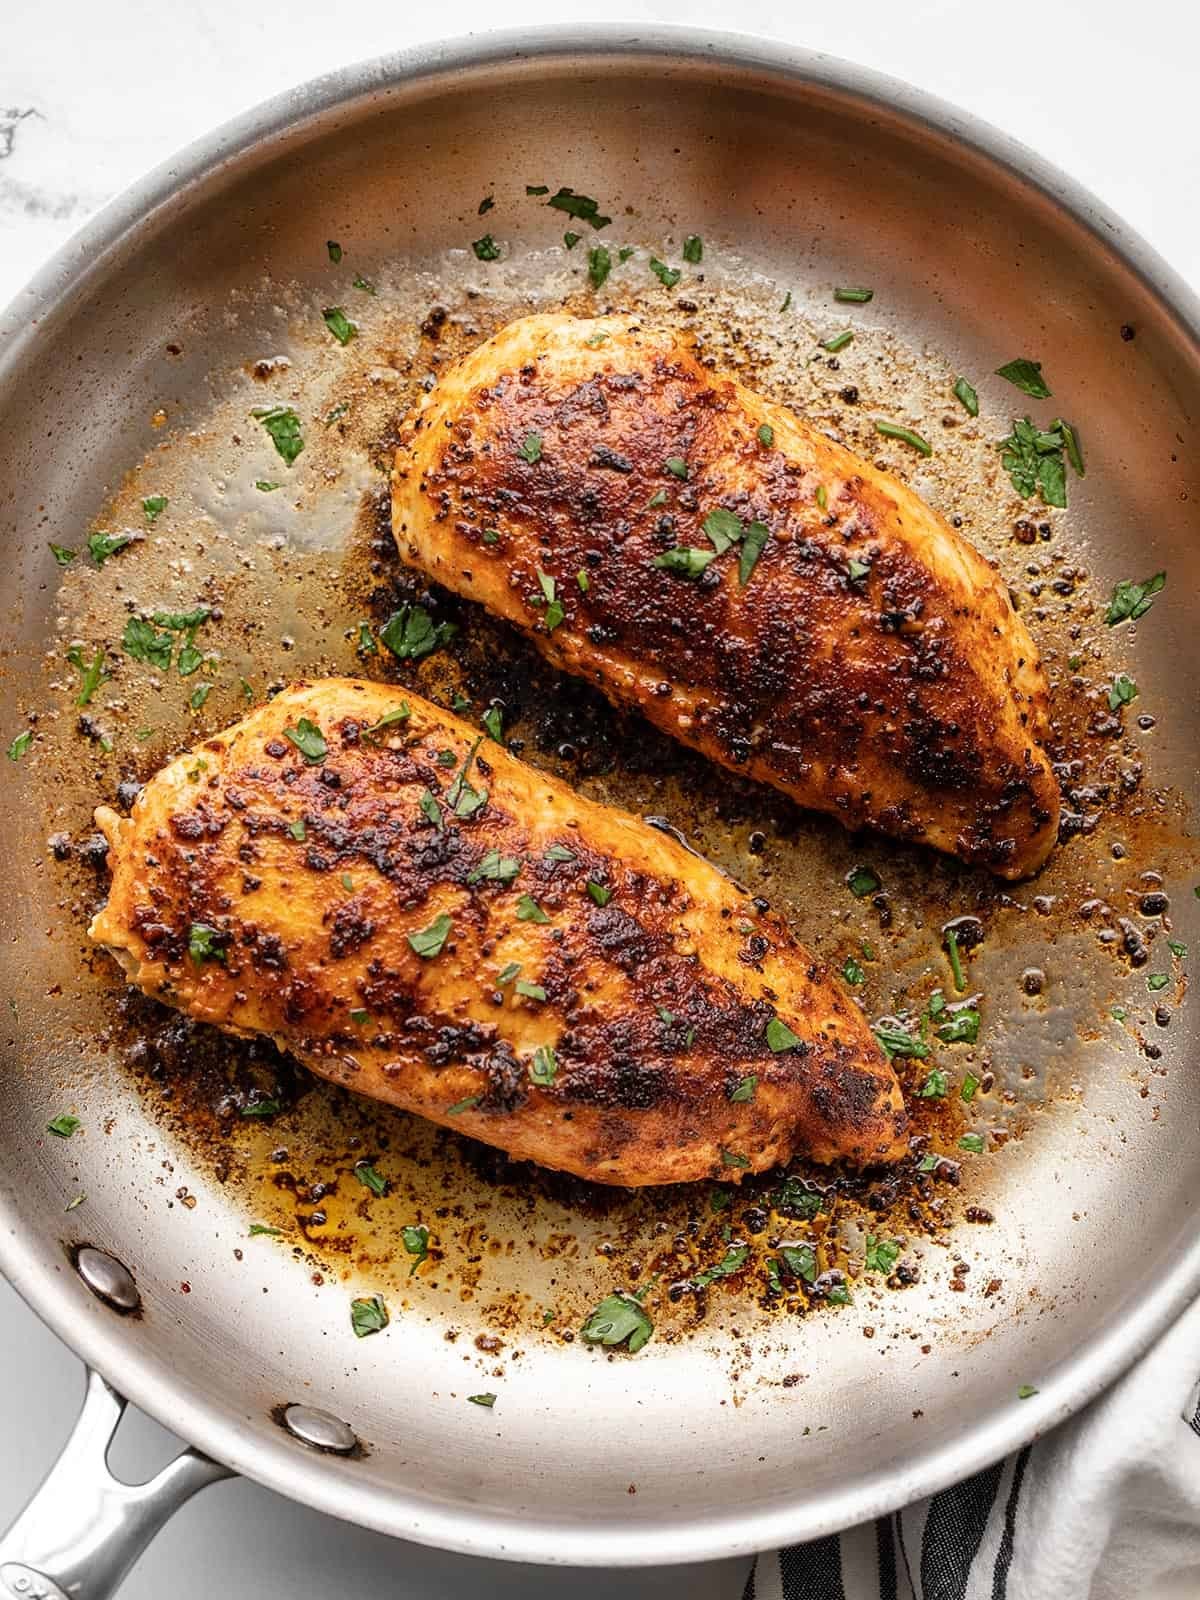
3. Sear and Cook the Chicken
- Add Chicken to Hot Skillet: Once the oil is shimmering hot, carefully place the seasoned chicken breasts in the skillet in a single layer, ensuring not to overcrowd the pan. Overcrowding will lower the pan temperature and steam the chicken instead of searing it. Cook in batches if necessary.
- Sear One Side Without Moving: For thick breasts, sear for about 8 minutes on the first side without flipping or moving them. For thinner breasts, sear for about 4-5 minutes. This undisturbed searing time is essential for developing a beautiful brown crust.
- Flip and Cook the Second Side: Flip the chicken breasts using tongs. Cook on the second side until they are browned and cooked through. This will take approximately another 5-8 minutes for thick breasts and 3-5 minutes for thin breasts.
4. Use a Meat Thermometer – The Only Reliable Way to Know When Chicken is Done
- Check Internal Temperature: The most accurate way to determine if chicken breast is cooked through is to use an instant-read meat thermometer. Insert the thermometer into the thickest part of the chicken breast, avoiding the bone if present.
- Target Temperature: Chicken breast is safe to eat when it reaches an internal temperature of 165°F (74°C).
- Don’t Rely on Visual Cues Alone: While juices running clear when pierced with a fork can be an indicator, it’s not always reliable. A meat thermometer is the foolproof method to ensure safety and prevent overcooking.
5. Rest the Chicken
- Rest for 5-10 Minutes: Once the chicken reaches 165°F, remove it from the skillet and transfer it to a clean cutting board. Tent loosely with foil and let it rest for 5-10 minutes before slicing or serving.
- Why Resting is Important: Resting allows the juices to redistribute throughout the chicken, resulting in more tender and flavorful meat. Skipping this step can lead to dry chicken as the juices will run out when you slice into it immediately.
Seasoning Ideas to Elevate Your Pan-Seared Chicken Breast
While the basic recipe is delicious on its own, experimenting with different seasonings can transform your pan-seared chicken breast and prevent flavor fatigue. Here are some tasty ideas:
- Lemon Herb: Lemon zest, dried thyme, rosemary, garlic powder.
- Spicy Cajun: Cajun seasoning blend, paprika, cayenne pepper.
- Mediterranean: Dried oregano, basil, garlic, lemon zest, a pinch of red pepper flakes.
- Garlic Parmesan: Garlic powder, grated Parmesan cheese, Italian seasoning.
- Smoky BBQ: Smoked paprika, brown sugar, chili powder, cumin.
- Asian Inspired: Ginger powder, garlic powder, onion powder, white pepper, a touch of sesame oil after cooking.
Tips for Juicy and Tender Stove-Cooked Chicken Breast
- Don’t Overcook: Overcooking is the number one culprit for dry chicken breast. Using a meat thermometer and removing the chicken as soon as it reaches 165°F is crucial.
- Pound for Evenness: Pounding chicken breasts to an even thickness ensures they cook at the same rate, preventing some parts from being dry while others are still undercooked.
- Don’t Overcrowd the Pan: Give the chicken breast space in the skillet. Overcrowding lowers the pan temperature and leads to steaming rather than searing. Cook in batches if needed.
- Rest is Best: Always rest your chicken after cooking. This allows the juices to redistribute, resulting in significantly juicier meat.
- Consider a Butter Baste (Optional): For extra richness and flavor, add a tablespoon of butter to the skillet during the last few minutes of cooking. As the butter melts, spoon it over the chicken breast to baste it.
Conclusion
Mastering how long to cook chicken breast on the stove is a fundamental cooking skill that will unlock countless quick, healthy, and delicious meals. By understanding the factors that affect cooking time, using a meat thermometer, and following these simple steps, you can consistently achieve perfectly cooked, juicy, and flavorful chicken breast every time. So ditch the dry chicken fears and get ready to enjoy pan-seared chicken breast as a new favorite in your kitchen!