Baking chicken breasts in the oven is a fantastic way to prepare a healthy and versatile protein. Whether you’re a seasoned cook or just starting out, understanding the correct cooking times and temperatures is crucial for achieving juicy, flavorful, and safe-to-eat chicken. This guide will walk you through everything you need to know about how long to cook chicken in the oven, ensuring perfect results every time.
Chicken breasts are a kitchen staple, loved for their lean protein and adaptability. They can be the star of a main course, sliced into salads, or shredded for tacos and wraps. However, baking chicken breasts can be tricky. Overcooked chicken is dry, tough, and unappetizing, while undercooked chicken poses a serious health risk. The key to delicious baked chicken lies in mastering the cooking time and temperature.
Many home cooks struggle with baking chicken breasts, often resulting in disappointment. Common issues include dry chicken, uneven cooking, and lack of flavor. But fear not! With the right techniques, baking perfect chicken breasts is easily achievable. This comprehensive guide will demystify the process and equip you with the knowledge to bake chicken breasts like a pro. We’ll cover everything from preparation to achieving that perfect internal temperature, so you can confidently serve juicy and tender chicken every time.
This article is your go-to resource for mastering oven-baked chicken breasts. We’ll delve into the factors that influence cooking time, provide step-by-step instructions, and offer tips for seasoning and serving your perfectly cooked chicken. Let’s unlock the secrets to baking chicken breasts that are moist, flavorful, and cooked to perfection.
Understanding the Factors That Influence Chicken Cooking Time
Several factors can affect how long it takes to cook chicken breasts in the oven. Understanding these variables is essential for adjusting cooking times and ensuring your chicken is cooked through without drying out.
- Thickness of the Chicken Breast: Thicker chicken breasts will naturally require longer cooking times than thinner ones. For even cooking, it’s recommended to pound thicker breasts to a more uniform thickness, around ½ to ¾ inch. This ensures that the chicken cooks evenly throughout, preventing dry edges and undercooked centers.
- Bone-in vs. Boneless Chicken: This guide focuses on boneless, skinless chicken breasts. Bone-in chicken, or chicken with skin, will generally take longer to cook. Bone-in chicken also tends to retain more moisture during cooking.
- Oven Temperature: The oven temperature plays a significant role in cooking time. Higher temperatures cook chicken faster, but can also increase the risk of drying it out if not monitored carefully. Lower temperatures cook more gently and can result in more tender chicken, but take longer. We will explore optimal temperatures shortly.
- Starting Temperature of the Chicken: It’s generally recommended to start with thawed chicken. Cooking frozen chicken will significantly increase cooking time and can lead to uneven cooking, with the outside cooking faster than the inside. Ensure your chicken is fully thawed before baking for best results.
- Oven Calibration: Ovens can vary in temperature accuracy. An oven thermometer is a worthwhile investment to ensure your oven is heating to the correct temperature. This eliminates guesswork and ensures consistent cooking results.
Recommended Oven Temperatures and Cooking Times for Chicken Breast
So, how long to cook chicken in the oven? The sweet spot for baking boneless, skinless chicken breasts is generally at a higher temperature for a shorter duration. This method helps to sear the outside, locking in juices and preventing dryness, while ensuring the inside is cooked through.
Optimal Oven Temperature: 450°F (232°C)
Cooking Time: 15-20 minutes for boneless, skinless chicken breasts that are about ½ to ¾ inch thick.
Important Note: These times are guidelines. The most accurate way to determine if your chicken is cooked is to use a meat thermometer. The internal temperature of cooked chicken must reach 165°F (74°C) to be safely consumed. Insert the thermometer into the thickest part of the breast, ensuring you don’t touch the bone if you are cooking bone-in chicken.
Why 450°F? Cooking chicken breasts at 450°F offers several advantages:
- Speed: High heat cooks the chicken quickly, making it a great option for weeknight meals.
- Moisture Retention: The quick cooking time helps to prevent the chicken from drying out, resulting in juicier breasts.
- Slightly Crispy Exterior: The high heat encourages a slightly browned and flavorful exterior, enhancing the overall texture and taste.
Lower Temperature Options (and why 450°F is preferred):
While some recipes suggest lower temperatures like 350°F (175°C) or 375°F (190°C), these require significantly longer cooking times (25-35 minutes or more) and can increase the risk of dry chicken. The extended cooking time at lower temperatures allows more moisture to evaporate. Therefore, for boneless, skinless chicken breasts, 450°F is generally the preferred temperature for optimal results in terms of both texture and time.
Step-by-Step Guide to Baking Juicy Chicken Breasts
Follow these simple steps to bake perfectly juicy chicken breasts every time:
- Preheat Your Oven to 450°F (232°C): Ensure your oven is fully preheated before placing the chicken inside. This ensures consistent cooking from the start.
- Prepare the Chicken: If your chicken breasts are unevenly thick, place them between two sheets of plastic wrap or parchment paper and gently pound them with a meat mallet or rolling pin to an even thickness of about ½ to ¾ inch. This step is crucial for even cooking.
- Brine (Optional but Highly Recommended): Brining is a game-changer for juicy chicken. Dissolve ¼ cup of kosher salt in 4 cups of lukewarm water. Submerge the chicken breasts in the brine and let them soak for 15-30 minutes (or up to 6 hours in the refrigerator). Brining helps the chicken retain moisture during cooking. Rinse the chicken thoroughly with cold water and pat completely dry with paper towels after brining. If your chicken is pre-brined, skip this step.
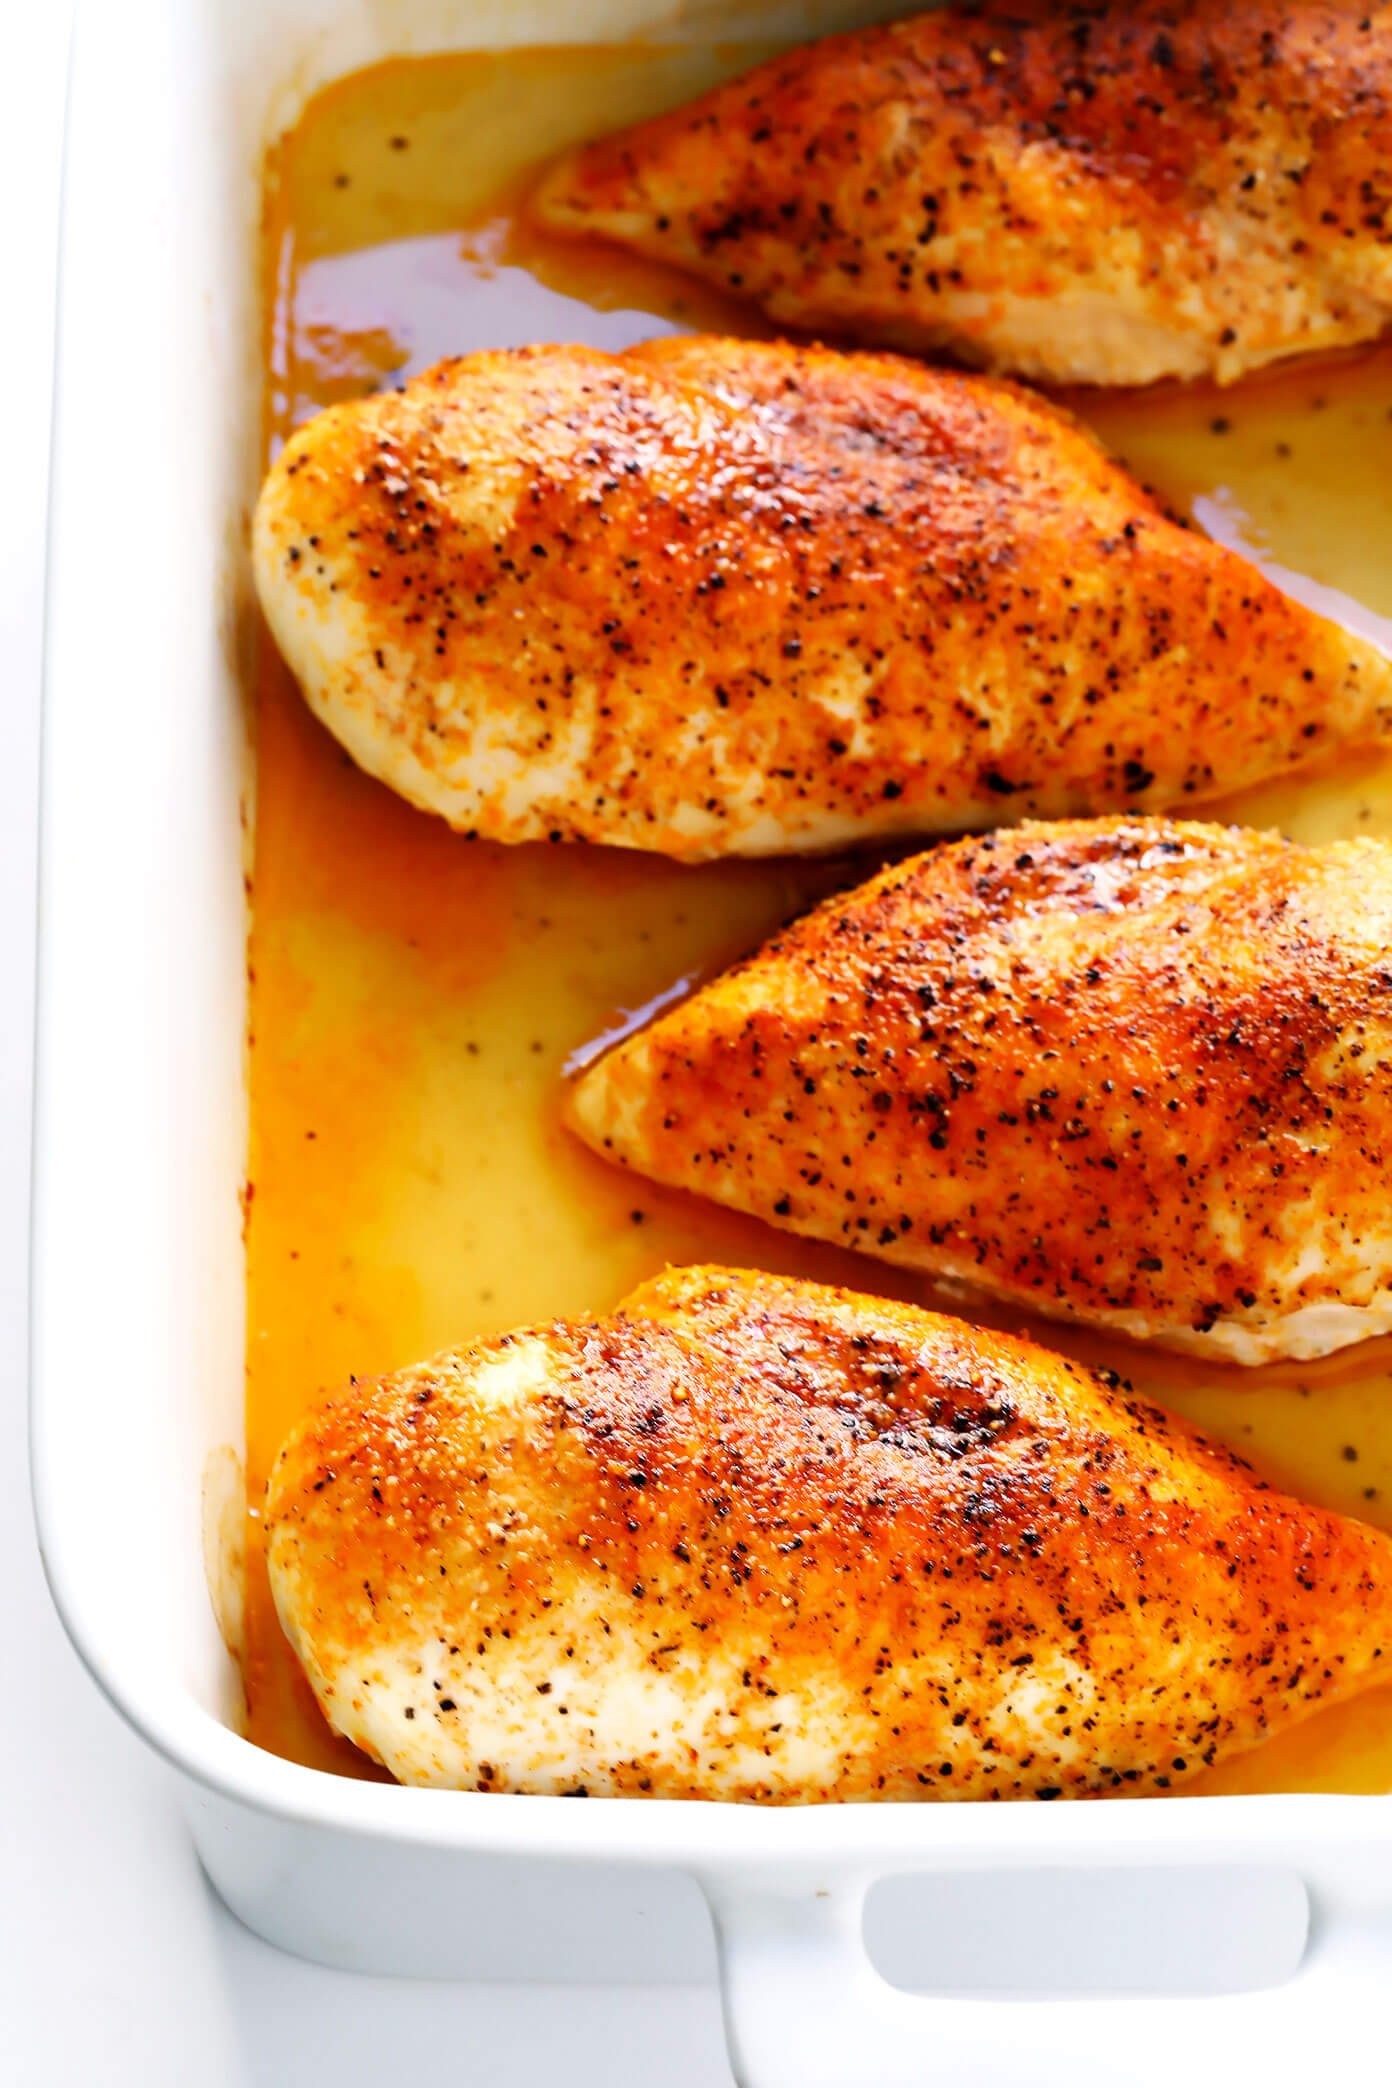
- Season the Chicken: Pat the chicken breasts thoroughly dry with paper towels. This is important for browning. Brush both sides of the chicken with melted butter or olive oil. Season generously with salt, pepper, garlic powder, paprika, or your favorite blend of herbs and spices. Don’t be shy with the seasoning!
- Arrange Chicken in a Baking Dish: Place the seasoned chicken breasts in a single layer in a baking dish. Avoid overcrowding the pan, as this can steam the chicken instead of roasting it. Use a baking dish that is appropriate for high temperatures; avoid glass dishes at 450°F unless specifically rated for that temperature. A metal baking sheet also works well.
- Bake: Place the baking dish in the preheated oven and bake for 15-20 minutes.
- Check the Internal Temperature: After 15 minutes, check the internal temperature of the thickest part of a chicken breast using a meat thermometer. Continue baking until the thermometer registers 165°F (74°C).
- Rest: Once the chicken reaches 165°F, remove it from the oven and let it rest for 5-10 minutes before slicing or serving. Tent loosely with foil to keep warm. Resting allows the juices to redistribute throughout the chicken, resulting in more tender and flavorful meat.
Tips for Extra Flavor and Juicy Chicken
- Don’t Skip the Brine (if not pre-brined): Brining is a simple step that makes a significant difference in the juiciness of baked chicken breasts. It’s especially beneficial for lean chicken breasts, which are prone to drying out.
- Use Butter (or Olive Oil): Brushing the chicken with melted butter or olive oil not only adds flavor but also helps create a slightly crispy exterior and prevents the chicken from drying out. Butter adds richness, while olive oil offers a healthier option.
- Experiment with Seasonings: While salt and pepper are essential, don’t be afraid to experiment with different herbs, spices, and rubs. Consider Italian seasoning, lemon pepper, Cajun seasoning, or your own custom blends.
- Consider Marinating: For even more flavor and tenderness, marinate your chicken breasts for 30 minutes to a few hours before baking. Marinades can be as simple as Italian dressing or more complex blends of herbs, spices, and acidic ingredients like lemon juice or vinegar.
- Avoid Overcrowding the Pan: Give the chicken breasts space in the baking dish. Overcrowding leads to steaming instead of roasting, which can result in less browning and potentially uneven cooking. Use a larger baking dish or bake in batches if necessary.
- Use a Meat Thermometer: A meat thermometer is your best friend when baking chicken. It eliminates guesswork and ensures your chicken is cooked to a safe and delicious internal temperature of 165°F.
- Rest the Chicken: Resist the temptation to slice into the chicken immediately after it comes out of the oven. Resting is crucial for allowing the juices to redistribute, resulting in more tender and flavorful chicken.
Serving Suggestions for Baked Chicken Breast
Baked chicken breasts are incredibly versatile and can be served in countless ways. Here are a few ideas:
- Classic Main Course: Serve baked chicken breasts with roasted vegetables like asparagus, broccoli, or potatoes, and a side of rice or quinoa.
- Salads: Slice or dice baked chicken breasts and add them to your favorite salads for a protein boost. Chicken Caesar salad, Cobb salad, or a simple garden salad all benefit from baked chicken.
- Sandwiches and Wraps: Use sliced or shredded baked chicken breast in sandwiches, wraps, or paninis. Add your favorite toppings and sauces.
- Tacos and Fajitas: Shred baked chicken breast and use it as a filling for tacos, fajitas, or burritos. Season with taco seasoning or fajita seasoning for extra flavor.
- Pasta Dishes: Dice or slice baked chicken breast and add it to pasta dishes like pasta primavera, chicken Alfredo, or pesto pasta.
- Meal Prep: Baked chicken breasts are perfect for meal prepping. Cook a batch on the weekend and use them throughout the week in various dishes.
Storing Leftover Baked Chicken Breast
Leftover baked chicken breast can be stored in an airtight container in the refrigerator for up to 3-4 days. For longer storage, you can freeze cooked chicken for up to 3 months. It’s best to slice, dice, or shred the chicken before freezing for easier use later. Thaw frozen chicken in the refrigerator overnight before reheating. Reheat leftover chicken gently in the microwave, oven, or skillet until heated through.
Conclusion
Mastering how long to cook chicken in the oven is essential for any home cook. By following these guidelines and using a meat thermometer, you can consistently bake juicy, flavorful, and perfectly cooked chicken breasts. Remember the key factors: thickness, oven temperature, and internal temperature. With a little practice, you’ll be baking restaurant-quality chicken in your own kitchen in no time. Enjoy experimenting with different seasonings and serving suggestions to make baked chicken breasts a regular and delicious part of your meal rotation.