Are you tired of dry, flavorless chicken breasts? Baking chicken breasts can be tricky, often resulting in a disappointing meal. But what if you could consistently bake juicy, tender, and flavorful chicken every time? This guide will show you how with a simple 5-step method that guarantees perfect oven-baked chicken breasts.
Many home cooks struggle with baking chicken breasts, encountering issues like dryness, rubbery texture, and lack of flavor. It’s a common kitchen frustration, especially when chicken breasts are such a versatile and healthy protein option. Overcooked chicken is not only unappetizing but also a waste of good ingredients. Through trial and error, a reliable method has been developed to achieve consistently delicious results. This method focuses on simple steps that anyone can follow to transform ordinary chicken breasts into a culinary delight.
This guide breaks down the process into five easy-to-remember steps, making perfectly baked chicken accessible to everyone, from beginner cooks to seasoned chefs. Whether you’re looking for a main course for a family dinner, meal prepping for the week, or adding protein to your favorite salad, mastering baked chicken breasts is a valuable skill. Say goodbye to dry chicken and hello to consistently juicy and flavorful baked chicken breasts that will become a staple in your kitchen. Let’s dive into the secrets of baking chicken breasts to perfection.
The Secret to Perfect Baked Chicken: B.B.R.R.R. Method
The key to baking incredibly juicy chicken breasts lies in a simple 5-step acronym: B.B.R.R.R. This method covers all the essential techniques to ensure your chicken is moist, flavorful, and perfectly cooked every time.
B – Brine: The Foundation of Juicy Chicken
Brining is the most crucial step for achieving juicy baked chicken breasts. It’s a simple technique that involves soaking the chicken in a saltwater solution. This process enhances the chicken’s moisture-retention capabilities, preventing it from drying out during baking. Even a short brining time can make a significant difference in the final texture of your chicken.
To brine chicken breasts effectively, start by filling a large bowl with lukewarm water. Dissolve kosher salt in the water; it should taste noticeably salty but not overwhelmingly so. Adding ice or cold water helps to lower the water temperature, which is important for food safety. Submerge the chicken breasts in the saltwater solution, ensuring they are fully immersed. Let the chicken brine for at least 15 minutes. For an even more tender result, you can brine for up to 6 hours in the refrigerator. However, avoid brining for longer periods as it can make the chicken too salty.
After brining, remove the chicken from the saltwater and rinse it thoroughly under cold water to remove excess salt. Pat the chicken breasts completely dry with paper towels. This step is crucial as dry chicken will brown better in the oven. Brining might seem like an extra step, but it’s a game-changer for baked chicken breasts, guaranteeing a juicy and tender outcome. Check the packaging of your chicken; some brands are pre-brined in a sodium solution. If your chicken is pre-brined, skip this step and move directly to brushing.
B – Brush: Moisture and Flavor Seal
Brushing the chicken breasts with melted butter or olive oil is the second essential step in this method. This layer of fat serves multiple purposes. First, it adds flavor and richness to the chicken. Butter, in particular, imparts a delicious savory note that complements the chicken beautifully. Olive oil is a healthier alternative and provides a subtle fruity flavor. Secondly, the fat helps to create a golden-brown crust on the outside of the chicken as it bakes in the high heat of the oven. This crust not only enhances the visual appeal but also adds a pleasant textural contrast to the tender inside. Thirdly, brushing with fat helps the seasonings adhere better to the chicken surface, maximizing flavor infusion. Finally, it prevents the chicken from sticking to the baking dish, ensuring easy removal and cleanup.
Melt butter in the microwave or on the stovetop until fully liquid. Alternatively, use high-quality olive oil. Liberally brush the melted butter or olive oil over all sides of the chicken breasts, ensuring every part is coated. Place the brushed chicken breasts in a large baking dish or roasting pan. Using a baking dish with sides is recommended to contain any juices released during cooking and prevent them from burning in the oven.
R – Rub: Unleash Flavor with Seasonings
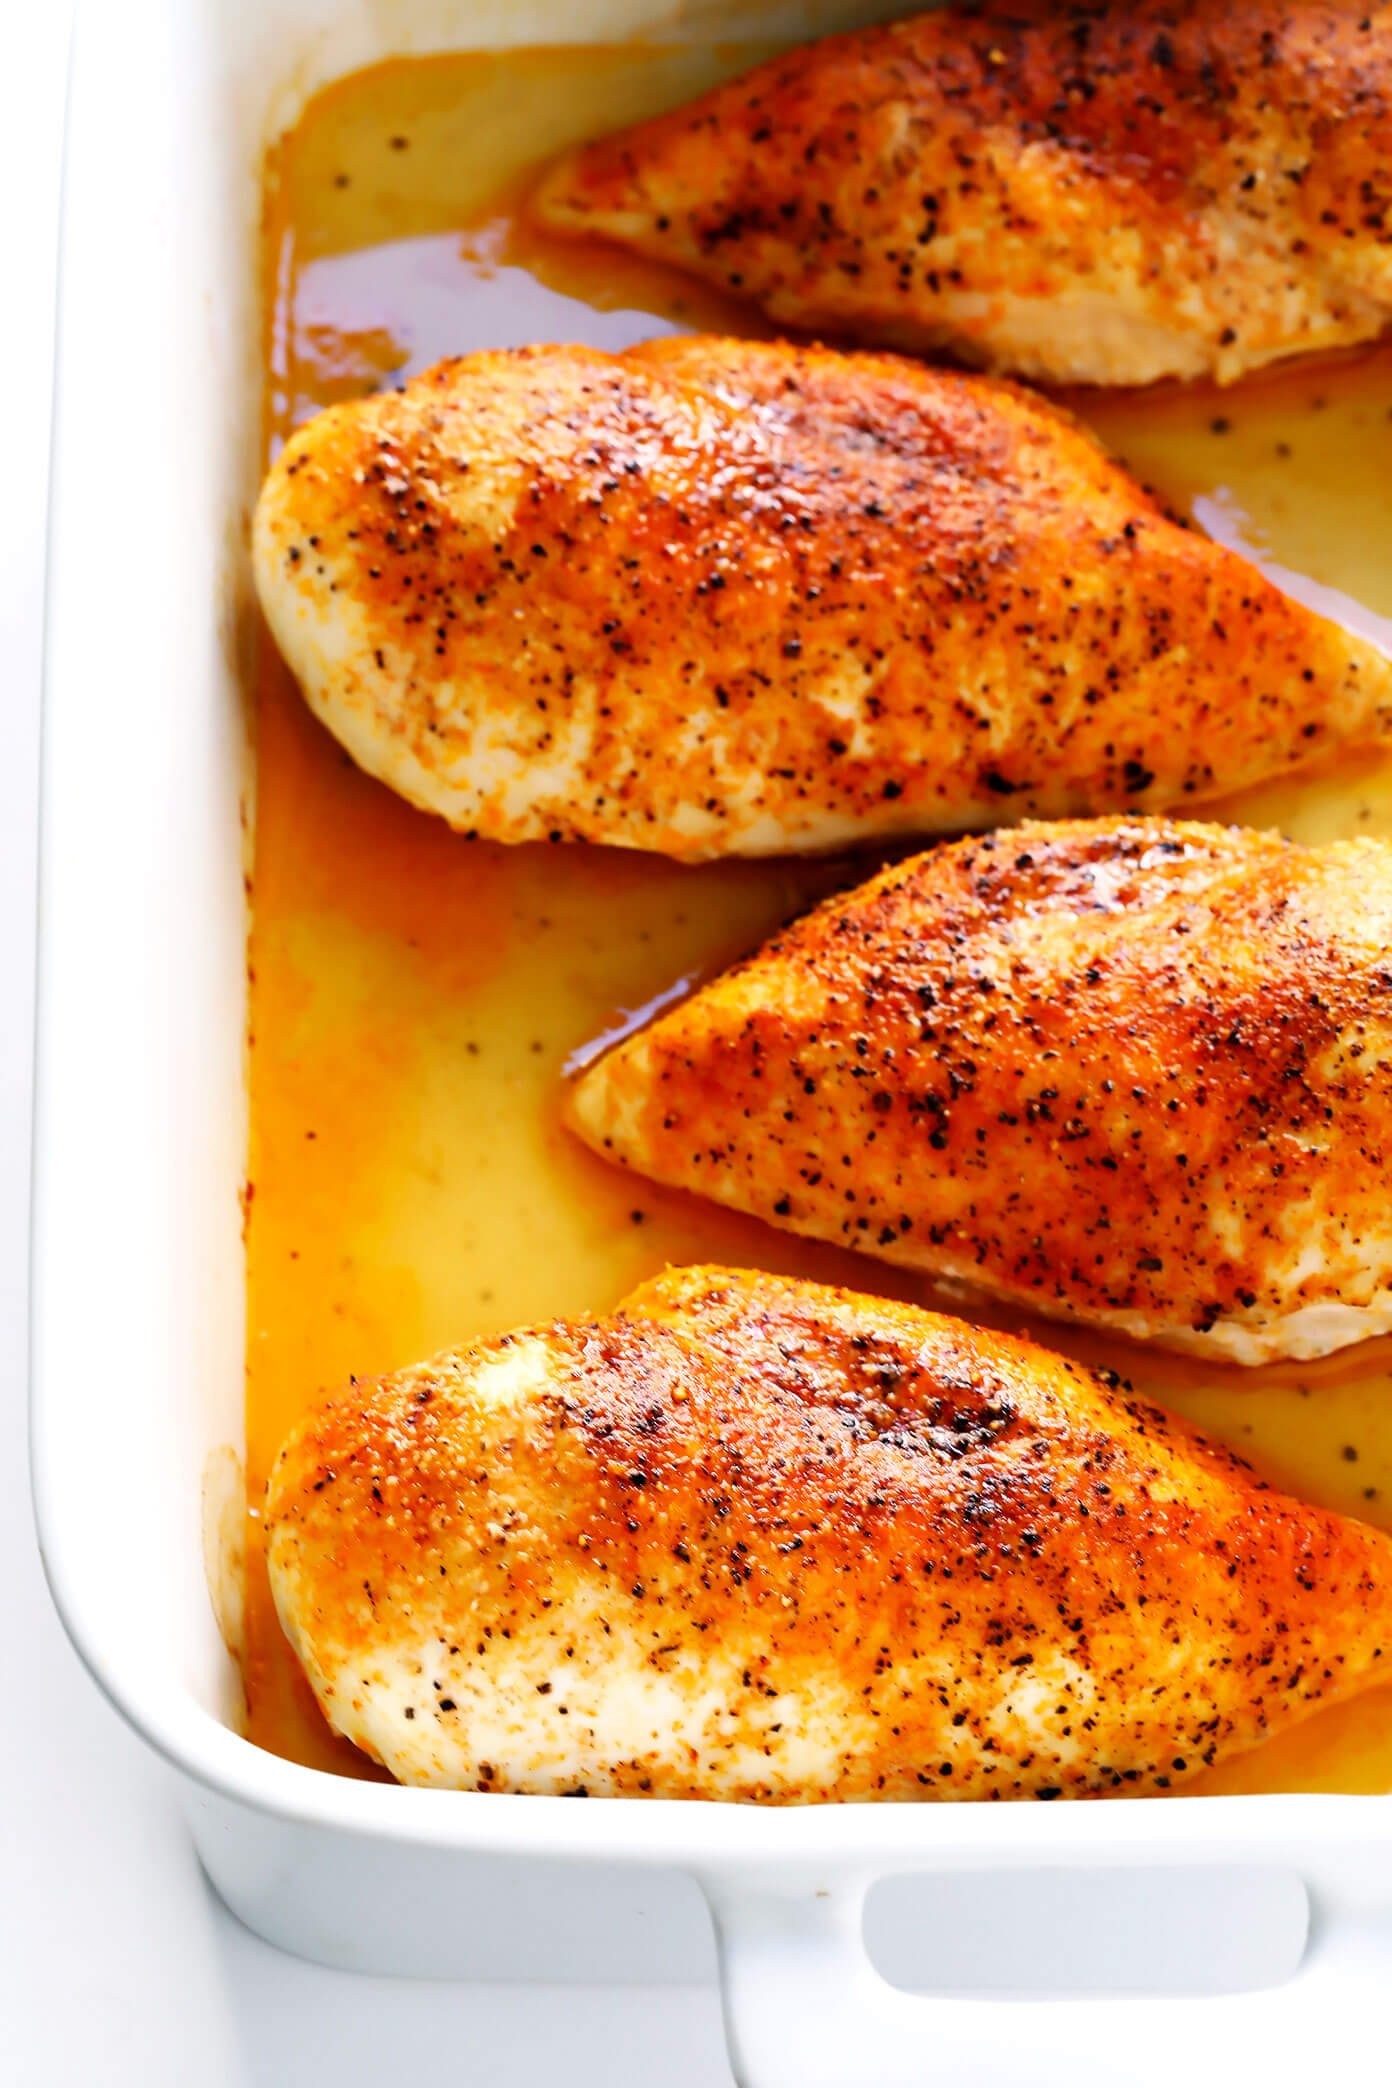
Seasoning is where you can truly customize the flavor of your baked chicken breasts. While salt and pepper are essential, a simple blend of spices can elevate the dish from basic to extraordinary. Chicken breasts, being a mild protein, readily absorb flavors from seasonings. A well-chosen seasoning rub adds depth and complexity, making each bite more enjoyable.
For an all-purpose chicken seasoning, combine kosher salt, freshly ground black pepper, garlic powder, and smoked paprika. Smoked paprika adds a subtle smoky sweetness that enhances the savory notes of the chicken. Garlic powder provides a foundational savory flavor, while salt and pepper balance and enhance all the other seasonings. In a small bowl, whisk together these spices until well combined. Generously sprinkle the seasoning mixture over both sides of the buttered or oiled chicken breasts. Rub the seasonings into the chicken to ensure even distribution and maximum flavor penetration.
Feel free to experiment with different seasoning blends to match your taste or the cuisine you’re aiming for. For an Italian-inspired chicken, use Italian seasoning with dried oregano, basil, and thyme. For a spicier kick, add cayenne pepper or chili powder. Consider using onion powder, dried herbs like rosemary or thyme, or even pre-made seasoning blends like Cajun or taco seasoning. The possibilities are endless, so have fun exploring different flavor combinations to find your favorites.
R – Roast: Mastering the Oven Temperature and Time
Roasting chicken breasts at the correct temperature and for the right duration is crucial for achieving that perfect balance of a crispy exterior and juicy interior. The debate among cooks often revolves around low-and-slow versus high-and-fast roasting methods. For chicken breasts, the high-heat method at 450°F (232°C) is highly recommended for several reasons. High heat sears the outside of the chicken quickly, creating a flavorful crust that locks in the juices. This method also significantly reduces cooking time, preventing the chicken from drying out.
Preheat your oven to 450°F (232°C). Place the seasoned chicken breasts in the preheated oven and roast for approximately 15-18 minutes, depending on their thickness. The exact cooking time will vary based on the size and thickness of the chicken breasts. Thicker breasts will require slightly longer cooking times. The most reliable way to determine doneness is to use a meat thermometer. Insert the thermometer into the thickest part of a chicken breast, avoiding the bone. The internal temperature should reach 165°F (74°C), which is the safe temperature for cooked chicken according to the FDA.
Resist the temptation to overcook the chicken, as this will result in dryness. If you prefer a slightly browned and crispier top, you can broil the chicken for the last 3-5 minutes of cooking. Switch the oven to broil on high, and keep a close watch on the chicken to prevent burning. Broiling adds a final touch of color and crispiness but requires careful attention to avoid overcooking. Using a meat thermometer is the most foolproof way to ensure perfectly cooked, juicy chicken breasts every time.
R – Rest: The Final Touch for Tenderness
Resting the baked chicken breasts after they come out of the oven is a non-negotiable step for maximizing tenderness and juiciness. Just like with other meats, resting allows the juices inside the chicken to redistribute evenly throughout the meat. When chicken is heated, the muscle fibers contract, pushing moisture towards the center. Resting allows these fibers to relax and reabsorb the juices, resulting in a more tender and flavorful final product. Skipping the resting step will lead to a significant loss of juices when you cut into the chicken, resulting in drier meat.
Once the chicken reaches an internal temperature of 165°F (74°C), remove the baking dish from the oven. Transfer the chicken breasts from the hot baking dish to a clean plate. Loosely tent the plate with aluminum foil. This helps to keep the chicken warm while it rests without steaming it. Let the chicken rest for at least 5-10 minutes before slicing or serving. During this time, the internal temperature may continue to rise a few degrees – this is known as carryover cooking and is perfectly normal. After resting, the chicken breasts will be noticeably juicier and more tender.
Serving and Storage Suggestions
Baked chicken breasts are incredibly versatile and can be served in numerous ways. Freshly baked chicken breasts are delicious served hot straight from the oven as a main course. Pair them with your favorite side dishes for a complete and satisfying meal.
Serving Ideas for Baked Chicken Breasts
For a simple and healthy meal, serve baked chicken breasts with roasted vegetables like asparagus, broccoli, or Brussels sprouts. Mashed potatoes, quinoa, or rice are excellent carbohydrate sides that complement the chicken. A fresh salad adds a light and refreshing element to the meal. Slice or dice baked chicken breasts to add protein to salads, wraps, or sandwiches. Shredded baked chicken is perfect for tacos, enchiladas, or chicken salad. Baked chicken can also be incorporated into pasta dishes, casseroles, and soups.
How to Store Baked Chicken Breasts
Leftover baked chicken breasts can be stored in the refrigerator or freezer. To refrigerate, allow the chicken to cool completely, then place it in an airtight container. Store in the refrigerator for up to 3 days. For longer storage, freeze the baked chicken. Slice, dice, or shred the chicken before freezing for easier use later. Place the chicken in freezer-safe bags or containers, removing as much air as possible to prevent freezer burn. Frozen baked chicken can be stored for up to 3 months. Thaw frozen chicken in the refrigerator overnight before reheating. Reheat leftover chicken in the microwave, oven, or skillet until heated through. Adding a little broth or water during reheating can help to maintain moisture.
Conclusion
Baking juicy chicken breasts doesn’t have to be a challenge. By following the simple 5-step B.B.R.R.R. method – Brine, Brush, Rub, Roast, Rest – you can consistently achieve perfectly cooked, tender, and flavorful chicken every time. This method is easy to remember and adaptable to your favorite seasonings and side dishes. Say goodbye to dry, disappointing chicken and hello to delicious, juicy baked chicken breasts that will impress your family and friends. Mastering this technique will make baked chicken breasts a regular and enjoyable part of your meal rotation. Enjoy your perfectly baked chicken!