Think baking fresh, homemade sourdough bread is beyond your reach? Think again! This beginner’s guide is your ultimate resource for easily making sourdough bread at home, without the fuss of kneading. In under 10 minutes of active time, you can mix the dough in the morning or evening and wake up to the irresistible aroma of tangy, crisp, and light sourdough. It’s simpler than you imagine!
What Bakers Are Saying
“I have tried so many sourdough bread recipes, and this is the FIRST one that has given me a successful, fully risen loaf! As someone relatively new to sourdough, I found that other recipes just didn’t deliver. The detailed instructions and explanations here truly make a world of difference for beginners like me.”
— Savannah
If you’ve ever felt frustrated by sourdough baking, know that you’re not alone.
Back in 2013, I set a personal goal to bake more bread. My kitchen became a lab as I experimented with countless recipes, experiencing both triumphs and flops. My baking journey began with this incredibly easy no-knead artisan bread recipe, which eventually paved the way to my sourdough dream: baking homemade sourdough bread.
I’ll admit, I experienced beginner’s luck. My initial sourdough loaves were everything you hope for – light, airy, and perfectly plump! But like many bakers, curiosity led me down the rabbit hole of sourdough science. Hydration levels? Baker’s percentages? Proofing times? Shaping techniques? It felt overwhelming. Driven to experiment, I started tweaking my recipe, getting lost in the technicalities. And guess what? My baking flow vanished. That initial luck disappeared. I lost sight of the simple joy of learning by doing – by touching, feeling, and shaping the dough. The result? Bread so dense and heavy, even my dog turned up his nose.
I realized I needed to go back to basics. I dove back into sourdough, but this time with a renewed focus: to relearn from the ground up and find a practical balance between the art, the science, and the intuition of baking. I took detailed notes, connected with the sourdough community, and rebuilt my understanding, all for you. What I discovered is that sourdough baking is more than just following a recipe; it’s about developing an understanding. And it’s only as complicated as it’s explained.
With over 13 years of sourdough baking experience, combined with my professional culinary background, I understand the hurdles: the fear of failure, the hesitation to start, the confusion, the comparisons, the initial excitement, and all the other factors that might be holding you back. My specialty is teaching others with a practical, no-nonsense approach. In fact, this sourdough bread recipe has been the most popular recipe on my blog for over a decade, consistently attracting millions of views every month. It even inspired my bestselling cookbook, Artisan Sourdough Made Simple, which further explores this timeless culinary art with a wide range of creative sourdough bread recipes. So, if you’re feeling lost and just want to bake delicious bread, you’ve come to the right place. Welcome to the sourdough journey.
Why This Sourdough Bread Recipe is a Game Changer:
- Minimalist Approach: Only one bowl and 5 simple ingredients needed.
- Olive Oil Magic: Olive oil creates a wonderfully soft and airy interior crumb, paired with a perfectly golden, crispy crust.
- No Special Equipment: Forget stand mixers and bread machines.
- Straightforward Instructions: Easy-to-follow, step-by-step instructions that eliminate confusion.
- Flexible Baking Schedule: Customizable baker’s schedule to fit your life.
- Community Support: Access to ongoing Q&A and community support to help you every step of the way.
What You Will Master in This Guide
In this comprehensive tutorial, you’ll learn how to bake fresh, homemade sourdough bread with clear step-by-step recipe instructions and helpful videos to guide you visually. The resulting sourdough boasts a delightful light and crisp taste, with a satisfyingly chewy texture. Feel free to keep the recipe as is, or get creative by adding your favorite ingredients like roasted garlic, rosemary, olives, jalapeños, cheese, and more. You’ll also find a wealth of essential tips, smart storage solutions, and guidance on creating your own vibrant sourdough starter from scratch. Got questions? Dive into the comment section! I’m here to offer personalized troubleshooting and foster a supportive baking community. ❤️
P.S. The world of sourdough bread is vast, with countless recipes and variations. No two loaves are ever exactly alike – it’s a truly personal process. Use this tutorial as your foundation, and don’t be afraid to make adjustments as you learn. Ask questions, trust your instincts, and most importantly, follow your gut. After you’ve baked a few loaves, the rhythm of sourdough will become second nature, and you’ll be baking like a pro in no time.
Understanding Sourdough Bread
Simply put, sourdough bread is a type of bread that undergoes a slow fermentation process.
What makes it truly unique is that it doesn’t rely on commercial yeast to rise. Instead, sourdough bread gets its lift from a living fermented culture called a sourdough starter, which acts as a natural leavening agent.
Sourdough is celebrated for its distinctive tangy flavor, wonderfully chewy texture, and satisfyingly crisp, crackly crust. From a nutritional standpoint, it’s a superior choice compared to most store-bought breads. The naturally occurring acids and extended fermentation help break down gluten, making sourdough potentially easier to digest and allowing for better nutrient absorption. And let’s not forget, it tastes incredibly delicious!
Bubbly and active sourdough starter ready for baking
Sourdough Starter: The Heart of Sourdough
Before you begin your sourdough journey, you’ll need a sourdough starter.
In its simplest form, a sourdough starter is a live culture made from just flour and water.
Once combined, this mixture starts to ferment, cultivating the wild yeasts and beneficial bacteria naturally present in the flour and air. A small portion of this vibrant culture is then used to make your bread dough rise. You can find detailed, step-by-step instructions on how to create your own starter here.
But the journey doesn’t end there.
Your sourdough starter is a living thing and needs regular feedings of flour and water to stay alive and maintain its strength for optimal rising power.
Feeding Your Sourdough Starter: A Quick Guide
Every sourdough baker develops their own feeding routine over time.
Here’s a simple overview of my go-to method: I start by discarding about half of the starter culture. Then, I feed the remaining starter in the jar with equal weights of flour and water. I whisk it thoroughly with a fork until it’s smooth and lump-free. Finally, I let it rest at room temperature or in a slightly warm spot (ideally 75-80ºF/ 24-26ºC) until it becomes visibly bubbly and active. Learn more about feeding your starter here.
P.S. This is the jar I use for my sourdough starter, and I absolutely love it.
Knowing When Your Sourdough Starter is Ready to Bake
Your starter is ready to use when it’s bubbly, vibrant, active, and has roughly doubled in size.
This can take anywhere from 2 to 12 hours or even longer, depending on factors like temperature (warmer is generally faster) and the overall health of your starter. Patience is key!
The Float Test: If you’re unsure if your sourdough starter is ready, perform a simple float test. When your starter appears to be at its peak height (before it starts to deflate), drop a small spoonful (about 1 teaspoon) into a glass of room temperature water. If it floats to the top, it’s ready for baking! If it sinks, it needs to be fed again and allowed to become more active.
Acquiring a Sourdough Starter
Every sourdough starter is unique, reflecting its environment and flour.
You can create one from scratch, purchase a dried starter online, or if you’re fortunate, receive a portion of a thriving starter from a fellow baker.
Starters vary in consistency, from thick to thin, and can be made with different types of flour. I actually maintain two different starters: one I made myself, and another that was a gift from my friend Celia. She generously dried a portion of her starter and mailed it to me all the way from Sydney, Australia!
Using Sourdough Starter for Baking
Once your starter is fed, bubbly, and active, simply measure out the amount needed for your recipe. That’s it! Remember to feed the remaining starter in your jar with more flour and water to keep the cycle going. Any sourdough starter you have leftover after feeding (also known as “sourdough discard”) is perfect for making delicious sourdough discard recipes, such as fluffy sourdough pancakes, sourdough scones, and even fresh, homemade sourdough pasta.
Long-Term Storage Tips
If you bake sourdough infrequently, store your starter in the refrigerator and feed it just once a week. For avid bakers who bake more often, keep your starter at room temperature and feed it at least once a day to maintain its activity.
Want to learn more about sourdough starters? Explore these helpful resources: Feeding Sourdough Starter: My Best Tips & Tricks & Sourdough Discard 101: Recipes & FAQs Answered.
Step-by-Step Guide: Baking Your First Sourdough Bread
Step #1: Mixing the Sourdough Dough
In a large bowl, combine the following ingredients. I find a fork works well for the initial mixing:
- 250g warm water
- 150g bubbly, active sourdough starter
- 25g olive oil
Then, add:
- 500g bread flour
- 10g fine sea salt
Mix everything together with your hands until the flour is fully incorporated. The dough will feel somewhat dry, rough, and shaggy at this stage.
Cover the bowl tightly with plastic wrap, a reusable beeswax wrap, or a very damp kitchen towel. Let the dough rest and ‘autolyse’ for about 30 minutes to 1 hour. After resting, return to the bowl and gently work the dough into a ball (it doesn’t need to be perfectly smooth). Note: If you want to add inclusions like olives, fresh herbs, or cheese, incorporate them into the dough before shaping it into a ball.
Baking Tip: For consistently excellent results, I highly recommend weighing your ingredients using a digital kitchen scale. Measuring cups can be less accurate, which can affect the dough’s texture.
Understanding Autolyse in Sourdough
- Autolyse is the initial resting period right after mixing the dough ingredients. This crucial step jumpstarts gluten development without any kneading. Strong gluten is essential for great sourdough bread.
- The autolyse time can range from 15 minutes to an hour or more, depending on the type of bread and your baking schedule. For this recipe, a minimum of 30 minutes is ideal. When time allows, I prefer to let it rest for a full hour. You’ll notice the dough becomes softer and much easier to handle afterward.
A Note on Salt: Some bakers prefer to add salt after the autolyse because salt can potentially slow down gluten development. While I used to follow this method, I now mix everything, including salt, right from the start. I find it practical, efficient, and it consistently produces fantastic loaves. The choice is yours!
Step #2: Bulk Fermentation (First Rise)
- Now, your dough is ready for its bulk fermentation, also known as the “bulk rise” or “first rise.”
- To bulk ferment: cover the bowl of dough with lightly oiled plastic wrap (or transfer it to a dough tub) and let it rise at room temperature, ideally around 68-70°F (20-21°C).
How Long Does Bulk Fermentation Take?
- The dough is ready when it has almost doubled in volume and no longer feels dense. This can take anywhere from 3 to 12 hours, or sometimes longer, depending on your room temperature, the strength of your sourdough starter, and your specific environment. A dough tub with volume markings can be incredibly helpful for monitoring the rise!
- For example, in warmer summer temperatures (around 80°F/ 26°C), bulk fermentation might take just 2-4 hours. In winter, at cooler room temperatures (around 68°F/ 20°C), it could take 10-12 hours. Temperature directly influences fermentation time.
- Remember, sourdough bread rises slower than bread made with commercial yeast. Focus on watching the dough, not the clock, and be flexible with timing.
Optional Technique: Stretch and Fold
About 30 minutes into the bulk rise, you have the option to perform a series of ‘stretch and folds’ to further develop the dough’s strength and structure {click here for a step-by-step tutorial}. While not essential, this technique can improve the height and overall texture of your loaf, and it’s a satisfying part of the process! Watch the video to see how it’s done.
Step #3: Dividing and Shaping the Dough
- Gently turn the dough out onto a lightly floured surface.
- Use a bench scraper or knife to divide the dough in half for two smaller loaves, or keep it as a single portion for one larger loaf.
Shaping a Round Sourdough Boule (Loaf)
To shape a round boule, start by folding the top edge of the dough down towards the center. Rotate the dough slightly, and then fold the next section of dough towards the center. Continue this process, working your way around the dough until you’ve completed a full circle. Alternatively, you can use the envelope shaping technique demonstrated in the video below.
Step #4: Choosing Your Baking Vessel
- I prefer to bake sourdough bread in a Dutch oven. Another excellent option is the Challenger Bread Pan, which is designed to accommodate both round and oval loaves.
- Baking in a pot like a Dutch oven is crucial because it traps heat and moisture. This creates steam within the pot, which is essential for achieving artisan-style sourdough at home. Steam plays a key role in how the bread rises and develops its characteristic ‘bloom’ or expansion during baking. Using a Dutch oven gives you excellent control over this process.
- Note: You can use any oven-safe pot that can safely withstand temperatures up to 450ºF/ 232ºC, including the lid and handles.
Baking Tip: In the past, I attempted baking sourdough bread on pizza stones and cookie sheets without success. The crust would harden too quickly in my home oven’s dry environment, causing the bread to tear and split on the bottom and sides. I tried various steaming methods to compensate, but found them cumbersome and impractical for regular baking. Nothing worked effectively until I started using a pot. For me, baking in a pot was the only practical solution to achieve that perfect sourdough crust in a standard home oven.
Step #5: Second Rise (Proofing)
- After shaping, the dough needs a second rise, often called “proofing.”
- To proof: generously sprinkle the bottom of your Dutch oven with cornmeal (or line it with non-stick parchment paper as an alternative). Place the shaped dough inside.
- This second rise is shorter than the bulk fermentation, usually around 30 minutes to 1 hour. The dough is ready when it looks puffy and no longer dense, but it doesn’t need to double in size.
- Preheat your oven to 450ºF/ 232ºC during the last part of the second rise.
Baking Tip: Instead of doing a free-form second rise directly in the Dutch oven, consider using a cloth-lined proofing basket or an 8-inch bowl lined with a floured cloth. Using a proofing basket or bowl will provide support and help the dough maintain its shape during the second rise, especially for wetter doughs.
Step #6: Scoring the Sourdough
- Just before the dough goes into the hot oven, make a single slash about 2-3 inches long down the center of the loaf.
- Scoring allows steam to escape in a controlled way and encourages the dough to expand beautifully during baking, preventing random cracks.
- You can use a small serrated knife, a paring knife, or a specialized bread lame.
Step #7: Baking Your Sourdough Bread
- Place the lid on the Dutch oven, and reduce the oven temperature to 400ºF/ 204ºC.
- Bake on the center oven rack for 20 minutes with the lid on.
- After 20 minutes, remove the lid. The bread will be pale and slightly shiny at this point, as shown in the picture above.
- Continue baking (uncovered) for another 40 minutes, or until the crust is deeply golden brown and the internal temperature of the bread reaches 205-210ºF/ 96-98ºC.
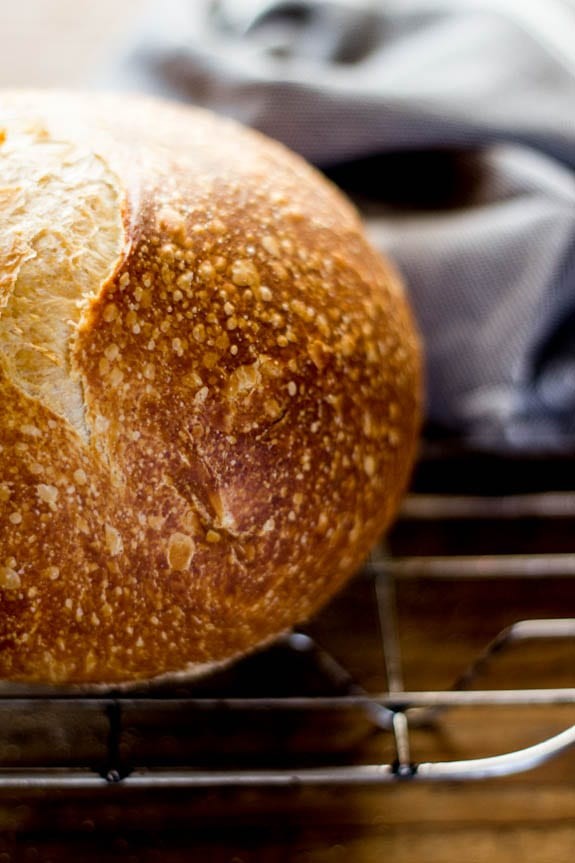
- Let the sourdough loaf cool completely on a wire rack for at least 1 hour before slicing. Patience is essential! Cutting into it too soon will result in a gummy texture inside.
Baking Tip: For an extra-crispy crust, crack open the oven door slightly during the last 10 minutes of baking (optional). This allows excess moisture to escape, resulting in a crisper sourdough crust. Alternatively, you can remove the bread from the Dutch oven for the last 10 minutes and let it bake directly on the oven rack for maximum crispness.
Explore More Sourdough Recipes & Resources
Sourdough Starter Guides:
Delicious Sourdough Bread Recipes:
Sourdough Baking Tips & Techniques:
Essential Sourdough Tools & Supplies:
Sample Baking Schedule
- **Friday Evening:** Feed your sourdough starter, cover the jar, and leave it at room temperature overnight. If you keep your starter in the fridge, it might need two feedings to fully reactivate. Feed it in the morning and again in the evening.
- **Saturday Morning:** Check your starter. If it’s lively and bubbly, you can mix the dough to rise during the day. Or, feed it again in the afternoon to make the dough in the evening for an overnight bulk fermentation. Use the float test to confirm your starter is ready.
- Saturday Morning/Evening (whenever your starter is ready): Mix the sourdough dough. Let it bulk ferment at room temperature. In warm weather, if the dough rises quickly and you’re not ready to bake, cover the bowl with lightly oiled plastic wrap and refrigerate it until you’re ready.
- **Sunday Morning:** Divide and shape the dough. Place it in the Dutch oven for the second rise. Score the loaf. Bake. Cool completely. Enjoy your homemade sourdough!
Sourdough Bread Recipe
[Print Recipe](https://www.theclevercarrot.com/2014/01/sourdough-bread-a-beginners-guide/print/20764/)Description
This easy, homemade sourdough bread recipe is perfect for both beginner and experienced bakers. Made with just 5 simple ingredients: bread flour, active sourdough starter, water, salt, and olive oil (which gives the interior a wonderfully light and soft crumb!). Follow these step-by-step instructions and videos, and you’ll be baking fresh, homemade sourdough bread that rivals any bakery. You can absolutely do it!
Ingredients
- 150g / 5.35 oz bubbly, active sourdough starter
- 250g / 8.80 oz warm water, preferably filtered (see notes below)
- 25g / 0.90 oz olive oil
- 500g / 17.65 oz bread flour (not all-purpose flour)
- 10g / 0.4 oz fine sea salt
- Fine ground cornmeal or parchment paper, for dusting the Dutch oven
Important Notes & Tips
- For best results, use a digital kitchen scale to weigh your ingredients. Measuring cups are not accurate for bread baking, and precise flour-to-water ratios are crucial!
- For a softer, more pliable dough, you can increase the water to 300-325g total. If using more water, perform the second rise in a cloth-lined bowl instead of directly in the Dutch oven.
- You’ll need a 5.5 or 6-quart Dutch oven for baking.
- This recipe has been successfully tested with King Arthur Bread Flour, Gold Medal Bread Flour, and Pillsbury Bread Flour.
Instructions
Make the Dough
- In a large bowl, combine the sourdough starter, warm water, and olive oil. Mix with a fork. Add the bread flour and salt. Continue mixing with a fork until the dough becomes stiff. Then, use your hands to squish everything together until all the flour is incorporated. The dough will be dry and shaggy. Cover the bowl with plastic wrap, a reusable wrap, or a clean, very damp kitchen towel. Let it rest (autolyse) for 30 minutes to 1 hour.
- After the autolyse, return to the bowl and work the dough into a rough ball shape, about 15 seconds of gentle manipulation.
Note: The recipe provides a range for water quantity (250g to 325g). If using 250g water, the dough will be quite stiff. If using 300-325g water, the dough will be wetter. Both are normal; the texture depends on your water amount.
Bulk Fermentation (First Rise)
Note: Bulk fermentation time varies significantly (3-12 hours+) depending on ingredient temperature, starter activity, and room temperature. In summer (around 80°F/ 26°C), it might take 2-4 hours. In winter (around 68°F/ 20°C), it can take 10-12 hours or longer. Watch the dough, not the clock.
Optional: Stretch & Fold
During bulk fermentation, you can perform stretch and folds to strengthen the dough. Start 30-45 minutes into the bulk rise. Gently stretch a portion of the dough upwards and fold it over itself. Rotate the bowl a quarter turn and repeat until you’ve completed one set. Do this once or twice, spaced about 1 hour apart. This step is optional but will improve bread volume and height. Click here for a step-by-step video tutorial.
Note: Doughs made with 250g water vs. 300-325g water will feel different during stretch and folds. The drier dough will be stiffer; the wetter dough will be more elastic. Both are acceptable textures. If the dough resists stretching, give it extra rest time between sets.
Divide & Shape
- Lightly flour half of your work surface for dividing, and leave the other half clean for shaping.
- Turn the dough out of the bowl onto the floured section. No need to punch it down; it will gently deflate as you shape it.
- Divide the dough in half for 2 loaves, or leave it whole for a single loaf.
- To shape: Use a bench knife to move the dough to the clean, unfloured section. If there’s flour, shaping will be difficult – brush away any excess. Fold the top of the dough towards the center, rotate, and repeat until you’ve gone full circle.
- Flip the dough seam-side down. Gently cup the sides and rotate in quarter turns, using a circular motion. You can also pull the dough towards you to even out the shape. Repeat until you’re happy with the round shape.
Note: Shaping relies on surface tension. The dough needs to grip a clean, unfloured area to form a tight ball. Flour will make it slide and difficult to shape.
Second Rise (Proofing)
- The dough now needs a shorter second rise.
- Dust the bottom of your Dutch oven with cornmeal or use parchment paper. Place the shaped dough inside for a “free-form” second rise of 30 minutes to 1 hour. Cover with the lid. The dough is ready when slightly puffy, not doubled.
- Preheat your oven to 450ºF/ 232ºC towards the end of the second rise.
Note: The “free-form” second rise in the pot works best with drier doughs (like this recipe with 250g water). Wetter doughs may spread. For wetter dough, use a cloth-lined, floured proofing basket for the second rise to maintain shape.
Score the Dough
- Just before baking, make a shallow 2-3 inch slash (or longer) in the center of the dough using a bread lame, razor blade, sharp paring knife, or small serrated knife. The cut should be about 1/4 inch deep.
Bake the Dough
- Place the Dutch oven with the scored dough in the center of the preheated oven (lid on). Reduce oven temperature to 400°F/ 204°C. Bake for 20 minutes. Remove the lid and bake uncovered for another 40 minutes, or until deeply golden brown. Oven temperatures vary, so adjust baking time if needed.
- Check the internal temperature with a thermometer; it should be 205-210ºF/ 96-98ºC for sourdough.
- Remove from the oven and cool completely on a wire rack for at least an hour before slicing to avoid a gummy interior.
Sourdough FAQs
-
) Can I use all-purpose flour?
- For best results, use bread flour. For an all-purpose flour sourdough recipe, try my Artisan Sourdough with All-Purpose Flour.
-
) Can I add whole wheat flour?
- You can, but it’s not recommended without adjusting the water. For whole wheat sourdough, try my Light Whole Wheat Sourdough.
-
) Why does this recipe use 150g starter, while your book uses 50g? What’s the difference?
- Recipe variations exist! This beginner recipe uses more starter for faster rise times, making it easier for new bakers. My book explores different ratios for varied outcomes.
-
) What’s the purpose of olive oil?
- Olive oil enriches the dough, creating a softer crumb and pleasant texture. It’s a classic addition to sourdough.
-
) Why second rise in a Dutch oven vs. a cloth-lined bowl in different recipes?
- Drier doughs (like this recipe with lower hydration) hold shape in a Dutch oven for the second rise. Wetter doughs need the support of a cloth-lined bowl to prevent spreading.
-
) Why not preheat the Dutch oven?
- This recipe uses a free-form second rise directly in the pot, so preheating isn’t possible. Preheat is optional; comparable results can be achieved without preheating, simplifying the process.
-
) Can I halve the recipe for 2 loaves? Adjust baking time?
- Yes, halve the recipe. Bake for 20 minutes (lid on) and 30 minutes (lid off). Check for doneness around 45 minutes.
-
) Halved recipe, store second dough if not baking immediately?
- Refrigerate the second dough in a cloth-lined, floured bowl, covered. If refrigerated for over an hour, let it rest at room temperature while the oven preheats before baking.
-
) How to get dough out of a cloth-lined bowl?
- Open the cloth, place parchment paper on top, flip the bowl, remove bowl and cloth. Dough will be smooth-side up, ready to score.
-
) Cup measurements, please?
- Approximate cup measurements:
- 3/4 cup active starter
- 1 cup + 1 tbsp warm water
- 2 tbsp olive oil
- 4 cups bread flour
- 1 1/2 tsp fine sea salt
- NOTE: Weight measurements are more accurate. For cups, aerate flour first, then lightly spoon and level into the cup. Too much flour leads to dense bread. Adjust water up to ~1 1/3 cups for softer dough if needed. Starter volume may vary; add up to 1 cup if needed.
- Approximate cup measurements:
Join the Sourdough Conversation
Jump to the comment section to ask your questions, share your sourdough baking experiences, and connect with fellow bakers!