Your Apple Watch is more than just a gadget; it’s a personal accessory that reflects your style and keeps you connected. A key aspect of making it truly yours is customizing the watch face. Changing your Apple Watch face is a simple yet powerful way to refresh its look, prioritize the information you need at a glance, and even match your outfit or activity. Whether you want a sleek and minimalist design or a face packed with data, the possibilities are vast.
This guide will walk you through everything you need to know about how to change your Apple Watch face, ensuring you can effortlessly switch up your style whenever you desire. We’ll cover adding new faces, choosing from your collection, adding complications for extra functionality, and managing your face collection for optimal organization.
Adding a New Watch Face to Your Collection
Expanding your collection of Apple Watch faces opens up a world of personalization. You can create multiple faces tailored to different situations – one for work, one for workouts, and one for evenings out. Adding a new face is straightforward, and you can do it directly on your Apple Watch or using the Watch app on your iPhone.
Adding a Watch Face Directly on Your Apple Watch:
- Start from your current watch face: Ensure your Apple Watch screen is active and displaying your current watch face.
- Touch and hold the display: Press and hold firmly on the watch face until you feel a slight vibration and the screen changes, indicating you’ve entered the face editing mode.
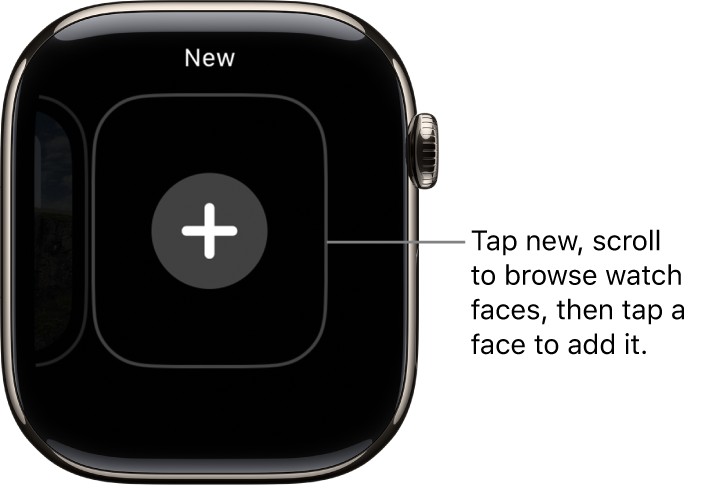
- Swipe left to the “+” sign: Swipe left across the available watch faces until you reach the end of the collection, where you’ll find a “+” button.
- Tap the “+” button: Tap the “+” button to add a new watch face. This will open the watch face gallery on your Apple Watch.
- Browse and select a watch face: Use the Digital Crown to scroll through the available watch face options. You can explore different categories and styles.
- Tap “Add” to confirm: Once you find a watch face you like, tap the “Add” button below it to add it to your collection.
Tip: Explore curated collections like “New Watch Faces” or “Artists” for inspiration and to quickly find faces within specific themes.
Adding a Watch Face Using the Apple Watch App on iPhone:
The Apple Watch app on your iPhone provides a more comprehensive view of the Face Gallery and makes customization even easier.
- Open the Apple Watch app: Locate and open the Apple Watch app on your paired iPhone.
- Tap “Face Gallery”: In the bottom menu bar, tap on the “Face Gallery” tab.
- Explore the Face Gallery: Browse through the extensive collection of watch faces. They are organized into categories, making it easy to find a style you like.
- Customize your chosen face: Tap on a watch face to see customization options. You can adjust colors, styles, complications, and more, depending on the face.
- Tap “Add” to My Faces: After customizing the face to your liking, scroll down and tap the “Add” button to add it to your “My Faces” collection on your Apple Watch.
Switching to a Different Watch Face
Once you have a collection of watch faces, switching between them is incredibly simple and fast. You can change faces directly from your wrist in seconds.
Switching Watch Faces on Your Apple Watch:
- Touch and hold the current watch face: As before, touch and hold the display of your current watch face until you enter the face editing mode.
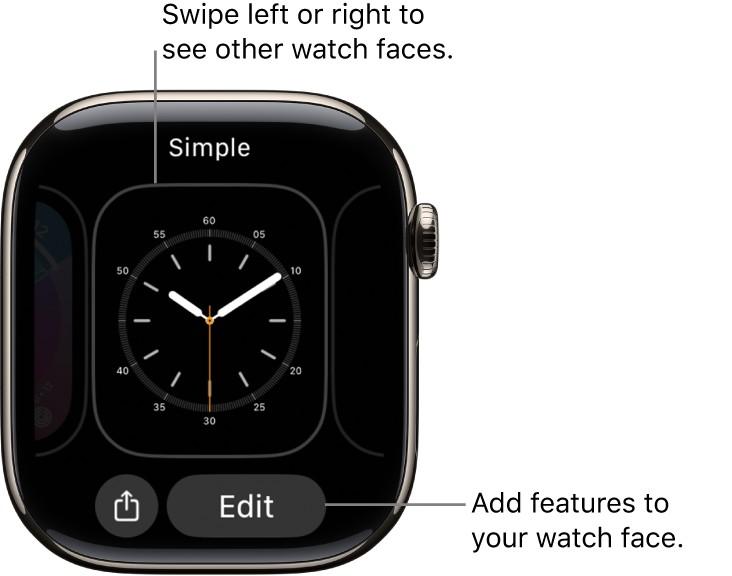
- Swipe left or right to browse: Swipe left or right across your collection of watch faces to preview each one.
- Tap to select: When you find the watch face you want to use, simply tap on it. The watch face will instantly change to your selection.
Tip: For even quicker switching, enable “Swipe to Switch Watch Face”. Open the Settings app on your Apple Watch, navigate to “Clock,” and toggle “Swipe to Switch Watch Face” to the on position. With this enabled, you can swipe left or right directly from the active watch face to change faces without long-pressing.
Personalizing Your Watch Face with Complications
Complications are the small, informative elements you can add to many Apple Watch faces. They provide quick access to data from apps, such as weather updates, calendar events, activity progress, stock tickers, and much more. Adding complications allows you to tailor your watch face to display the information most relevant to you.
Adding Complications to Your Watch Face:
- Enter Edit Mode: Touch and hold the watch face until you are in the edit mode.
- Swipe to the Complications screen: Swipe left all the way to the last screen. This screen is dedicated to complications (if the chosen watch face supports them).
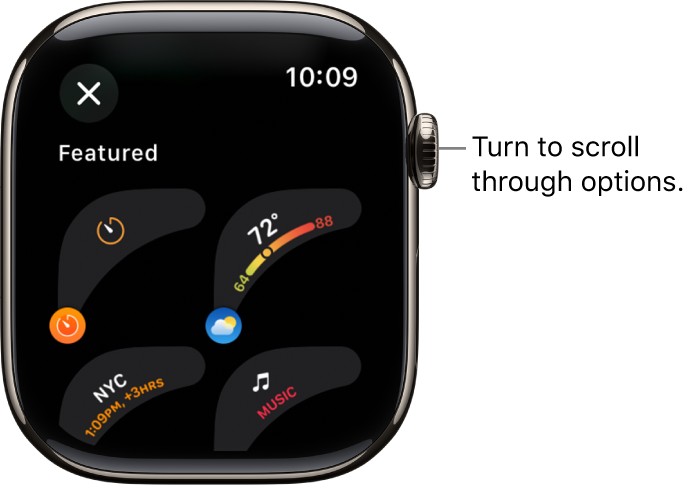
- Tap a complication area: Tap on a complication area you want to customize. This will highlight the area and show available complication options.
- Use the Digital Crown to choose a complication: Turn the Digital Crown to scroll through the list of available complications. These can include built-in Apple apps or complications from third-party apps you have installed.
- Press the Digital Crown to save: Once you’ve selected your desired complication, press the Digital Crown to confirm and save your changes.
- Tap the watch face to finish: Finally, tap the watch face itself to exit edit mode and switch to your newly customized face.
Many apps from the App Store offer complications, extending the functionality and information you can display directly on your wrist.
Popular Complication Options:
| App | Available Complications |
|---|---|
| Activity | Rings, Timeline |
| Weather | Air Quality, Conditions, Humidity, Rain, Temperature, UV Index, Wind |
| Calendar | Today’s Date, Your Schedule |
| Stocks | Added Stocks, Last Viewed Stocks |
| Reminders | Due Today, Reminders |
| Heart Rate | Heart Rate |
| Battery | Battery Percentage |
This is just a small selection; numerous apps offer complications to personalize your Apple Watch experience further.
Managing Your Watch Face Collection
Keeping your watch face collection organized ensures quick access to your favorite faces and prevents unnecessary clutter. You can easily view, rearrange, and delete faces from your collection both on your iPhone and directly on your Apple Watch.
Viewing Your Watch Face Collection on iPhone:
- Open the Apple Watch app: Launch the Apple Watch app on your iPhone.
- Tap “My Watch”: This should be the default tab when you open the app.
- Scroll through “My Faces”: Under the “My Faces” section, you’ll see a visual list of all the watch faces in your collection. Swipe horizontally to browse them.
Rearranging Your Watch Face Collection on iPhone:
- Tap “Edit” in “My Faces”: In the “My Faces” section, tap the “Edit” button located to the right.
- Drag to reorder: Next to each watch face, you’ll see a three-line icon [placeholder for icon if possible]. Touch and hold this icon and drag the watch face up or down to rearrange the order in your collection.
- Tap “Done”: Once you have rearranged your faces to your liking, tap “Done” to save the new order.
Rearranging Your Watch Face Collection on Apple Watch:
- Enter Edit Mode: Touch and hold the current watch face on your Apple Watch.
- Enter Reorder Mode: Touch and hold on a watch face again within the edit mode until it is selected and slightly raised.
- Drag to reorder: Drag the selected watch face left or right to reposition it within your collection.
- Tap to finish: Tap the display to exit reorder mode and save the new arrangement.
Deleting a Watch Face from Your Collection on Apple Watch:
- Enter Edit Mode: Touch and hold the current watch face.
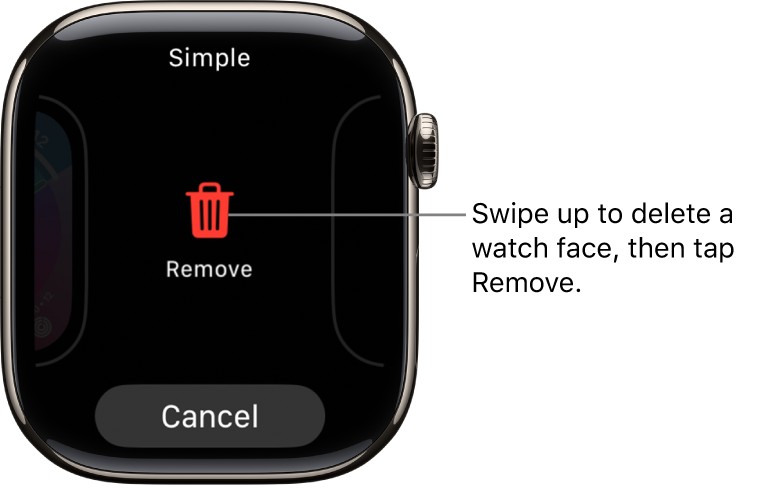
- Swipe up to delete: Swipe up on the watch face you wish to remove. A “Remove” button will appear.
- Tap “Remove”: Tap the “Remove” button to delete the watch face from your collection.
Deleting a Watch Face from Your Collection on iPhone:
- Open the Apple Watch app and go to “My Faces”: Follow steps 1 and 2 from “Viewing Your Watch Face Collection on iPhone.”
- Tap “Edit” in “My Faces”: Tap the “Edit” button.
- Tap the delete button: Tap the red delete button (looks like a minus sign in a circle) [placeholder for delete icon if possible] next to the watch face you want to delete.
- Tap “Remove”: Confirm deletion by tapping “Remove”.
- Tap “Done”: Tap “Done” to finalize changes in “My Faces”.
You can always re-add any deleted watch faces from the Face Gallery later if you change your mind.
Conclusion
Changing your Apple Watch face is a fundamental aspect of personalizing your device and making it work best for you. With a wide array of faces and complications available, you can create a timepiece that is both stylish and incredibly functional. Experiment with different faces, explore complications, and curate your collection to truly make your Apple Watch your own. Whether you’re looking for information at a glance or a fresh aesthetic, mastering how to change your Apple Watch face unlocks a new level of customization and enjoyment.