Is your computer acting up? Experiencing unexpected shutdowns, sluggish performance during demanding tasks, or system freezes? Especially when the weather heats up, these issues could point to a common culprit: CPU overheating. Keeping a close eye on your CPU temperature is not just for hardcore overclockers pushing their systems to the limit, but for every PC user who wants to ensure optimal performance and longevity of their machine. Whether you’re rocking a high-end Ryzen 7 7800X3D or a more modest processor, understanding your CPU temps is crucial.
Surprisingly, Windows doesn’t provide a built-in way to monitor your CPU temperature directly. While you could delve into your BIOS settings, this is hardly a convenient solution for a quick temperature check. Thankfully, a variety of free and user-friendly software tools are available that make it incredibly easy to monitor your processor’s temperature in real-time. With this information at your fingertips, you can determine if your CPU is running within safe limits or if you need to consider steps to improve your PC’s cooling.
Before diving into software solutions, it’s worth performing a quick physical check. Ensure that your PC’s fans and air vents are free from dust and obstructions. Dust accumulation is a common cause of overheating, hindering your system’s cooling efficiency. A can of compressed air is an essential tool for any PC owner to combat this problem.
Get a 2-pack of Dust-off canned air from Amazon
Why Monitoring PC Temps is Crucial
Ignoring your PC’s CPU temperature can lead to a cascade of problems, impacting both performance and the lifespan of your components. Here’s why keeping an eye on your temps is so important:
- Performance Throttling: Modern CPUs are designed to protect themselves from overheating. When temperatures get too high, the CPU will automatically reduce its clock speed – a process known as thermal throttling. This results in a noticeable drop in performance, making your games stutter, applications run slowly, and overall system responsiveness suffer.
- System Instability and Crashes: Extreme overheating can lead to system instability, causing your PC to freeze, lock up, or spontaneously shut down. These sudden shutdowns can result in data loss and frustration, interrupting your work or gaming sessions.
- Hardware Damage and Reduced Lifespan: Prolonged exposure to high temperatures can degrade your CPU and other components over time. Excessive heat can accelerate component aging, potentially shortening the lifespan of your expensive hardware and leading to premature failures.
- Overclocking Stability: If you’re into overclocking, monitoring CPU temps is absolutely critical. Overclocking pushes your CPU beyond its stock settings, generating more heat. Without careful temperature monitoring, you risk pushing your CPU too far, leading to instability or even permanent damage.
- Summer Heat Amplification: Ambient room temperature significantly impacts your PC’s internal temperatures. During hot summer months, your PC will naturally run hotter. Monitoring becomes even more important to ensure your cooling system can cope with the increased ambient heat.
Understanding CPU Temperature Ranges: What’s Normal and What’s Not?
Knowing how to check your PC temps is only half the battle; you also need to understand what those numbers mean. CPU manufacturers specify a maximum safe operating temperature for their processors, often referred to as “Tj. Max” (Temperature Junction Maximum). Exceeding this temperature can lead to immediate system shutdown to prevent damage. However, running consistently close to Tj. Max is not ideal for the long-term health of your CPU.
Here’s a general guideline for CPU temperatures under load to help you interpret your readings:
- Under 60°C (140°F): Excellent. Your CPU is running cool and efficiently. This is ideal for optimal performance and longevity.
- 60°C to 70°C (140°F to 158°F): Good. Still within a comfortable range for prolonged operation. Slightly elevated but generally not a cause for concern. Consider checking for dust buildup if temps are slowly increasing over time.
- 70°C to 80°C (158°F to 176°F): Warm. This range is acceptable for demanding tasks or moderate overclocking. However, if you’re not overclocking or running intensive applications, it might indicate a need for improved cooling. Check fans and airflow.
- 80°C to 90°C (176°F to 194°F): Hot. Getting into the potentially problematic zone. If you consistently see temperatures in this range, especially during normal usage or gaming (without heavy overclocking), investigate your cooling system. Check for dust, fan issues, and consider reapplying thermal paste or upgrading your cooler. Powerful laptops may reach the low 80s under heavy gaming loads, which is often considered acceptable due to space constraints, but exceeding 85°C (185°F) should raise concerns.
- Over 90°C (194°F): Dangerously Hot! Immediate action is needed. Sustained temperatures above 90°C can lead to system instability, performance throttling, and potential hardware damage. Stop any demanding tasks, check your cooling system immediately, and troubleshoot the issue.
To find the Tj. Max for your specific CPU, you can consult the product specifications on the manufacturer’s website (Intel or AMD) or use resources like the CPU World website. Most monitoring software will also display the Tj. Max value for your processor.
Top Software to Check Your PC Temps
Fortunately, monitoring your CPU temperature is straightforward with the right software. Here are some of the best free tools available:
Core Temp: Simple and Direct
Core Temp is a lightweight and user-friendly application specifically designed for monitoring CPU temperature. Its strength lies in its simplicity and focus. Once installed (be cautious during installation to avoid bundled software by unchecking optional offers), Core Temp provides a no-frills interface displaying real-time temperature readings for each core of your CPU, as well as an overall average temperature.
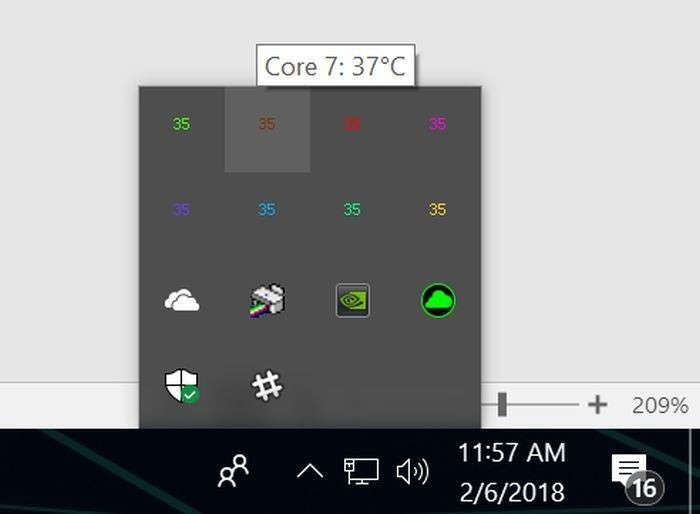
For quick monitoring, Core Temp can display temperatures directly in your system tray (the notification area in the bottom right corner of your Windows taskbar). This allows you to keep an eye on your CPU temps without even having the main application window open. The settings menu allows for customization of the system tray display, but the default setup is perfectly adequate for most users.
Core Temp interface displaying individual CPU core temperatures.
HWInfo: Detailed System Monitoring
HWInfo is a powerful and comprehensive system information and monitoring tool. While it provides a wealth of information about every aspect of your PC hardware, it can also be used effectively for CPU temperature monitoring. When you launch HWInfo, you can choose to run it in “sensors-only mode” to focus specifically on monitoring data.
Navigating to the CPU section within the sensors window will reveal detailed temperature readings, including current temperature, minimum, maximum, and average values, as well as other relevant CPU statistics. HWInfo is a more advanced tool than Core Temp, offering a deeper dive into system metrics, making it a great choice for enthusiasts who want detailed insights into their PC’s operation.
HWInfo showing both Tdie and Tctl CPU temperature readings for an AMD Ryzen processor.
Note for Ryzen Users: If you’re using an AMD Ryzen processor and monitoring with HWInfo (or similar advanced tools), you might see two different CPU temperature readings: “Tdie” and “Tctl”. Focus on the “Tdie” reading, which represents the actual temperature of the CPU die itself. “Tctl” (Control Temperature) is a reporting temperature that may include an offset and is primarily used for fan control. Simpler tools like Core Temp typically present a single, offset-adjusted temperature reading that is comparable to Tdie.
NZXT CAM: Feature-Rich and User-Friendly
NZXT CAM is another popular monitoring software known for its sleek and visually appealing interface. While NZXT is primarily a hardware manufacturer, their CAM software is freely available and works with any PC, not just NZXT components. CAM provides real-time monitoring of CPU temperature, GPU temperature, RAM usage, storage utilization, and more, all presented in an easy-to-understand dashboard.
Beyond monitoring, NZXT CAM also offers features like in-game FPS overlay, overclocking controls for compatible hardware, and even mobile apps to remotely monitor your PC’s status. Its user-friendly interface and comprehensive feature set make it a strong contender for both beginners and experienced users.
NZXT CAM software interface displaying system monitoring information including CPU temperature.
Other Notable Options: Open Hardware Monitor and SpeedFan
Open Hardware Monitor and SpeedFan are also well-regarded free system monitoring tools that can display CPU temperatures along with other hardware information. Open Hardware Monitor is open-source and supports a wide range of hardware sensors. SpeedFan, while slightly older in interface, is known for its fan control capabilities, allowing you to adjust fan speeds based on temperature readings.
While Core Temp remains a top recommendation for its simplicity in solely checking CPU temps, exploring these other options can be beneficial depending on your monitoring needs and preferences.
Checking CPU Temp on Different Windows Versions
The software tools mentioned above are generally compatible with various versions of Windows, including Windows 10 and Windows 11. The process for checking CPU temperature remains consistent across these operating systems: download and install your chosen monitoring software, and then run the application to view real-time temperature readings. Since Windows itself doesn’t offer native CPU temperature monitoring, these third-party tools are essential regardless of your Windows version.
What to Do if Your PC Temps Are Too High
If you’ve checked your PC temps and found them to be consistently high, especially under normal load or idle conditions, it’s time to take action to improve your CPU cooling. Here’s a step-by-step approach:
Initial Steps: Cleaning Your PC
Dust accumulation is the most common culprit behind elevated CPU temperatures. Dust acts as an insulator, trapping heat and hindering the effectiveness of your cooling fans and heatsinks. Regularly cleaning the dust from your PC’s interior is crucial for maintaining optimal cooling.
- Power Down and Unplug: Completely shut down your PC and unplug it from the power outlet before cleaning.
- Open the Case: Carefully open your PC case to access the internal components. Consult your case manual if you’re unsure how to open it.
- Use Compressed Air: Use a can of compressed air to blow out dust from fans, heatsinks, air vents, and other components. Short bursts of air are more effective than long continuous sprays. Work in a well-ventilated area or outdoors, as you’ll be dispersing dust into the air.
- Focus on Fans and Heatsinks: Pay particular attention to cleaning the CPU cooler heatsink and fan, as well as case fans and GPU cooler fans. These are the key components responsible for airflow and heat dissipation.
- Check Fan Direction and Blockages: While cleaning, visually inspect your case fans to ensure they are oriented correctly for proper airflow (intake fans at the front and bottom, exhaust fans at the rear and top). Make sure no cables or other obstructions are blocking fan blades or airflow pathways.
- Consider a PC Cleaning Guide: For a more detailed walkthrough, refer to guides on how to clean your PC.
Close up of a person cleaning the inside of a dusty PC case with canned air.
Advanced Cooling: Thermal Paste and CPU Coolers
If cleaning doesn’t significantly reduce your CPU temperatures, or if you’re consistently running hot even after cleaning, more advanced cooling solutions may be necessary:
-
Reapply Thermal Paste: Thermal paste is a critical interface material that fills microscopic gaps between the CPU and the cooler, ensuring efficient heat transfer. Over time, thermal paste can dry out and lose its effectiveness, leading to increased temperatures.
- Purchase Thermal Paste: Obtain a high-quality thermal paste from reputable brands like Arctic, Noctua, or Arctic Silver.
- Remove Old Paste: Carefully remove your CPU cooler. Clean off the old thermal paste from both the CPU and the cooler base using isopropyl alcohol (rubbing alcohol) and a lint-free cloth or coffee filter.
- Apply New Paste: Apply a small, pea-sized amount of new thermal paste to the center of the CPU. Follow the instructions that come with your thermal paste for the recommended application method.
- Reinstall Cooler: Reinstall your CPU cooler, ensuring it is securely mounted and making good contact with the CPU.
-
Upgrade Your CPU Cooler: If your stock CPU cooler or an entry-level aftermarket cooler is insufficient for your CPU’s heat output, especially if you’re overclocking or using a high-performance processor, upgrading to a more robust CPU cooler is a worthwhile investment.
-
Air Coolers: Larger air coolers with bigger heatsinks and fans offer significantly improved cooling compared to stock coolers. The Noctua NH-D15 is considered one of the best air coolers available, while the Cooler Master Hyper H412 is a more budget-friendly but still effective option. Ensure the air cooler you choose is compatible with your CPU socket and PC case size.
-
Liquid Coolers (CLCs): Closed-loop liquid coolers (also known as AIO coolers) offer even greater cooling performance than air coolers. They use a radiator to dissipate heat away from the CPU. Liquid coolers are particularly effective for high-TDP CPUs and overclocked systems. Consider a 240mm or 360mm radiator size for high-end CPUs or overclocking.
-
Applying thermal paste to a CPU before installing a cooler.
One of our favorite CPU air coolers
Noctua NH-D15 CPU cooler
Keeping your PC’s CPU temperature in check is essential for optimal performance, system stability, and the longevity of your valuable components. By utilizing readily available software tools and implementing basic cooling maintenance, you can ensure your PC runs smoothly and efficiently, even during demanding tasks and hot weather. Don’t let overheating slow you down – take control of your PC temps today!