Have you ever dreamt of effortlessly cooking chicken breasts in the oven, only to be met with dry, rubbery, and bland results? You’re not alone. Chicken breast, while a lean and versatile protein, can be notoriously tricky to bake perfectly. But fear not! Achieving juicy, tender, and flavorful oven-baked chicken breast is absolutely within your reach. This guide will walk you through a simple yet foolproof 5-step method that will transform your chicken game forever. Say goodbye to dry chicken and hello to consistently delicious, oven-baked chicken breasts that will become a staple in your kitchen.
The Secret to Juicy Baked Chicken Breast: B.B.R.R.R. Method
The key to unlocking perfectly baked chicken breast lies in five simple steps, easily remembered with the acronym B.B.R.R.R.: Brine, Brush, Rub, Roast, and Rest. Let’s dive into each step to ensure your chicken breasts are cooked to juicy perfection every time.
1. Brine Your Chicken: The Foundation of Moisture
Brining is the unsung hero of juicy chicken. This simple step involves soaking your chicken breasts in a saltwater solution, which does wonders for both moisture and flavor. Scientifically, brining works by allowing the chicken to absorb extra liquid, which it retains during cooking, preventing it from drying out. It also seasons the chicken from the inside out.
To brine your chicken breasts:
- Prepare the brine: In a large bowl, combine 2 cups of lukewarm water with 1/4 cup of kosher salt. Stir until the salt is mostly dissolved.
- Cool the brine: Add 2 cups of cold water or a handful of ice cubes to quickly lower the water temperature. The brine should be cool to the touch before adding the chicken.
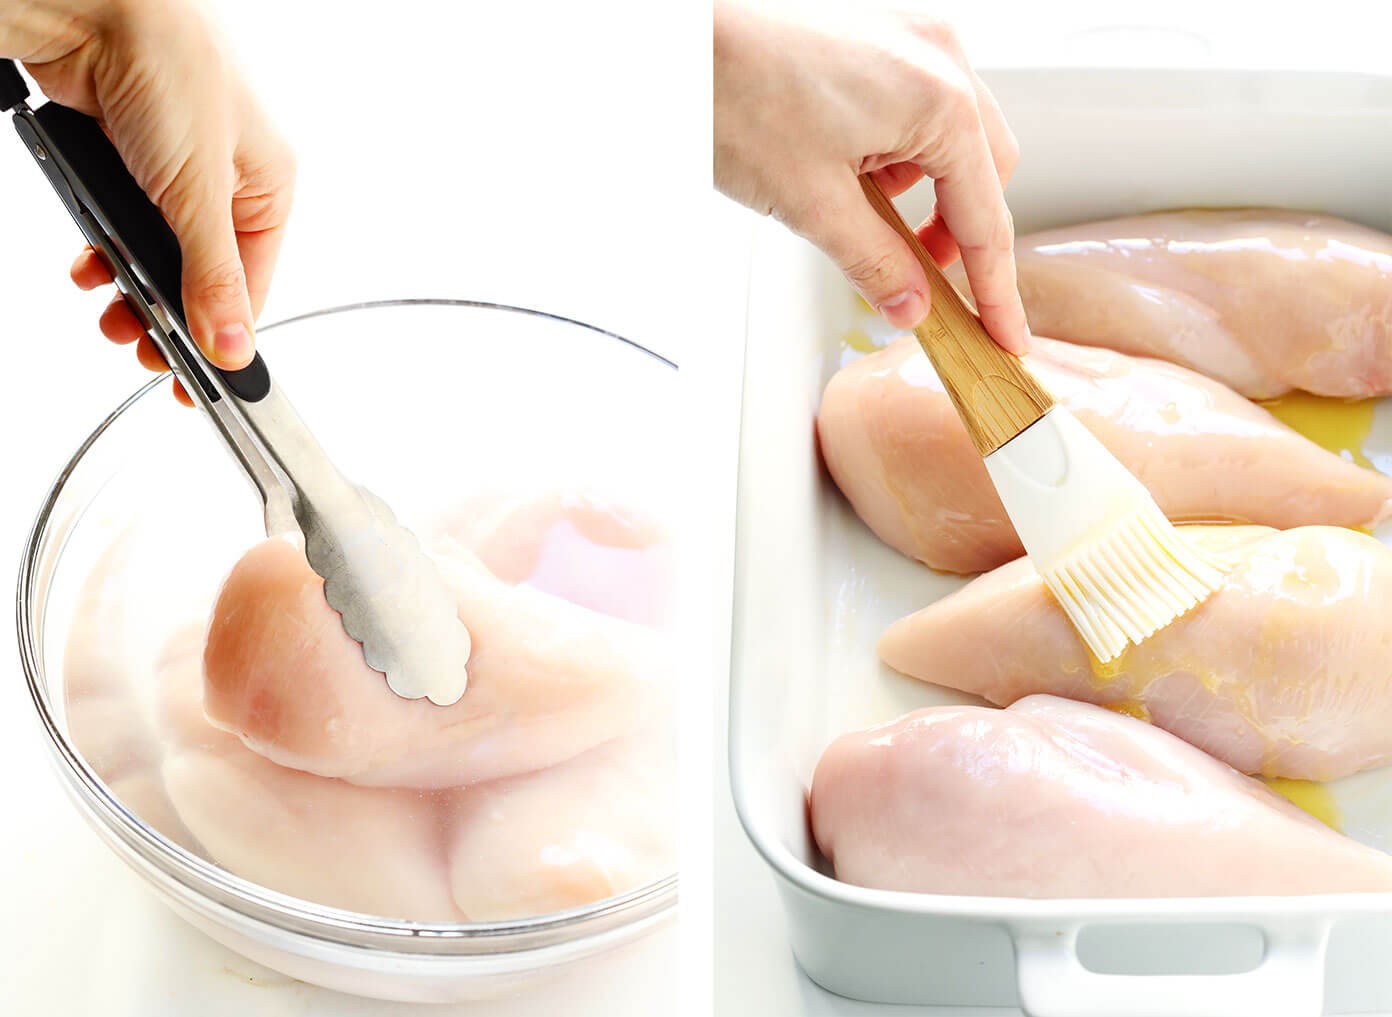
- Submerge the chicken: Place the chicken breasts in the saltwater mixture, ensuring they are fully submerged.
- Brine for 15-60 minutes: Let the chicken brine for at least 15 minutes, or up to 1 hour for maximum benefit. If brining for longer than 15 minutes, you can cover the bowl and refrigerate it.
After brining, remove the chicken breasts from the solution. Rinse them thoroughly under cold water to wash away excess salt, and pat them completely dry with paper towels. This step is crucial for browning during roasting.
Note: Always check the packaging of your chicken breasts. Some brands are pre-brined in a sodium solution. If your chicken is already pre-brined, skip this step to avoid overly salty chicken.
2. Brush with Butter (or Oil): Flavor and Crust Builder
Next, we brush the chicken breasts with melted butter or olive oil. This step serves two important purposes. First, it adds flavor. Butter, in particular, imparts a rich, savory note that complements chicken beautifully. Olive oil offers a healthier alternative and also adds a subtle flavor. Second, brushing with fat helps to create a beautiful golden-brown crust as the chicken roasts, enhancing both the texture and visual appeal of your dish. It also prevents the chicken from sticking to the baking dish.
Melt approximately 1 tablespoon of butter or measure out 1 tablespoon of olive oil. Using a pastry brush, liberally brush the melted butter or olive oil over both sides of each chicken breast, ensuring even coverage.
3. Rub with Seasonings: Customize Your Flavor Profile
Now it’s time to season your chicken breasts. While simple salt and pepper are sufficient, a well-balanced seasoning blend can elevate your baked chicken to another level. Chicken breast is a blank canvas, ready to absorb and showcase your favorite flavors.
For a versatile, all-purpose seasoning, try this simple blend:
- 1 teaspoon kosher salt
- 1/2 teaspoon freshly ground black pepper
- 1/2 teaspoon garlic powder
- 1/2 teaspoon smoked paprika
In a small bowl, whisk together the seasonings. Then, generously sprinkle the seasoning mixture over both sides of the buttered or oiled chicken breasts. Rub the seasonings into the chicken to ensure even distribution and maximum flavor penetration.
Feel free to experiment with different seasoning blends to match your meal. Consider these variations:
- Italian Herb: Dried oregano, basil, rosemary, thyme, garlic powder, onion powder.
- Lemon Herb: Lemon zest, dried thyme, parsley, garlic powder, salt, pepper.
- Spicy Southwestern: Chili powder, cumin, coriander, smoked paprika, cayenne pepper, garlic powder, onion powder.
4. Roast at High Heat: Quick Cooking for Tenderness
The roasting step is where the magic happens. For juicy chicken breasts, high-heat roasting is the preferred method. Cooking chicken at a high temperature (450°F) for a shorter period helps to quickly sear the outside, creating a flavorful crust and sealing in the juices, resulting in a tender interior.
Preheat your oven to 450°F (232°C). Place the seasoned chicken breasts in a single layer in a large baking dish. Avoid overcrowding the pan, as this can steam the chicken instead of roasting it. If necessary, use two baking dishes to ensure the chicken breasts are spaced apart.
Roast the chicken in the preheated oven for 15-18 minutes, depending on the thickness of the breasts. Thicker breasts will require slightly longer cooking times. The best way to determine doneness is to use a meat thermometer. Insert the thermometer into the thickest part of a chicken breast; it should register 165°F (74°C) when fully cooked, as recommended by the FDA for safe consumption.
Tip: If you desire a slightly browned and crispier top, you can broil the chicken for the last 2-3 minutes of cooking. Keep a very close eye on the chicken while broiling to prevent burning.
5. Rest Before Serving: Lock in the Juices
Resting is the final, often overlooked, but absolutely essential step for achieving ultimate juiciness. When chicken (or any meat) cooks, the juices redistribute towards the center. If you slice into it immediately after cooking, these juices will run out, resulting in drier meat. Resting allows the juices to redistribute evenly throughout the chicken breast, resulting in maximum tenderness and moisture in every bite.
Once the chicken reaches an internal temperature of 165°F, remove the baking dish from the oven. Transfer the chicken breasts to a clean plate and loosely tent them with aluminum foil. Let the chicken rest for 5-10 minutes before slicing or serving. This resting period makes a significant difference in the final juiciness of your baked chicken.
Tips for Perfect Oven Baked Chicken Breast
- Use a Meat Thermometer: Investing in an instant-read meat thermometer is the most foolproof way to ensure your chicken is cooked to the perfect temperature without overcooking.
- Pound Chicken Breasts for Even Thickness: Chicken breasts are often uneven in thickness, leading to some parts drying out before others are cooked through. Pounding thicker parts to an even thickness ensures consistent cooking. Place chicken between plastic wrap or parchment paper and gently pound with a rolling pin or meat mallet.
- Don’t Overcrowd the Pan: Overcrowding the baking dish will cause the chicken to steam instead of roast, hindering browning and potentially resulting in unevenly cooked chicken.
- Experiment with Seasonings: Don’t be afraid to get creative with your seasoning blends to explore different flavor profiles and complement various cuisines.
Serving Suggestions for Baked Chicken Breast
Baked chicken breasts are incredibly versatile and can be served in countless ways. Enjoy them as a main course with your favorite side dishes, slice or dice them for salads, sandwiches, wraps, or pasta dishes, or shred them for tacos, quesadillas, and soups.
Side Dish Ideas:
- Roasted vegetables (broccoli, asparagus, carrots, Brussels sprouts)
- Quinoa or rice pilaf
- Mashed potatoes or sweet potatoes
- Salad with vinaigrette dressing
- Steamed green beans or peas
Storing Leftover Baked Chicken Breast
Store leftover baked chicken breasts in an airtight container in the refrigerator for up to 3 days. For longer storage, you can freeze cooked chicken for up to 3 months. It’s recommended to slice, dice, or shred the chicken before freezing for easier use in future recipes.
With this simple 5-step method and helpful tips, you’re now equipped to bake juicy, tender, and flavorful chicken breasts in the oven every single time. Say goodbye to dry chicken and hello to perfectly cooked protein that will elevate your meals. Enjoy creating delicious and healthy dishes with your newfound chicken-baking expertise!