Few acrobatic skills capture the imagination quite like the backflip. While front flips, handsprings, and aerials are impressive, there’s something uniquely captivating about the backflip. Growing up, watching superheroes and ninjas effortlessly perform backflips in movies and TV shows sparked a dream. It seemed like the ultimate display of cool, a move I wished I could execute anywhere, anytime. For a long time, it felt like just a fantasy. I wasn’t naturally athletic, and gymnastics seemed like a world away.
Years later, after getting into bodyweight training and building strength, that old dream resurfaced. To take my training further, I joined an adult gymnastics class. Initially, surrounded by experienced gymnasts, I felt out of my depth, but I was determined to learn. Starting with basics like rolls and cartwheels, the classes gradually progressed to more challenging skills.
The backflip became my focus. It was a daunting challenge. I was even hesitant to go backwards on a trampoline, afraid of injury. Learning the backflip required breaking it down, step by step. But after dedicated practice over several months, it clicked. Suddenly, I was performing backflips in class and even outside. A long-held dream had become reality.
Practicing backflips outdoors, I often encountered amazed reactions from both kids and adults, expressing their wish to learn the move. This guide is designed to share the process of learning a backflip, outlining the necessary steps and techniques to work your way up to this impressive skill.
Warning: Attempting backflips without proper guidance and safety measures is dangerous and can lead to serious injury, even death. Do not try to learn backflips on your own. It is essential to train in a safe environment with proper equipment and under the direct supervision of a qualified professional. Enrolling in a certified gymnastics class is highly recommended if you are serious about learning backflips safely and effectively.
The Three Key Phases of a Backflip
The backflip, also known as a back tuck, is broken down into three distinct phases: the takeoff, the tuck, and the landing. Mastering each phase in sequence is crucial for a successful and safe backflip.
Phase 1: The Takeoff – Launching Your Flip
The takeoff is more than just jumping high; it’s about achieving the correct trajectory. You don’t need exceptional jumping ability to execute a backflip. Proper technique in the takeoff phase is more important than vertical height.
The ideal takeoff angle is slightly backward from straight up. Launching too far forward will lead to a gainer, a more complex move. If you launch too far backward, you’ll limit your jump height and won’t have sufficient space to complete the rotation.
Crucially, keep your arms extended above your head throughout the takeoff. This positioning serves as a safety measure, allowing your arms to protect you if the flip goes wrong. Some people might instinctively bring their arms in as they approach the completion of the flip, but maintaining them overhead initially is safer for beginners.
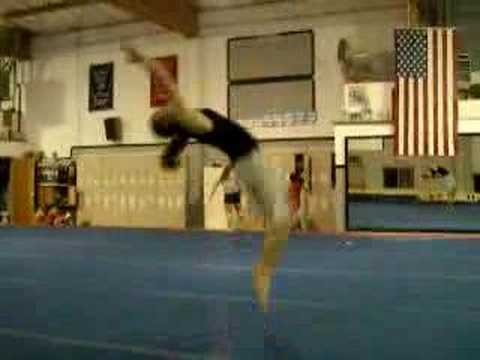
Phase 2: The Tuck – Initiating Rotation
Once you’ve jumped with the correct angle and reached full extension, the next phase is the tuck. This is where you initiate the rotational force needed to complete the backflip. The tuck involves bringing your legs in towards your chest, facilitating the rotation over your head.
The key to a strong tuck is to engage your core muscles and pull your legs in quickly and powerfully. Focus on using your abdominal muscles to drive the rotation. Avoid consciously leaning back too early in the jump, as this can compromise your takeoff angle. Instead, concentrate on the upward jump and then powerfully pull your legs in to initiate the flip.
Phase 3: The Landing – Sticking the Backflip
The final phase is landing. As you complete your rotation, you’ll be descending towards the ground, now facing upright. At the right moment, you need to stop your rotation and open your body back up to prepare for landing. Aim to land on your feet, ideally returning to a standing position upon landing.
If your backflip isn’t perfectly executed, you might land in a crouched position or even with your hands touching the ground in a frog-like stance. With practice and refinement of your technique, you’ll consistently achieve cleaner landings, closer to a standing position.
Filming your practice sessions is highly beneficial. Video feedback allows you to analyze your jump angle, tuck, and overall form, identifying areas for improvement. If video recording isn’t possible, verbal cues from a spotter, such as “Jump higher” or “Tuck tighter,” can provide valuable real-time adjustments.
Watch and Learn: Backflip Video Tutorials
Visual aids are invaluable when learning complex movements like backflips. Watching backflip tutorials and demonstrations can significantly enhance your understanding of the technique and timing.
Observing different backflip attempts, even those that aren’t perfect, can be instructive. It highlights that even with slight imperfections in takeoff, tuck, or landing, a backflip can still be completed. While striving for perfect form is the goal, understanding that “good enough” is achievable in the learning phase can be encouraging.
Exploring advanced backflip variations can also be motivating once you’ve mastered the basics. These variations include performing backflips onto elevated surfaces, launching off objects, adding weights for resistance, or even linking multiple backflips together. Backflip layouts, performed with a straighter body position, are another advanced progression, typically requiring more height and momentum.
The Crucial Role of Spotting: Ensuring Your Safety
Spotting is essential for learning backflips, especially when you are first attempting head-over-heels rotations. Having an experienced spotter is crucial for safety and building confidence.
Here’s a step-by-step guide to spotting a backflip:
Step 1: Position yourself to the side of the person attempting the backflip.
Step 2: Place one hand in the center of their lower back, you can even grip their shirt for better control. Place your other hand behind their thighs, just above the back of their knees.
Step 3: As they jump, use your hand on their back to provide support and lift, while the hand on their legs assists in guiding their rotation over.
Step 4: Maintain contact with them until they are completely inverted and rotating independently. Only release your support once they are safely completing the flip.
Step-by-Step Training Plan to Master the Backflip
Reading instructions and watching videos is a starting point, but practical, progressive training is key to mastering the backflip. Here’s a step-by-step training plan, starting from the basics, designed to guide you towards successfully performing a backflip:
- Jump and Fall Back into Raised Padding: This initial step helps you get comfortable with the sensation of going backwards. Practicing falling backward into soft, raised padding reduces fear and builds spatial awareness for backward movements.
- Trampoline Backflip with Spot: The trampoline provides extra bounce, making rotation easier. Start practicing backflips on a trampoline with a spotter. The spotter provides physical assistance and safety assurance as you get used to the rotation.
- Trampoline Backflip Solo: Once comfortable with a spotter, progress to performing backflips on the trampoline independently. This step builds confidence and refines your technique in a forgiving environment.
- Raised Height Backflip into Pad (with Spot): Introduce a slight elevation (start with around 3 feet) and flip into a padded landing area, still with a spotter. This simulates the height and landing impact of a floor backflip but with added safety.
- Raised Height Backflip into Pad (Solo): Practice backflips from a raised height into padding without a spotter. This step enhances your self-reliance and control in the air.
- Reduce Height Gradually: Gradually decrease the height of the platform you are flipping from until you are performing backflips from ground level into the padding. This prepares you for the final transition to a non-padded surface.
- Floor Backflip with Spot (No Padding): Attempt your first backflips on the floor (or firm surface) with a spotter present. The spotter provides crucial safety and guidance during this significant transition.
- Floor Backflip Solo: Once you consistently and confidently perform backflips with a spotter on the floor, practice performing them independently. This is the culmination of your progressive training.
- Take it Outside (Sand or Grass Recommended): Take your backflips outdoors, starting in a soft landing area like sand or grass. Consider using a spotter initially in a new environment.
With consistent effort and dedication to this step-by-step training plan, mastering the backflip is within reach. Remember to prioritize safety, seek professional guidance, and enjoy the journey of learning this impressive skill. For more in-depth details and advanced techniques, consider exploring specialized resources like detailed guides and coaching materials on backflips.