Maintaining your water heater is crucial for its longevity and efficiency, yet it’s often a neglected aspect of home maintenance. While water heater manuals are full of advice on upkeep, many homeowners simply don’t perform any maintenance at all. One of the simplest and most effective maintenance tasks you can undertake is draining your water heater. This guide will walk you through the process of How To Drain A Water Heater, explaining why it’s important and how to do it correctly to maximize the lifespan of your appliance.
Why Drain Your Water Heater?
The primary reason to drain your water heater is to prevent sediment buildup. Over time, minerals and debris in your water supply settle at the bottom of your water heater tank, forming sediment. This sediment acts as an insulator, which can significantly reduce the efficiency of your water heater.
Here’s how sediment buildup affects your water heater:
- Reduced Efficiency: Sediment insulates the heating element from the water, forcing your water heater to work harder and longer to heat the water. This leads to increased energy consumption and higher utility bills.
- Overheating and Damage: The thermostat, designed to regulate water temperature, can become surrounded by sediment. This insulation can cause the thermostat to misread the actual water temperature, leading to overheating and potential damage to the heating element or the tank itself.
- Noisy Operation: Sediment can cause rumbling or popping noises as the water heater operates. These sounds are a clear indication that sediment is present and needs to be addressed.
- Shorter Lifespan: The strain caused by sediment buildup can significantly shorten the lifespan of your water heater, leading to premature failure and costly replacements.
Manufacturers recommend regular draining as a preventative measure against these issues. While the frequency may vary, understanding how to drain your water heater is a fundamental part of home maintenance.
When to Drain Your Water Heater
The ideal frequency for draining your water heater depends on several factors, including the hardness of your water and manufacturer recommendations. However, here are some general guidelines and signs that indicate it’s time to drain your water heater:
- Preventative Maintenance: For optimal performance, a partial drain, removing a few quarts of water, is recommended monthly by some manufacturers. A more thorough drain, removing several gallons, should be performed at least annually.
- Noisy Water Heater: If you hear rumbling, popping, or banging sounds coming from your water heater tank, this is a strong indicator of sediment buildup and a sign you need to drain it.
- Cloudy or Discolored Hot Water: Sediment can sometimes be stirred up and cause your hot water to appear cloudy or discolored, especially when you first turn on a hot water faucet.
- Slow Heating or Insufficient Hot Water: If you notice that your water is taking longer to heat up or you’re running out of hot water sooner than usual, sediment buildup could be the culprit.
Regular draining, even if it’s just a partial drain monthly and a more thorough drain annually, can significantly contribute to the health and efficiency of your water heater.
Tools and Materials You’ll Need
Before you begin the process of draining your water heater, gather the necessary tools and materials. This simple task requires minimal equipment:
- Garden Hose: You’ll need a garden hose that can be connected to the drain valve at the bottom of your water heater. The length will depend on where you plan to drain the water (e.g., a utility sink, outside).
- Bucket (Optional): A bucket can be useful for catching a small amount of water during a partial drain or for testing the water for sediment.
- Hose Cap (Optional): As mentioned in the original article, a garden hose cap can be handy if your drain valve happens to leak slightly after draining. This is a simple and effective fix.
With these basic tools, you’re ready to proceed with draining your water heater.
Step-by-Step Guide: How to Drain Your Water Heater
Draining your water heater is a straightforward process. Follow these steps carefully to ensure safety and effectiveness:
1. Safety First: Turn Off Power and Water Supply
For Electric Water Heaters: Locate the circuit breaker for your water heater in your electrical panel and switch it to the “off” position. This will prevent electrical shock and damage to the heating elements.
For Gas Water Heaters: Turn the gas control valve on the water heater to the “pilot” or “off” setting. This will shut off the gas supply to the burner.
Turn Off Water Supply: Locate the cold water inlet valve on top of your water heater and turn it clockwise to shut off the water supply to the tank.
2. Connect the Hose
Locate the drain valve at the bottom of your water heater tank. It usually looks like a small spigot or valve, often with a handle. Screw one end of your garden hose securely onto the drain valve. Place the other end of the hose in a safe drainage location, such as a utility sink, floor drain, or outside in your yard, ensuring it flows downhill.
3. Open a Hot Water Faucet
Before opening the drain valve, open a hot water faucet somewhere in your house, preferably on the highest floor. This will help to relieve pressure within the tank and allow the water to drain more easily. Let the hot water run until it stops or slows to a trickle.
4. Open the Drain Valve
Now, carefully open the drain valve on your water heater. This is usually done by turning a small handle or lever on the valve. Water should begin to flow out through the garden hose. Control the flow by adjusting the drain valve.
5. Drain the Water
Allow the water to drain from the water heater. The initial water may be hot, so exercise caution. Let the water run until it appears clear, or until you’ve drained the desired amount. For a partial drain (monthly maintenance), a few quarts to a gallon is sufficient. For a more thorough annual drain, you may want to drain several gallons or even most of the tank, depending on sediment buildup.
Observe the drained water. If it’s cloudy or contains sediment, it confirms the need for draining. You might consider draining more water until it runs clearer.
6. Close the Drain Valve
Once you’ve drained the desired amount of water and the water runs clear, or you’ve completed your partial drain, close the drain valve securely by turning the handle or lever back to its original position. Ensure it’s tightly closed to prevent leaks.
7. Remove the Hose
Carefully disconnect the garden hose from the drain valve. Have a bucket or rag ready to catch any drips.
8. Turn Water Supply Back On
Go back to the cold water inlet valve on top of your water heater and slowly turn it counterclockwise to turn the water supply back on. Let the tank refill completely. You’ll know it’s full when water starts flowing steadily from the hot water faucet you opened earlier. Close the hot water faucet once the water is running clear and without air sputtering.
9. Turn Power Back On
For Electric Water Heaters: Return to your electrical panel and switch the circuit breaker for your water heater back to the “on” position.
For Gas Water Heaters: If your gas water heater has a pilot setting, relight the pilot light according to the manufacturer’s instructions, then turn the gas control valve back to the “on” position or desired temperature setting. Some newer gas water heaters have electronic ignition and may simply require turning the gas control valve back to “on.”
10. Check for Leaks
After restoring water and power/gas, carefully inspect the drain valve and the area around the water heater for any leaks. If the drain valve drips slightly, you can use a garden hose cap, as suggested in the original article, to create a tight seal.
By following these steps, you can effectively drain your water heater and contribute to its efficient and long-lasting operation.
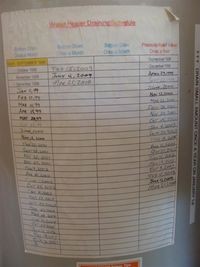
Alt text: Water heater maintenance chart showing monthly drain flush and annual pressure relief valve and anode rod checks.
Tips for Effective Water Heater Draining
To maximize the effectiveness and safety of draining your water heater, consider these additional tips:
- Water Temperature: Be mindful that the water in the tank can be very hot, even after turning off the power. Exercise caution when draining and avoid direct contact with hot water.
- Stubborn Valves: If your drain valve is stiff or difficult to turn, avoid forcing it. You can try using penetrating oil or gently tapping it with a hammer. If it’s excessively difficult, consider consulting a plumber to avoid damaging the valve.
- Full vs. Partial Drain: For monthly maintenance, a partial drain is often sufficient. For annual maintenance or when addressing significant sediment buildup, a more thorough drain is recommended. Completely draining the tank might stir up more sediment initially but can be beneficial for removing a larger volume of buildup.
- Regularity is Key: The more consistently you drain your water heater, the less sediment will accumulate, making each draining process easier and more effective over time.
Conclusion
Draining your water heater is a simple yet vital maintenance task that can significantly extend the life and improve the efficiency of your appliance. By understanding how to drain a water heater and incorporating this routine maintenance into your home care schedule, you can prevent sediment buildup, reduce energy costs, and ensure a reliable supply of hot water for years to come. Regular water heater maintenance is a small investment of time that pays off in long-term savings and peace of mind.
Alt text: Close-up of a water heater pressure relief valve, a component requiring annual maintenance.