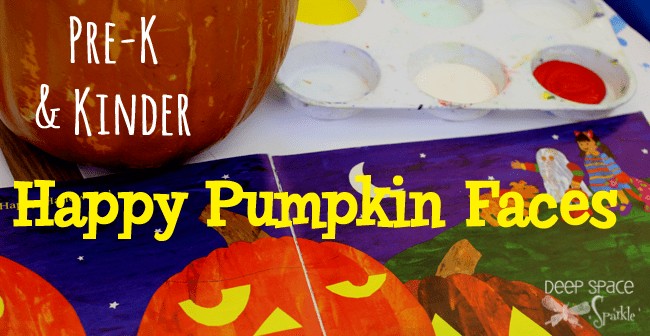
Pumpkins are a classic symbol of autumn and Halloween, and what better way to celebrate the season than by learning how to draw one? This easy pumpkin drawing tutorial is perfect for kids of all ages, from preschoolers to older children. It’s a fantastic art project that combines drawing, painting, and even scissor skills practice. Let’s get started and create some happy pumpkins!
This art project is not just about drawing a pumpkin; it’s an opportunity to explore color mixing, observational drawing, and painting techniques, all while encouraging creative expression. We’ll break down the process into simple steps, making it easy and enjoyable for young artists.
Materials You’ll Need:
Before we begin, gather these supplies:
- Paper
- Oil pastels or crayons
- Yellow, red, and white paint (tempera or acrylic)
- Paintbrushes
- Water container
- Scissors
- Black and white paper for facial features
- Glue (liquid school glue watered down works best for young children)
Step-by-Step Guide: Drawing a Segmented Pumpkin
Instead of drawing a simple circle, we’ll create a more realistic and interesting pumpkin by using a segmented approach. This technique helps children understand the form of a pumpkin and adds depth to their drawings.
Step 1: Start with Dots and Curved Lines
- Two Dots: Begin by placing two dots on your paper, one near the top and one near the bottom. These dots will guide the height of your pumpkin.
- Curved Lines: Using an oil pastel or crayon, connect the top dot to the bottom dot with a curved line. Imagine you’re drawing a slightly rounded side of a hill. Repeat this on the other side of the imaginary line between the dots, mirroring the first curve. Make sure to curve outwards to create the pumpkin’s round shape.
Step 2: Add More Segments
- Continue Curving: Place your pastel back on the top dot and draw another curved line down to the bottom dot, right next to the first curve you made. Do this on both sides again, adding more segments to your pumpkin.
- Make it Big: Keep adding these curved segments until your pumpkin is as wide and round as you want it to be. The more segments you add, the bigger your pumpkin will look. Don’t worry about making it perfect; pumpkins come in all shapes and sizes!
Painting Your Pumpkin
Now that the drawing is complete, it’s time to bring your pumpkin to life with paint! We’ll use a simple color mixing technique to create realistic pumpkin shades.
Color Mixing with Yellow, Red, and White
- Palette Setup: Provide each child with a palette (a paper plate or plastic tray works well) of yellow, red, and white paint.
- Yellow Base: Start with yellow paint. Have the children take a paintbrush, dip it in water (and wipe off excess water) and then into the yellow paint. Paint one segment of their pumpkin entirely with yellow.
- Add Red for Warmth: Without cleaning the brush, dip the tip into a tiny amount of red paint. Paint over the yellow section. Ask the children to observe what happens when red and yellow mix. They’ll see a warmer, orange-yellow color appear, closer to a pumpkin shade.
- Lighten with White: For another segment, clean the brush in water, then dip it into yellow paint again, painting a new segment. Next, dip a clean brush into white paint and paint over the yellow. This will create a lighter yellow, demonstrating how white lightens colors.
- Experiment and Blend: Encourage experimentation! Children can add more red if a segment is too yellow or more white if it’s too orange. They can blend the colors directly on the paper to create variations in shade and tone, making their pumpkins look more realistic and interesting.
Cutting Out the Pumpkin (and Scissor Skills Tips)
Once the paint is dry, it’s time to cut out the pumpkin. This is a great opportunity to practice scissor skills, especially for younger children who are still learning.
A photograph illustrating a child learning to use scissors, highlighting the correct grip and hand position for effective cutting.
Cutting can be challenging for little hands, but with the right guidance and some patience, it can be a rewarding part of the art project.
Tips for Teaching Scissor Skills:
- Right Scissors: Use scissors designed for small hands, ensuring they have enough space for fingers to grip comfortably.
- Thumbs Up: Teach children to always hold scissors with their thumbs pointing upwards.
- Stable Elbow: Instruct them to keep their cutting arm elbow tucked firmly into their waist and to avoid moving the elbow while cutting. Practice just opening and closing scissors without moving the elbow.
- Paper Rotation: Show them how to use their non-cutting hand to rotate the paper while keeping the cutting hand stable. This makes it easier to cut along curved lines.
- Practice First: Before cutting the pumpkin, let them practice cutting strips or “ropes” of Play-Doh or scrap paper to get comfortable with the scissor motion.
Adding a Happy Face
The final touch is to give your pumpkin a personality by adding a happy face!
- Eyes: On white paper, draw eyes with a black oil pastel. Encourage oval shapes for a friendly look, as triangles can sometimes look more spooky (unless you’re going for a Halloween theme!). Cut out the eyes. Then, cut out small black paper dots and glue them onto the white eyes. Let the children experiment with placing the black dots in different positions to see how it changes the pumpkin’s expression.
- Mouth: Cut out a mouth shape from black paper. Any shape works – a smile, a wide grin, or even a surprised mouth!
- Teeth (Optional): For extra detail, cut out small white paper teeth and glue them to the inside of the mouth.
- Glue it All Together: Use watered-down school glue and a paintbrush to apply glue to the back of the facial features and stick them onto the pumpkin. This glue method is much easier for young children to manage than glue sticks or undiluted glue, minimizing mess and excess glue.
The children will be so proud of their unique and happy pumpkins! This project is adaptable for various age groups and skill levels. It’s a wonderful way to celebrate autumn, learn about art techniques, and have fun creating something special.
Have you tried a pumpkin art project with your little ones? We’d love to hear about your experiences!