Dive into the delightful world of botanical art and learn How To Draw Flowers, specifically charming geraniums! These blossoms are not only beautiful but also surprisingly easy to illustrate, making them perfect for adding a personal touch to greeting cards, mail art, or simply enjoying the creative process. You don’t need to be a seasoned artist or have fancy equipment to get started. This tutorial will guide you through creating a lovely flower illustration, even if you’re just beginning your artistic journey.
Supplies You’ll Need for Flower Drawing
Before we begin our flower drawing adventure, gather these essential supplies:
- Watercolor Paper: Opt for watercolor paper for best results. A sketchbook works wonderfully.
- Black Muji Pen (0.38mm): A reliable pen with quick-drying, pigmented ink is ideal.
- Small Flat Watercolor Brush (1/8″): For blending and adding washes.
- Size 0 Watercolor Brush: For finer details and controlled application.
- Gold Sumi Ink or Gold Watercolor: To add elegant highlights and a touch of shimmer.
The Muji pen is highly recommended for drawing flowers due to its consistent ink flow, rich pigment, and quick-drying nature, preventing smudging. Plus, it’s an affordable choice for artists of all levels.
Step 1: Sketching the Open Flower Bloom
Our focus is on illustrating a wild geranium, admired for its delicate, tissue paper-like petals. Unlike common geraniums, wild geraniums have a more open and less “bunched” appearance, typically featuring five petals with added depth. Let’s start by outlining the basic structure of the geranium bloom. Begin by drawing five petals, allowing some to overlap for a natural look. Feel free to add more petals – the example uses seven for a fuller bloom!
Embrace imperfections! Wiggly and uneven lines enhance the delicate and artistic quality of your flower drawing.
Next, add depth by thickening lines in areas where shadows would naturally fall, such as where petals overlap or curve under.
Define the flower’s center by drawing lines radiating outwards from the middle.
Fine lines extending from the center create a circular structure, adding detail to your flower drawing.
Enhance the center further by adding a scribble-style ring around the middle to deepen the shadows. On the petal edges, where they appear slightly uneven, draw delicate veins reaching towards the center.
These delicate lines give the petals a soft, tissue paper-like texture, essential for a realistic flower drawing. Add small circles to the center – these represent the anthers, the pollen-collecting parts of the flower.
Fill in the areas around the anthers with your black pen to create contrast. Stippling, or using small dots, is also effective for adding texture and shadow. For the final touch on the bloom, use stippling to add further contrast.
Focus stippling in naturally darker areas and where petals overlap to enhance the three-dimensional effect of your flower drawing.
Step 2: Drawing Geranium Flower Buds
Geraniums often bud in clusters, so we’ll illustrate three buds to complement our open bloom. Start by drawing the base of each bud.
Aim for shapes that resemble small dinosaur footprints to create the base of the flower buds. Next, draw in the actual flower buds atop these bases, mimicking the shapes shown below.
Refer to the image for shape inspiration when drawing your flower buds. Enhance the buds by adding shadows using thicker lines.
Again, use small lines and stippling to add soft depth and definition to the buds. Incorporate some smaller, accessory buds to create a more natural cluster.
Step 3: Illustrating the Flower Stems
For the stems, continue using imperfect lines to maintain the organic feel of your flower drawing. Remember, stems aren’t perfectly symmetrical! Draw the stem beneath the open bloom as shown.
Now, add stems to the cluster of three buds.
Geranium stems have a slightly fuzzy texture. Add small, hair-like strokes to the stems to reflect this characteristic.
Step 4: Drawing Geranium Leaves
Geranium leaves are known for their distinctive sawtooth edges and segmented appearance. They aren’t smooth and have a unique, textured look.
Notice how double lines are used for the veins to give the center of each leaf more dimension. To add depth to your flower illustration, include a background leaf. A folded leaf, resembling a taco shape, works perfectly. The bottom edge will be straight, like a stem, and the top will mimic the silhouette of other leaves.
Draw a second leaf layer inside the taco shape, similar to mountain range layers. This represents the folded-up portion of the leaf. Add diagonal, parallel lines to this folded section for shading and realism.
Note that the parallel lines don’t need to extend completely from edge to edge for a more natural look. Add paired lines to the leaves and stippling to achieve our desired contrast.
Step 5: Blending Out the Ink with Water
Now, it’s time to blend the ink using water and a watercolor brush! A small, flat brush offers better control for this step. Using a wet brush, gently pull the ink from areas with heavier lines or more contrast.
“Pulling color” simply means brushing over your ink lines with water, allowing the water to dilute and spread the ink, creating a soft, gray watercolor effect. Pull more color into softer, lighter areas to create shadows and fill in around the illustration.
Embrace the color bleed effect when pulling water outside the lines for a more artistic touch. Don’t worry about being heavy-handed; the water dries lighter than it appears initially! The Muji pen is excellent for flower drawing because, even with water blending, the initial lines and stippling remain defined. If using a different pen, you might need to redefine areas with more stippling after the water dries if the lines fade too much.
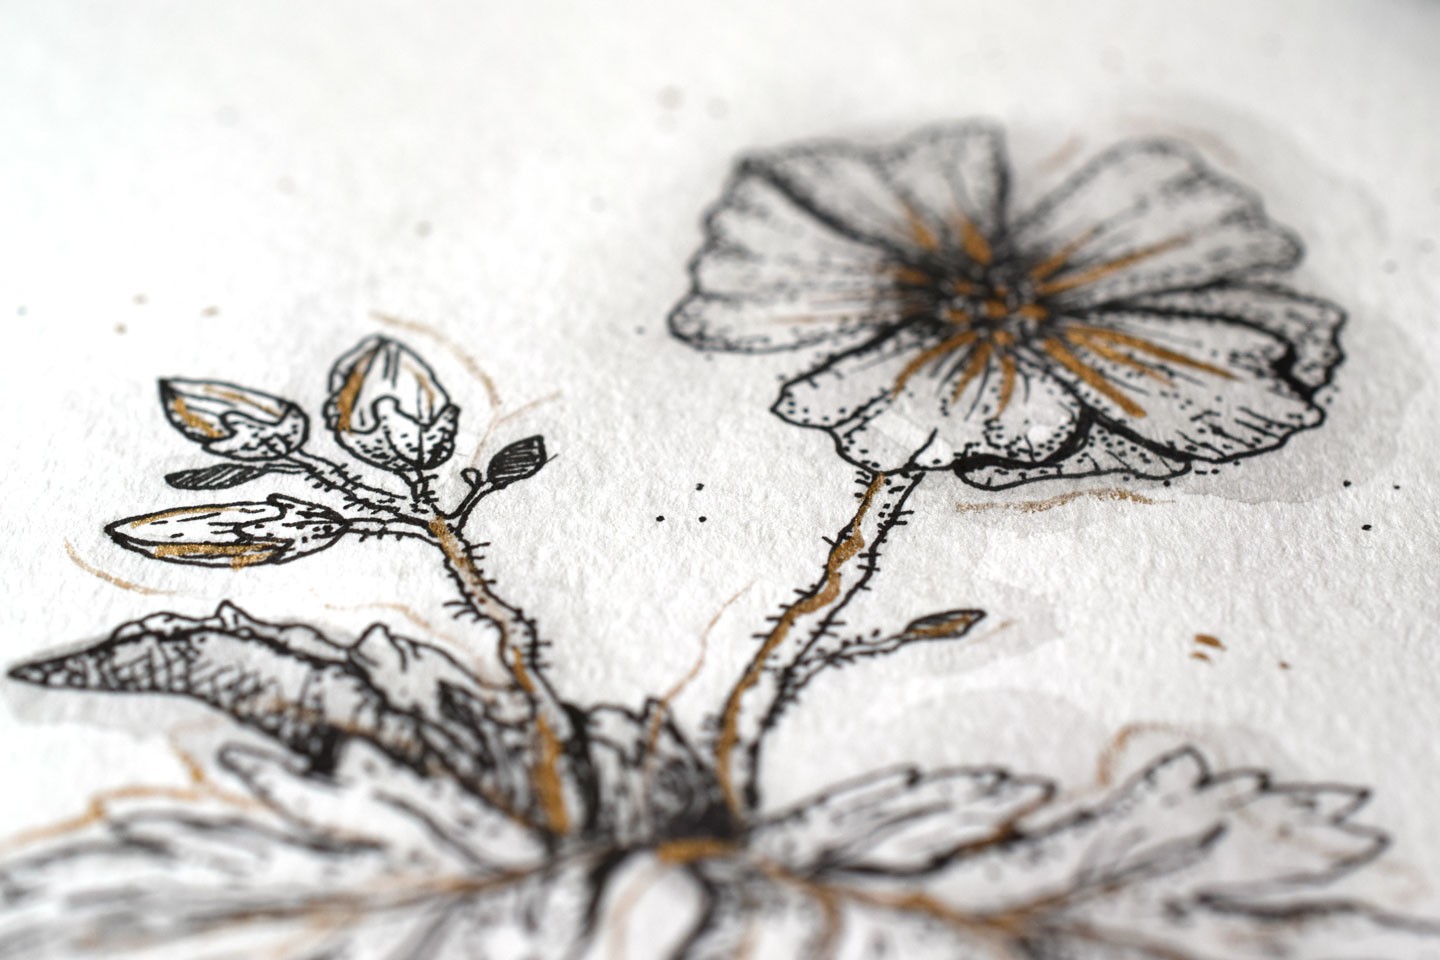
Step 6: Adding Gold Details for Elegance
This step is optional but highly recommended for adding an organic, elegant touch with gold sumi ink (or any gold watercolor or Finetec paints). Mix the gold paint with a little water to achieve a creamy consistency. Then, use your brush to apply gold dots, contours, lines, and shadows to your flower drawing.
Finally, add whimsical touches by using your black pen to draw small dots around the flower. This creates an airy, seed-like effect, completing your botanical illustration.
Congratulations! You’ve Learned How to Draw Flowers!
Behold, you’re an ar-tist! You’ve successfully drawn a beautiful geranium, ready to adorn envelopes, cards, or your wall. This flower drawing tutorial is wonderfully adaptable – feel free to adjust the number of buds and leaves to your liking. The beauty of botanical illustration lies in the vast natural variety, allowing for artistic freedom in your depictions.
Experiment and enjoy the process of learning how to draw flowers! We hope you enjoyed this tutorial and look forward to exploring more flower drawing techniques together soon, perhaps with poppies next!
XO,