For many individuals and businesses striving to build a strong online presence, Instagram verification is a significant achievement. That coveted blue checkmark beside your name isn’t just a symbol; it’s a powerful indicator of credibility and authenticity on the platform. In a digital world saturated with information, Instagram verification helps you stand out, build trust with your audience, and ultimately achieve your Instagram marketing objectives.
This comprehensive guide will walk you through the intricacies of How To Get Verified On Instagram. We’ll explore the step-by-step process of requesting verification through the Instagram app, delve into the Meta Verified subscription route, and provide actionable tips to enhance your chances of securing that blue badge.
Understanding Instagram Verification
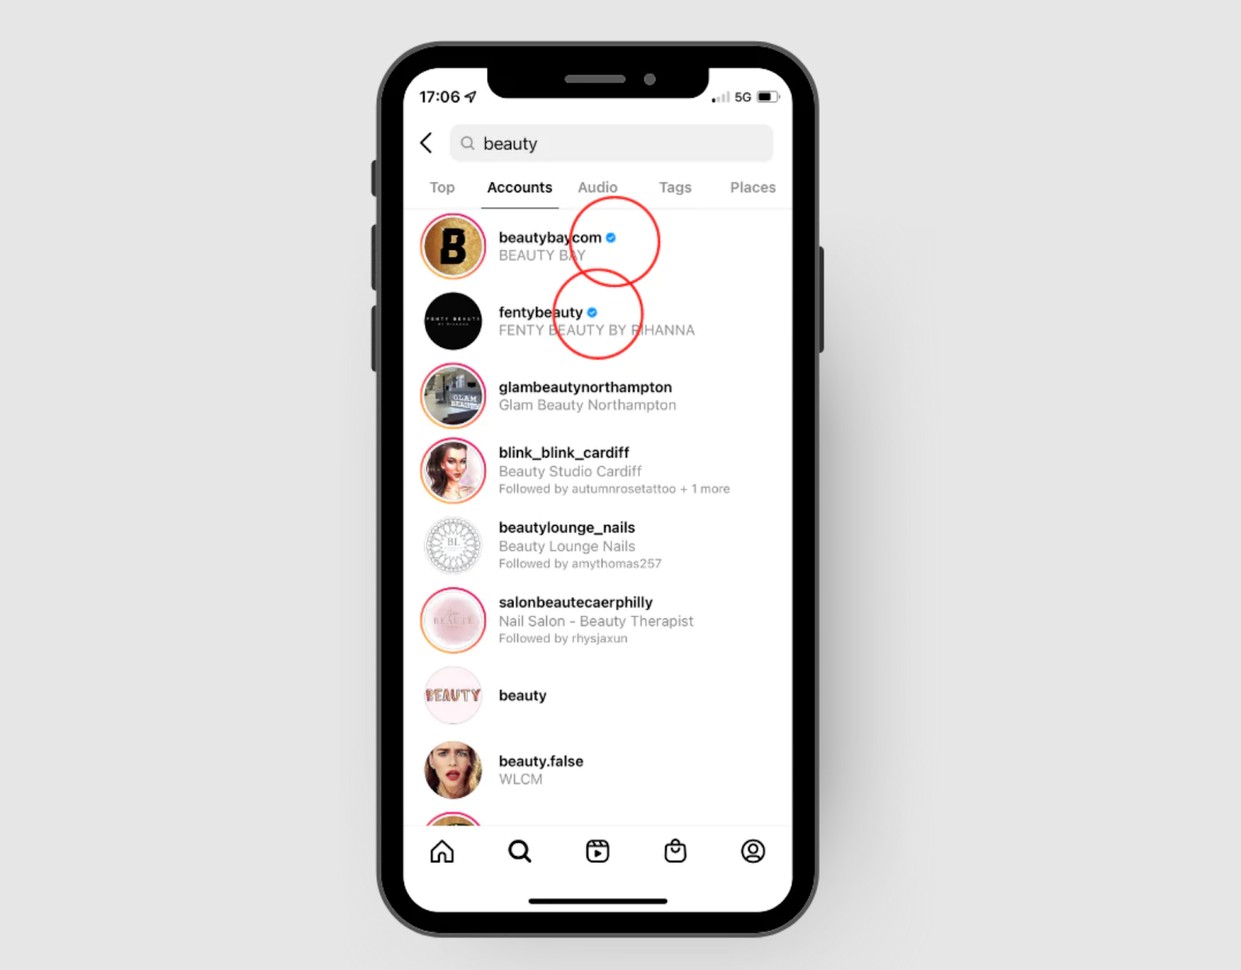
An Instagram verified badge, symbolized by a blue check mark, is displayed adjacent to your profile name. This badge serves as Instagram’s official confirmation that the account genuinely represents the public figure, celebrity, brand, or entity it claims to be. As Instagram itself states, verified badges are a crucial signal “that it is the authentic presence for that person or brand.”
The meaning of Instagram verification has evolved alongside the platform itself and other social media networks. Initially, verification was primarily reserved for accounts of notable figures and highly searched entities. While this aspect of notability remains relevant, the blue check now broadly signifies account authenticity, helping users distinguish genuine accounts from fan pages or impersonators.
Who is Eligible for Instagram Verification?
The good news is that Instagram verification isn’t exclusive to celebrities or mega-influencers. The application process is open to anyone. According to Instagram’s official guidelines, verification can be attained either by subscribing to Meta Verified, a paid service, or by applying through the standard in-app request with an account that meets specific criteria.
To be eligible for Instagram verification, your account must adhere to the following principles:
- Authenticity: Your account must represent a real person, registered business, or public figure. You will need to provide official documentation, such as a government-issued ID or business registration documents, to substantiate this.
- Uniqueness: Only one account per person or business can be verified, with exceptions for language-specific accounts. Instagram does not verify general interest accounts (like meme pages) or fan accounts.
- Completeness: Your Instagram profile must be public, possess a complete bio, feature a profile picture, and demonstrate activity at the time of application. “Active” is generally interpreted as consistent posting, sharing, and engagement with content.
- Notability: This is often the most challenging requirement. Notability signifies that your account represents a “well-known, highly searched for” individual or brand. Instagram assesses notability by reviewing if the account is featured in multiple news sources. It’s important to note that paid or promotional content is not considered valid for fulfilling this criterion. However, if you don’t meet the notability requirement through press coverage, Meta Verified offers an alternative path to verification through a paid subscription.
Furthermore, all applicants must comply with Instagram’s Community Guidelines and Terms of Use. Meeting these fundamental requirements makes you eligible to apply for verification, irrespective of follower count. You can technically apply for verification as soon as you set up your complete profile.
The Advantages of Instagram Verification
Why should you pursue Instagram verification? Here are compelling reasons to seek that blue check mark:
- Combating Impersonation: The primary purpose of verification is to protect genuine accounts from impersonators. The blue badge clearly signals to followers and visitors that your account is the official, authentic presence, not a fake or fan account.
- Building Trust and Credibility: A verified badge instantly enhances your credibility. Users are more likely to perceive a verified account as trustworthy and authoritative, making them more receptive to your content and messaging.
- Enhancing Perceived Status: The blue check mark is often seen as a status symbol, conveying that your account is noteworthy and worth following. This can boost your social capital and influence on the platform.
- Attracting Collaboration Opportunities: While Instagram might downplay the notability aspect of verification, many brands and businesses still view it as a marker of influence and credibility, increasing your chances of securing brand partnerships and collaborations.
- Improving Search Visibility: Verified accounts often receive preferential treatment in Instagram’s search results. When users search for content related to your niche, your verified account is more likely to appear higher than unverified accounts, increasing organic visibility and brand discovery.
- Driving Business Growth and Sales: For businesses selling products or services on Instagram, enhanced search visibility and trust can translate directly into increased website traffic, lead generation, and ultimately, sales.
Methods to Get Verified on Instagram
Instagram offers two distinct pathways to achieve account verification:
- Request Verification via the Instagram App (Free Method)
- Subscribe to Meta Verified (Paid Subscription)
The optimal approach depends on your specific circumstances and priorities. Let’s examine each method in detail to help you determine the best route for you.
Method 1: Request Verification via the Instagram App (Free)
Pros: This method is entirely free. There are no application or maintenance fees associated with obtaining and retaining the blue check mark.
Cons: Proving notability can be challenging, especially for emerging brands or individuals. The approval process can also be lengthy, potentially taking up to 30 days.
Here’s a step-by-step guide to requesting verification through the Instagram app:
-
Log in to Your Instagram Account: Ensure you are logged into the specific Instagram account you wish to verify.
-
Access Account Settings: Navigate to your profile page and tap the hamburger menu icon (three horizontal lines) in the top-right corner. Scroll down to “Account type and tools” under “For professionals” and tap on it. Then select “Request verification” under “Tools”.
-
Complete the Verification Application: You will need to provide the following information:
- Full Legal Name: Enter your full legal name or the full legal name of your business.
- “Known As” or Working Name: Enter the name you are commonly known by (e.g., brand name, stage name).
- Category: Select the category that best describes your account (e.g., News/Media, Sports, Business/Brand/Organization).
- Attach Identification: Upload a clear image of a government-issued photo ID (driver’s license, passport) for individuals, or official business documents (articles of incorporation, tax filings) for businesses.
- Provide Links and Context (Optional but Recommended): In the “Please help us understand why this account should be verified” section, provide up to 5 links to news articles, websites, or social media profiles that demonstrate your notability and public interest. Focus on credible, independent sources (not paid or promotional content). Briefly explain the context of these links and why they support your verification request.
-
Submit Your Application: Once you have completed all sections of the application, tap the “Submit” button.
Instagram will typically review your application within 30 days and notify you of the outcome in your activity feed. If approved, the verification badge will appear on your profile immediately.
Method 2: Subscribe to Meta Verified (Paid)
Pros: Meta Verified offers a significantly faster verification process, often granting the blue check within hours or days, compared to the potentially lengthy wait with the free method.
Cons: Meta Verified requires a recurring monthly subscription fee to obtain and maintain verified status on Instagram.
Here’s how to get verified through a Meta Verified subscription:
-
Confirm Eligibility: While Meta Verified is more accessible, your account must still meet certain eligibility criteria. To subscribe:
- You must be at least 18 years old.
- Your profile must feature your full name and a profile picture clearly showing your face.
- Your account should have a history of prior posts.
- You need a government-issued ID that matches your profile name and picture.
- Two-factor authentication must be enabled on your profile.
- For businesses, you’ll also need a linked Facebook Business Page.
-
Navigate to Meta Verified: Open the Instagram app, log in, and go to your profile. Tap the menu icon (three lines) in the top right corner, and then select “Meta Verified” under “For professionals.”
-
Select a Profile to Verify: Choose the Instagram account (personal or business) you wish to verify. You can verify up to two eligible profiles: one Instagram and one Facebook account.
-
Pay the Subscription Fee: Meta Verified requires a recurring monthly subscription. The pricing varies depending on your region and whether you are an individual creator or a business. For businesses, subscription tiers start at $14.99/month. For individual creators, it’s also typically around $14.99/month. Tap “Pay” and enter your payment details through the app store or Meta Pay. Then, tap “Continue,” and “Subscribe.”
-
Confirm Profile Information: Review and confirm your profile name and picture. Businesses will also need to submit business details like name, address, phone number, and website.
-
Verify Your Account: Confirm your identity by uploading photos of your government-issued photo ID. Ensure the information is legible, then tap “Submit and Finish.” Businesses may receive a verification code via SMS or email.
Once these steps are completed, your verified badge should appear on your profile and across Instagram features like comments, DMs, Reels, and Stories. Meta Verified subscribers also gain access to enhanced support and account protection features.
5 Key Tips to Improve Your Chances of Instagram Verification
Whether you choose the free application or Meta Verified, these tips will significantly boost your likelihood of getting verified:
1. Avoid Buying Instagram Verification Badges
Instagram strictly prohibits the buying, selling, or transferring of verified badges (Meta Verified subscriptions are the legitimate paid route). Steer clear of any services or accounts claiming to offer verification for a fee or through unofficial channels. Engaging in such tactics can lead to account suspension or permanent bans.
If you encounter accounts promising “guaranteed verification” for payment, recognize them as scams and report them to Instagram.
2. Focus on Earned Publicity, Not Purchased Clout
Instead of seeking shortcuts, invest in building genuine notability. Collaborate with PR agencies or journalists who can help you gain media coverage. Some agencies have access to Facebook’s Media Partner Support, which can facilitate verification requests.
To attract publicity, focus on newsworthy activities relevant to your niche. Consider these strategies:
- Organize or Participate in Community Events: Engage in local events, charitable initiatives, or industry gatherings.
- Seek Media Appearances: Guest on podcasts, industry publications, or other media channels.
- Support Relevant Causes: Pledge donations or ongoing support to charities aligned with your brand values.
- Publish Original Research or Insights: Release white papers, industry reports, or unique data relevant to your target audience.
Building brand awareness through legitimate media channels strengthens your notability and significantly increases your chances of verification.
3. Grow Your Following Organically with Real Engagement
Never purchase followers. Focus on building a genuine, engaged community organically. Buying followers is easily detectable due to low engagement rates. These fake followers (often bots or inactive accounts) don’t interact with your content, hurting your engagement and visibility in Instagram’s algorithm.
While follower count isn’t a direct verification requirement, a highly engaged and growing audience signals relevance and influence. Strategies to grow your Instagram following organically include:
- Strategic Hashtag Use: Utilize relevant hashtags to reach targeted audiences interested in your content.
- Diverse Content Formats: Publish a mix of Instagram Stories, Reels, and feed posts to cater to different content preferences.
- Run Engaging Giveaways and Contests: Incentivize engagement and attract new followers with valuable giveaways.
- Encourage User-Generated Content: Foster community participation by encouraging users to create and share content related to your brand.
- Curate a Visually Appealing Profile Grid: Maintain a consistent aesthetic and brand identity in your profile grid to attract and retain followers.
- Create Shareable, Valuable Content: Produce content that resonates with your audience, prompting them to share it with their networks.
Genuine followers are more than just numbers; they represent your community, driving website traffic, sales, and influence, regardless of verification status.
4. Optimize Your Profile and Bio for Clarity and Impact
All verified accounts share a common trait: complete and optimized profiles. This includes a concise and impactful bio, a professional profile photo, a website link (or a link-in-bio tool), and well-organized Story Highlights.
Your Instagram bio is your digital introduction. Users often decide whether to follow you based on your bio. Make it count! Optimized bios of verified accounts typically:
- Clearly State Essential Business Information: Brand name, industry, concise company overview.
- Provide Contact Options: Direct messages, links to shop, or relevant contact information.
- Showcase Brand Personality: Reflect your brand voice and visual identity.
- Highlight Unique Selling Propositions: Communicate what makes your brand distinct and valuable.
- Incorporate a Clear Call to Action: Encourage a specific action, like visiting your website or following your page.
5. Adhere to Meta’s Community Standards
Consistency and responsible content posting are crucial. Ensure all your content aligns with Meta’s Community Standards, which promote a safe and legal online environment. Review these guidelines to confirm compliance and maintain a positive brand image.
What to Do if Your Verification Request is Denied
Even after following these tips, your verification request might be rejected. Here’s how to proceed:
1. Re-examine Verification Requirements
Double-check the core verification criteria: authenticity, uniqueness, completeness, and notability. Ensure you’ve provided the most appropriate documentation, removed any duplicate accounts, and optimized your profile to the fullest.
Critically assess your notability. Search for your brand on Google. If you find minimal mentions outside your own website, your notability might be the issue.
2. Wait and Reapply Strategically
If rejected, you can reapply after 30 days. Avoid reapplying prematurely, as it will lead to automatic rejection. Use this 30-day period to actively improve your brand’s visibility and Instagram presence based on the tips provided. Don’t simply reapply without making changes.
3. Emphasize Credibility Through Other Channels
If verification remains elusive, you can still build trust and credibility through other means. Instagram recommends linking your account to your official website, Facebook page, and YouTube channel. Share behind-the-scenes content to humanize your brand and build trust. Continue posting diverse content formats to engage your audience and grow organically.
How to Get Verified on Instagram: Frequently Asked Questions
Can an individual person get verified on Instagram?
Yes, individuals and small businesses are eligible for Instagram verification. You don’t need to be a celebrity to be considered notable. However, you must have only one primary account representing your brand on the platform to qualify.
How many followers do I need to get verified on Instagram?
Instagram doesn’t specify a minimum follower count for verification. However, a larger, engaged follower base increases the likelihood of being considered “notable.”
Can you pay to get verified on Instagram?
The standard verification application is free. Meta Verified offers a paid subscription for verification, but you still need to apply and verify your identity to receive the blue check mark through this method. Directly paying for a verification badge outside of Meta Verified is not possible and likely a scam.
What are the steps to get verified on Instagram?
- Log into the Instagram account you want to verify.
- Access “Request verification” in “Account type and tools” under “For professionals” in settings.
- Complete the application form, providing your name and required information.
- Submit the form and await a response from Instagram within 30 days.
By following these guidelines and persistently building your brand presence, you can significantly increase your chances of achieving Instagram verification and unlocking the numerous benefits it offers.