Ribbon bows are a fantastic way to add a touch of elegance and personality to a variety of decorations. Whether you’re looking to embellish wreaths, spruce up gifts, top your Christmas tree, or enhance lanterns, a handmade ribbon bow can make all the difference. While there are numerous techniques for crafting these beautiful accents, this guide focuses on the easiest method, perfect for beginners and seasoned crafters alike.
Supplies You’ll Need to Make a Ribbon Bow
Getting started with bow making is simple and doesn’t require a lot of specialized equipment. Here’s what you’ll need to gather for this easy ribbon bow tutorial:
Ribbons
The ribbon you choose is crucial and often the most enjoyable part of the process. A wide array of ribbon types are available, but for bow making, wired ribbon is highly recommended. The wire edges make shaping loops and tails incredibly easy, and they help the bow maintain its form beautifully over time.
For wreath bows, a wider ribbon, around 2 1/2 inches, works wonderfully. Wired burlap ribbon is a popular choice due to its rustic charm and versatility.
Zip Tie or Wire
To secure your bow shape, you’ll need something to cinch it in the center. A zip tie is a convenient option for quickly holding the bow together. Alternatively, floral wire provides a more discreet and adjustable hold. Other options include chenille stems or pipe cleaners, especially if you want to match the color to your ribbon. Keeping a selection of colored chenille stems on hand can be quite useful.
Wire Cutters and Scissors
Sharp scissors are essential for clean ribbon cuts. Heavy-duty wire cutters are necessary if you are using wired ribbon and zip ties, allowing you to trim the zip tie ends and manage the wire within the ribbon if needed.
Step-by-Step Guide: How to Make a Simple Ribbon Bow
Follow these straightforward steps to create your own beautiful ribbon bow. This method is designed to be easy and enjoyable, even if you’re new to crafting bows.
1. Create the Ribbon Loops
Begin by determining the desired size of your bow. The size of your loops will dictate the overall size of the bow. Make a loop with your ribbon, then continue to loop the ribbon around, creating a layered circle. It’s important to start and stop your ribbon circles slightly before the center and finish a little after, ensuring a balanced loop formation.
2. Cut the Loops
Once you have formed your loops to the desired fullness (in this example, three loops), cut the ribbon, leaving about an inch past the center point where you’ve been holding the loops.
3. Prepare the Streamers (Tails)
For the bow’s tails, take a piece of ribbon and fold it in half. Cut it to be a little longer than the length you want for your final tails. This extra length allows for angled or decorative cuts at the ends later.
4. Pinch the Center of the Loops
Carefully pinch together the center of all the ribbon loops you created. This gathering point will be the core of your bow.
5. Attach the Streamers
Pinch the center of your ribbon tail piece and position it behind the pinched loops, holding it at the bottom center. This places the tails directly beneath the loops, forming the classic bow shape.
Step showing the addition of ribbon streamers to the loops to create the bow’s tails.
6. Secure the Bow with a Zip Tie
Use a zip tie to tightly secure the pinched center of the loops and tails together. Wrap the zip tie around the center and pull it snugly to hold the bow shape firmly. Once secured, trim off the excess zip tie with your wire cutters. If you plan to attach the bow to something like a wreath using wire or a chenille stem, position it at the back of the bow before securing with the zip tie, ensuring it’s included in the cinched center.
7. Add a Center Knot
To create a neat center for your bow, cut a small piece of ribbon and tie a knot in its center. Use the tails of this knotted ribbon to wrap around the center of your bow, covering the zip tie and adding a polished look. You can tie these tails at the back to secure, or leave them long for attaching the bow. Feel free to use a different ribbon for the center knot to add contrast or texture.
8. Finishing Touches and Attachment
You can tie the tails of the center knot at the back, leaving longer tails if you need to tie the bow onto something. These longer tails are ideal for attaching to wreaths, Christmas trees, swags, or gifts. Alternatively, hot glue or floral wire can be used for attachment, providing versatile options depending on your project.
9. Fluff Your Bow
Fluffing is key to giving your bow a professional and full appearance. Start by manipulating the loops, pulling and shaping them to your liking. A common technique is to start with the innermost left loop, pull it downwards and outwards, and then do the same to the opposite loop. The top loop can remain as the center or be pulled upwards. Experiment with different arrangements to find your preferred style.
10. Attach to Your Decoration
Your ribbon bow is now complete and ready to enhance your chosen décor. If you’ve added wire or a chenille stem in step 6, you can easily use these to wire the bow directly to a wreath frame or other items. Hot glue is another effective method for securing the bow, or you can use pins to carefully attach it to fabric surfaces.
With just a few minutes and simple materials, you’ve learned how to make a beautiful ribbon bow!
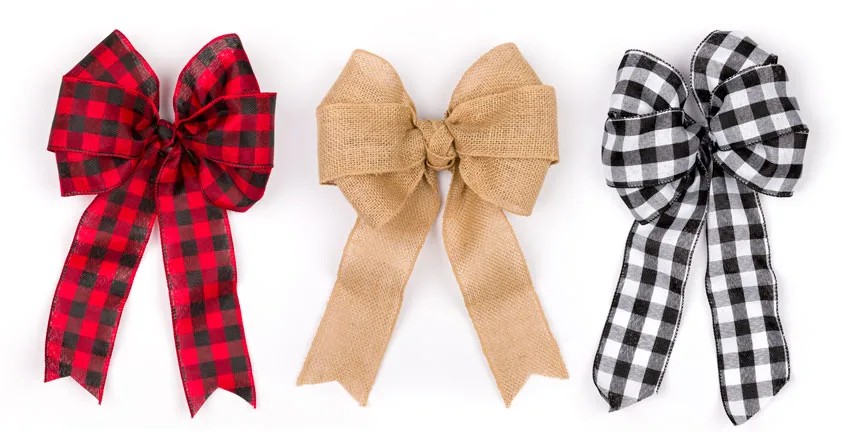
These bows bring a charming farmhouse feel with burlap or buffalo check ribbons. For a more sophisticated touch, try using satin ribbon for an elegant finish.
Explore Different Ribbon Bow Styles
Once you master this basic bow technique, you can explore variations to create different looks:
Double Ribbon Bow
For a fuller and more dynamic bow, consider using two different ribbons. The Double Ribbon Bow is created similarly to the basic bow, but with two ribbons layered together. This method adds depth and texture to your bows, making them especially suitable for Christmas tree toppers or statement wreath bows.
Multi-Ribbon Bow
Experimenting with multiple ribbons can lead to truly unique and elaborate bow designs. By combining different widths, textures, and patterns, you can create multi-ribbon bows that are perfect for special occasions or to add a personalized touch to your decorations.
Perfect Your Ribbon Bow Craft
Making ribbon bows is a rewarding craft that adds a personal and beautiful touch to your decorations and gifts. With a little practice, you’ll be creating perfect bows for every occasion in no time!