Passing down essential skills is a part of fatherhood, from bike riding to skipping stones, and crafting a paper airplane that truly soars is definitely on that list. Instead of relying on hazy childhood memories and creating a paper plane that immediately nose-dives, why not learn to construct models designed for distance and flight?
Below, you’ll find three tried-and-tested paper airplane designs, ranging from beginner to expert level. These aren’t just any folds; there’s real science behind why some paper airplanes fly better than others. Starting with the easiest, these models are perfect for all ages, from kids just learning to fold to adults rediscovering the fun. Yes, that means you can try these out in the office break room too!
Beginner Level: The Bulldog Dart – Easy to Fold and Fly Straight
The Bulldog Dart is your entry point into paper airplane mastery. It’s straightforward, requires minimal folds, and offers reliable flight. While it might not win any distance records, it’s the perfect first paper airplane for kids.
1. Begin by folding your paper in half lengthwise and then unfold it. This initial crease serves as a crucial center guideline for the subsequent folds.
2. Fold the top two corners down so they precisely meet at the center crease you just made. This classic fold is likely the starting point you remember from your own childhood paper airplane adventures.
3. Flip the paper airplane over. Now, fold the corners in again, aligning them with the center crease. Ensure the diagonal edge on the left side of the plane aligns perfectly with the center, mirroring the right side.
4. Fold the top point downwards so that the very tip aligns with the bottom edge where the previous folds converge. This creates the Bulldog Dart’s distinctive nose.
5. Fold the entire airplane in half along the original center crease, folding it inwards on itself. This step forms the sturdy, snub-nosed shape that gives the Bulldog Dart its name.
6. Create the wings by folding them down. Align the fold so that it forms a straight, continuous line from the top of the snub nose to the back of the plane. Repeat this wing fold on the opposite side.
Intermediate Level: The Harrier – Stable Flight for Longer Distances
Stepping up in complexity, the Harrier paper airplane involves a few more folds and delivers enhanced flight performance compared to the Bulldog Dart. It strikes a perfect balance between simplicity and the more intricate designs, making it a great choice for recreational paper aviation.
1. Begin by folding the paper in half lengthwise and unfolding. Just like with the Bulldog Dart, this center crease acts as your primary guide for the subsequent folds.
2. Fold the top corners inwards so they meet precisely at the center crease. This is a familiar starting fold that sets the foundation for the Harrier’s aerodynamic shape.
3. Fold the entire top section down, shaping it to resemble an envelope. It’s important to leave a small gap of about half an inch at the bottom edge. The top point should not meet the bottom edge directly; this slight offset is key to the Harrier’s design.
4. Fold the top corners inwards again so they converge at the middle crease. After this fold, a small triangular flap will be visible, extending out from beneath these newly folded corners.
5. Fold that small triangular flap upwards to secure the previous folds in place. This flap acts as a locking mechanism, ensuring the structural integrity of the Harrier’s nose.
6. Fold the entire airplane in half. Crucially, ensure you fold it outwards, not inwards. The triangular flap you folded in the previous step should remain visible along the bottom edge of the folded plane.
7. Fold the wing down so its leading edge aligns with the bottom edge of the airplane. Repeat this wing fold on the opposite side to create symmetrical wings.
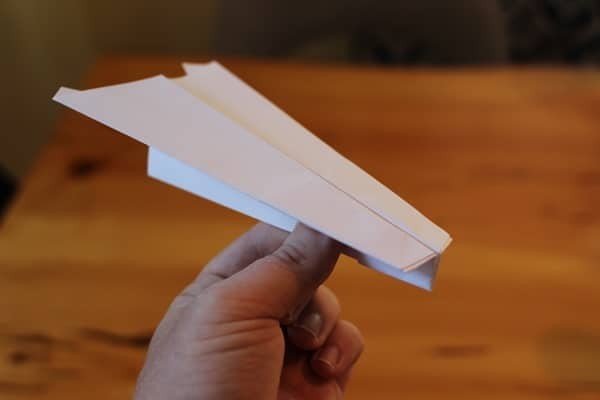
The finished Harrier paper airplane is shown below. Notice its distinctive pointed wings and the triangular element on its underside. This design contributes to the Harrier’s impressive stability during flight.
Expert Level: The Hammer – For Distance and Impressive Flights
While the world of paper airplane design extends to incredibly complex models, the Hammer strikes an ideal balance. It offers a significant step up in complexity while remaining accessible to the average paper airplane enthusiast. With more folds than the previous two models, the Hammer is engineered for superior flight distance and duration. Pay close attention to each step, as the rewarding flight performance is well worth the effort.
1. First, fold the top left corner all the way down until it meets the right edge of the paper. Unfold immediately after creasing; this fold establishes a guiding crease for subsequent steps.
2. Repeat the same process with the top right corner: fold it down to meet the left edge and unfold. This second crease will intersect with the first, forming an ‘X’ shape that’s crucial for the Hammer’s structure.
3. Fold the top right corner down again, this time aligning its edge precisely with the crease that runs from the top left to the bottom right. This fold starts shaping the Hammer’s wing structure.
4. Mirror the previous step on the left side. Fold the top left corner down so that its point meets exactly at the diagonal right edge of the airplane. Symmetry is key for balanced flight.
5. Fold the paper airplane in half inwards on itself, then unfold it. This creates another center crease that will serve as a guideline for further folds and ensure symmetry.
6. After unfolding, fold the top section down so that its edge aligns perfectly with the bottom edge of the paper. This fold reduces the paper’s overall height and prepares it for wing formation.
7. Fold the top corners down once more so that their points meet at the middle crease you made in step 5. These folds begin to define the Hammer’s sophisticated wing shape.
8. Unfold these last corner folds. As with several steps in the Hammer design, these creases are primarily guides for the upcoming, more intricate folds.
9. Take the top edge that you previously folded down in Step 6 and fold it back upwards. Fold along the point where its edge intersects with the creases created in Step 7. This is a slightly complex fold that adds to the wing’s profile.
10. Fold the corners inwards yet again, aligning their edges with both the edge of the top flap you just folded up and the creases from Step 7. This refines the wing shape further and adds structural strength.
11. Fold the wings inwards one more time. This time, simply fold along the crease you’ve already established. After this step, your paper airplane should have clean, straight lines running from top to bottom.
12. Fold the top section down from where it meets the top edges of the wing flaps created in the previous step. This fold creates the final aerodynamic profile of the Hammer.
13. Fold the entire assembly in half outwards. All the paper flaps should now be on the exterior of the airplane. Due to the multiple layers of paper, this fold can be a bit challenging. Take your time and ensure clean, crisp creases.
14. Finally, fold the wings down so that their edges align with the bottom edge of the plane. This creates a small, aerodynamic snub nose. This final fold can also be a bit thick, so precision and patience are key.
Making paper airplanes is a fantastic DIY project for kids and adults alike. While you’re crafting these planes, why not engage in some fun riddles for kids? It’s a great way to combine creativity and mental exercise.
To further explore the benefits of play and relaxation, consider listening to our podcast interview with Charlie Hoehn, author of Play It Away: A Workaholic’s Cure For Anxiety.
Related Posts
Previous Article Next Article