We’re diving deep into the luscious world of How To Make Caramel right at home. Forget store-bought imitations; we’re talking about rich, buttery, and utterly irresistible homemade caramel sauce. This easy caramel recipe is a game-changer, ready to elevate everything from decadent salted caramel cakes to a simple scoop of vanilla ice cream. Or, let’s be honest, straight from the spoon – because the best caramel sauce deserves to be savored in its purest form! We’re taking away all the guesswork with this foolproof guide, complete with step-by-step photos, so you’ll learn exactly how to make caramel perfectly every single time.
Why Make Homemade Caramel?
In a world of convenience, you might wonder, “Why bother making caramel from scratch?” The answer is simple: homemade caramel is in a league of its own. The depth of flavor, the velvety texture, and the pure satisfaction of creating something so delicious from basic ingredients are unmatched. Store-bought caramel often falls short, tasting overly processed or artificial. When you learn how to make caramel yourself, you gain complete control over the ingredients and the final taste. You can use high-quality butter and cream, adjust the saltiness to your preference, and even infuse it with different flavors. Plus, the aroma of caramelizing sugar filling your kitchen is an experience in itself!
Essential Tips for Caramel Success
Before we jump into the recipe, let’s cover a few key tips that will ensure your homemade caramel is nothing short of perfection:
- Invest in Quality Butter: Caramel is a simple recipe with few ingredients, so the quality of each one truly shines through. Using high-quality butter, preferably European-style butter with a higher fat content, will result in a richer, more flavorful caramel sauce. This is one area where splurging a little makes a big difference.
- Undivided Attention is Key: Making caramel requires your full attention. Sugar can go from perfectly caramelized to burnt in a matter of seconds. Once you start melting the sugar, stay close to the stove and keep a watchful eye on it throughout the process. Don’t get distracted!
- Salt is Your Flavor Enhancer: Don’t underestimate the power of salt in caramel. It’s not just about making it “salted caramel”; salt is essential to balance the sweetness and enhance the overall flavor profile. A good pinch of sea salt will prevent your caramel from tasting cloyingly sweet and bring out its nuanced flavors.
With these tips in mind, you’re well on your way to mastering how to make caramel. Let’s get started and break down each step to ensure your caramel-making journey is smooth and successful.
Step One: Gently Melt the Sugar
Even Heating is Crucial, Avoid Constant Stirring
Place the sugar in a heavy-bottomed saucepan over medium heat. The heavy bottom is important as it helps distribute heat evenly, preventing hot spots that can burn the sugar. Initially, don’t stir the sugar. Instead, gently swirl the saucepan every few minutes. This helps the sugar heat evenly and prevents it from crystallizing. You’ll notice the sugar starting to clump together – this is perfectly normal and the first stage of caramelization.
Step Two: Caramelize to Golden Perfection
Patience is Key for Deep Flavor
Continue to heat the sugar, keeping a close watch. As the sugar melts, you can begin to stir it gently every few minutes with a heatproof spatula or spoon to ensure even melting. Be patient; this process can take up to 10-15 minutes. The sugar will go through stages – from clumping to melting, and finally to caramelizing. You’ll know it’s ready when it’s completely liquid, a beautiful amber color, and there are no sugar clumps remaining. The color is your guide to flavor – a light amber will be sweeter and milder, while a darker amber will have a more intense, slightly bitter caramel flavor. Be careful not to let it get too dark, as burnt sugar will taste bitter and ruin your caramel.
This is your goal for this step:
Step Three: Incorporate Butter for Richness
Expect Bubbling and Stir Vigorously
Once the sugar is fully caramelized and removed from the heat, immediately add the room temperature butter. Be prepared for a vigorous bubbling reaction – this is normal! The temperature difference between the hot sugar and the cooler butter causes this reaction. Stir or whisk constantly and vigorously as the butter melts into the sugar. Initially, it might look separated or curdled, but keep whisking.
Don’t panic at the bubbling! As you continue to whisk, the butter and caramelized sugar will emulsify and come together into a smooth, homogenous sauce. Keep whisking until the mixture is completely smooth and uniform in color.
Aim for this smooth consistency:
Step Four: Finish with Cream and Salt
Achieve Velvety Texture and Balanced Flavor
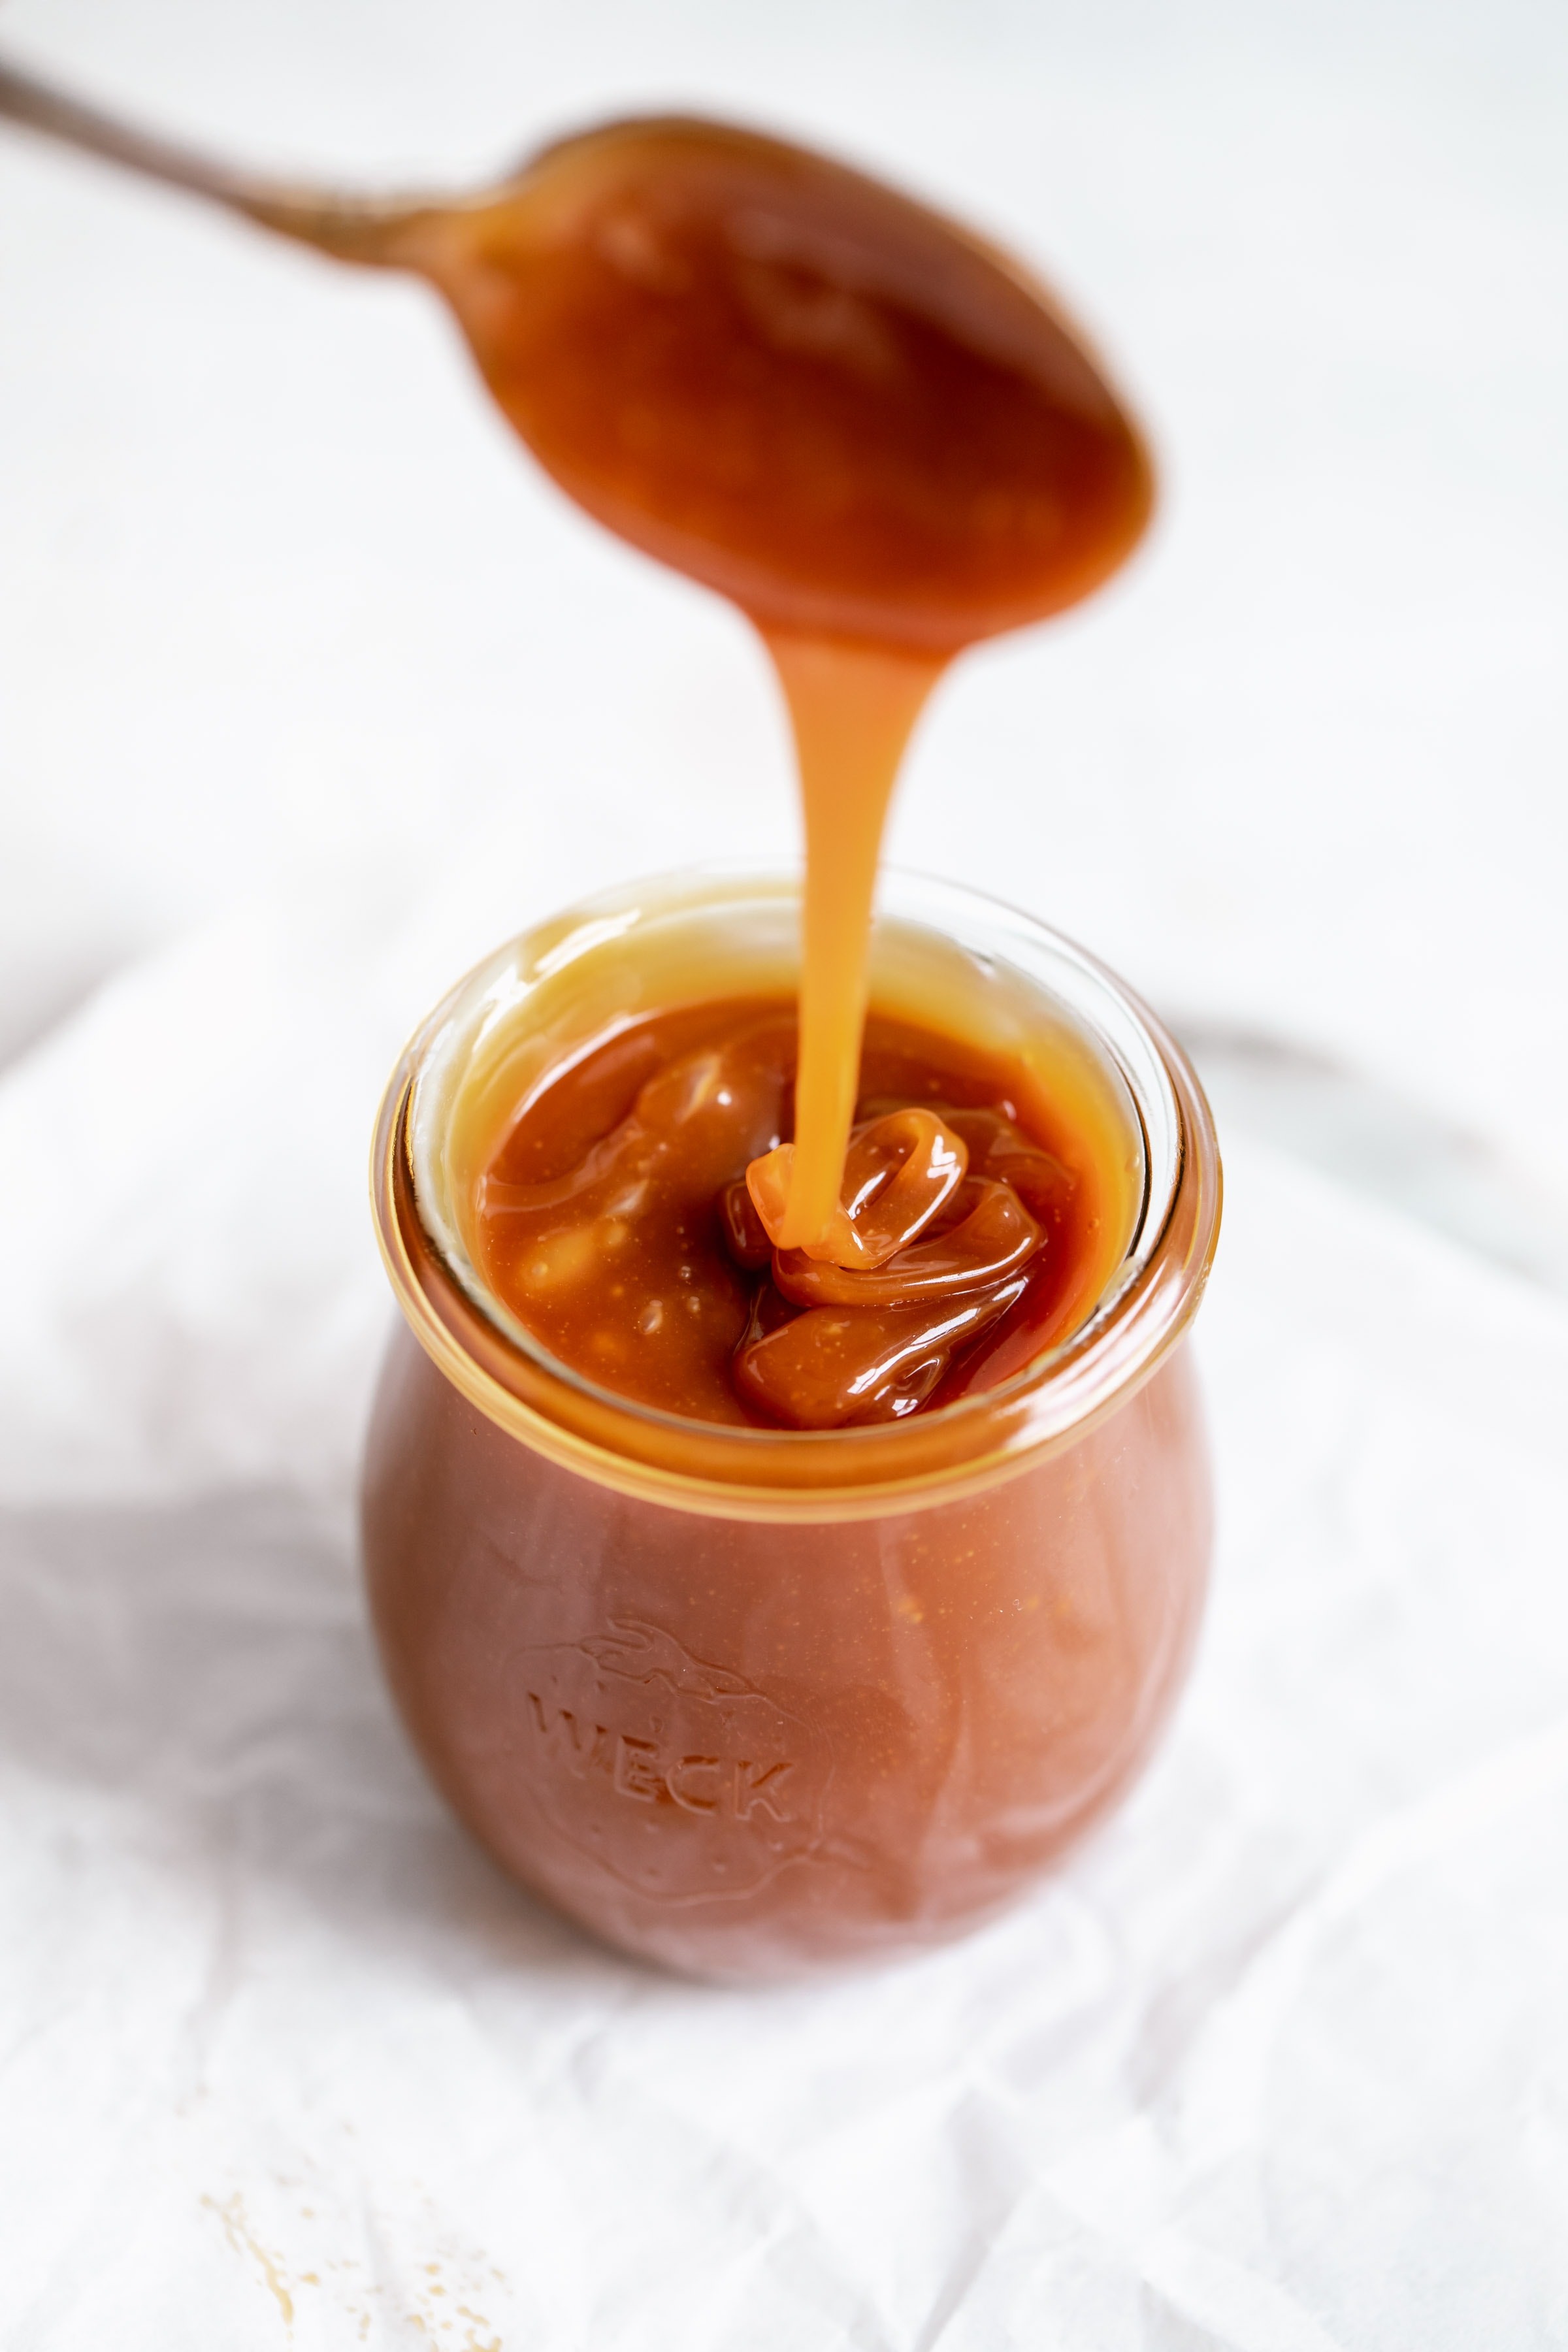
Finally, pour in the cream and add the salt. The cream will further cool the mixture, so continue to stir until everything is fully incorporated and the caramel sauce is smooth and glossy. The cream adds richness and that signature velvety texture to the caramel. Stir until the sauce is homogenous and the salt is evenly distributed. Taste the caramel and adjust the salt to your liking. Remember, the caramel will thicken as it cools.
The final result – luscious homemade caramel sauce!
Delicious Ways to Use Homemade Caramel Sauce
Once you’ve mastered how to make caramel, a world of culinary possibilities opens up! Homemade caramel sauce is incredibly versatile and can elevate both sweet and savory dishes. Here are just a few ideas to get you started:
- Drizzled over Desserts: From pumpkin pie and apple crumble to brownies and cheesecakes, caramel adds a touch of indulgence.
- Cake Filling: Create a show-stopping salted caramel cake by using it as a filling between layers.
- Ice Cream Topping: Warm caramel sauce over cold ice cream is a classic combination for a reason.
- Coffee and Hot Chocolate Enhancer: Stir a spoonful into your morning coffee or evening hot chocolate for a decadent treat.
- Caramel Apples: A fall favorite, homemade caramel makes the best caramel apples.
- Savory Applications: Surprisingly, caramel can also complement savory dishes. Try it as a glaze for roasted vegetables like sweet potatoes or carrots, or as a drizzle over brie cheese.
- Homemade Candies: Use it as a base for candies like caramel candies or turtles.
- Macaron Filling: As a sophisticated filling for macarons, especially chai or vanilla flavored shells.
- Sweet Potato Cupcakes: Elevate sweet potato cupcakes with a generous drizzle of caramel.
Or, of course, enjoy it straight from the spoon! We won’t tell.
Storing Your Homemade Caramel Sauce
Good news! You can make caramel sauce ahead of time. Store your cooled homemade caramel sauce in an airtight container, such as a mason jar, in the refrigerator for up to 1 month. For longer storage, you can freeze it for up to 3 months. To thaw frozen caramel, simply let it defrost in the refrigerator overnight. If it separates slightly, gently warm it in a saucepan over low heat, stirring until smooth again.
Now that you’re equipped with the knowledge of how to make caramel, there are no more excuses for settling for store-bought versions! Homemade caramel is truly superior in flavor and quality. So, grab your ingredients and get ready to create some caramel magic. Happy caramel making and, more importantly, happy caramel eating!
- Author: Sarah | Broma Bakery
- Prep Time: 0 minutes
- Cook Time: 15 minutes
- Total Time: 15 mins
- Yield: 1 1/4 cups caramel
- Category: sauce
- Method: stovetop
- Cuisine: american
Units:
Equipment
Ingredients
- 1 cup granulated sugar
- 6 tablespoons unsalted butter, room temperature, high quality recommended
- 1/2 cup heavy cream
- 1/2 to 1 teaspoon sea salt, or to taste
Instructions
- In a heavy-bottomed saucepan, heat the sugar over medium-low heat until completely melted. Swirl the pan gently every 20 seconds or so to promote even melting. Be patient as the sugar will clump initially before melting slowly. Watch carefully to prevent burning.
- Once melted and amber in color, remove the pan from the heat immediately and stir in the room temperature butter. The mixture will bubble vigorously. This is expected.
- Next, pour in the heavy cream and add 1/2 teaspoon of sea salt. Stir until all ingredients are fully combined and the sauce is smooth. Taste and add more sea salt if desired.
- Pour the caramel sauce into a heatproof bowl or jar and let it cool completely before using. The caramel will thicken as it cools.
Watch the Video (link to video if available)
Recipe Notes
- Butter Quality: Using high-quality butter significantly impacts the flavor of the caramel. Opt for European-style butter for a richer taste.
- Cream for Thickness: For a thicker caramel sauce, reduce the amount of heavy cream to 1/3 cup.
- Flavor Variations: Customize your caramel by adding extracts or spices at the end. Vanilla extract, cinnamon, or ginger are excellent additions.
- Storage: Store leftover caramel sauce in an airtight container in the refrigerator for up to 1 month or freeze for up to 3 months.
