Have you ever wondered How To Make Cold Brew coffee that rivals your favorite café? Cold brew isn’t just a trend; it’s a superior way to enjoy coffee, especially when the weather heats up. I’m a huge fan of cold brew, and while we have a traditional coffee maker, it gathers dust in the cupboard most of the time. The reason? Cold brew’s incredibly smooth, rich flavor and lower acidity are simply unbeatable. Plus, let’s be honest, a steaming hot coffee in the summer? No thanks!
For years, I was stuck buying expensive cold brew concentrate from the grocery store. Then I discovered the amazing secret: making cold brew at home is incredibly easy and budget-friendly! You only need two basic ingredients: coffee and water. Forget about complicated equipment; all you need is a simple Mason jar, a fine-mesh strainer, and cheesecloth or paper filters. Ready to ditch the store-bought stuff and learn how to make your own amazing cold brew? Let’s dive in!
What Exactly is Cold Brew Coffee? Understanding the Basics
It’s a common misconception to confuse cold brew with iced coffee, but they are fundamentally different. While both end up cold and refreshing, the brewing methods are worlds apart. Iced coffee is simply hot brewed coffee that’s cooled down and served over ice. Think of it as your regular drip coffee taking a chill pill.
Cold brew, on the other hand, uses cold or room temperature water to extract flavor from coffee grounds over a long steeping period, typically 12 to 24 hours. This extended brewing process in cooler temperatures is what gives cold brew its signature smooth, less bitter, and less acidic taste profile compared to hot brewed coffee. The slow extraction brings out different flavor compounds, resulting in a naturally sweeter and more mellow coffee concentrate.
Why Make Cold Brew Coffee at Home? The Benefits
Making cold brew at home isn’t just about saving money; it’s about unlocking a superior coffee experience and enjoying numerous advantages:
- Smoother, Less Acidic Taste: The cold brewing process extracts coffee flavors without the harsh acids and bitterness that hot water can release. This results in a naturally smoother, sweeter, and easier-to-drink coffee, especially beneficial for those with sensitive stomachs.
- Cost-Effective: Buying pre-made cold brew concentrate can be expensive. Making it at home significantly reduces the cost per serving, allowing you to enjoy premium cold brew without breaking the bank.
- Convenience: Brew a large batch of cold brew concentrate once, and you’ll have delicious coffee ready to go in your refrigerator for up to two weeks. This is perfect for busy mornings or when you need a quick and refreshing pick-me-up.
- Customizable Strength: You control the coffee-to-water ratio, allowing you to create a concentrate that suits your taste preferences. Whether you like a bold, intense brew or a milder flavor, homemade cold brew is easily adjustable.
- Impress Your Friends (and Yourself!): Serving homemade cold brew is a sure way to impress guests. It shows you care about quality and are willing to go the extra mile for a delicious cup of coffee. Plus, there’s a certain satisfaction in crafting your own perfect brew.
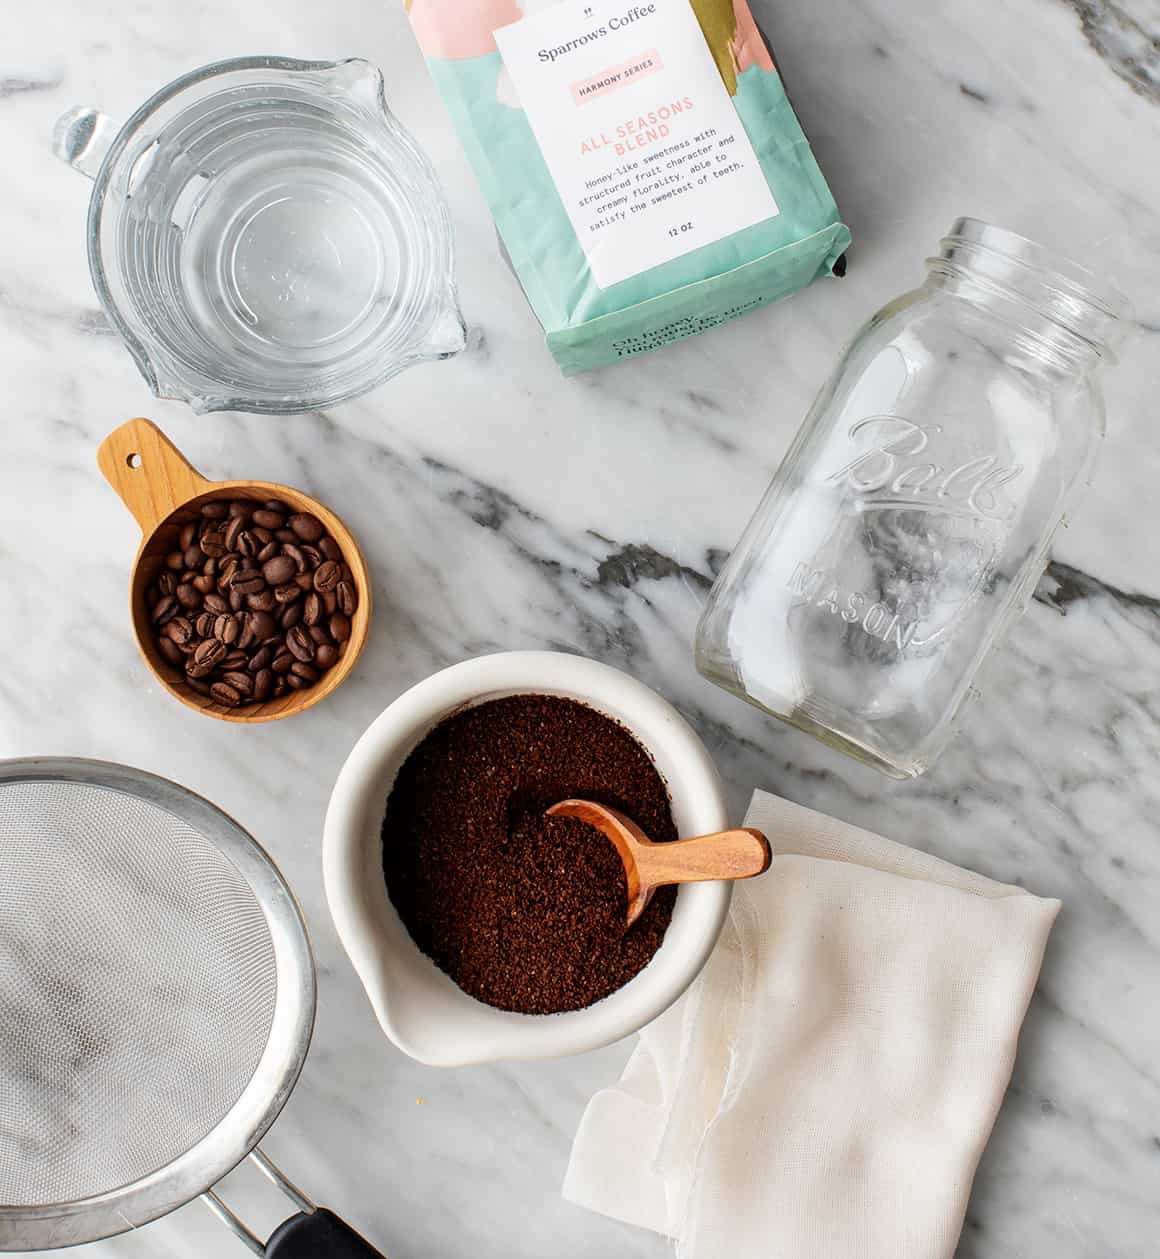
Essential Equipment and Ingredients for Homemade Cold Brew
Making cold brew at home requires minimal equipment and just two key ingredients:
Ingredients:
- Fresh Coffee Beans: High-quality, whole bean coffee is crucial for the best flavor. Choose your favorite roast – medium to dark roasts often work well for cold brew, offering rich and chocolatey notes.
- Filtered Water: Using filtered water is important as it removes impurities that can negatively impact the taste of your cold brew.
Equipment:
- Large Mason Jar (or Pitcher): A 28-ounce or larger Mason jar, or any large, clean container with a lid, will work perfectly for brewing.
- Coffee Grinder (Burr Grinder Recommended): Freshly ground coffee is essential. A burr grinder provides a more consistent grind size, which is ideal for cold brew. If you don’t have one, you can use a blade grinder, but be careful not to grind too finely.
- Fine Mesh Strainer: This is used to separate the coffee grounds from the brewed concentrate.
- Cheesecloth or Paper Filters: Lining the strainer with cheesecloth or paper filters ensures a clear, grit-free cold brew. Paper filters may result in a slightly cleaner brew, while cheesecloth allows for a bit more body.
- Large Bowl (for straining): To catch the cold brew as you strain it.
Step-by-Step Guide: How to Make Cold Brew Coffee at Home
Don’t be intimidated by the steeping time – making cold brew is incredibly simple and mostly hands-off! Here’s a step-by-step guide to making delicious cold brew at home:
Step 1: Coarsely Grind Your Coffee Beans
Start with fresh, whole bean coffee. Coarsely grind your coffee beans. The grind size is important for cold brew – you want a coarse, French press-like grind. Think coarse sea salt. A coarse grind prevents the coffee from becoming overly bitter and makes straining easier. Avoid pre-ground coffee for the best flavor, as it loses freshness quickly. If you don’t own a grinder, you can often have beans coarsely ground at your local coffee shop.
Step 2: Combine Coffee Grounds and Water in a Mason Jar
Place the coarsely ground coffee into your Mason jar or chosen container. Pour filtered water over the coffee grounds. A general guideline is a 1:2 coffee to water ratio for a concentrate (e.g., 1 ½ cups of coarsely ground coffee to 3 cups of filtered water). This ratio creates a fairly strong concentrate that you can dilute later. Adjust the ratio to your preference – for a less concentrated brew, use more water.
Step 3: Stir and Steep at Room Temperature
Stir gently to ensure all the coffee grounds are saturated with water. This helps with even extraction. Cover the jar with a lid or plastic wrap. Let the mixture steep at room temperature for 12 to 24 hours. The steeping time is crucial. For a smoother, less intense flavor, steep for 12-16 hours. For a stronger, more robust cold brew, steep for 20-24 hours. Experiment to find your ideal steeping time.
Step 4: Strain the Cold Brew Concentrate
After steeping, it’s time to strain the coffee grounds. Place a fine-mesh strainer over a large bowl. Line the strainer with cheesecloth or a paper filter. This double filtration step ensures a clean, grit-free concentrate. Slowly pour the coffee mixture through the strainer. Allow all the liquid to filter through, but don’t press down on the coffee grounds, as this can push sediment through.
Step 5: Store and Serve Your Homemade Cold Brew
Transfer the strained cold brew concentrate to an airtight container (like a clean jar or pitcher) and store it in the refrigerator. It will keep fresh for up to two weeks.
When you’re ready to enjoy your cold brew, pour it over ice. Remember, this is a concentrate, so you’ll likely want to dilute it with water or milk to your desired strength. Start with a 1:1 ratio of concentrate to water/milk and adjust to taste. Add your favorite milk (almond milk, oat milk, dairy milk), sweeteners, or flavorings as desired.
Pro Tips for Perfect Homemade Cold Brew Coffee
- Freshly Ground is Always Best: Just like with hot coffee, freshly grinding your beans right before brewing makes a huge difference in flavor. The oils released during grinding are what give coffee its complexity. These oils degrade over time, so fresh is key.
- Coarse Grind Matters: Using a coarse grind is essential for cold brew. It prevents over-extraction and makes straining much easier.
- Experiment with Coffee-to-Water Ratios: The 1:2 ratio is a starting point. Adjust the ratio to find your perfect strength. Use more coffee for a stronger concentrate and more water for a weaker one.
- Steeping Time is Flexible: Steeping for 12-24 hours is a general guideline. Experiment with shorter or longer steeping times to discover your preferred flavor profile. Taste test after 12 hours and continue steeping if you want a stronger brew.
- Use Good Quality Water: Filtered water is crucial for clean-tasting cold brew. Avoid tap water, which can contain minerals and chlorine that affect the flavor.
- Storage is Key: Store your cold brew concentrate in an airtight container in the refrigerator to maintain its freshness and flavor for up to two weeks.
Serving Suggestions and Delicious Cold Brew Variations
Cold brew is incredibly versatile! Enjoy it in numerous ways beyond just iced coffee:
- Classic Iced Cold Brew: Simply pour diluted cold brew over ice and add your favorite milk or creamer.
- Cold Brew Latte: Combine cold brew concentrate with milk (dairy or non-dairy) for a creamy and refreshing latte. Sweeten to taste.
- Cold Brew Mocha: Add chocolate syrup or cocoa powder to your cold brew latte for a decadent mocha.
- Sparkling Cold Brew: Mix cold brew concentrate with sparkling water or club soda for a bubbly and refreshing drink. Add a splash of citrus for extra zing.
- Cold Brew Cocktails: Cold brew makes a fantastic base for coffee cocktails. Try it in a White Russian or an Espresso Martini variation.
- Warm Cold Brew (Yes, Really!): Gently heat diluted cold brew for a less acidic alternative to hot coffee. Avoid boiling, which can alter the flavor.
Making cold brew coffee at home is a simple yet rewarding process. With just a few basic steps and ingredients, you can unlock a world of smooth, delicious, and refreshing coffee. Ditch the expensive store-bought concentrate and start crafting your own perfect cold brew today!