Craving that creamy, cloud-like topping on your iced coffee just like your favorite coffee shop? Cold foam is the secret to taking your homemade coffee drinks to the next level, and the best part is, it’s incredibly easy and affordable to make right in your own kitchen. This guide will walk you through everything you need to know to create perfect cold foam every time, using simple methods and readily available ingredients.
Understanding Cold Foam
What Exactly is Cold Foam?
Cold foam is essentially frothed milk, but served cold. Think of it as the cool cousin of the steamed milk in lattes and cappuccinos. It’s made by rapidly aerating cold milk or non-dairy milk alternatives until it becomes light, airy, and slightly thickened. The texture is key – it’s velvety smooth, rich, and pourable, not as stiff as whipped cream. This allows it to gently float on top of your drink, adding a luxurious mouthfeel to each sip.
Why is Cold Foam So Popular?
Cold foam has exploded in popularity for a few key reasons:
- Enhanced Texture and Flavor: It adds a delightful creamy texture contrast to your iced coffee or other cold beverages, without the heaviness of traditional whipped cream. The subtle sweetness and milky flavor enhance the overall drink profile.
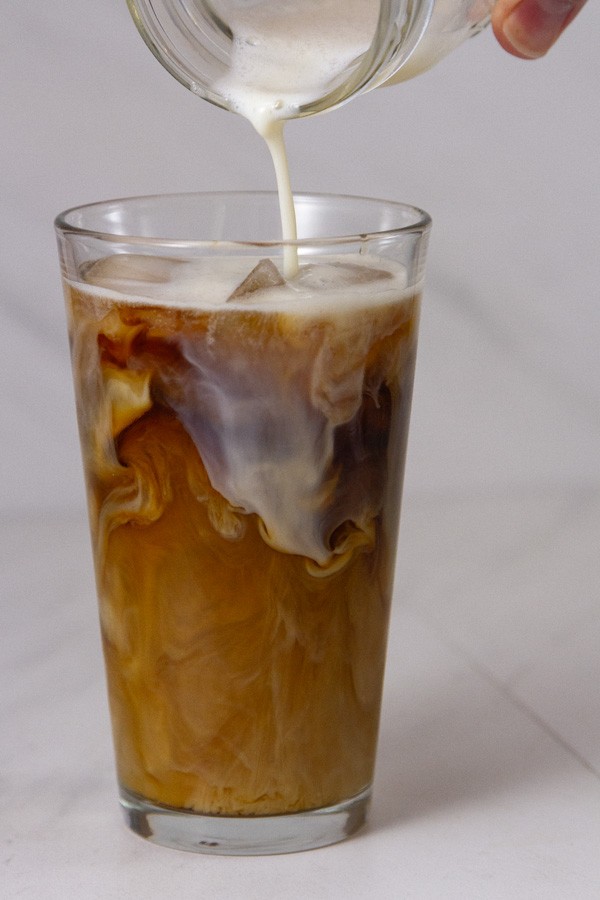
- Visual Appeal: A perfectly layered drink with a cloud of white cold foam on top is undeniably Instagrammable. It elevates the everyday coffee experience to something special.
- Café Experience at Home: Making cold foam at home allows you to recreate that gourmet coffee shop experience without the high price tag and the need to leave your house.
- Versatility: Cold foam isn’t just for iced coffee! It’s delicious on hot coffee, teas, and even as a light topping for desserts and fruits.
Choosing Your Milk: Dairy vs. Non-Dairy
The type of milk you choose significantly impacts the texture and flavor of your cold foam. Let’s explore the best options:
Dairy Milk for Cold Foam
Generally, dairy milk is known to create the most stable and voluminous cold foam due to its protein content. Here’s a breakdown:
- Cream: For the ultimate indulgence, heavy cream or heavy whipping cream produces the richest, thickest, and most flavorful cold foam. It whips up beautifully and holds its shape well. However, it’s also the highest in fat and calories.
- 1% or Skim Milk: Surprisingly, lower-fat milks like 1% or skim milk can create very impressive, thick foam. This is because they have a higher protein-to-fat ratio, which contributes to foam stability. While the texture is great, the flavor might be less creamy compared to higher-fat options.
- Whole Milk: Whole milk strikes a good balance between flavor and foam texture. It creates a creamy and flavorful cold foam that is still quite thick and satisfying.
- 2% Milk: 2% milk will also work, but it may produce a slightly less stable and less voluminous foam compared to whole or lower-fat milks.
- Half-and-Half: Half-and-half can be used, but it might not foam as readily as milk or cream. It will add richness, but the foam may be less airy.
Exploring Non-Dairy Alternatives for Vegan Cold Foam
Creating vegan cold foam with plant-based milk alternatives is possible, but it can be a bit more challenging to achieve the same thickness and stability as dairy milk. Here are some common options:
- Oat Milk: Oat milk is often considered one of the best non-dairy options for cold foam. It has a naturally creamy texture and foams relatively well, producing a decent volume and a pleasant flavor that complements coffee.
- Almond Milk: Almond milk can be used, but it tends to produce a thinner and less stable foam compared to oat milk or dairy milk. Using barista blends specifically formulated for foaming can improve results.
- Soy Milk: Soy milk, especially barista versions, can also create a reasonable cold foam. It offers a good balance of foamability and a neutral flavor that works well in coffee.
- Coconut Cream (from the can, not coconut milk beverage): For a very rich and decadent vegan cold foam, you can use the thick cream from the top of a can of refrigerated full-fat coconut milk. Be mindful of the coconut flavor, which will be noticeable.
- Other Plant-Based Creamers: Some plant-based coffee creamers are specifically designed to foam. These can be a convenient option, but the results can vary by brand and formulation.
Important Note for Non-Dairy Milks: Non-dairy milks often benefit from being very cold and may require a bit more frothing time to achieve the desired texture. Barista blends often contain stabilizers and gums that aid in foaming.
Can You Use Coffee Creamer?
While you can use coffee creamer to make a frothy topping, it typically doesn’t produce the same thick, structured cold foam that you might be expecting. Creamers often contain sweeteners and flavorings, and while they can add flavor and frothiness, the foam tends to be less dense and less stable than foam made from milk or cream.
Flavoring Your Cold Foam: Get Creative!
Plain cold foam is delicious, but it’s also a fantastic canvas for flavor! Here are some ideas to customize your cold foam and create signature drinks:
-
Sweeteners:
- Simple Syrup: The classic choice, easily dissolves and adds sweetness.
- Vanilla Simple Syrup: Infuses a hint of vanilla.
- Maple Syrup: Adds a warm, autumnal note.
- Caramel Syrup or Other Flavored Syrups: Torani or similar syrups offer endless flavor possibilities like caramel, hazelnut, chocolate, and more.
-
Extracts and Spices:
- Vanilla Extract or Vanilla Bean Paste: Enhances the creamy flavor.
- Almond Extract: Adds a nutty, marzipan-like flavor.
- Matcha Powder: Creates a vibrant green Matcha Cold Foam with earthy notes.
- Pumpkin Spice: Perfect for fall-themed drinks.
- Cinnamon: Adds warmth and spice.
-
Fresh Ingredients:
- Fresh Mint: Muddle a few mint leaves for a refreshing mint cold foam. You can strain them out after frothing if desired.
- Citrus Zest: A touch of lemon or orange zest can add brightness.
Step-by-Step Guide: How to Make Cold Foam at Home
Making cold foam at home is surprisingly simple, and you likely already have the necessary equipment. Here are five easy methods:
Method 1: Mason Jar (The Easiest Method)
This is the most accessible method, requiring no special equipment beyond a jar with a lid!
- Gather your ingredients: Cold milk or cream (dairy or non-dairy), sweetener and flavorings if desired.
- Pour ingredients into a mason jar: Ensure the jar is no more than half full to allow room for the milk to expand as it foams.
- Seal the jar tightly with the lid.
- Shake vigorously for 30-60 seconds: Shake hard and consistently until the milk has doubled in volume and become foamy. You’ll feel it thicken as you shake.
- Pour immediately over your drink: The cold foam is best used right away.
Benefits of the Mason Jar Method:
- Simple and accessible: Everyone has a jar!
- No special equipment needed.
- Easy cleanup.
Method 2: Milk Frother (Quick and Convenient)
A milk frother, whether handheld or countertop, is a dedicated tool that makes quick work of cold foam.
- Pour ingredients into a tall glass or container: Choose a container that’s appropriate for your frother and allows space for the milk to expand.
- Submerge the frother whisk fully into the milk.
- Turn on the frother and froth for 20-30 seconds: Froth until the milk thickens and becomes foamy. Move the frother up and down slightly to incorporate air.
- Pour immediately over your drink.
Benefits of the Milk Frother Method:
- Fast and efficient.
- Creates consistent foam.
- Relatively inexpensive, especially handheld frothers.
Method 3: Immersion Blender (Powerful and Versatile)
An immersion blender with a whisk attachment can also be used to make cold foam, especially if you already own one.
- Pour ingredients into a tall, narrow container or the jar that may come with your immersion blender.
- Insert the immersion blender with the whisk attachment, ensuring the whisk is submerged.
- Blend on medium-high speed for 20-30 seconds: Blend until the milk foams and thickens. Move the blender up and down to incorporate air evenly.
- Pour immediately over your drink.
Benefits of the Immersion Blender Method:
- Powerful frothing action.
- Versatile if you already own an immersion blender.
- Can make larger quantities more easily than a handheld frother.
Method 4: French Press (Traditional and Effective)
A French press isn’t just for coffee; it’s also a great manual frothing tool!
- Pour ingredients into the pitcher of a French press.
- Insert the lid and plunge the plunger up and down repeatedly: Plunge vigorously for about 30-60 seconds, or until the milk foams and doubles in volume.
- Pour immediately over your drink, holding back the foam with a spoon if needed to control the pour.
Benefits of the French Press Method:
- No electricity needed.
- Effective frothing action.
- Another use for your French press!
Method 5: Regular Blender or Smoothie Blender (For Larger Batches)
A regular countertop blender or a personal smoothie blender like a Nutribullet can be used for making larger batches of cold foam or when using thicker ingredients.
- Pour ingredients into the blender pitcher.
- Blend on medium-high speed for 15-30 seconds: Blend until the mixture is foamy and has increased in volume. Watch carefully to avoid over-blending.
- Pour immediately over your drink.
Benefits of the Blender Method:
- Ideal for larger quantities.
- Can handle thicker ingredients.
- Good for flavored cold foams where you want to blend in ingredients thoroughly.
Troubleshooting & Tips for Perfect Cold Foam
- Milk Temperature is Key: Always start with very cold milk straight from the refrigerator for the best frothing results. Warm milk will not foam as well.
- Container Size Matters: Use a container that is at least double the volume of the liquid ingredients. This gives the milk room to aerate and expand into foam.
- Don’t Over-Froth: Froth just until the milk is thickened and foamy but still pourable. Over-frothing can lead to a foam that is too stiff or starts to separate.
- Milk Type Adjustments: If you’re struggling to get foam with a particular non-dairy milk, try a barista blend or add a tiny pinch of xanthan gum (a stabilizer) to help with foaming.
- Serve Immediately: Cold foam is best served fresh. While it can be re-frothed briefly if it separates slightly, it’s ideal to make it just before you’re ready to enjoy your drink.
Storing Cold Foam (Make-Ahead Tips)
While fresh cold foam is always best, you can store leftovers for a short time if needed:
- Pour leftover cold foam into a mason jar with a lid.
- Store in the refrigerator for up to 3 days.
- Before serving, shake the jar vigorously for a few seconds to re-froth the foam. It might not be quite as perfect as freshly made, but it will still be enjoyable.
Buying Pre-Made Cold Foam: Convenience vs. Homemade
For ultimate convenience, you can now buy pre-made cold foam in a can, similar to whipped cream!
- Canned Cold Foam: Brands like Coffee Toppers and Reddi-wip offer canned cold foam in various flavors. These are readily available online and in some grocery stores.
Pros of Pre-Made Cold Foam:
- Extremely convenient and ready to use.
- Long shelf life.
- Available in different flavors.
Cons of Pre-Made Cold Foam:
- Can be more expensive than homemade.
- May contain additives and preservatives.
- Doesn’t always taste as fresh as homemade.
Homemade cold foam is generally preferred for its freshness, cost-effectiveness, and control over ingredients.
Serving Suggestions: Elevate Your Drinks & Desserts
Cold foam is incredibly versatile! Here are some delicious ways to use it:
- Coffee Drinks:
- Iced Coffee and Hot Coffee
- Cold Brew and Nitro Cold Brew
- Iced Lattes, Iced Mochas, Iced Cappuccinos, Iced Espressos
- Tea Drinks:
- Iced London Fog Tea Lattes
- Iced Matcha Tea Lattes
- Other Drinks:
- Coffee Soda or Coffee Sparkling Water
- Dessert Topping:
- Drizzle over fresh fruit for a light and refreshing dessert.
Serving Tip: You can either let the cold foam float beautifully on top of your drink or gently stir it in for an extra creamy experience with every sip. Some people even prefer to layer it at the bottom for an “upside down” latte effect!
Recipe Card: Homemade Cold Foam
Yields: 1 serving
Prep time: 5 minutes
Cook time: 0 minutes
Total time: 5 minutes
Ingredients:
- ⅓ cup cold cream or milk (dairy or plant-based, as desired)
- 1 teaspoon simple syrup or other liquid sweetener (optional)
- ¼ teaspoon vanilla extract or other extract, spice, or flavoring of choice (optional)
Equipment:
- Mason jar with lid, milk frother, immersion blender, French press, or blender
Instructions:
Choose your preferred method:
-
Mason Jar:
- Add milk, syrup, and extract (if using) to a mason jar. Ensure the jar is not overfilled.
- Securely tighten the lid and shake vigorously for 30-60 seconds until the mixture is thick and foamy.
-
Milk Frother:
- Pour milk, syrup, and extract (if using) into a tall glass or container.
- Submerge the frother whisk and froth for 20-30 seconds until foamy.
-
French Press:
- Pour ingredients into the French press pitcher.
- Plunge the lid repeatedly until the milk foams.
-
Blender:
- Add ingredients to a blender.
- Blend on medium-high speed for 15-30 seconds until foamy.
To Serve:
- Gently pour the cold foam over your favorite iced or hot coffee, tea, or other beverage.
- Enjoy immediately!
Recipe Notes:
- For the best foam, use very cold milk directly from the refrigerator.
- If the cold foam separates slightly after making, you can briefly whisk it back together before serving.
- Leftover cold foam can be stored in a sealed jar in the refrigerator for up to 3 days. Shake well before serving to re-froth.
Conclusion
Making cold foam at home is a game-changer for your coffee routine. It’s easy, affordable, and allows you to customize your drinks just like a barista. Experiment with different milks, flavors, and methods to find your perfect cold foam and elevate your everyday coffee experience. So go ahead, whip up a batch of delicious cold foam and transform your next coffee break into a café-worthy treat!