Sweet corn on the cob is a quintessential summer treat, bringing back memories of sunny days and delicious meals. For many, the simple pleasure of biting into juicy, golden kernels, slathered in butter and seasoned with salt, is pure summer bliss. If you’re looking for the easiest way to cook this seasonal favorite and achieve incredibly sweet and tender results, boiling is the way to go.
Boiled corn on the cob is a classic for a reason. It’s incredibly simple, requires minimal ingredients, and consistently delivers delicious results. While grilling and steaming are also popular methods, boiling corn brings out its natural sweetness and keeps the kernels plump and juicy. This guide will walk you through the straightforward steps to make perfect boiled corn on the cob every time, ensuring it becomes your go-to summer side dish. Forget complicated techniques – with just a few minutes and a pot of boiling water, you can enjoy the freshest, most flavorful corn imaginable.
The Simple Steps to Boiling Corn on the Cob
Making boiled corn on the cob is remarkably easy, needing only fresh corn and water. The key is to use the freshest corn you can find for the best flavor. You can easily cook as many ears as your pot allows, just ensuring they are fully submerged in the boiling water.
Step 1: Prepare the Corn
Begin by removing the husks and silks from the corn cobs. Peel back the green husks and pull them away from the cob, then discard them. Carefully remove and discard the silks, those fine, thread-like strands that cling to the kernels. While you are preparing the corn, fill a large pot with water and bring it to a rolling boil over high heat. Using a large pot ensures there is enough space for the corn and helps maintain the water’s boiling temperature when you add the corn.
Step 2: Boil the Corn
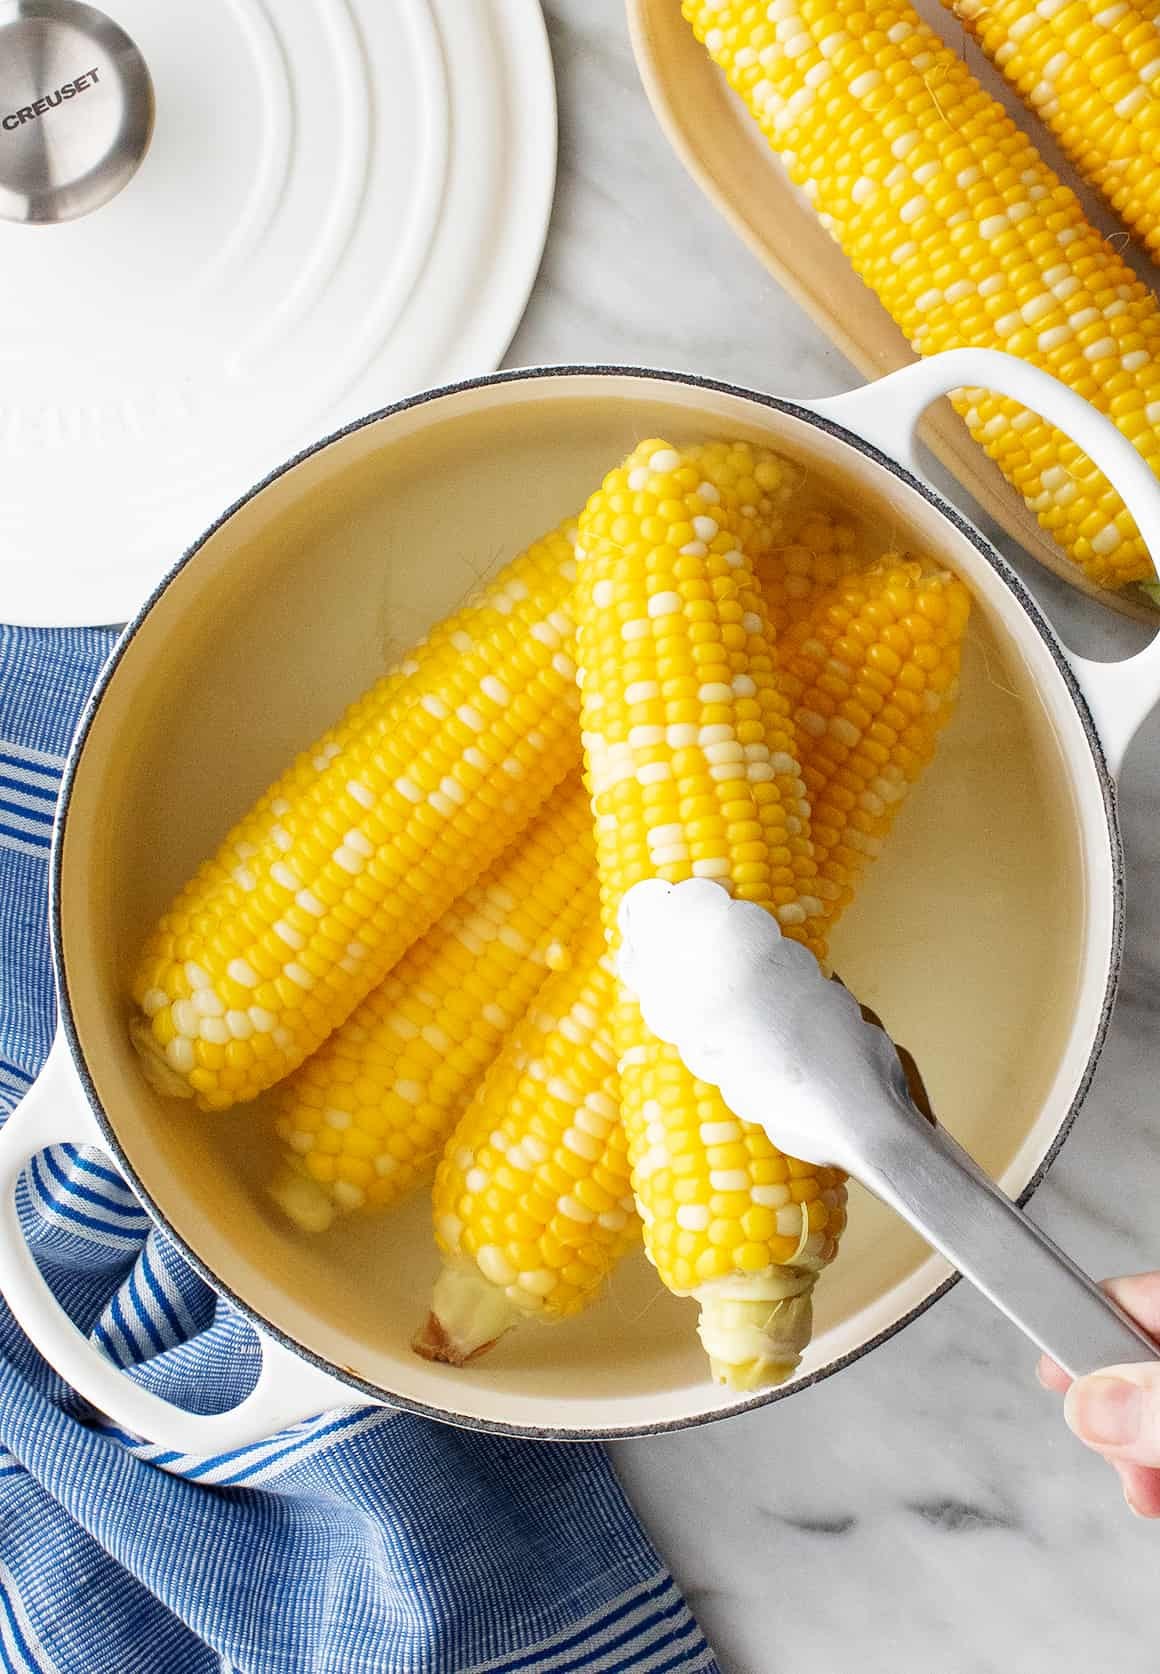
Once the water is boiling vigorously, gently place the husked corn cobs into the pot. Make sure the corn is fully submerged in the boiling water; you may need to use a utensil to push them down. Return the water to a boil. Cook the corn uncovered for approximately 3 to 5 minutes. The exact cooking time can vary slightly depending on the freshness and maturity of the corn, as well as your personal preference for tenderness. The corn is ready when the kernels are tender and have turned a vibrant, bright yellow color. A quick way to check for doneness is to pierce a kernel with a fork – it should be easily pierced and release milky juice. If you are not ready to serve the corn immediately, you can turn off the heat and leave the corn in the hot water to keep warm until serving time. This prevents the corn from drying out.
Step 3: Serve and Enjoy!
Carefully remove the cooked corn from the pot using tongs or a slotted spoon and transfer it to a serving platter. Serve immediately while it’s hot. The simplest and most classic way to enjoy boiled corn on the cob is with generous amounts of butter, salt, and freshly ground black pepper. Let everyone season their own corn to their liking.
Delicious Serving Ideas for Boiled Corn
While classic butter, salt, and pepper are always a winning combination, there are many exciting ways to elevate your boiled corn on the cob. Get creative and try some of these flavorful variations:
- Herb Butter: Enhance the flavor with a compound butter. Mix softened butter with fresh herbs like chives, parsley, or basil, and a pinch of garlic powder for an extra layer of flavor.
- Saucy Corn: Drizzle your favorite sauce over the hot corn. Chipotle sauce adds smoky heat, while vegan ranch provides a creamy and tangy contrast.
- Fresh Herb Garnish: Sprinkle chopped fresh herbs like cilantro, basil, or chives over the buttered corn for a fresh and aromatic touch.
- Spice it Up: For a bolder flavor, dust the corn with spices like smoked paprika, chili powder, or a Cajun seasoning blend.
- Mexican Street Corn Inspired: Create a homemade elote-style corn. After boiling, brush the corn with a mixture of mayonnaise and adobo sauce from canned chipotle peppers. Then, sprinkle with crumbled Cotija cheese and a squeeze of lime juice.
Experiment with these suggestions and discover your own favorite ways to enjoy boiled corn on the cob!
Boiled corn on the cob is the perfect side dish for all your summer cookouts and barbecues. Pair it with classic barbecue fare like veggie burgers, black bean burgers, or BBQ jackfruit sandwiches. It also complements fresh summer salads beautifully, creating a balanced and satisfying meal. No matter what you serve it with, perfectly boiled corn on the cob is sure to be a crowd-pleaser.
Explore More Corn Recipes
If you enjoyed learning how to boil corn on the cob, be sure to check out these other delicious corn recipes for more summer inspiration:
[Link to Grilled Corn on the Cob Recipe]
[Link to Creamed Corn Recipe]
[Link to Corn Salad Recipes]
How to Boil Corn on the Cob Recipe
(Star Rating: 5 stars from 95 votes)
Prep Time: 10 minutes
Cook Time: 5 minutes
Serves: 4-8
Learn how to boil corn on the cob for perfectly tender, sweet, and juicy results every time. This simple method creates the ultimate summer side dish, ready to be topped with butter, salt, and pepper, or your favorite seasonings.
Equipment:
- Large Pot
Ingredients:
- 4-8 ears fresh sweet corn, husks and silks removed
- Butter or compound butter, for serving
- Sea salt and freshly ground black pepper to taste
Instructions:
- Fill a large pot with water and bring to a rolling boil.
- Add the husked corn to the boiling water, ensuring it is submerged.
- Cook for 3-5 minutes, or until the kernels are tender and bright yellow. For an alternative method, place corn in cold water, bring to a boil, and cook for 1-2 minutes.
- Drain the water and serve the corn immediately.
- Serve warm with butter, salt, and pepper, or your desired toppings.
Enjoy your perfectly boiled corn on the cob!