Making fudge at home can be a delightful experience, especially when you’re equipped with the right knowledge and techniques. How To Make Fudge is a question that many dessert enthusiasts ask, and HOW.EDU.VN is here to provide you with expert guidance. Whether you’re a beginner or an experienced baker, our comprehensive guide will help you create the perfect batch of fudge every time. Discover tips, tricks, and variations to elevate your fudge-making skills and impress your friends and family with decadent homemade treats.
1. Understanding the Basics of How To Make Fudge
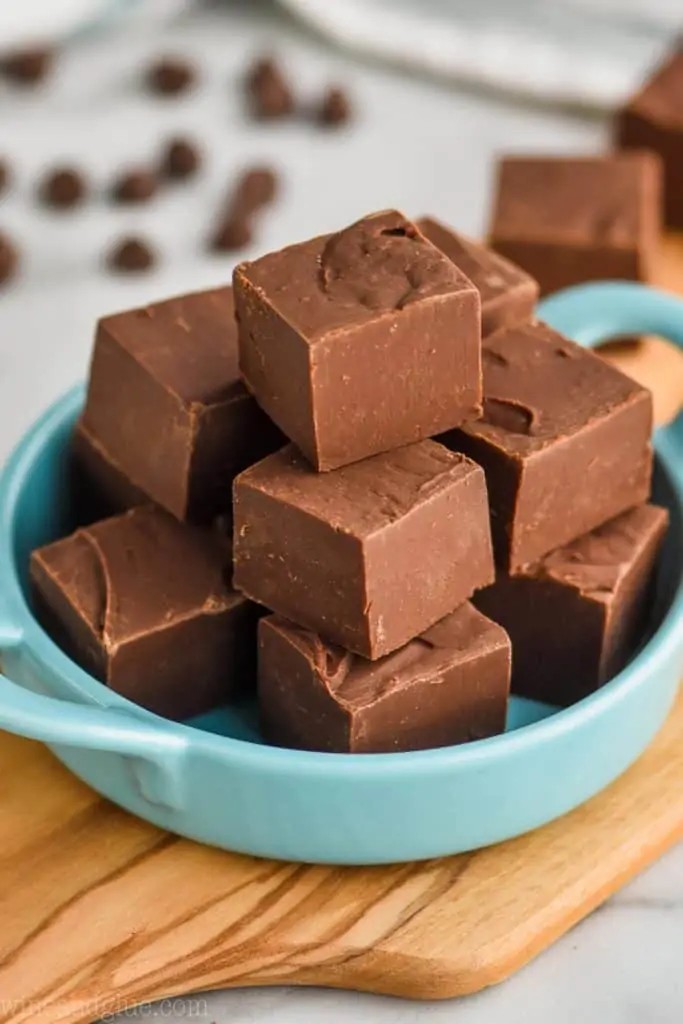
Fudge is a classic confection known for its rich, creamy texture and intense flavor. While there are many variations, the basic concept of how to make fudge involves combining sugar, butter, and milk, then cooking the mixture to a specific temperature before cooling and cutting it into squares. The key to achieving perfect fudge lies in understanding the science behind the ingredients and the cooking process.
1.1. The Key Ingredients
The primary ingredients in most fudge recipes include:
- Sugar: Provides sweetness and structure to the fudge.
- Butter: Adds richness, flavor, and a smooth texture.
- Milk (or Cream): Contributes to the creamy consistency and helps dissolve the sugar.
- Chocolate: Offers a deep, decadent flavor and contributes to the fudge’s characteristic color.
- Vanilla Extract: Enhances the overall flavor profile, adding a touch of warmth and complexity.
1.2. The Science Behind Fudge Making
The process of how to make fudge involves several key chemical reactions:
- Sugar Dissolution: Heating the sugar with milk or cream helps it dissolve completely, creating a smooth base for the fudge.
- Maillard Reaction: This reaction occurs when sugars and amino acids are heated, resulting in the browning and development of complex flavors.
- Crystallization: Controlling the formation of sugar crystals is crucial for achieving the desired fudge texture. Undesirable large crystals can result in grainy fudge, while fine, controlled crystallization leads to a smooth, creamy consistency.
2. Essential Equipment and Tools for Making Fudge
Before diving into the actual process of how to make fudge, it’s essential to gather the necessary equipment and tools. Having the right tools on hand will make the process smoother and more enjoyable.
2.1. Must-Have Equipment
- Heavy-Bottomed Saucepan: A heavy-bottomed saucepan is crucial for even heat distribution, preventing scorching and ensuring consistent cooking.
- Candy Thermometer: A reliable candy thermometer is essential for monitoring the temperature of the fudge mixture. Accurate temperature control is vital for achieving the perfect texture.
- 8×8 Inch Baking Pan: This is the standard size for most fudge recipes, providing the right thickness and proportions.
- Parchment Paper or Aluminum Foil: Lining the baking pan with parchment paper or foil makes it easy to remove the fudge after it has set.
- Wooden Spoon or Heat-Resistant Spatula: For stirring the fudge mixture and ensuring even cooking.
2.2. Optional but Helpful Tools
- Stand Mixer or Hand Mixer: While not essential, a mixer can be helpful for incorporating ingredients and achieving a smooth consistency.
- Microwave-Safe Bowl: For melting chocolate or other ingredients in the microwave.
- Measuring Cups and Spoons: Accurate measurements are crucial for the success of any fudge recipe.
- Sharp Knife or Pizza Cutter: For cutting the fudge into neat, even squares.
3. Step-by-Step Guide: How To Make Fudge from Scratch
Now that you have a solid understanding of the basics and have gathered your equipment, let’s dive into the step-by-step process of how to make fudge from scratch.
3.1. Classic Chocolate Fudge Recipe
This recipe provides a solid foundation for understanding how to make fudge, and it can be easily adapted to create various flavor combinations.
Ingredients:
- 2 cups granulated sugar
- 3/4 cup unsalted butter
- 2/3 cup evaporated milk
- 4 ounces unsweetened chocolate, chopped
- 1/4 teaspoon salt
- 1 teaspoon vanilla extract
Instructions:
- Prepare the Pan: Line an 8×8 inch baking pan with parchment paper or aluminum foil, leaving an overhang on the sides. This will make it easier to remove the fudge later.
- Combine Ingredients: In a heavy-bottomed saucepan, combine the sugar, butter, and evaporated milk.
- Cook the Mixture: Place the saucepan over medium heat and stir constantly until the sugar is dissolved and the butter is melted.
- Bring to a Boil: Once the sugar is dissolved, bring the mixture to a boil, stirring occasionally.
- Monitor the Temperature: Insert a candy thermometer into the saucepan and continue cooking until the mixture reaches 235°F (113°C), also known as the “soft-ball stage.” This is a crucial step in how to make fudge, as the temperature determines the final texture.
- Remove from Heat: Once the mixture reaches the soft-ball stage, remove the saucepan from the heat.
- Add Chocolate and Salt: Add the chopped chocolate and salt to the saucepan and let it sit for a minute to soften.
- Stir Until Smooth: Stir the mixture until the chocolate is completely melted and the fudge is smooth and glossy.
- Add Vanilla Extract: Stir in the vanilla extract.
- Cool and Set: Pour the fudge mixture into the prepared baking pan and spread it evenly. Let it cool completely at room temperature, then refrigerate for at least 2 hours to set.
- Cut and Serve: Once the fudge is firm, lift it out of the pan using the parchment paper or foil overhang. Cut it into squares and serve.
3.2. Tips for Success
- Use High-Quality Chocolate: The quality of the chocolate will significantly impact the flavor of the fudge. Opt for a good-quality unsweetened chocolate for the best results.
- Stir Constantly: Stirring the mixture constantly while cooking prevents scorching and ensures even heat distribution.
- Monitor the Temperature: Accurate temperature control is crucial for achieving the desired fudge texture. Use a reliable candy thermometer and ensure it is properly calibrated.
- Don’t Overcook: Overcooking the fudge can result in a dry, crumbly texture. Remove the saucepan from the heat as soon as the mixture reaches the soft-ball stage.
- Cool Completely: Allowing the fudge to cool completely before cutting it is essential for achieving clean, even squares.
4. Exploring Different Fudge Variations
Once you’ve mastered the basic chocolate fudge recipe, you can start experimenting with different variations to create unique and delicious treats. The possibilities are endless when it comes to how to make fudge, and here are a few popular options to get you started.
4.1. Peanut Butter Fudge
Peanut butter fudge is a classic variation that combines the rich, creamy texture of fudge with the nutty flavor of peanut butter.
Ingredients:
- 2 cups granulated sugar
- 3/4 cup unsalted butter
- 2/3 cup evaporated milk
- 1 cup creamy peanut butter
- 1/4 teaspoon salt
- 1 teaspoon vanilla extract
Instructions:
- Follow steps 1-5 of the Classic Chocolate Fudge Recipe.
- Remove from Heat: Once the mixture reaches the soft-ball stage, remove the saucepan from the heat.
- Add Peanut Butter and Salt: Add the peanut butter and salt to the saucepan and stir until the peanut butter is completely melted and the mixture is smooth.
- Add Vanilla Extract: Stir in the vanilla extract.
- Cool and Set: Pour the fudge mixture into the prepared baking pan and spread it evenly. Let it cool completely at room temperature, then refrigerate for at least 2 hours to set.
- Cut and Serve: Once the fudge is firm, lift it out of the pan using the parchment paper or foil overhang. Cut it into squares and serve.
4.2. Chocolate Walnut Fudge
Chocolate walnut fudge is a decadent variation that adds a crunchy texture and nutty flavor to the classic chocolate fudge.
Ingredients:
- 2 cups granulated sugar
- 3/4 cup unsalted butter
- 2/3 cup evaporated milk
- 4 ounces unsweetened chocolate, chopped
- 1/2 cup chopped walnuts
- 1/4 teaspoon salt
- 1 teaspoon vanilla extract
Instructions:
- Follow steps 1-9 of the Classic Chocolate Fudge Recipe.
- Add Walnuts: Stir in the chopped walnuts.
- Cool and Set: Pour the fudge mixture into the prepared baking pan and spread it evenly. Let it cool completely at room temperature, then refrigerate for at least 2 hours to set.
- Cut and Serve: Once the fudge is firm, lift it out of the pan using the parchment paper or foil overhang. Cut it into squares and serve.
4.3. White Chocolate Fudge
White chocolate fudge is a sweet and creamy variation that offers a different flavor profile from traditional chocolate fudge.
Ingredients:
- 2 cups granulated sugar
- 3/4 cup unsalted butter
- 2/3 cup evaporated milk
- 12 ounces white chocolate, chopped
- 1/4 teaspoon salt
- 1 teaspoon vanilla extract
Instructions:
- Follow steps 1-5 of the Classic Chocolate Fudge Recipe.
- Remove from Heat: Once the mixture reaches the soft-ball stage, remove the saucepan from the heat.
- Add White Chocolate and Salt: Add the white chocolate and salt to the saucepan and let it sit for a minute to soften.
- Stir Until Smooth: Stir the mixture until the white chocolate is completely melted and the fudge is smooth and glossy.
- Add Vanilla Extract: Stir in the vanilla extract.
- Cool and Set: Pour the fudge mixture into the prepared baking pan and spread it evenly. Let it cool completely at room temperature, then refrigerate for at least 2 hours to set.
- Cut and Serve: Once the fudge is firm, lift it out of the pan using the parchment paper or foil overhang. Cut it into squares and serve.
4.4. Other Creative Variations
- Cookies and Cream Fudge: Add crushed Oreo cookies to the basic chocolate fudge recipe for a cookies and cream flavor.
- Mint Chocolate Fudge: Add mint extract and chocolate chips to the basic chocolate fudge recipe for a refreshing mint chocolate flavor.
- Salted Caramel Fudge: Add caramel sauce and sea salt to the basic chocolate fudge recipe for a sweet and salty treat.
- Maple Walnut Fudge: Use maple syrup instead of sugar and add chopped walnuts for a maple walnut flavor.
5. Troubleshooting Common Fudge-Making Problems
Even with the best recipes and instructions, fudge-making can sometimes be tricky. Here are some common problems and their solutions to help you troubleshoot your fudge-making process.
5.1. Grainy Fudge
Grainy fudge is often caused by the formation of large sugar crystals. Here are some tips to prevent grainy fudge:
- Stir Constantly: Stirring the mixture constantly while cooking helps prevent the formation of large sugar crystals.
- Use a Clean Saucepan: Make sure your saucepan is clean and free of any sugar crystals before starting.
- Avoid Sugar Splatters: Sugar crystals can form on the sides of the saucepan and fall back into the mixture, causing graininess. Use a wet pastry brush to wash down the sides of the saucepan and dissolve any sugar crystals.
- Don’t Overcook: Overcooking the fudge can cause the sugar to crystallize. Remove the saucepan from the heat as soon as the mixture reaches the soft-ball stage.
5.2. Soft Fudge
Soft fudge is often caused by not cooking the mixture to a high enough temperature. Here are some tips to prevent soft fudge:
- Use a Reliable Candy Thermometer: Make sure your candy thermometer is accurate and properly calibrated.
- Cook to the Soft-Ball Stage: Ensure the mixture reaches 235°F (113°C), also known as the “soft-ball stage.”
- Don’t Underestimate the Time: It may take longer than expected to reach the soft-ball stage, so be patient and continue cooking until the temperature is reached.
5.3. Dry Fudge
Dry fudge is often caused by overcooking the mixture. Here are some tips to prevent dry fudge:
- Monitor the Temperature: Accurate temperature control is crucial for preventing dry fudge. Use a reliable candy thermometer and ensure it is properly calibrated.
- Remove from Heat Promptly: Remove the saucepan from the heat as soon as the mixture reaches the soft-ball stage.
- Don’t Overcook: Overcooking the fudge can result in a dry, crumbly texture.
5.4. Fudge Doesn’t Set
If your fudge doesn’t set, it may be due to not cooking the mixture to a high enough temperature or not cooling it properly. Here are some tips to help your fudge set:
- Cook to the Soft-Ball Stage: Ensure the mixture reaches 235°F (113°C), also known as the “soft-ball stage.”
- Cool Completely: Allow the fudge to cool completely at room temperature, then refrigerate for at least 2 hours to set.
- Don’t Rush the Cooling Process: Rushing the cooling process can prevent the fudge from setting properly. Be patient and allow it to cool completely before cutting it.
6. Expert Tips and Tricks for Perfect Fudge
To elevate your fudge-making skills and ensure perfect results every time, here are some expert tips and tricks from the culinary specialists at HOW.EDU.VN.
6.1. Choosing the Right Ingredients
- Use High-Quality Ingredients: The quality of the ingredients will significantly impact the flavor and texture of the fudge. Opt for high-quality chocolate, butter, and other ingredients for the best results.
- Use Fresh Ingredients: Fresh ingredients will contribute to a better flavor and texture. Make sure your butter and milk are fresh and within their expiration dates.
- Don’t Skimp on Vanilla Extract: Pure vanilla extract adds a perfect layer of flavor to the fudge. Avoid imitation vanilla extract, as it can have an artificial taste.
6.2. Mastering the Cooking Process
- Use a Heavy-Bottomed Saucepan: A heavy-bottomed saucepan is crucial for even heat distribution, preventing scorching and ensuring consistent cooking.
- Stir Constantly: Stirring the mixture constantly while cooking prevents scorching and helps prevent the formation of large sugar crystals.
- Monitor the Temperature: Accurate temperature control is crucial for achieving the desired fudge texture. Use a reliable candy thermometer and ensure it is properly calibrated.
- Don’t Overcook: Overcooking the fudge can result in a dry, crumbly texture. Remove the saucepan from the heat as soon as the mixture reaches the soft-ball stage.
6.3. Cooling and Cutting Techniques
- Prepare the Pan: Line the baking pan with parchment paper or aluminum foil, leaving an overhang on the sides. This will make it easier to remove the fudge later.
- Cool Completely: Allow the fudge to cool completely at room temperature, then refrigerate for at least 2 hours to set.
- Use a Sharp Knife: Use a sharp knife or pizza cutter to cut the fudge into neat, even squares.
- Warm the Knife: Warming the knife under hot water before cutting can help prevent the fudge from sticking to the knife.
- Cut into Even Squares: Cut the fudge into even squares for a professional presentation.
7. The Importance of Temperature Control
Temperature control is one of the most critical aspects of how to make fudge. The temperature of the fudge mixture determines the final texture and consistency of the fudge.
7.1. Understanding the Soft-Ball Stage
The “soft-ball stage” is a term used in candy making to describe the consistency of a sugar syrup when it reaches a certain temperature. In the case of fudge, the mixture should be cooked to 235°F (113°C), which is the soft-ball stage.
To test if the mixture has reached the soft-ball stage, drop a small amount of the mixture into a bowl of cold water. If the mixture forms a soft, pliable ball that can be easily flattened between your fingers, it has reached the soft-ball stage.
7.2. Using a Candy Thermometer
A candy thermometer is an essential tool for accurately monitoring the temperature of the fudge mixture. Here are some tips for using a candy thermometer:
- Choose a Reliable Thermometer: Opt for a high-quality candy thermometer that is accurate and easy to read.
- Calibrate the Thermometer: Before using the thermometer, calibrate it by placing it in boiling water. The thermometer should read 212°F (100°C) at sea level. If it doesn’t, adjust the reading accordingly.
- Position the Thermometer: Place the thermometer in the saucepan so that the bulb is fully submerged in the mixture but not touching the bottom of the pan.
- Monitor the Temperature: Monitor the temperature closely and remove the saucepan from the heat as soon as the mixture reaches the soft-ball stage.
8. Fudge and Dietary Considerations
Fudge is a sweet treat that can be enjoyed by many, but it’s important to consider dietary restrictions and preferences when making and serving fudge.
8.1. Gluten-Free Fudge
Most fudge recipes are naturally gluten-free, as they don’t contain any wheat, barley, or rye. However, it’s important to check the labels of all ingredients to ensure they are gluten-free.
8.2. Dairy-Free Fudge
For those who are dairy-free or lactose intolerant, it’s possible to make fudge using dairy-free alternatives. Here are some options:
- Dairy-Free Butter: Use a dairy-free butter substitute, such as coconut oil or vegan butter.
- Dairy-Free Milk: Use a dairy-free milk alternative, such as almond milk, soy milk, or coconut milk.
- Dairy-Free Chocolate: Use dairy-free chocolate chips or unsweetened chocolate.
8.3. Vegan Fudge
For those who follow a vegan diet, it’s possible to make fudge using vegan-friendly ingredients. Here are some options:
- Vegan Butter: Use a vegan butter substitute, such as coconut oil or vegan butter.
- Vegan Milk: Use a vegan milk alternative, such as almond milk, soy milk, or coconut milk.
- Vegan Chocolate: Use vegan chocolate chips or unsweetened chocolate.
- Maple Syrup: Use maple syrup instead of sugar for a natural sweetener.
8.4. Sugar-Free Fudge
For those who are watching their sugar intake, it’s possible to make fudge using sugar-free sweeteners. Here are some options:
- Stevia: Use stevia, a natural sweetener derived from the stevia plant.
- Erythritol: Use erythritol, a sugar alcohol that has a low glycemic index.
- Monk Fruit: Use monk fruit, a natural sweetener derived from the monk fruit.
9. Storing and Serving Fudge
Proper storage and serving techniques are essential for maintaining the quality and flavor of your homemade fudge.
9.1. Storing Fudge
- Airtight Container: Store fudge in an airtight container to prevent it from drying out.
- Room Temperature: Fudge can be stored at room temperature for up to 2 weeks.
- Refrigeration: For longer storage, fudge can be refrigerated for up to 1 month.
- Freezing: Fudge can be frozen for up to 3 months. Wrap it tightly in plastic wrap and then place it in an airtight container or freezer bag.
9.2. Serving Fudge
- Room Temperature: Serve fudge at room temperature for the best flavor and texture.
- Cut into Squares: Cut the fudge into neat, even squares for a professional presentation.
- Garnish: Garnish the fudge with chopped nuts, sprinkles, or a drizzle of chocolate sauce.
- Pair with Coffee or Tea: Fudge pairs well with coffee or tea, making it a perfect dessert for after-dinner enjoyment.
10. Consulting with Experts at HOW.EDU.VN
If you’re still facing challenges with how to make fudge or want personalized guidance, don’t hesitate to consult with the experts at HOW.EDU.VN. Our team of experienced culinary professionals is dedicated to providing you with the knowledge and support you need to succeed in the kitchen.
10.1. Benefits of Consulting with Our Experts
- Personalized Advice: Receive personalized advice tailored to your specific needs and skill level.
- Troubleshooting Assistance: Get help troubleshooting any issues you’re facing with your fudge-making process.
- Advanced Techniques: Learn advanced techniques and tips for creating gourmet fudge variations.
- Confidence and Empowerment: Gain the confidence and empowerment to create delicious homemade fudge that will impress your friends and family.
10.2. How To Get in Touch
Ready to elevate your fudge-making skills? Contact the experts at HOW.EDU.VN today.
- Address: 456 Expertise Plaza, Consult City, CA 90210, United States
- WhatsApp: +1 (310) 555-1212
- Website: HOW.EDU.VN
FAQ About How To Make Fudge
Here are some frequently asked questions about how to make fudge, answered by the experts at HOW.EDU.VN.
1. What is the best type of chocolate to use for fudge?
The best type of chocolate to use for fudge depends on your personal preference. Unsweetened chocolate provides a deep, intense chocolate flavor, while semi-sweet chocolate offers a slightly sweeter taste. White chocolate is a good option for those who prefer a sweeter, creamier fudge.
2. Can I make fudge without a candy thermometer?
While it’s possible to make fudge without a candy thermometer, it’s not recommended. A candy thermometer is the most accurate way to ensure the fudge mixture reaches the soft-ball stage, which is crucial for achieving the desired texture.
3. How do I prevent grainy fudge?
To prevent grainy fudge, stir the mixture constantly while cooking, use a clean saucepan, avoid sugar splatters, and don’t overcook the fudge.
4. How do I fix soft fudge?
If your fudge is too soft, you can try recooking it. Place the fudge back in the saucepan and cook it over medium heat, stirring constantly, until it reaches the soft-ball stage. Then, pour it back into the baking pan and let it cool completely.
5. How long does fudge last?
Fudge can be stored at room temperature for up to 2 weeks, refrigerated for up to 1 month, or frozen for up to 3 months.
6. Can I add alcohol to fudge?
Yes, you can add alcohol to fudge. Stir in a tablespoon or two of your favorite liquor, such as rum, bourbon, or Irish cream, after the fudge has been removed from the heat.
7. Can I make fudge in the microwave?
Yes, you can make fudge in the microwave. Combine the ingredients in a microwave-safe bowl and microwave in 30-second intervals, stirring after each interval, until the chocolate is melted and the mixture is smooth.
8. What can I add to fudge to make it more interesting?
You can add a variety of ingredients to fudge to make it more interesting, such as nuts, dried fruit, sprinkles, chocolate chips, or marshmallows.
9. Is fudge difficult to make?
Fudge can be a bit tricky to make, but with the right recipe, equipment, and techniques, it’s definitely achievable. The key is to follow the instructions carefully and pay attention to the temperature of the fudge mixture.
10. Where can I find more expert advice on making fudge?
For more expert advice on how to make fudge, contact the culinary specialists at HOW.EDU.VN. We’re here to help you create delicious homemade fudge that will impress your friends and family.
Why Trust HOW.EDU.VN for Your Culinary Expertise?
At HOW.EDU.VN, we pride ourselves on providing reliable, expert-backed information to help you succeed in all your culinary endeavors. Our team of experienced chefs and food scientists are dedicated to delivering the most accurate, up-to-date guidance available. Whether you’re a seasoned baker or a beginner in the kitchen, you can trust HOW.EDU.VN to provide the knowledge and support you need to create delicious and impressive dishes.
Don’t let the complexities of fudge-making intimidate you. With the guidance of HOW.EDU.VN, you can master the art of how to make fudge and create delectable treats that will delight your taste buds. Contact us today and let our experts help you on your culinary journey.
Ready to Make Perfect Fudge? Contact Us Today
Don’t struggle alone with your fudge-making challenges. Let the experts at HOW.EDU.VN guide you to success. Our personalized advice, troubleshooting assistance, and advanced techniques will empower you to create delicious homemade fudge that will impress your friends and family. Contact us today and take the first step towards becoming a fudge-making master.
- Address: 456 Expertise Plaza, Consult City, CA 90210, United States
- WhatsApp: +1 (310) 555-1212
- Website: how.edu.vn
We look forward to helping you achieve your fudge-making goals!