Hello everyone! As a Korean cooking enthusiast and content creator for how.edu.vn, I’m excited to guide you through the process of making classic, spicy, and utterly delicious traditional Napa cabbage kimchi, known in Korean as tongbaechu-kimchi, baechu-kimchi, or pogi-kimchi. In Korea, when we simply say “kimchi,” this iconic dish is what comes to mind, even with the incredible variety of kimchi in Korean cuisine, including many other delicious Napa cabbage variations.
Over the years, I’ve shared several kimchi recipes, but I realized I’ve never created a truly in-depth guide specifically for tongbaechu-kimchi. While I have videos for mak-kimchi (easy kimchi recipe), a quicker version with chopped cabbage, and yangbaechu-kimchi (emergency kimchi) for when you’re short on time, and even a recipe for making baechu-kimchi with kkakdugi in one go, this is the definitive, traditional method. (And for our vegan friends, I also have a fantastic vegan kimchi version!)
For me, this how to make kimchi recipe embodies the authentic, deep flavor I crave. Using whole cabbage leaves requires a bit more effort than chopping them, as you’ll meticulously spread the flavorful, spicy paste leaf by leaf. It’s a labor of love, but mastering this traditional style of kimchi making is a true badge of honor in Korean cooking. If you can make this kimchi well, you’ve truly leveled up your Korean culinary skills.
The first crucial step in learning how to make kimchi is brining the Napa cabbage in a saltwater solution. This softens the leaves, making them pliable and ready to absorb the vibrant flavors. While some purists insist on sea salt, I consistently use Kosher salt in all my Korean recipes for its reliable results. This brining process also sets the stage for the magic of lactobacillus bacteria. These beneficial microorganisms convert sugars into lactic acid, naturally preserving the cabbage and developing that signature tangy kimchi flavor over time. The beauty of homemade kimchi is its versatility – you can enjoy it fresh, right after making it, or let it ferment to deepen its complexity and sourness. As it ferments, it transforms, becoming perfect for beloved dishes like hearty kimchi-jjigae (kimchi stew) and flavorful kimchi fried rice.
Growing up, I remember my mother making enormous batches of kimchi – sometimes up to 200 heads of cabbage! This was part of kimjang, the traditional Korean practice of preparing kimchi in large quantities for the winter. She’d gather with three or four of her friends, and they would transform our kitchen into a kimchi-making powerhouse. They’d spend the day chopping vegetables, mixing the aromatic paste, and, most importantly, spreading it by hand onto each cabbage leaf. This hand-application is essential for tongbaechu-kimchi. Armed with their own rubber gloves, they’d work together, sharing stories and laughter, fueled by a delicious lunch of pollock stew or beef radish soup. Kimjang was as much a social event as it was food preparation.
At the end of the day, my mom’s friends would leave with a share of the kimchi, but the bulk of it stayed with us, enough to sustain our family throughout the long winter months. And when it was time for her friends to make their kimjang kimchi, my mom would reciprocate, bringing her gloves and expertise to their homes.
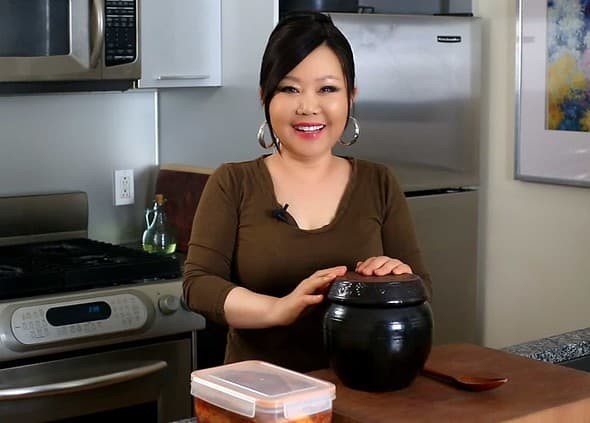
In the accompanying video, you’ll also see me fermenting the kimchi in a traditional onggi, a beautiful earthenware pot specifically designed for fermentation. While an onggi is not essential for making delicious kimchi, it’s a wonderful tool if you have one. If not, don’t worry! A BPA-free plastic container or a glass jar works perfectly well.
For more answers to frequently asked questions about how to make kimchi, I encourage you to watch this video.
I sincerely hope you enjoy this recipe and embark on your own kimchi-making journey at home. It’s a rewarding experience – delicious, surprisingly easy, and a fun way to connect with Korean culinary tradition. Let’s get started on learning how to make kimchi!
Authentic kimchi fermented in a traditional Korean Onggi pot.
Ingredients
This recipe yields approximately 8 pounds (3.6 kg) of homemade kimchi.
For Salting the Cabbage:
- 2 Napa cabbages (about 6 pounds total)
- 1 ½ cups Kosher salt
- 1 gallon of water
For the Rice Porridge ( 풀 / Ppul ):
- 2 cups water
- 2 tablespoons sweet rice flour (also known as glutinous rice flour)
- 2 tablespoons turbinado sugar (or brown or white sugar)
Vegetables:
- 2 cups Korean radish ( mu / 무 ) matchsticks, or daikon radish as a substitute
- 1 cup carrot matchsticks
- 7 to 8 green onions (scallions), chopped
- 1 cup Asian chives (buchu / 부추), chopped (optional, or substitute with 3 additional green onions, chopped)
- 1 cup water dropwort (minari / 미나리), optional
Seasonings and Spices for Kimchi Paste:
- ½ cup garlic cloves (approximately 24 cloves), minced
- 2 teaspoons ginger, minced
- 1 medium onion, minced
- ½ cup fish sauce
- ¼ cup fermented salted shrimp (saeujeot / 새우젓) with its salty brine, finely chopped
- 2 cups Korean red pepper flakes (gochugaru / 고춧가루)
Directions
Now, let’s dive into the step-by-step instructions on how to make kimchi!
Part 1: Prepare and Salt the Cabbage
- Trim the Cabbage: If the cores of the Napa cabbages protrude significantly, use a knife on a cutting board to trim them for a flatter base.
- Halve the Cabbage: To split each cabbage in half cleanly, start by making a shallow slit at the base of the core. This gives you a grip to gently pull the halves apart, preventing tearing of the inner leaves.
Preparing Napa cabbage: Halving the cabbage is the first step in learning how to make kimchi.
- Create Core Slits: On each cabbage half, make a slit through the core, about 2 inches above the stem. The aim is to loosen the leaves while still keeping them attached to the core. This helps with even salting.
Slitting the core of Napa cabbage: Preparing the cabbage to ensure proper salting for homemade kimchi.
- Salt the Cabbage Leaves: In a large basin or tub, submerge the cabbage halves in water to wet them thoroughly. Then, lift each leaf and sprinkle Kosher salt between the layers, ensuring salt reaches down to the core. Use more salt towards the thicker stem ends of the leaves.
Salting Napa cabbage leaves: A crucial step in how to make kimchi, ensuring proper texture and flavor.
Napa cabbage salting process: Sprinkling salt between the leaves is key for making authentic kimchi.
- Brine for 2 Hours: Let the salted cabbages rest for 2 hours, turning them over every 30 minutes to ensure even salting. If desired, you can ladle some of the salty water accumulating at the bottom of the basin over the top of the cabbages to further distribute the brine.
Turning Napa cabbage during brining: Essential for even salting when learning how to make kimchi.
Brining Napa cabbage for kimchi: Allowing the cabbage to soften and absorb salt for the perfect kimchi texture.
- Wash and Drain: After 2 hours, rinse the cabbage halves thoroughly under cold running water several times. This removes excess salt and any grit. As you wash, separate the halves into quarters by cutting along the slits you made earlier. Remove the cores, give the cabbage a final rinse, and place it in a strainer over a basin to drain excess water while you prepare the kimchi paste.
Washing salted Napa cabbage: Rinsing the cabbage is a key step in how to make kimchi, removing excess salt.
Part 2: Make the Rice Porridge and Kimchi Paste
While the cabbage is salting (and during the turning intervals), you can prepare the rice porridge and kimchi paste:
-
Cook the Porridge: In a small pot, combine water and sweet rice flour. Whisk well with a wooden spoon to prevent lumps. Cook over medium heat for about 10 minutes, stirring continuously, until the mixture begins to bubble and thicken into a porridge. Add sugar and cook for another minute, stirring to dissolve. Remove from heat and let the porridge cool completely.
-
Combine Seasonings: Pour the cooled rice porridge into a large mixing bowl. Add minced garlic, ginger, and onion, followed by fish sauce, fermented salted shrimp (with its brine), and Korean red pepper flakes (gochugaru).
Fermented salted shrimp (saeujeot): An essential ingredient in authentic how to make kimchi recipes.
Kimchi seasoning base: Garlic and other aromatics are key to a flavorful kimchi paste.
Kimchi paste texture: Achieving the right consistency for coating cabbage leaves.
Mixing kimchi paste: Combining all seasoning ingredients for homemade kimchi.
-
Mix into Kimchi Paste: Use a wooden spoon to thoroughly mix all the seasonings into the cooled porridge until a smooth, vibrant red paste forms.
-
Add Vegetables: Incorporate the radish matchsticks, carrot matchsticks, and chopped green onions into the kimchi paste. If using, add Asian chives and water dropwort as well. Mix everything well to evenly coat the vegetables with the paste.
Adding vegetables to kimchi paste: Incorporating radish and other vegetables into the flavorful kimchi mix.
Colorful kimchi paste with vegetables: The vibrant mix of vegetables and seasoning paste ready for cabbage.
Finished kimchi paste: The final kimchi paste, bursting with flavor and ready to be applied to cabbage.
Part 3: Making Kimchi
- Apply Kimchi Paste to Cabbage: In a large bowl, take a quarter of the drained cabbage. Take a handful of kimchi paste and generously spread it on each cabbage leaf, making sure to coat both sides thoroughly.
Spreading kimchi paste on cabbage leaves: Applying the flavorful paste leaf-by-leaf is key in how to make kimchi.
- Wrap and Pack: Once every leaf in a cabbage quarter is coated with the paste, wrap the quarter around itself to form a compact bundle or packet. Place this kimchi packet into your fermentation jar, plastic container, or onggi. Repeat with the remaining cabbage quarters and kimchi paste, packing them tightly into your chosen container.
Wrapped whole cabbage kimchi: Neatly packed kimchi quarters ready for fermentation.
- Enjoy Fresh or Ferment: You can enjoy your kimchi immediately for a fresh, crisp taste, or let it ferment at room temperature for a few days to develop its signature tangy and complex flavors.
Freshly made kimchi: Enjoying kimchi right away for a crisp and vibrant flavor.
Part 4: Fermentation and Storage
-
Room Temperature Fermentation: Kimchi fermentation begins naturally within a day or two at room temperature. The speed of fermentation depends on your room’s temperature and humidity – warmer and more humid conditions accelerate the process. You’ll know fermentation is underway when the kimchi starts to smell and taste sour, and you may see bubbles rising when you press down on it. If using a sealed container, remember to open it periodically to release pressure and let it “breathe,” pressing down on the kimchi to keep it submerged.
-
Refrigerate to Slow Fermentation: Once your kimchi reaches your desired level of sourness, transfer it to the refrigerator. Refrigeration significantly slows down the fermentation process, allowing you to store and enjoy your kimchi for weeks, even months. Keep in mind that kimchi will continue to ferment slowly in the fridge, becoming more sour over time.
Fermented kimchi: Kimchi develops its signature sour and complex flavors through fermentation.
Now you know how to make kimchi! Enjoy the journey and the delicious results of your homemade Napa cabbage kimchi.