Have you ever found yourself wondering, “What exactly is meringue?” and immediately followed that thought with, “There’s no way I could ever make that!” If so, you’re definitely not alone. Meringue often carries a reputation for being fussy and difficult, leaving many home bakers feeling intimidated.
But the truth is, creating beautiful, glossy meringue is absolutely achievable at home. This guide is here to demystify the process, offering you the knowledge and confidence to whip up perfect meringue every time you need it. Forget the fear, grab your eggs, and let’s embark on a meringue-making journey that will transform you into a pro in your own kitchen!
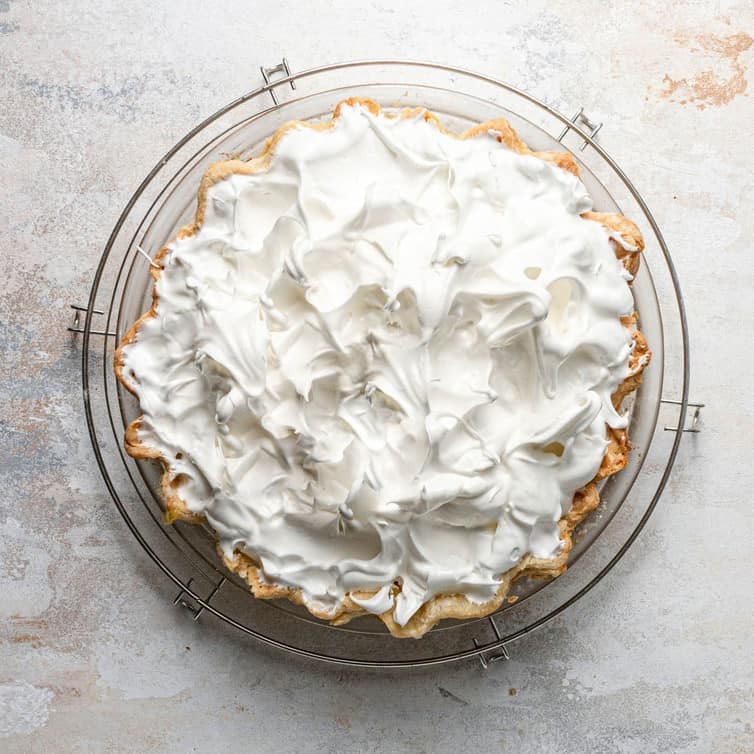
Meringue is more versatile than you might think. While lemon meringue pie is a classic application, meringue’s uses extend far beyond just pie toppings. It can elegantly crown puddings, be baked into crisp and airy meringue cookies or the dramatic pavlova, or even be blended with butter to create some of the most sumptuously smooth frostings imaginable.
At its heart, meringue is simply a magical transformation of humble egg whites and sugar into ethereal white clouds of pure deliciousness. Let’s dive into the details and learn How To Make Meringue like a seasoned baker.
Essential Ingredients for Perfect Meringue
To make meringue successfully, you only need a handful of key ingredients, but each plays a vital role in achieving that perfect result.
-
Eggs: For the best meringue, fresh eggs are your ideal choice. While convenient, using boxed or carton egg whites is generally not recommended. These are often pasteurized, a process that can sometimes hinder the egg whites from whipping up to their full glossy and stiff potential.
-
Sugar: Sweetness is essential for meringue! Granulated sugar is the standard choice, providing the necessary structure and flavor.
-
Cream of Tartar: This is often considered meringue’s secret weapon. Cream of tartar is an acid that acts as a stabilizer for the egg whites, helping you achieve those magnificent, voluminous pillows of meringue.
-
Salt and Vanilla Extract: These are the flavor enhancers. A pinch of salt balances the sweetness, and vanilla extract adds a touch of delicate flavor, elevating the overall taste of your meringue.
The Crucial Role of Cream of Tartar
Cream of tartar deserves special emphasis because of its significant contribution to meringue quality. This seemingly minor ingredient is actually a powerhouse when it comes to creating stable and beautiful meringue.
Scientifically speaking, cream of tartar prevents the proteins in egg whites from bonding too tightly together. This action results in a super-smooth meringue texture that is less prone to weeping or collapsing. It’s the ingredient that helps your meringue hold its shape and maintain its fluffy volume.
How much cream of tartar to use? A good guideline is to use ⅛ teaspoon of cream of tartar for every egg white in your recipe.
Cream of Tartar Substitute: If you find yourself without cream of tartar and can’t make a store run, don’t worry! You can use ½ teaspoon of lemon juice (another acid!) as a substitute for every egg white. While it works in a pinch, cream of tartar is generally preferred for optimal meringue stability.
Step-by-Step Guide to Making Meringue
Making meringue is a straightforward process. By following these steps and incorporating the tips provided, you’ll be whipping up meringue like a seasoned pastry chef in no time!
-
Begin Whipping the Egg Whites: In a clean mixing bowl, using an electric mixer fitted with the whisk attachment (or a hand mixer), start beating the egg whites on medium speed. Continue until they become broken up and appear frothy.
-
Add Stabilizers and Flavor: Introduce the cream of tartar, salt, and vanilla extract to the frothy egg whites.
-
Whip to Soft Peaks: Increase the mixer speed to medium-high and continue beating until soft peaks form. Soft peaks are characterized by their gentle drooping when the whisk is lifted; they should hold their shape briefly before the tip curls over.
-
Gradually Incorporate Sugar: Reduce the mixer speed slightly and begin adding the granulated sugar gradually, about a couple of tablespoons at a time. Ensure each addition of sugar is fully incorporated before adding the next.
-
Whip to Stiff, Glossy Peaks: Once all the sugar has been added, increase the mixer speed back to medium-high and continue beating until glossy, stiff peaks form. Stiff peaks should stand straight up when the whisk is lifted and have a shiny, smooth appearance. At this stage, it’s almost impossible to overbeat meringue, so continue mixing until you achieve those firm, defined peaks.
Exploring Different Types of Meringue
While all meringues share the foundation of egg whites and sugar, the techniques and applications vary, resulting in three distinct types of meringue: French, Swiss, and Italian.
French Meringue
French meringue, also known as “uncooked” or “classic” meringue, is the simplest and most common type. It is made by directly whipping together raw egg whites and sugar until stiff peaks are achieved. This is the type we’ve focused on in the step-by-step guide above.
Uses: French meringue is typically used for toppings that will be baked, such as on pies (like lemon meringue pie), or for creating baked meringue cookies and pavlovas. It’s essential to bake French meringue as it uses raw egg whites.
Swiss Meringue
Swiss meringue involves a gentle heating process before whipping. Egg whites and sugar are combined in a heatproof bowl set over a pan of simmering water (a double boiler). The mixture is heated, stirring constantly, until the sugar is completely dissolved and the mixture reaches a temperature of 160°F (71°C). This heating step pasteurizes the egg whites, making Swiss meringue safe to eat without further baking. After heating, the mixture is removed from the heat and whipped until it cools to room temperature and forms stiff peaks.
Uses: Swiss meringue is versatile and can be used for baked applications or as a base for Swiss Meringue Buttercream (SMB). SMB is made by incorporating butter into the finished Swiss meringue, creating a silky smooth and less sweet buttercream perfect for frosting cakes and cupcakes.
Italian Meringue
Italian meringue is considered the most stable and sophisticated of the three. It involves pouring a hot sugar syrup into already whipping egg whites. First, egg whites are whipped to soft peaks. Simultaneously, sugar and water are cooked to the “soft ball” sugar stage (235-240°F or 112-115°C). This hot sugar syrup is then slowly streamed into the whipping egg whites while the mixer is running. The mixture continues to whip until it cools to room temperature and forms glossy, stiff peaks. The cooked sugar syrup pasteurizes the egg whites, making Italian meringue safe to eat without baking.
Uses: Italian meringue is ideal for unbaked meringue toppings, such as those used in parfaits or when a torched meringue finish is desired. Its stability makes it perfect for piping intricate decorations and it’s also the foundation for Italian Meringue Buttercream (IMB), known for its incredibly stable and silky texture.
Expert Tips and Troubleshooting for Meringue Success
To ensure your meringue turns out perfectly every time, keep these expert tips in mind and address common issues proactively:
-
Use Room Temperature Eggs: While separating eggs is easier when they are cold, allow the egg whites to come to room temperature before making meringue (about 30 minutes). Room temperature egg whites whip to a greater volume, resulting in a lighter and fluffier meringue.
-
Ensure a Clean Bowl and Utensils: The presence of any fat, even a trace amount of egg yolk or residual grease on your bowl or beaters, can prevent egg whites from whipping properly and reaching stiff peaks. Make absolutely sure your bowl and whisk are spotlessly clean and completely dry before you begin.
-
Gradually Add Sugar is Key: Adding sugar slowly, a couple of tablespoons at a time, is crucial. This gradual addition ensures that the sugar fully dissolves into the egg whites, preventing a grainy texture and minimizing the risk of the meringue collapsing. Adding too much sugar at once can weigh down the egg whites and inhibit the formation of stiff peaks.
-
You Can’t Overbeat Meringue (Once Sugar is Added): It’s a common misconception that meringue can be easily overbeaten. However, once all the sugar is incorporated, it becomes very difficult to overmix. Continue beating until you achieve truly stiff, glossy peaks. If in doubt, mix a little longer to ensure proper stability.
-
Adding Flavors and Colors: If you want to infuse your meringue with flavor, add extracts (like vanilla, almond, or lemon) when you add the vanilla extract as indicated in the recipe. For colored meringue, use gel food coloring (gel is preferred over liquid food coloring to minimize adding extra liquid). Add the gel color once the meringue has reached stiff peaks and beat until the color is evenly distributed.
-
Recommended Equipment: A stand mixer is the most convenient tool for making meringue (it’s hands-free!). However, a hand mixer works perfectly well too. For the truly dedicated, meringue can even be made by hand using a large wire whisk – be prepared for an arm workout!
-
Consider Weather Conditions: Humidity can be meringue’s nemesis. On very humid days, it can be more challenging to whip egg whites to stiff peaks. While modern climate control helps, you might notice a difference in meringue behavior on a dry winter day versus a humid summer day. If humidity is very high, consider making meringue on a drier day or ensuring your kitchen is as cool and dry as possible.
Basic Meringue Recipe
Yield: 8 servings
Prep Time: 15 minutes
Total Time: 15 minutes
Ingredients:
- 5 large egg whites, room temperature
- ½ teaspoon cream of tartar
- ½ teaspoon vanilla extract
- Pinch of salt
- ½ cup (99g) granulated sugar
Instructions:
- Using an electric mixer with the whisk attachment (or a hand mixer), beat the egg whites on medium speed until frothy. Add the cream of tartar, salt, and vanilla extract.
- Increase the mixer speed to medium-high and beat until soft peaks form.
- While continuing to beat, gradually add the granulated sugar, a couple of tablespoons at a time, and beat until glossy and stiff peaks form.
Recipe Notes:
- Eggs: Use fresh, room temperature eggs for the best volume. Carton egg whites are not recommended.
- Cleanliness: Ensure your bowl and utensils are completely clean and dry to prevent fat contamination.
- Sugar Addition: Add sugar gradually to ensure proper dissolution and meringue stability.
- Mixing Time: Don’t be afraid to mix until truly stiff peaks form. You cannot overbeat meringue after sugar is added.
- Flavor and Color: Add extracts with vanilla. Use gel food coloring after stiff peaks form for colored meringue.
- Equipment: Stand mixer, hand mixer, or whisk can be used.
- Weather: Humidity can affect meringue. Opt for drier days if possible.
- Serving Suggestions: Use immediately to top pies, puddings, or bake into meringue cookies or pavlova.
Nutrition Information (per serving, approximate):
Calories: 59kcal, Carbohydrates: 13g, Protein: 2g, Fat: 1g, Sodium: 31mg, Potassium: 62mg, Sugar: 13g, Calcium: 1mg
Enjoy creating beautiful and delicious meringues! With a little practice and these helpful tips, you’ll be amazed at how easy it is to master this elegant and versatile baking technique.