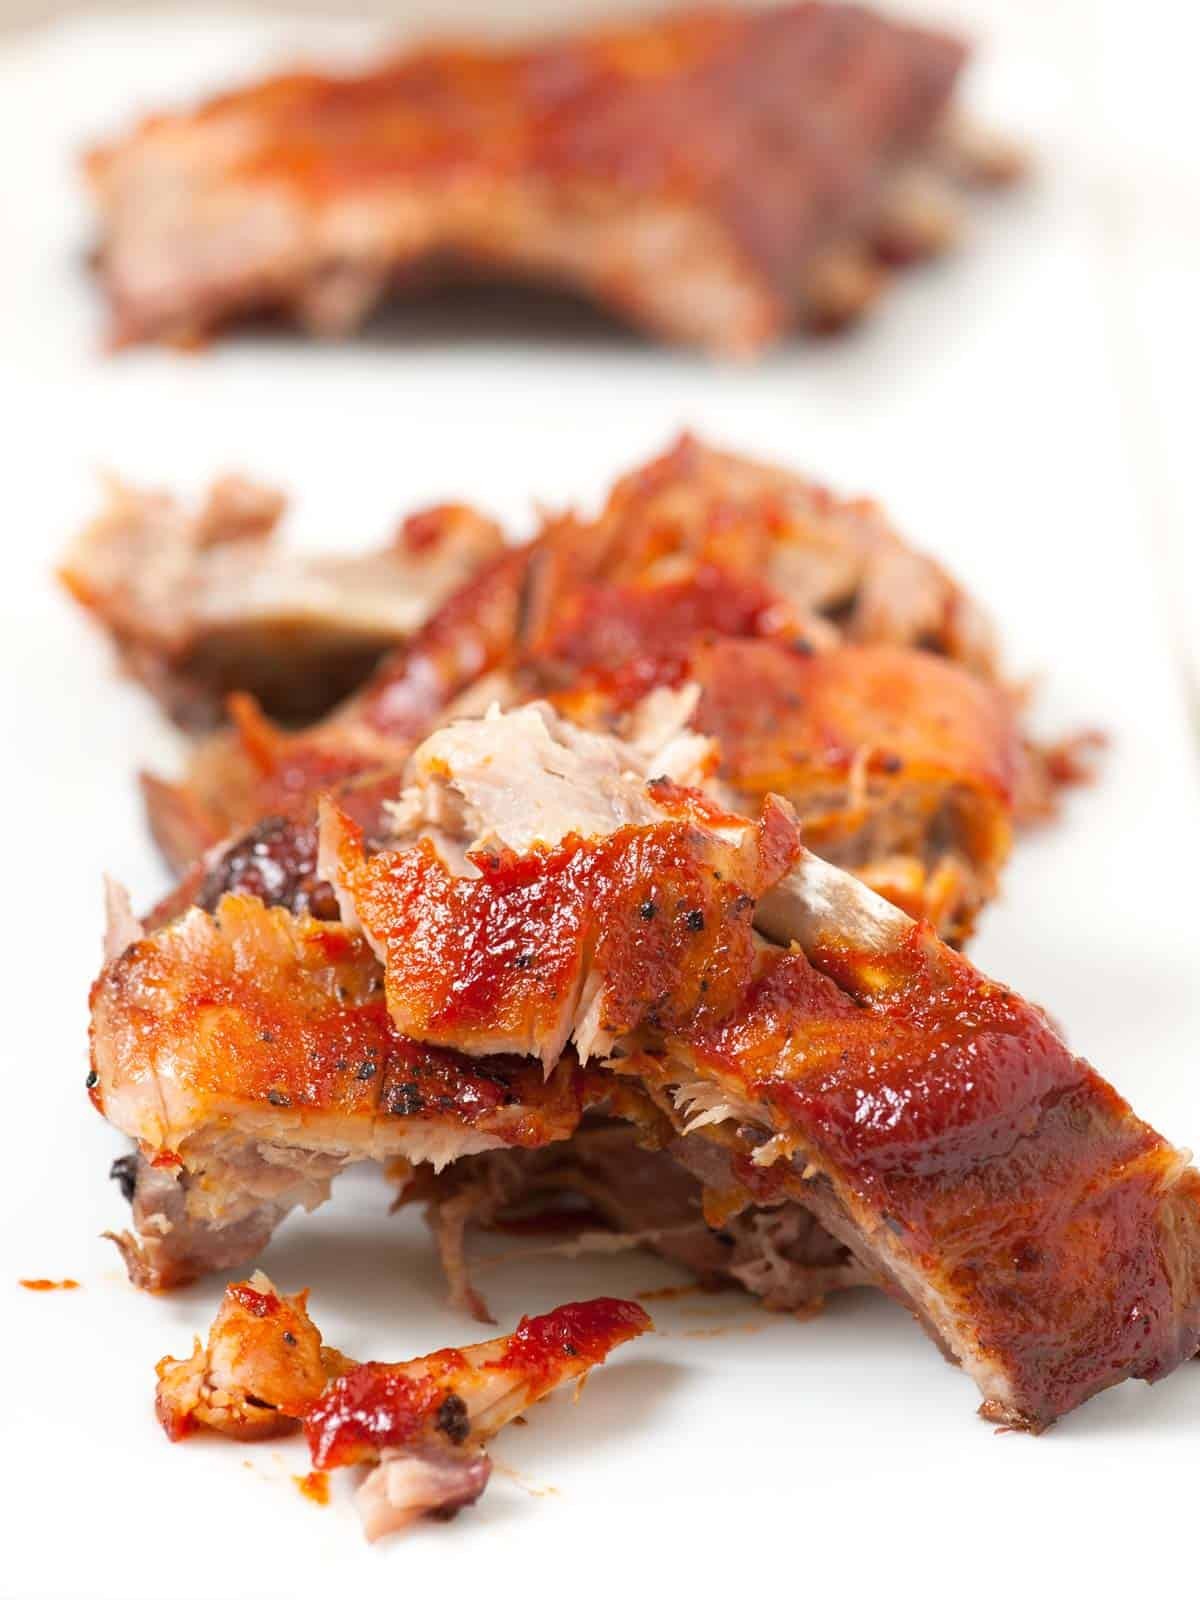
Craving incredibly tender, fall-off-the-bone ribs without firing up the grill? You’re in the right place! Baking ribs in the oven is a surprisingly easy and foolproof method to achieve barbecue perfection. This recipe will guide you through the simple steps to create mouthwatering oven-baked ribs that will impress your family and friends. The magic lies in low and slow cooking, allowing the ribs to become unbelievably tender while you relax. Say goodbye to tough, chewy ribs and hello to your new favorite way to cook them!
Alt text: Video showcasing the preparation and cooking process of easy oven-baked ribs, highlighting their tender texture.
This oven-baked ribs recipe is a family favorite for a reason. It’s truly the best and easiest way to guarantee ribs that are so tender they practically fall off the bone. Forget complicated techniques and hours of babysitting a smoker. With this method, your oven does most of the work, transforming simple pork ribs into a flavorful and satisfying meal.
We’ll be baking our ribs at a gentle 275°F (135°C) for two to three hours. This low temperature and long cooking time are key to breaking down the connective tissues in the ribs, resulting in that melt-in-your-mouth tenderness we all crave. This reliable method is so effective that I even use it as the foundation for my Asian sticky ribs with a delicious hoisin glaze. Once you master this basic oven-baking technique, you can explore endless flavor variations!
Key Ingredients for Perfect Oven-Baked Ribs
Let’s gather the simple ingredients you’ll need to make these amazing oven-baked ribs. The beauty of this recipe lies in its simplicity – you don’t need a long list of fancy items to achieve incredible flavor.
- Pork Ribs: For this recipe, I prefer using baby back ribs, known for their tenderness and lean meat. However, this method works wonderfully with other types of ribs as well. You can use spare ribs, St. Louis-style ribs, or even country-style ribs. Keep in mind that while the cooking time should be generally similar, it’s always best to keep an eye on them and adjust based on their thickness and how they are progressing.
- Simple Seasoning: Sometimes, less is more! For a classic BBQ flavor, a generous seasoning of salt and freshly ground black pepper is all you truly need. These simple seasonings enhance the natural flavor of the pork without overpowering it. Of course, if you have a favorite BBQ spice rub or seasoned salt blend, feel free to use it to customize the flavor profile to your liking.
- BBQ Sauce: The sauce is where you can really personalize your ribs! I love to use my homemade sweet and spicy BBQ sauce (recipe below!) for these oven-baked ribs. It provides a perfect balance of sweetness, spice, and tanginess that complements the rich pork flavor. However, feel free to use your favorite homemade BBQ sauce recipe or a high-quality store-bought sauce. Think about the flavor profile you enjoy – smoky, sweet, tangy, spicy – and choose a sauce that aligns with your taste. We also use a similar sauce for our popular BBQ chicken wings, and I’m also a big fan of this sweet and tangy BBQ sauce if you want more inspiration.
Step-by-Step Guide: How to Cook Ribs in the Oven
This oven-baked ribs method is inspired by Steamy Kitchen’s approach to oven-baked ribs, and it has become our go-to technique ever since. The process is incredibly straightforward, making it perfect for both beginner and experienced cooks. The key ingredient here is patience – allowing the ribs to cook low and slow is what unlocks their ultimate tenderness.
For the absolute most tender, fall-off-the-bone ribs, there’s one crucial step: removing the thin membrane from the back of the ribs. This membrane, also known as the silverskin, can become tough and chewy during cooking, preventing that desirable melt-in-your-mouth texture. Removing it ensures that the ribs become incredibly tender and allows the seasonings to penetrate the meat more effectively.
You might find that your butcher has already removed this membrane for you, which is a great time-saver. But if it’s still intact, don’t worry – it’s easy to remove yourself. Here’s how:
- Place the ribs meat-side down on a cutting board.
- Locate the thin, silvery membrane on the bone-side of the ribs.
- Using a sharp knife, gently slide the tip of the knife under the membrane, near one of the bones.
- Once you’ve lifted a small section, use your fingers to grip the membrane and gently pull it away from the bones.
- If the membrane is slippery, use a clean kitchen towel or paper towel to get a better grip and continue pulling until it’s completely removed.
Once the membrane is removed (or if it was already gone), the next step is to season the ribs generously. I like to keep it simple with salt and pepper, ensuring every part of the ribs is seasoned. Don’t be shy with the seasoning – it’s essential for flavorful ribs! Rub the salt and pepper (or your chosen spice rub) all over both sides of the rib rack.
After seasoning, wrap the ribs tightly in heavy-duty aluminum foil. This step is crucial for steaming the ribs in their own juices, which contributes to their tenderness. Make sure the foil is sealed tightly to trap the moisture inside. If your foil isn’t wide enough to wrap the entire rack, you can use two pieces to create a secure packet.
Now it’s time for the oven to work its magic! Bake the wrapped ribs in a preheated oven at 275°F (135°C) for 2 ½ to 3 ½ hours, or until they are incredibly tender. The exact cooking time will depend on the type and thickness of your ribs, so it’s important to check for doneness.
How do you know when the ribs are ready? The best way to check is by inserting a sharp knife or a meat thermometer into the thickest part of the meat. There should be very little resistance, and the meat should feel very tender. Another way to check is to gently bend the rack of ribs. If the meat looks like it’s easily pulling away from the bones, they are ready to come out of the oven.
For the final touch, just before serving, unwrap the baked ribs and generously slather them with your favorite barbecue sauce. Brush the sauce evenly over both sides of the ribs, ensuring they are nicely coated.
To create that classic caramelized BBQ sauce finish, you have a couple of options: you can broil them in the oven for a few minutes or finish them on a grill. If broiling, move an oven rack to the top position, turn the broiler to high, and broil the sauced ribs for 3 to 4 minutes, keeping a very close eye on them to prevent burning. If grilling, place the sauced ribs on a preheated grill over medium heat for a few minutes per side, until the sauce is caramelized and slightly sticky.
And that’s all there is to it! These oven-baked ribs are incredibly easy to make and deliver consistently delicious, fall-off-the-bone results every time. Get ready to enjoy some of the best ribs you’ve ever made!
Storing and Reheating Baked Ribs
Leftover baked ribs are a treat! Baked ribs can be stored in an airtight container in the refrigerator for up to 4 days. Make sure they are cooled down to room temperature before refrigerating to maintain their quality.
For longer storage, you can freeze baked ribs for up to 3 months. To freeze, I recommend double-wrapping them tightly in plastic wrap and then aluminum foil to prevent freezer burn. Thaw the frozen ribs overnight in the refrigerator before reheating.
To reheat the ribs and bring them back to their juicy glory, the best method is to reheat them in a low oven. Wrap the ribs in foil and place them in a preheated 275°F (135°C) oven for 20 to 30 minutes, or until heated through. You can also reheat them on a grill over medium heat, wrapped in foil, for a similar amount of time.
Once the ribs are warmed through, you can brush them with fresh BBQ sauce before serving and broil or grill them briefly to caramelize the sauce, just like in the final step of the original recipe. This will make them taste freshly made!
What to Serve with Oven-Baked Ribs
Oven-baked ribs are a fantastic main course that pairs perfectly with a variety of classic and flavorful side dishes. Here are some of our favorite sides to serve alongside ribs:
- Classic BBQ Sides: You can’t go wrong with traditional BBQ sides like potato salad, coleslaw, and cornbread. These sides offer a delicious contrast in textures and flavors to the rich and savory ribs.
- Potato Perfection: Crispy roasted potatoes and creamy mashed potatoes are always crowd-pleasing choices that complement ribs beautifully. For a touch of sweetness and a nutritional boost, try mashed sweet potatoes for a delightful twist.
- Refreshing Salads: To balance the richness of the ribs, consider serving a refreshing salad. A veggie-packed pasta salad or a classic macaroni salad are both excellent options. Alternatively, a simple green salad with your favorite homemade dressing, such as honey mustard, creamy blue cheese, or homemade ranch, provides a light and vibrant counterpoint to the hearty ribs.
More Delicious Pork Recipes to Explore
If you love pork as much as we do, you’re in for a treat! Beyond these amazing oven-baked ribs, we have many more pork recipes for you to discover. For quick and flavorful weeknight meals, check out our juicy skillet pork chops or these easy oven-baked pork chops. For a more elegant and impressive dish, I highly recommend this pork tenderloin recipe roasted on a bed of apples and onions – it’s perfect for a special occasion. And for a super fast and flavorful meal, you can’t beat our easy ground pork tacos – they are ready in minutes and always a hit!
Easy Fall Off the Bone Oven Baked Ribs
- PREP
- COOK
- TOTAL
Baking low and slow is the key to these fall-off-the-bone oven-baked ribs. We finish these ribs with a sweet and spicy BBQ sauce, but you can use any sauce you love. For the most tender results, removing the thin membrane from the back of the rack is highly recommended. Depending on where you purchase your ribs, this may already be done for you. If not, instructions are included in the tips section below the recipe.
Makes 4 Servings
Watch Us Make the Recipe
You Will Need
- 2 to 2 ½ pounds baby back pork ribs
- 1 tablespoon olive oil
- 1/4 cup finely diced onion
- 1/2 teaspoon ground cumin
- 1/2 cup ketchup
- 1 tablespoon hot chili sauce like Sriracha
- 2 tablespoons light brown sugar
- 1 tablespoon apple cider vinegar
- Salt and ground pepper, to taste
Directions
Bake the Ribs
- Preheat the oven to 275°F (135°C). Set aside a large roasting pan or rimmed baking sheet and foil.
- If the thin membrane is still on the back of your ribs, remove it. See the tips section below for detailed instructions.
- Season both sides of the ribs generously with salt and pepper. If using a spice rub, rub it evenly over the ribs.
- Place the ribs, meatiest-side up, in a large roasting pan. You may need to cut the rack in half to fit. Cover the pan tightly with aluminum foil, ensuring a good seal. If your foil isn’t large enough, wrap each rack tightly in foil packets and place them on the baking sheet.
- Bake for 2 ½ to 3 ½ hours, or until the meat easily falls from the bones. Check for doneness after 2 hours. Ribs are ready when they are cooked through and tender. To check, pierce them with a sharp knife – there should be minimal resistance. You can also gently bend the ribs; if the meat appears to pull away from the bone easily, they are ready.
Make Homemade BBQ Sauce
- While the ribs are baking, prepare the barbecue sauce. Heat olive oil in a saucepan over medium heat. Add diced onions and cook until softened and translucent, about 5 to 8 minutes.
- Stir in cumin and cook for an additional 30 seconds to release its aroma.
- Add ketchup, hot chili sauce, brown sugar, and apple cider vinegar. Stir to combine, season with salt to taste, and cook for 2 minutes. Set aside.
To Finish
- Remove the ribs from the oven and discard the aluminum foil. Generously brush both sides with the prepared barbecue sauce.
- (Optional) Move an oven rack near the top. Turn the broiler to high and broil the ribs for 3 to 4 minutes, until the barbecue sauce starts to caramelize. Watch closely to prevent burning. Alternatively, finish on a grill for a similar caramelized effect.
Adam and Joanne’s Recipe Tips
- Ribs Variety: While baby back ribs are recommended, spare ribs, country-style, and St. Louis-style ribs will also work with this recipe. The cooking time should remain similar, but monitor them to ensure they cook to desired tenderness.
- Removing the Membrane: Place ribs meat-side-down. Locate the membrane on the bone side. Use a knife to gently lift the membrane, then grip and pull it off using your fingers. Use a kitchen towel for better grip if it’s slippery.
- Cooking Multiple Racks: Cooking time remains consistent for multiple racks. Wrap each rack tightly in foil and place them on a large baking sheet. Two racks typically fit on a standard baking sheet, allowing for baking multiple racks at once.
- Ketchup Choice: For the BBQ sauce, use thicker ketchups without high fructose corn syrup for best results. Homemade ketchup or organic/natural options like Hunt’s 100% Natural or Heinz Simply work well.
- Recipe Inspiration: This recipe is an adapted version of a recipe previously shared with Betty Crocker, highlighting its trusted and delicious origins.
- Nutritional Information: The provided nutrition facts are estimates and include the barbecue sauce and 1 teaspoon of salt per serving.
Nutrition Per Serving: Serving Size 1/2 rack / Calories 433 / Protein 26 g / Carbohydrate 13 g / Dietary Fiber 0 g / Total Sugars 11 g / Total Fat 30 g / Saturated Fat 10 g / Cholesterol 107 mg / Sodium 694 mg
AUTHOR: Adam Gallagher
You May Also Like…
Hoisin Sticky Ribs
Crispy Carnitas
Perfect Slow Cooker Pulled Pork
Pork Tenderloin with Peppers
Apple Stuffed Pork Chops