Remember the gooey, stretchy, and oh-so-satisfying slime from childhood? That nostalgic, squishy substance is not only back in trend, but it’s also incredibly easy to make at home! If you’re looking for a fun, engaging activity for kids (and adults!), learning How To Make Slime With Glue is the perfect project. This simple DIY is not only entertaining but also a fantastic way to explore basic science principles right in your kitchen.
This guide will walk you through creating your own homemade slime using just a few common ingredients: glue and borax. Get ready to dive into the squishy world of slime making!
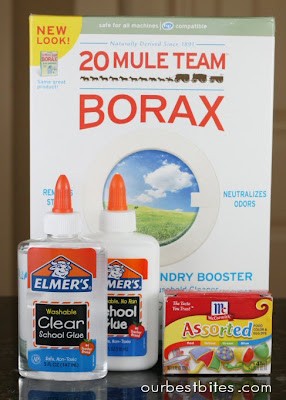
Image showing the simple ingredients needed to make homemade slime: borax powder, water, Elmer’s glue, and food coloring.
What You’ll Need to Make Slime with Glue
Before we get started, gather these simple supplies. You probably already have some of them at home!
- Borax Powder: This is the key ingredient that will transform the glue into slime. You can find borax in the laundry detergent aisle of most supermarkets.
- Water: You’ll need water to dissolve the borax and to mix with the glue.
- Elmer’s Glue: Both clear and white Elmer’s glue work great for slime. Clear glue will give you a translucent slime, while white glue will create a more opaque version. For this tutorial, we are using clear glue.
- Food Coloring (Optional): Add a few drops of your favorite food coloring to make your slime vibrant and colorful. Green is a classic slime color!
- Mixing Bowls: You’ll need two bowls – one for the borax solution and one for mixing the slime.
- Spoon or Stirring Stick: For mixing the ingredients.
Step-by-Step Guide: How to Make Glue Slime
Let’s get to the fun part – making the slime! Follow these easy steps to create your own gooey masterpiece:
Step 1: Prepare the Borax Solution
In one of your mixing bowls, dissolve 1 teaspoon of borax powder in 1 cup of warm water. Stir well until the borax is completely dissolved and the water is clear. Set this borax solution aside.
Image depicting the first step of making slime: dissolving borax powder in a cup of water in a clear glass.
Step 2: Mix Glue and Water
Take your second mixing bowl and pour in ½ cup (4 oz) of Elmer’s glue. Add ½ cup of water to the glue.
Image showing pouring clear Elmer’s glue into a mixing bowl as part of the slime-making process.
Stir the glue and water mixture until it is well combined and smooth.
Image illustrating the mixing of water into the clear glue in a bowl, preparing for the next slime ingredient.
Step 3: Add Food Coloring (Optional)
If you want to add color to your slime, now is the time! Add a few drops of food coloring to the glue mixture.
Image displaying the addition of green food coloring to the glue and water mixture to color the slime.
Stir until the color is evenly distributed throughout the glue mixture.
Step 4: Combine and Knead
This is where the magic happens! Slowly pour the borax solution into the glue mixture. You’ll instantly see slime start to form – it will look like a solid mass forming in the bowl.
Image capturing the moment the borax solution is poured into the glue mixture, showing slime starting to form.
Stir with your spoon or stirring stick for a few moments, then get your hands in there! Use your hands to gather the slime mass. It will feel wet and sticky at first.
Image demonstrating the initial mixing of the slime with hands, showing the wet and stringy texture.
Keep kneading the slime. As you knead, the slime will become firmer and less sticky as the moisture gets absorbed or kneaded out. Pour out any excess liquid remaining in the bowl.
Image showing the slime being kneaded and stretched, achieving a smoother and less sticky consistency.
Continue to knead until you have a smooth, non-sticky ball of slime. If the slime is still too sticky, knead it a bit more.
Image of the finished homemade slime, showcasing its smooth and solid yet stretchy texture.
Tips for Perfect Homemade Slime
- Adjusting Consistency: If your slime is too sticky, you may need to knead it more. If it’s too firm, try adding a tiny bit of water and kneading it in.
- Experiment with Glue: Try making slime with white glue for a different texture and opacity. White glue slime tends to be a bit firmer.
- Add-ins for Fun Slime: Once you’ve mastered the basic recipe, you can get creative! Try adding glitter, small beads, or even essential oils for scent to your slime.
Slime Safety and Storage
- Adult Supervision: Always supervise young children when making and playing with slime.
- Non-Edible: Slime is not for consumption. Make sure children understand that it is for play only.
- Wash Hands: Wash hands thoroughly after playing with slime.
- Storage: Store your slime in an airtight container or ziplock bag to prevent it from drying out. Properly stored slime can last for a long time!
Making slime with glue is a simple, enjoyable activity that provides hours of fun. It’s also a great way to introduce kids to basic science concepts in a hands-on way. So gather your ingredients and get ready to create your own amazing homemade slime!