Are you dreaming of baking crusty, flavorful sourdough bread at home? The journey begins with a sourdough starter, the living heart of all sourdough recipes. Creating your own starter might seem like a mysterious process, but it’s actually quite straightforward. With just flour, water, and a little patience, you can cultivate a thriving sourdough starter that will unlock a world of delicious baking possibilities. This guide will demystify the process and show you How To Make Sourdough Starter from scratch in about 7 days, perfect for beginners eager to dive into the world of sourdough. Get ready to bake incredible sourdough bread, focaccia, pizza, and much more with your homemade starter!
Understanding Sourdough Starter
Before we jump into the recipe, let’s understand what exactly a sourdough starter is. Simply put, a sourdough starter is a living culture made from flour and water. It’s a fermented mixture that harnesses the wild yeasts and beneficial bacteria naturally present in flour and our environment. These microorganisms are what give sourdough its unique flavor and leavening power. Unlike commercial bread, sourdough relies entirely on this natural fermentation process to rise, creating a bread with depth, tang, and a wonderful chewy texture.
Creating a sourdough starter from scratch takes time, typically around 7 days or even up to two weeks. This isn’t instant yeast; we’re cultivating a living ecosystem! We begin with whole wheat flour to kickstart fermentation and then switch to all-purpose or bread flour for daily feedings. A mature starter is recognized by its bubbly activity and ability to double in size after feeding, signaling it’s ready to leaven your dough.
Don’t be intimidated by the process. Making a sourdough starter is not difficult. It’s more about following a simple routine of mixing flour and water, then patiently waiting and feeding the mixture as it comes to life. Avoid overcomplicating it with too much information online. Stick to this beginner-friendly guide, follow the steps, and embrace the process.
Beginner Sourdough Starter Recipe: Step-by-Step Guide
What You’ll Need:
Supplies
- 3/4 L Jar (approximately 32 ounces) – a wide-mouth jar is preferable for easy access (like this one – affiliate link from original article, consider removing if external links not allowed)
- Digital kitchen scale – for accurate measurements, especially important in baking (like this one – affiliate link from original article, consider removing if external links not allowed)
- Small rubber spatula – for mixing and scraping down the jar
Ingredients
For Day 1:
- 60g (approximately 1/2 cup) Whole Wheat Flour
- 60g (approximately 1/4 cup) Water (lukewarm, around 85°F or 29°C)
For Daily Feedings (Days 3-7):
- 60g (approximately 1/2 cup) Unbleached All-Purpose Flour or Bread Flour
- 60g (approximately 1/4 cup) Water (lukewarm, around 85°F or 29°C)
Note on Ingredients: For best results, use unbleached all-purpose or bread flour. Brands like King Arthur Flour, Trader Joe’s, or Whole Foods Market are reliable choices. While organic flour can be used, some bakers find it slightly more challenging initially. Feel free to experiment with what works for you. For water, filtered or tap water is suitable. If your tap water has a strong chlorine smell, opt for filtered water.
Day 1: Getting Started
- In your clean jar, combine 60g of whole wheat flour and 60g of lukewarm water.
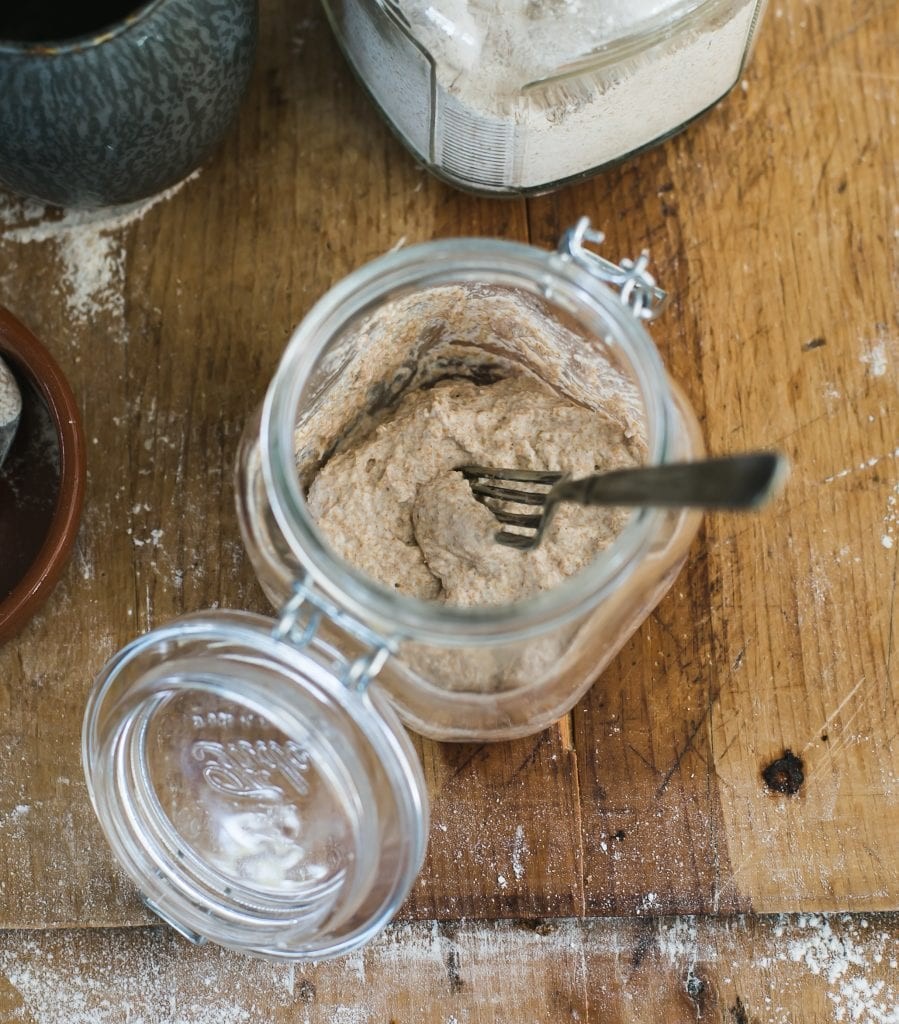
- Mix thoroughly with a fork or spatula until a smooth, thick paste forms. The consistency will be somewhat sticky.
- Cover the jar loosely with plastic wrap, a lid (not airtight), or a reusable wax wrap.
- Place the jar in a warm spot, ideally around 70-75°F (21-24°C), for 24 hours.
Temperature Tip: Maintaining a warm temperature is crucial for successful sourdough starter development. If your kitchen is cool, create a warmer environment. A slightly warm oven (turned OFF!) with the oven light on can work for a few hours (monitor with an oven thermometer to ensure it’s not too hot). A proofing box set to the desired temperature is ideal. Alternatively, a microwave with the door slightly ajar and the light on can also provide gentle warmth.
Day 2: Checking for Bubbles
- After 24 hours, check your starter for any signs of activity. Look for small bubbles on the surface.
- Bubbles indicate fermentation is beginning, which is a positive sign. However, don’t worry if you don’t see bubbles yet. Initial bubble formation can be subtle and might even disappear overnight.
- On Day 2, you don’t need to do anything else. Simply let your starter rest in its warm spot for another 24 hours. You can gently stir it once or twice to introduce oxygen, but it’s not essential.
Tip: Understanding “Hooch” You might notice a dark liquid forming on the surface of your starter during creation or even later on. This liquid, called “hooch,” is a byproduct of fermentation and signals that your starter is hungry. It often has a pungent smell, sometimes described as similar to rubbing alcohol. Hooch is normal. If you see it, it’s best to pour it off before the next feeding.
Days 3-7: Daily Feedings
Starting on Day 3, we begin the daily feeding process. This is crucial for nurturing the wild yeasts and bacteria in your starter. As they become more active, you’ll notice your starter rising and falling predictably. The goal is to increase the starter volume to approximately 1 cup (236g) by Day 7, following a consistent feeding routine each day.
Tips for Successful Feedings:
- Establish a Feeding Schedule: Feed your starter at roughly the same time every day. Consistency helps regulate the fermentation cycle and encourages predictable rising and falling. Morning feedings are often convenient.
- Track Growth: Use a rubber band or a piece of masking tape around your jar to mark the starter level right after feeding. This visual cue helps you monitor how much it rises and falls.
- Keep the Jar Clean: Use your spatula to scrape down the sides of the jar after each feeding. This prevents dried starter buildup and potential mold growth on the jar walls.
- Be Patient: Sourdough starter development is a gradual process. Temperature and consistent daily feedings are key. If your starter seems slow to develop, continue the feeding routine patiently.
Day 3:
- Discard half (60g) of your sourdough starter. You can scoop it out with a spoon or pour the starter into a bowl to weigh and discard. The texture might be stretchy at this stage.
- To the remaining starter in the jar, add 60g of all-purpose flour and 60g of water.
- Mix well until smooth, scraping down the sides of the jar. The consistency should now resemble thick pancake batter or yogurt.
- Cover and return to its warm spot for 24 hours.
- Total starter yield: approximately 180g.
Day 4:
- Discard half (90g) of your sourdough starter.
- Add 60g of all-purpose flour and 60g of water to the jar.
- Mix thoroughly and scrape down the sides.
- Cover and let it rest in a warm spot for 24 hours.
- Total starter yield: approximately 210g.
- Note: It’s common for starter activity to seem to slow down on Days 3-4 after switching to all-purpose or bread flour. This is normal as the starter adjusts to the new flour type. Be patient and continue the feedings.
Day 5:
- Discard half (105g) of your sourdough starter.
- Add 60g of all-purpose flour and 60g of water.
- Mix well and scrape down the sides.
- Cover and rest in a warm spot for 24 hours.
- Total starter yield: approximately 225g.
Day 6:
- Discard half (112g) of your starter.
- Add 60g of all-purpose flour and 60g of water.
- Mix well and scrape down the sides.
- Cover and rest in a warm spot for 24 hours.
- Total starter yield: approximately 232.5g.
Day 7:
- Discard half (116.25g) of your sourdough starter.
- Add 60g of all-purpose flour and 60g of water.
- Mix well and scrape down the sides.
- Cover and rest in a warm spot for 24 hours.
- Total starter yield: approximately 236g (1 cup).
Day 7-8: Your Sourdough Starter is Born!
- By Day 7 or 8, your sourdough starter should be showing significant signs of activity. It should have reliably doubled in size within a few hours after feeding. You’ll see abundant bubbles throughout the starter and on the surface. The texture will be light, spongy, and almost fluffy, like roasted marshmallows. It should also have a pleasantly tangy, slightly yeasty aroma, not a foul or overly sour smell.
- If your starter exhibits these characteristics, congratulations! Your sourdough starter is now active and ready to use for baking.
- If desired, transfer your starter to a clean jar at this point, especially if your original jar is messy.
- Many bakers like to name their sourdough starters! It’s a fun tradition.
What’s Next? Baking with Your Sourdough Starter
Now that you’ve successfully created your sourdough starter, the real fun begins – baking! Sourdough bread is the classic starting point. With your active starter, you can now embark on making your own artisan loaves, experiencing the unique flavor and texture of homemade sourdough. Beyond bread, your starter can be used in a variety of recipes, including sourdough pizza crust, focaccia, pancakes, and more.
Storing Your Sourdough Starter
To keep your sourdough starter healthy and ready for baking, proper storage and feeding are essential. The storage method depends on how frequently you bake.
Room Temperature Storage: If you bake several times a week, storing your starter at room temperature is convenient. This keeps the yeast and bacteria more active, requiring more frequent feedings, typically once or twice daily depending on your kitchen temperature and starter activity.
Refrigerator Storage: For less frequent baking, store your starter in the refrigerator. The cold temperature slows down fermentation significantly. In the fridge, you only need to feed your starter about once a week to maintain its vitality. You can feed it directly from the fridge without warming it up first. When you’re ready to bake, take your starter out of the fridge and feed it at room temperature to “wake it up” and ensure it’s active before using in your recipes.
Sourdough Starter FAQs
1. Can I make sourdough starter with only all-purpose flour?
Yes, you can. However, it might take a bit longer to become active compared to starting with whole wheat flour.
2. Can I make sourdough starter with only bread flour?
Yes. Bread flour is also suitable. Because bread flour absorbs more water than all-purpose flour, you might need to add a touch more water if the mixture seems too thick.
3. Can I use only whole wheat, spelt, or rye flour?
Yes. Similar to bread flour, these whole grain flours absorb more water, so adjust water as needed for the right consistency.
4. Is bleached flour okay for sourdough starter?
While technically possible, unbleached flour is recommended. The chemicals in bleached flour could potentially hinder the fermentation process.
5. Why start with whole wheat and then switch to all-purpose flour?
Whole wheat flour is richer in nutrients and bran, which helps jumpstart fermentation in the initial stages. All-purpose or bread flour is then used for ongoing feedings as it’s readily available and works well for most sourdough baking.
6. My starter seemed bubbly initially but is less active on Days 3-4. Is this normal?
Yes, this is normal. The initial bubbles are often due to the readily available sugars in whole wheat flour. When you switch to all-purpose or bread flour, the fermentation process might appear to slow down temporarily as the starter adapts to the new flour source. Continue feeding consistently, and activity will resume.
7. The recipe mentions “equal parts” flour and water, but the cup measurements aren’t equal. Is this a mistake?
“Equal parts” refers to weight, not volume. Using a kitchen scale for weighing flour and water is more accurate in baking. Cup measurements are provided as approximations for convenience, but weight measurements are more precise due to variations in ingredient density.
8. Can I use the sourdough discard from Days 1-7?
In the early stages, the discard might be quite acidic and not ideal for recipes. It’s generally recommended to start using discard in recipes after your starter is well-established (after Day 7-8). However, if it looks and smells reasonably pleasant, you can experiment with using it in discard recipes.
Start your sourdough journey today and experience the satisfaction of creating your own living starter and baking delicious, homemade sourdough!