AirPods are incredibly convenient for listening to music, watching videos, or taking calls on the go with your iPhone or iPad. But did you know you can also easily connect your AirPods to your laptop? Whether you have a MacBook or a Windows laptop, pairing your AirPods is a straightforward process that expands their utility even further. This guide will walk you through the simple steps to How To Pair Airpods To Laptop, ensuring you can enjoy seamless audio on all your devices.
Connecting AirPods to Your MacBook: Effortless Pairing
If you are part of the Apple ecosystem, you’ll find connecting your AirPods to your MacBook particularly seamless. Apple’s ecosystem is designed for interoperability, making the pairing process incredibly intuitive, especially if you’ve already set up your AirPods with your iPhone using the same Apple ID.
In many cases, your AirPods will automatically connect to your MacBook if both devices are logged into the same iCloud account. Here’s how to ensure they are connected, or how to connect them manually if needed:
Automatic Connection:
If you’ve already paired your AirPods with your iPhone and your MacBook is signed into the same iCloud account, your AirPods should automatically be ready to use with your Mac.
- Place your AirPods in your ears.
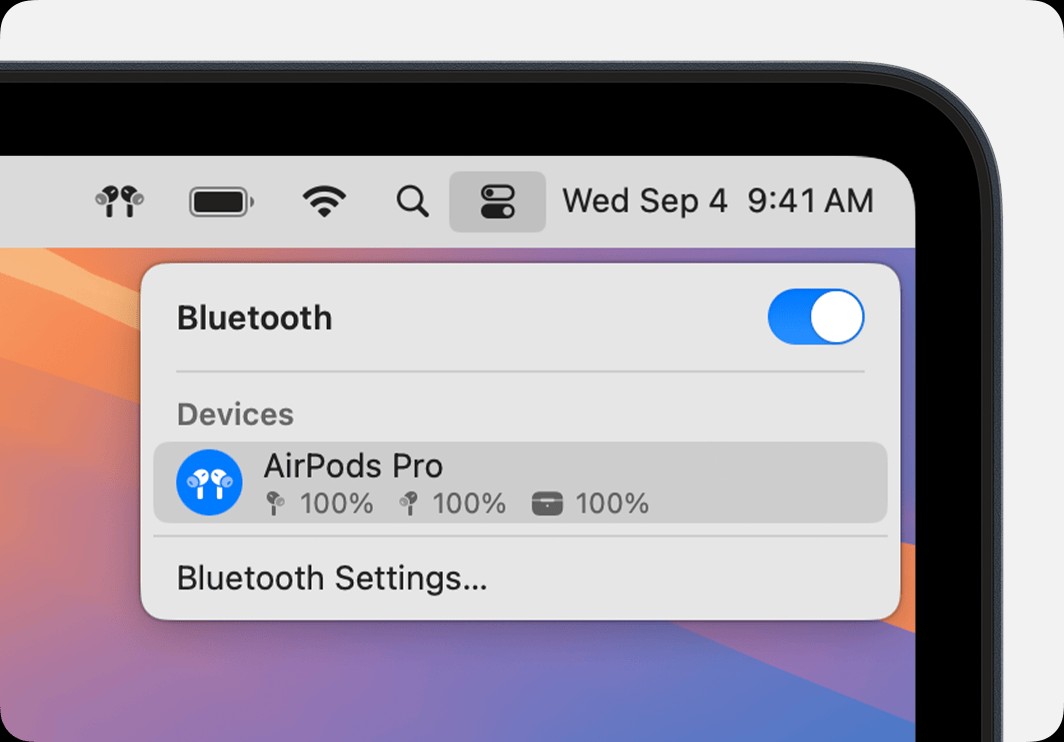
- Click the Control Center icon in your Mac’s menu bar (it looks like two switches).
- Select Bluetooth.
- Choose your AirPods from the list. They should appear if they are nearby and ready to connect.
Manual Pairing for Mac:
If your AirPods don’t automatically connect, or if you are pairing them for the first time directly with your MacBook, follow these manual steps:
- Open Bluetooth Settings: On your Mac, click the Apple menu () in the top left corner of your screen and select System Settings (or System Preferences in older macOS versions). Then, click on Bluetooth.
- Ensure Bluetooth is On: Make sure that Bluetooth is toggled on.
- Prepare AirPods for Pairing: Place both AirPods in their charging case and open the lid.
- Initiate Pairing Mode:
- For AirPods 4 (both models), double-tap the front of the case until the status light on the inside flashes white.
- For AirPods 1, AirPods 2, AirPods 3, AirPods Pro 1, and AirPods Pro 2, press and hold the setup button on the back of the charging case until the status light flashes white. This indicates they are in pairing mode.
- Connect in Bluetooth Settings: Look for your AirPods in the Nearby Devices list in your Mac’s Bluetooth settings. Click Connect next to your AirPods when they appear.
Once connected, your MacBook’s audio output will automatically switch to your AirPods. If you don’t hear sound through your AirPods, double-check the output device by clicking Control Center in the menu bar and ensuring your AirPods are selected as the audio output.
Pairing AirPods with a Windows Laptop or Other Bluetooth Laptops
You are not limited to using AirPods only with Apple devices. They function as standard Bluetooth headphones, meaning you can also pair them with Windows laptops, Chromebooks, Android devices, and any other device that supports Bluetooth audio. The process is slightly different from macOS, but still quite simple. Here’s how to connect AirPods to a non-Apple laptop:
- Access Bluetooth Settings: On your Windows laptop (or other non-Apple laptop), open the Bluetooth settings. Typically, this can be found in the system settings or control panel. For Windows, you can usually search for “Bluetooth settings” in the Start Menu.
- Turn Bluetooth On: Ensure Bluetooth is enabled on your laptop.
- Prepare AirPods for Pairing: With your AirPods in the charging case, open the lid.
- Enter Pairing Mode:
- For AirPods 4 (both models), double-tap the front of the case until the status light flashes white.
- For all other AirPods models, press and hold the setup button on the back of the case until the status light flashes white.
- Connect in Bluetooth Settings: On your laptop, initiate a Bluetooth device search or “Add Bluetooth device.” Your AirPods should appear in the list of available devices. Select your AirPods to pair and connect.
You might need to confirm the pairing on your laptop. Once paired, your laptop should recognize your AirPods as an audio output device. You can then select them as your preferred audio output in your sound settings.
Automatic Switching for Seamless Transitions
For users within the Apple ecosystem, certain AirPods models (AirPods 2nd, 3rd, and 4th generation, and all AirPods Pro models) offer automatic switching between devices. This feature is incredibly handy if you frequently switch between your MacBook, iPhone, and iPad.
For automatic switching to work, ensure:
- Your MacBook is running macOS Big Sur or later.
- Your iPhone is running iOS 14 or later.
- Your iPad is running iPadOS 14 or later.
- All devices are signed in to the same Apple ID with two-factor authentication enabled.
With these conditions met, your AirPods can intelligently switch between devices based on your activity. For example, if you are listening to music on your MacBook and receive a call on your iPhone, your AirPods will automatically switch to your iPhone for the call.
Conclusion
Pairing your AirPods to your laptop, whether it’s a MacBook or a Windows machine, is a quick and easy process that unlocks a more versatile audio experience. By following these simple steps, you can seamlessly switch between listening on your phone and working or relaxing on your laptop, all while enjoying the convenience and quality of your AirPods. Enjoy the enhanced audio experience your AirPods bring to all your devices!