Screen capturing on a Chromebook can seem tricky, but it’s actually quite straightforward. At HOW.EDU.VN, we understand the importance of capturing and sharing information efficiently. That’s why we’ve created this comprehensive guide to help you master screen capturing on your Chromebook, ensuring you can document, share, and collaborate seamlessly. Explore different methods and discover how to take screenshots, record your screen, and even capture full web pages effortlessly.
1. Understanding the Basics of Screen Capturing on a Chromebook
Chromebooks, known for their simplicity and cloud-based functionality, offer various ways to capture what’s on your screen. Whether you need to grab a quick screenshot, record a tutorial, or capture an entire webpage, understanding the basic techniques is crucial. This section will cover the fundamental methods for screen capturing on your Chromebook.
1.1. Taking a Full-Screen Screenshot
The simplest way to capture everything visible on your Chromebook screen is by taking a full-screen screenshot. This method is ideal for quickly documenting what you’re seeing, whether it’s an error message, an interesting article, or a funny meme.
How to do it:
- Press the Ctrl + Show Windows key (the Show Windows key looks like a rectangle with two vertical lines on the right).
- A notification will appear indicating that the screenshot has been saved to your Downloads folder.
This method captures the entire screen, including the taskbar and any open windows. It’s a quick and easy way to grab a visual representation of your entire display.
1.2. Capturing a Partial Screenshot
Sometimes, you only need to capture a specific portion of your screen. This is where the partial screenshot tool comes in handy. It allows you to select a rectangular area to capture, excluding anything outside of that area.
How to do it:
- Press Ctrl + Shift + Show Windows key.
- Your screen will dim, and a crosshair cursor will appear.
- Click and drag the cursor to select the area you want to capture.
- Release the mouse button, and the screenshot will be saved to your Downloads folder.
This method is perfect for capturing specific details without including unnecessary elements from the rest of the screen. It’s great for grabbing snippets of text, specific images, or portions of a document.
1.3. Using the Screenshot Tool in the Quick Settings
Chromebooks also offer a built-in screenshot tool accessible through the Quick Settings menu. This provides a convenient graphical interface for taking screenshots and screen recordings.
How to do it:
- Click on the status area in the bottom-right corner of your screen (where the clock and battery icon are located).
- Click on Screen capture.
- You’ll see options to capture a full screen, partial screen, or window.
- Select your desired option and follow the on-screen instructions.
This method offers a more visual and intuitive way to take screenshots, especially for those who prefer using a mouse or touchpad.
1.4. Location of Saved Screenshots
By default, all screenshots taken on a Chromebook are saved to the Downloads folder. You can access this folder through the Files app, which is pre-installed on your Chromebook.
How to access the Downloads folder:
- Open the Launcher (the circle icon in the bottom-left corner of your screen).
- Search for and open the Files app.
- In the left sidebar, click on Downloads.
Here, you’ll find all your screenshots, ready to be viewed, edited, or shared.
2. Advanced Screen Capturing Techniques on Chromebook
Beyond the basics, Chromebooks offer more advanced screen capturing capabilities, including screen recording and capturing full webpages. These techniques are essential for creating tutorials, documenting processes, and archiving web content.
2.1. Recording Your Screen
Screen recording is a powerful tool for creating tutorials, demonstrating software, or capturing gameplay. Chromebooks have a built-in screen recording feature that makes it easy to capture video of your screen.
How to record your screen:
- Open the Quick Settings menu (as described in section 1.3).
- Click on Screen capture.
- Select the Record option.
- Choose whether to record the full screen or a selected area.
- Click the Record button.
- To stop recording, click the Stop button in the bottom-right corner of your screen.
The screen recording will be saved as a WebM file in your Downloads folder. You can then play it back, edit it, or share it as needed.
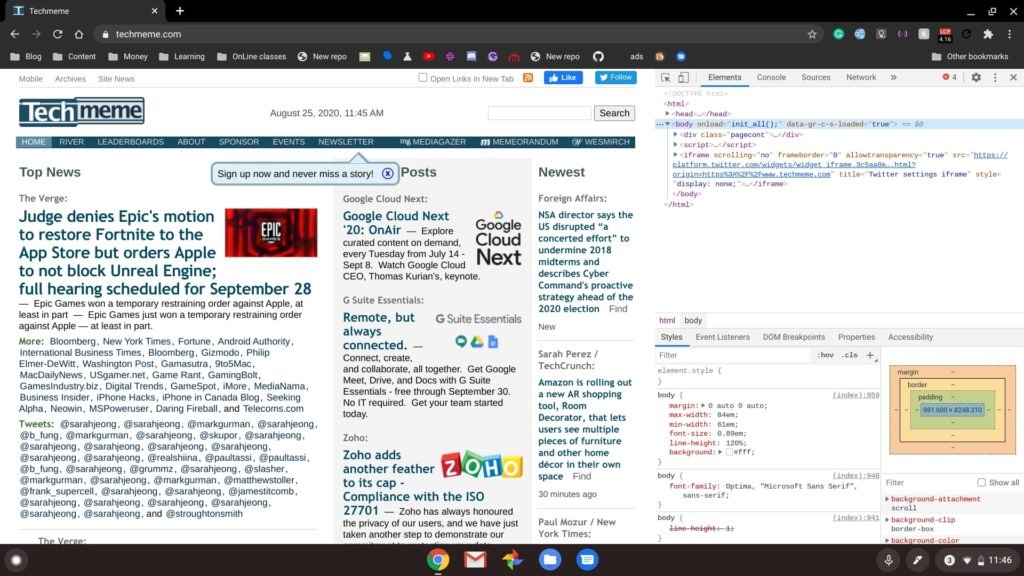
2.2. Capturing a Full Webpage
Sometimes, you need to capture an entire webpage, not just the visible portion. This is especially useful for archiving articles, documenting website layouts, or sharing complete web content. While Chromebooks don’t have a built-in feature for this, there are a couple of workarounds.
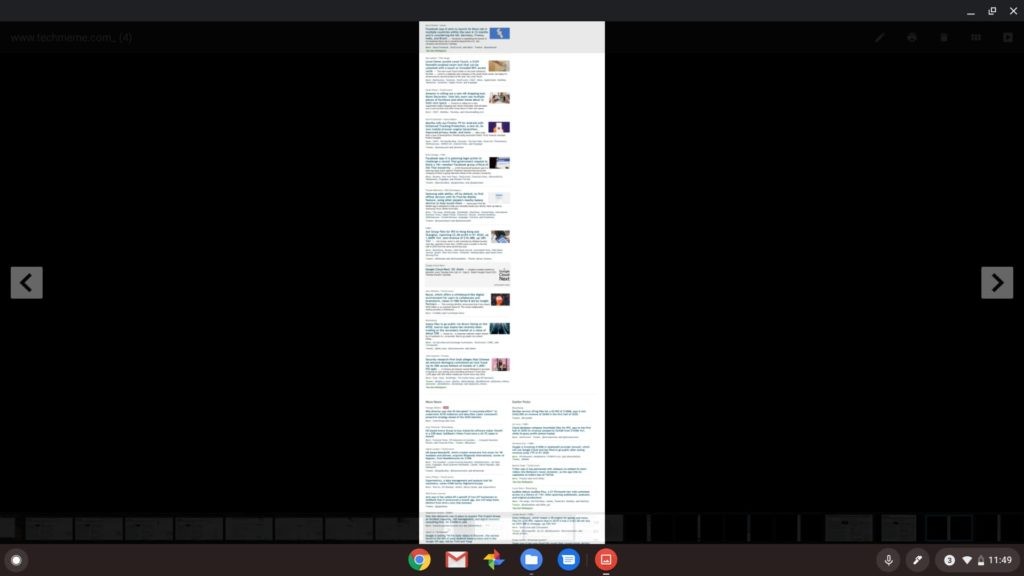
Method 1: Using Developer Tools
This method utilizes the built-in developer tools in Chrome to capture a full webpage.
- Open the webpage you want to capture in Chrome.
- Press Ctrl + Shift + I to open the Developer Tools.
- Press Ctrl + Shift + P to open the Command Menu.
- Type “capture full size screenshot” and select the option.
- The full webpage screenshot will be saved as a PNG file in your Downloads folder.
Method 2: Using Chrome Extensions
Several Chrome extensions can capture full webpages. These extensions often offer additional features like annotation and editing. Some popular options include:
- GoFullPage – Full Page Screen Capture: A simple and reliable extension for capturing full webpages with one click.
- Awesome Screenshot & Screen Recorder: A versatile extension that offers screen capture, screen recording, and annotation tools.
- Full Page Screen Capture: Another straightforward extension for capturing full webpages quickly.
To use these extensions, simply install them from the Chrome Web Store and follow their respective instructions.
2.3. Annotating Screenshots
Once you’ve taken a screenshot, you may want to add annotations to highlight specific areas, add notes, or draw attention to certain details. Chromebooks don’t have a built-in annotation tool, but you can use third-party apps or extensions for this purpose.
Using Chrome Extensions for Annotations:
Many of the Chrome extensions mentioned in section 2.2 also offer annotation tools. These extensions allow you to add text, arrows, shapes, and other annotations to your screenshots before saving or sharing them.
Using Online Image Editors:
You can also use online image editors like Pixlr or Canva to annotate your screenshots. Simply upload the screenshot to the editor and use its annotation tools to add your desired markings.
2.4. Editing Screenshots
Sometimes, you may need to crop, resize, or otherwise edit your screenshots before sharing them. Chromebooks don’t have a built-in image editor, but you can use online image editors or install Android apps for this purpose.
Using Online Image Editors:
Online image editors like Pixlr and Canva offer a wide range of editing tools, including cropping, resizing, adjusting brightness and contrast, and applying filters.
Using Android Apps:
Chromebooks can run Android apps, so you can install image editing apps like Adobe Photoshop Express or Snapseed from the Google Play Store. These apps offer powerful editing features and are often more convenient than online editors.
3. Optimizing Screen Captures for Different Purposes
The way you capture and optimize your screenshots and screen recordings can vary depending on their intended purpose. Whether you’re creating tutorials, sharing information, or documenting processes, tailoring your screen captures to the specific context can enhance their effectiveness.
3.1. Creating Tutorials
When creating tutorials, clarity and conciseness are key. Here are some tips for optimizing screen captures for tutorials:
- Use screen recording with narration: Combining screen recording with your voiceover can provide a more engaging and informative tutorial experience.
- Highlight important areas: Use annotation tools to draw attention to specific buttons, menus, or settings.
- Zoom in on details: If necessary, zoom in on specific areas of the screen to make them easier to see.
- Keep it short and focused: Break down complex tasks into smaller, more manageable steps.
- Add text overlays: Use text overlays to provide additional instructions or explanations.
3.2. Sharing Information
When sharing information, focus on clarity and relevance. Here are some tips for optimizing screen captures for sharing information:
- Crop out unnecessary elements: Remove any irrelevant parts of the screen to focus on the key information.
- Add annotations for emphasis: Use annotations to highlight important data points or key takeaways.
- Use clear and concise labels: Label different parts of the screen capture to make it easier to understand.
- Choose the right file format: Use PNG for screenshots with text and graphics, and JPEG for screenshots with photos.
- Optimize file size: Compress your screenshots to reduce file size without sacrificing too much quality.
3.3. Documenting Processes
When documenting processes, accuracy and completeness are crucial. Here are some tips for optimizing screen captures for documenting processes:
- Capture every step: Make sure to capture every step of the process, from start to finish.
- Use consistent formatting: Use consistent formatting for all your screen captures, including font size, colors, and annotations.
- Add detailed descriptions: Provide detailed descriptions of each step in the process.
- Organize your screen captures: Organize your screen captures in a logical order to make it easy to follow the process.
- Use version control: Use version control to track changes to your screen captures over time.
4. Troubleshooting Common Screen Capturing Issues on Chromebook
While screen capturing on a Chromebook is generally straightforward, you may encounter some issues from time to time. This section will cover some common problems and their solutions.
4.1. Screenshots Not Saving
If your screenshots are not saving, there are a few possible causes:
- Insufficient storage space: Make sure you have enough free storage space on your Chromebook.
- Incorrect file permissions: Check the file permissions for your Downloads folder to ensure that you have write access.
- Software conflicts: Try disabling any recently installed Chrome extensions or Android apps that may be interfering with the screen capturing process.
- System errors: Restart your Chromebook to resolve any temporary system errors.
4.2. Poor Screenshot Quality
If your screenshots are blurry or pixelated, try the following:
- Increase resolution: Increase the resolution of your Chromebook display.
- Use PNG format: Save your screenshots in PNG format, which preserves image quality better than JPEG.
- Avoid excessive zooming: Avoid zooming in too much on your screenshots, as this can cause them to become pixelated.
- Use a higher quality screen capture tool: Try using a different screen capture tool or Chrome extension that offers higher quality output.
4.3. Screen Recording Issues
If you’re experiencing problems with screen recording, such as choppy video or audio, try the following:
- Close unnecessary apps: Close any unnecessary apps or browser tabs to free up system resources.
- Reduce screen resolution: Reduce the resolution of your Chromebook display to reduce the processing load.
- Use a wired microphone: Use a wired microphone instead of a wireless microphone to improve audio quality.
- Update your Chromebook: Make sure your Chromebook is running the latest version of Chrome OS.
4.4. Full Webpage Capture Not Working
If you’re having trouble capturing full webpages, try the following:
- Try a different method: Try using a different method for capturing full webpages, such as using a Chrome extension or the Developer Tools.
- Disable conflicting extensions: Disable any Chrome extensions that may be interfering with the full webpage capture process.
- Check website compatibility: Some websites may not be compatible with full webpage capture tools.
5. Tips and Tricks for Efficient Screen Capturing
To further enhance your screen capturing skills on a Chromebook, consider these additional tips and tricks:
5.1. Using Keyboard Shortcuts
Mastering keyboard shortcuts can significantly speed up your screen capturing workflow. Here’s a quick recap of the essential shortcuts:
- Ctrl + Show Windows: Take a full-screen screenshot.
- Ctrl + Shift + Show Windows: Take a partial screenshot.
5.2. Customizing Screenshot Settings
While Chromebooks don’t offer extensive customization options for screenshots, you can adjust some settings to suit your preferences. For example, you can change the default save location for screenshots by going to Settings > Advanced > Downloads and changing the “Location” setting.
5.3. Integrating with Cloud Storage
To ensure your screenshots are always backed up and accessible from anywhere, integrate your Chromebook with a cloud storage service like Google Drive. You can set Google Drive as the default save location for your screenshots, or you can manually upload them to Google Drive after capturing them.
5.4. Using Third-Party Apps and Extensions
As mentioned earlier, numerous third-party apps and Chrome extensions can enhance your screen capturing capabilities on a Chromebook. Explore the Chrome Web Store and the Google Play Store to find tools that meet your specific needs.
5.5. Staying Updated
Google regularly releases updates to Chrome OS, which may include new features and improvements to the screen capturing functionality. Make sure to keep your Chromebook updated to take advantage of the latest enhancements.
6. The Importance of Expert Consultation
While this guide provides comprehensive information on screen capturing on Chromebooks, complex technical issues may require expert assistance. At HOW.EDU.VN, we connect you with leading experts who can provide personalized solutions to your specific challenges.
6.1. Why Seek Expert Advice?
Navigating technical issues can be time-consuming and frustrating. Consulting with an expert offers several benefits:
- Personalized Solutions: Experts provide tailored advice based on your unique situation.
- Time Efficiency: Get accurate solutions quickly, saving you valuable time.
- Problem Prevention: Identify and address potential issues before they escalate.
6.2. How HOW.EDU.VN Can Help
HOW.EDU.VN offers a platform to connect with experienced professionals across various fields. Our experts can assist with:
- Troubleshooting technical issues
- Optimizing your Chromebook settings
- Providing guidance on advanced screen capturing techniques
6.3. Benefits of Consulting Our Experts
Consulting with our experts offers several advantages:
- Access to Top Professionals: Connect with leading experts in their fields.
- Confidential Consultations: Your privacy and security are our top priorities.
- Practical Solutions: Receive actionable advice you can implement immediately.
7. Real-World Applications of Screen Capturing on Chromebook
Screen capturing on Chromebooks is not just a technical skill; it’s a versatile tool with numerous real-world applications. Whether you’re a student, teacher, professional, or hobbyist, screen capturing can enhance your productivity, communication, and creativity.
7.1. Education
In education, screen capturing can be used for:
- Creating tutorials: Teachers can create screen recordings to explain concepts, demonstrate software, or provide step-by-step instructions.
- Providing feedback: Teachers can use screenshots to provide visual feedback on student work.
- Capturing online resources: Students can capture important information from online articles, videos, and websites.
- Creating presentations: Students can use screenshots to create visually appealing presentations.
- Documenting research: Students can use screenshots to document their research process.
7.2. Business
In business, screen capturing can be used for:
- Creating training materials: Businesses can create screen recordings to train employees on new software, processes, or procedures.
- Providing customer support: Customer support representatives can use screenshots to guide customers through troubleshooting steps.
- Documenting bugs: Developers can use screenshots to document bugs and report them to the development team.
- Creating marketing materials: Marketers can use screenshots to create visually appealing marketing materials.
- Collaborating on projects: Team members can use screenshots to share ideas, provide feedback, and track progress on projects.
7.3. Creative Pursuits
In creative pursuits, screen capturing can be used for:
- Creating digital art: Artists can use screenshots to capture textures, patterns, and other visual elements for their digital art.
- Creating video games: Game developers can use screen recordings to create trailers, gameplay demos, and tutorials.
- Creating online content: Content creators can use screenshots to illustrate their blog posts, articles, and social media posts.
- Documenting personal projects: Hobbyists can use screenshots to document their personal projects, such as home renovations, gardening, or crafting.
- Sharing experiences: Individuals can use screenshots to share their experiences online, such as travel photos, recipes, or DIY projects.
8. Staying Ahead with Cutting-Edge Solutions at HOW.EDU.VN
In a rapidly evolving technological landscape, staying ahead requires access to the latest tools and expert insights. At HOW.EDU.VN, we are committed to providing you with cutting-edge solutions and expert guidance to help you thrive.
8.1. Embracing Innovation
We continuously update our resources and expertise to reflect the latest advancements in technology. This includes:
- Regularly updating our guides: Ensuring our content is current and accurate.
- Exploring new tools and techniques: Identifying and sharing innovative solutions.
- Expanding our network of experts: Connecting you with professionals at the forefront of their fields.
8.2. Continuous Learning
We believe that continuous learning is essential for personal and professional growth. That’s why we offer:
- A vast library of resources: Covering a wide range of topics and skill sets.
- Expert-led webinars and workshops: Providing in-depth training and insights.
- A supportive community: Connecting you with like-minded individuals for collaboration and knowledge sharing.
8.3. Preparing for the Future
Our goal is to equip you with the knowledge and skills you need to succeed in the future. This includes:
- Identifying emerging trends: Helping you anticipate and prepare for future challenges.
- Developing future-proof skills: Focusing on skills that will remain relevant in the long term.
- Providing personalized guidance: Helping you chart a course for success based on your unique goals and aspirations.
9. Expert Profiles at HOW.EDU.VN
At HOW.EDU.VN, we pride ourselves on connecting you with a diverse team of highly qualified experts. Here are a few examples of the expertise you can access through our platform:
| Expert Name | Field of Expertise | Credentials |
|---|---|---|
| Dr. Emily Carter | Educational Technology | Ph.D. in Education, 15+ years of experience in instructional design |
| Mr. David Rodriguez | Business Process Optimization | MBA, Certified Management Consultant, 20+ years of experience |
| Ms. Sarah Lee | Creative Content Creation | MFA in Digital Arts, Award-winning filmmaker, 10+ years of experience |
These are just a few examples of the many talented experts available to assist you at HOW.EDU.VN. Our team is dedicated to providing you with the highest quality guidance and support to help you achieve your goals.
10. Frequently Asked Questions (FAQ) About Screen Capturing on Chromebook
To further assist you, here are some frequently asked questions about screen capturing on Chromebook:
- How do I take a screenshot on a Chromebook?
- Press Ctrl + Show Windows key for a full-screen screenshot or Ctrl + Shift + Show Windows key for a partial screenshot.
- Where are screenshots saved on a Chromebook?
- Screenshots are saved in the Downloads folder by default.
- How do I record my screen on a Chromebook?
- Use the built-in screen recording tool in the Quick Settings menu.
- Can I capture a full webpage on a Chromebook?
- Yes, use Developer Tools or a Chrome extension like GoFullPage.
- How do I annotate screenshots on a Chromebook?
- Use a Chrome extension or an online image editor like Pixlr or Canva.
- How do I edit screenshots on a Chromebook?
- Use an online image editor or install an Android app like Adobe Photoshop Express.
- Why are my screenshots not saving?
- Check for sufficient storage space, correct file permissions, or software conflicts.
- How can I improve the quality of my screenshots?
- Increase resolution, use PNG format, and avoid excessive zooming.
- What if I have trouble capturing a full webpage?
- Try a different method or disable conflicting extensions.
- Where can I find expert help for technical issues?
- Connect with experts at HOW.EDU.VN for personalized solutions.
Screen capturing on a Chromebook is a valuable skill that can enhance your productivity, communication, and creativity. By mastering the techniques and tips outlined in this guide, you can capture, share, and collaborate seamlessly. And remember, for personalized solutions and expert guidance, HOW.EDU.VN is here to help you every step of the way.
If you’re facing challenges or seeking expert advice on any technical issue, don’t hesitate to reach out to our team of experienced professionals. We’re here to provide personalized solutions tailored to your specific needs.
Contact us today for a consultation:
- Address: 456 Expertise Plaza, Consult City, CA 90210, United States
- WhatsApp: +1 (310) 555-1212
- Website: HOW.EDU.VN
Let how.edu.vn connect you with the expertise you need to succeed.