Taking a screenshot on a Mac is a fundamental skill, whether you need to capture a quick image for sharing, document important information, or create visual aids. macOS offers several built-in, easy-to-use methods to capture your screen exactly as you need it. This guide will walk you through each method, ensuring you can master taking screenshots on your Mac like a pro.
Capture the Entire Screen: Command + Shift + 3
This is the quickest way to screenshot your entire Mac display. Simply press and hold these three keys simultaneously: Shift, Command, and 3.
Once you press these keys, you might see a brief flash on your screen. This indicates that the screenshot has been taken. By default, the screenshot will be saved as a PNG file on your desktop, named something like “Screen Shot [date] at [time].png”.
After taking the screenshot, a small thumbnail might briefly appear in the bottom-right corner of your screen.
- Click the thumbnail immediately: This will open the screenshot in a Quick Look preview, where you can quickly edit, annotate, share, or delete it.
- Ignore the thumbnail: If you don’t interact with the thumbnail, it will automatically save to your desktop after a few seconds.
This method is perfect for capturing everything visible on your screen in one go.
Capture a Portion of the Screen: Command + Shift + 4
If you only need to capture a specific area of your screen, the Shift, Command, and 4 key combination is your go-to shortcut.
- Press and hold Shift, Command, and 4 keys at the same time.
- Your cursor will transform into a crosshair pointer.
- Click and drag the crosshair to select the rectangular area you want to capture. A dashed line box will appear, indicating your selection.
- Adjust selection: While dragging, you can adjust the size and position of the selection box.
- Move selection without resizing: If you need to reposition the entire selection box without changing its dimensions, hold down the Space bar while dragging.
- Cancel screenshot: If you change your mind, press the Esc (Escape) key before releasing the mouse button or trackpad.
- Release the mouse button or trackpad to take the screenshot.
Similar to capturing the entire screen, a thumbnail preview might appear for quick editing, and the screenshot will be saved to your desktop by default.
This method is incredibly useful when you need to capture only a part of your screen, avoiding unnecessary elements.
Capture a Window or Menu: Command + Shift + 4 + Space Bar
To capture a specific window or menu on your Mac, use a combination of keys and the Space bar.
- First, make sure the window or menu you want to capture is active and visible on your screen.
- Press and hold Shift, Command, and 4 keys.
- Press the Space bar once. The crosshair pointer will change into a camera icon.
- Move the camera icon pointer over the window or menu you want to capture. The window will be highlighted.
- Exclude window shadow: If you want to capture the window without its shadow, hold down the Option (⌥) key while clicking.
- Cancel screenshot: Press the Esc (Escape) key to cancel.
- Click on the window or menu to take the screenshot.
Again, a thumbnail preview may appear, and the screenshot will be saved to your desktop. This method is perfect for capturing clean screenshots of application windows or dropdown menus.
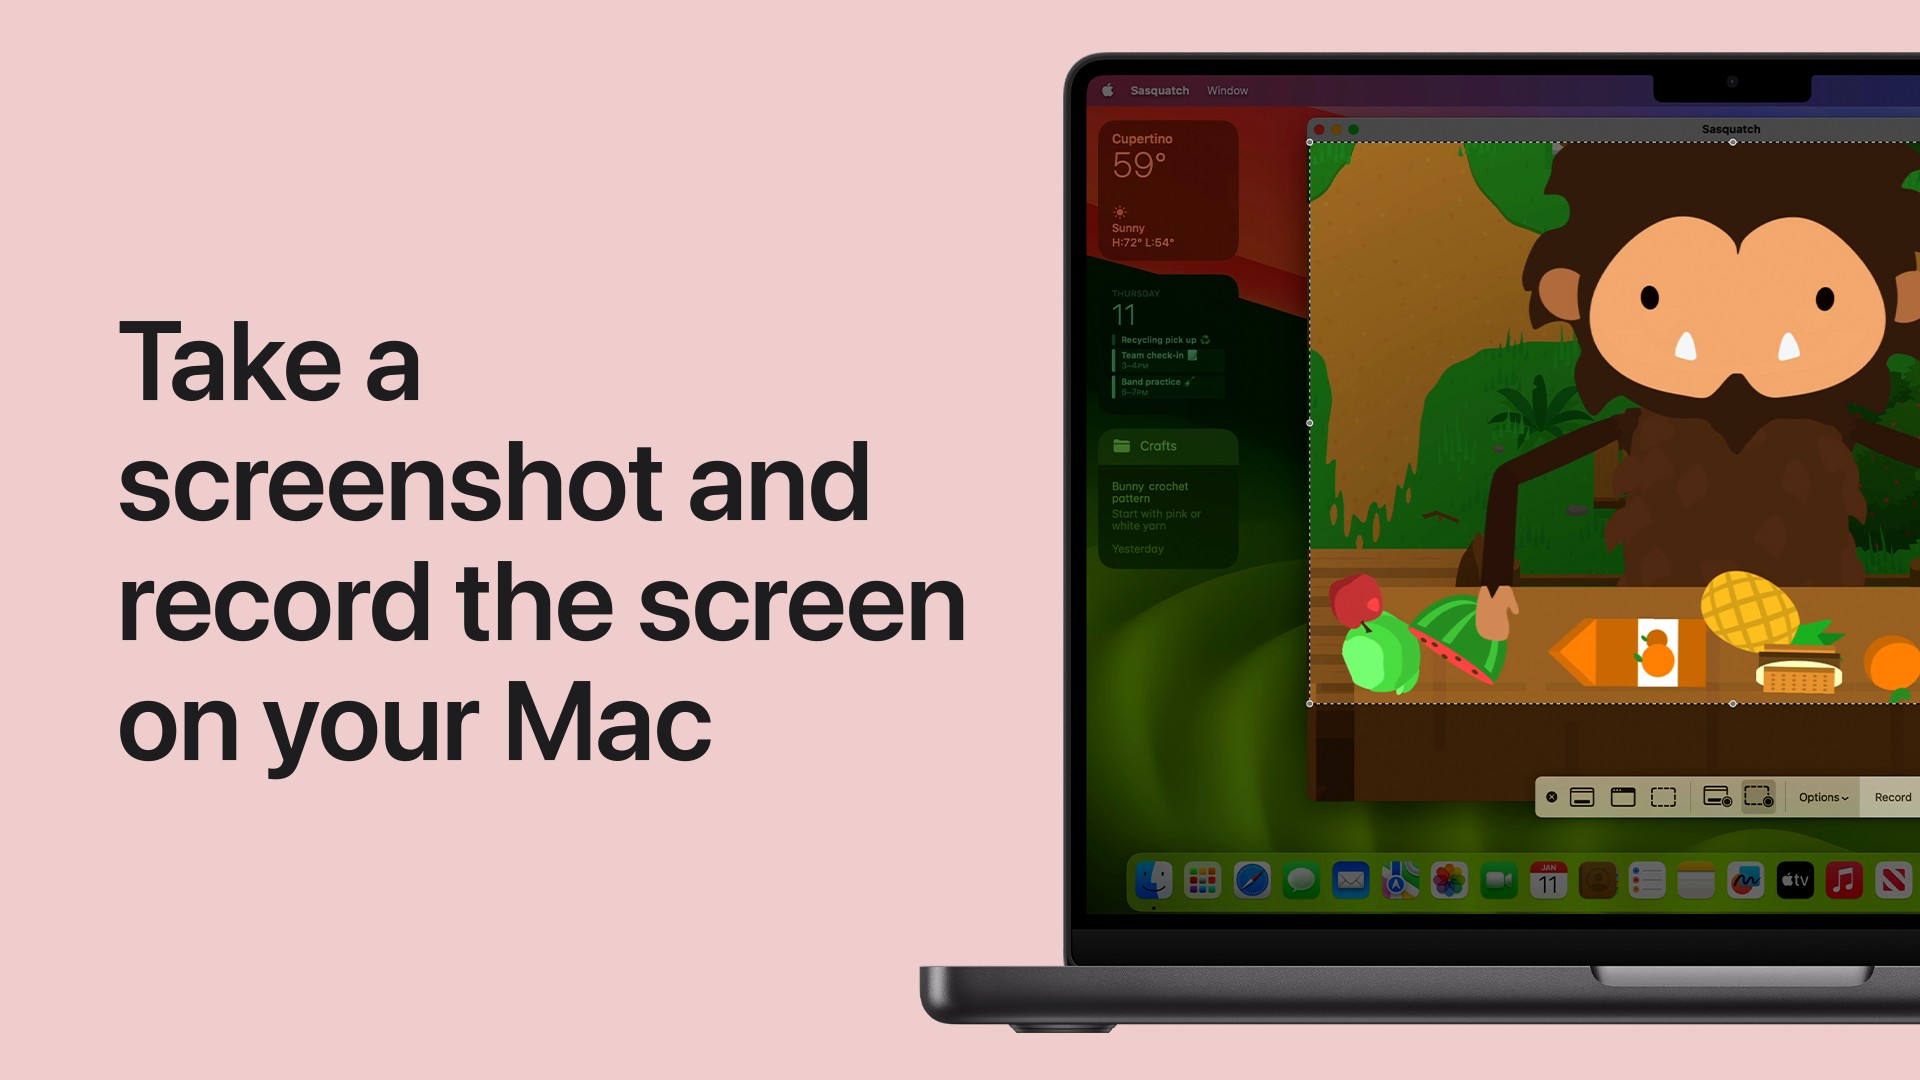
Using the Screenshot App: Command + Shift + 5
For more advanced screenshot options and screen recording capabilities, macOS provides the Screenshot app. You can quickly access it using the Shift, Command, and 5 keyboard shortcut.
Pressing Shift, Command, and 5 will bring up a toolbar at the bottom of your screen. This toolbar offers various options:
- Capture Entire Screen: Takes a screenshot of the entire display, similar to Command + Shift + 3.
- Capture Selected Window: Allows you to select a specific window to screenshot, similar to Command + Shift + 4 + Space Bar.
- Capture Selected Portion: Lets you draw a rectangle to capture a specific area, similar to Command + Shift + 4.
- Record Entire Screen: Starts recording a video of your entire screen.
- Record Selected Portion: Allows you to select an area to record a video of.
- Options: Provides settings to choose where to save screenshots and recordings, set a timer, and more.
The Screenshot app offers a centralized and feature-rich way to manage your screen capturing needs on macOS.
Finding and Managing Your Screenshots
By default, all screenshots are saved to your desktop. They are named with the prefix “Screen Shot” followed by the date and time the screenshot was taken, and saved as PNG files.
If you can’t find your screenshots on your desktop, try these steps:
- Check the Desktop folder in Finder: Open Finder, and in the sidebar, click “Desktop”. Alternatively, from the Finder menu bar, go to “Go” > “Desktop”.
- Search in Finder: Use Finder’s search function (Command + F) and search for “Screen Shot”.
- Check Screenshot app save location: If you’ve used the Screenshot app and changed the default save location, check the specified folder in the “Options” menu of the Screenshot app.
You can also quickly access the last taken screenshot by clicking on the thumbnail preview that appears after taking a screenshot. From the preview, you can drag and drop the screenshot to a different location, share it directly, or perform quick edits.
Mastering these different methods of taking screenshots on your Mac will significantly enhance your productivity and communication. Experiment with each method to find what works best for your needs and enjoy the ease of capturing and sharing your screen content.