How Much Paint Does A Gallon Cover is a common question when planning a painting project, but understanding paint coverage is crucial for accurate interior paint estimates. At HOW.EDU.VN, we help you navigate these calculations and ensure you have the right amount of paint for your project, avoiding costly overages or frustrating shortages. Learn about factors affecting paint mileage and get expert tips for optimal paint application, color consistency, and project planning to achieve a flawless finish.
1. Understanding Paint Coverage Basics
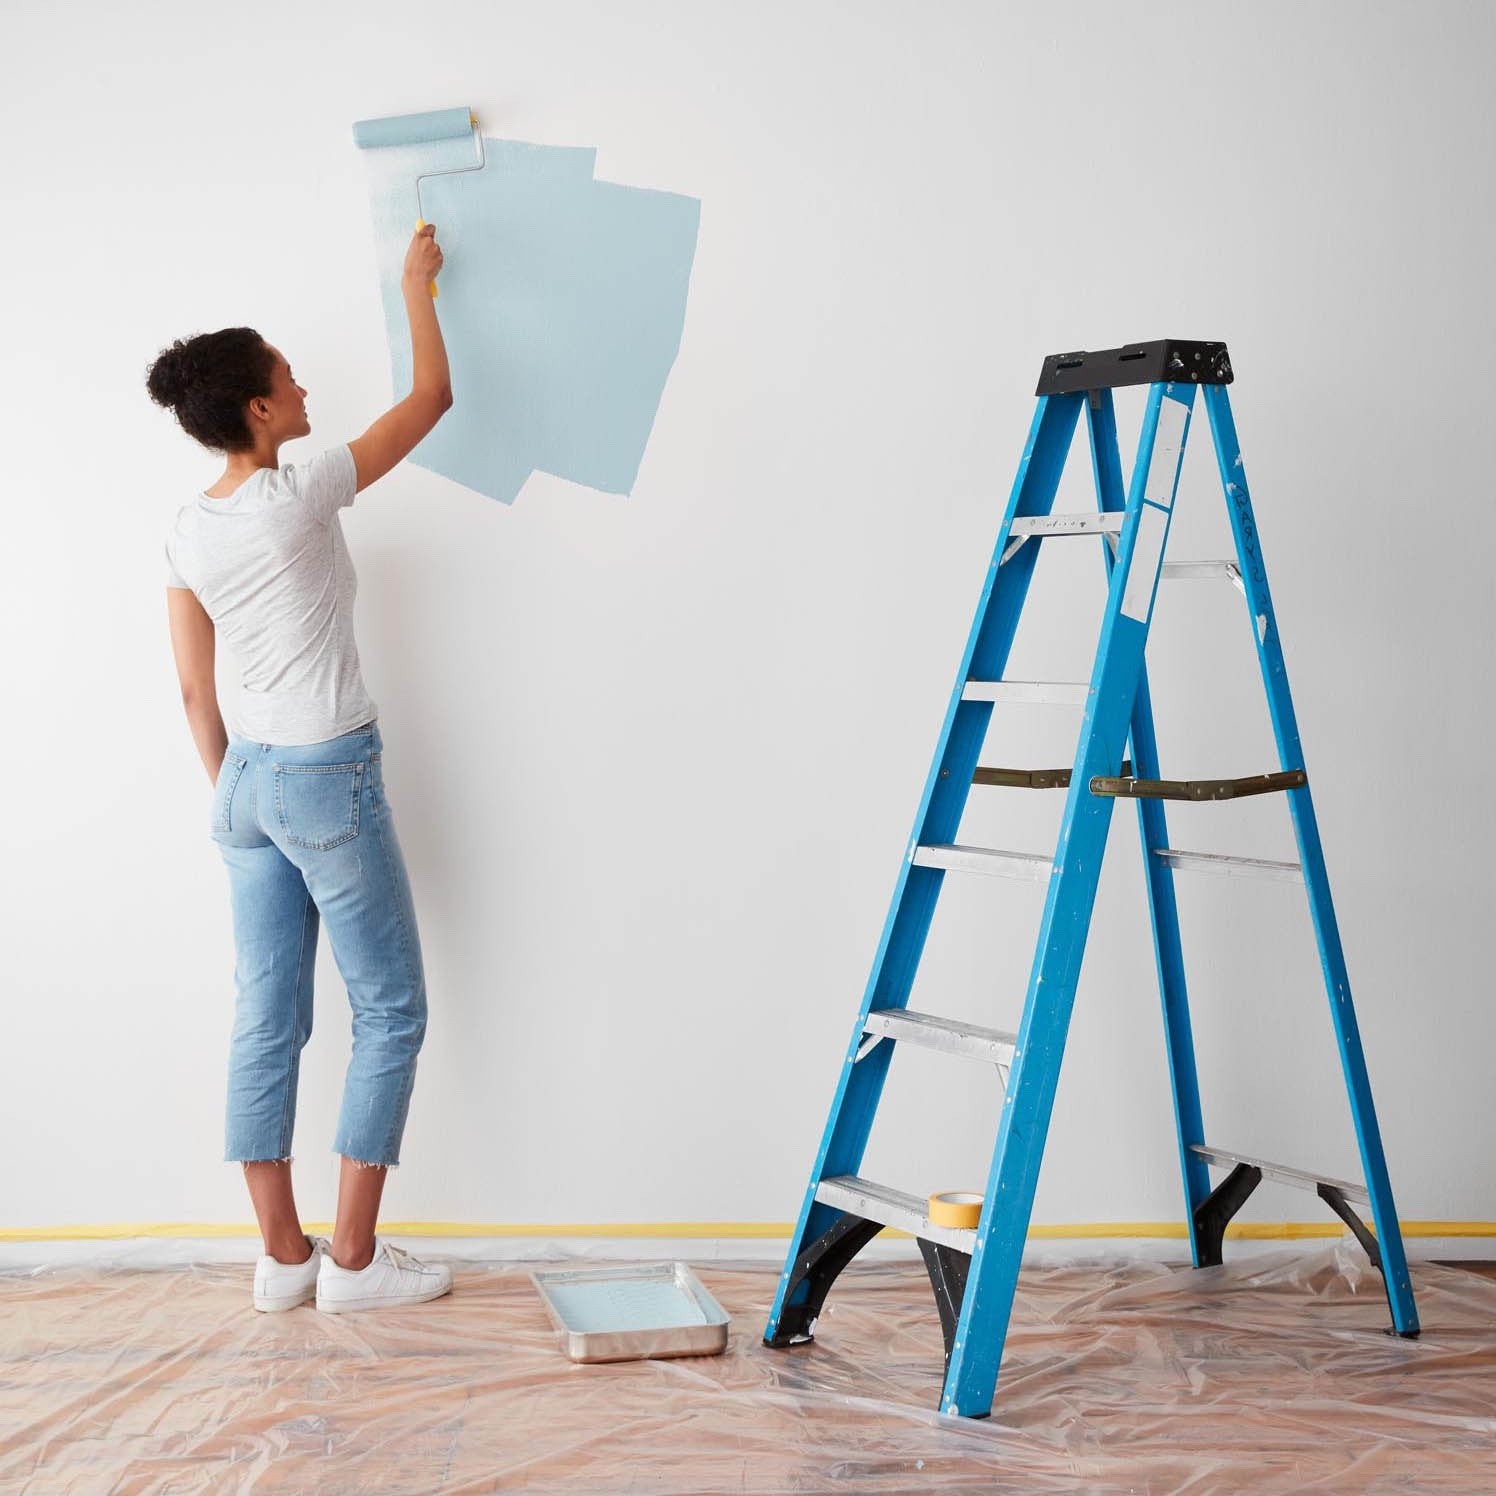
Paint coverage refers to the area a specific amount of paint can cover effectively. Typically, a gallon of paint is designed to cover approximately 350 to 400 square feet of a smooth, non-porous surface. However, this is just a guideline, and several factors can significantly impact the actual coverage you achieve. Knowing these factors helps you plan your project more accurately and ensures you purchase the right amount of paint.
These estimates are approximate, and coverage amounts may vary depending on the condition of your wall or surface.
Understanding typical paint coverage is essential for project planning; this graphic illustrates how surface conditions affect the estimated area a gallon can cover.
1.1. Key Factors Influencing Paint Coverage
Several elements can affect how much area a gallon of paint will cover. Understanding these factors is crucial for estimating your paint needs accurately.
- Surface Texture: Rough or textured surfaces require more paint than smooth ones.
- Surface Porosity: Porous surfaces absorb more paint, reducing the coverage area.
- Paint Quality: Higher-quality paints often provide better coverage per gallon.
- Application Method: Rolling, brushing, or spraying can affect how much paint is used.
- Color Difference: Drastic color changes may require additional coats, increasing paint usage.
1.2. The Role of Priming
Priming is an essential step, especially when painting new or unpainted surfaces. Primer seals the surface, reducing its porosity and allowing the paint to adhere better. This not only improves the paint’s coverage but also enhances its durability and finish. Using a primer can significantly reduce the number of paint coats required, saving you both time and money.
2. Special Circumstances Affecting Paint Coverage
Certain situations require special consideration when estimating paint coverage. These circumstances can significantly alter the amount of paint you need, and addressing them properly ensures a successful painting project.
2.1. Painting Over Dark Colors
Changing from a dark color to a lighter one often requires multiple coats of paint. Darker colors can bleed through lighter topcoats, making it necessary to apply additional layers for full coverage. Using a high-quality primer specifically designed to block dark colors can help mitigate this issue, reducing the number of paint coats needed.
When transitioning from dark to light colors, using a primer designed for blocking dark colors is essential to reduce the number of coats needed.
2.2. Painting Fresh Drywall
Fresh drywall is highly porous and tends to absorb a significant amount of paint. To address this, it’s crucial to prime the drywall with at least two coats of primer before applying any paint. Priming seals the surface, reducing its absorbency and ensuring that the paint adheres properly. This step is vital for achieving a uniform and professional finish.
2.3. Dealing with Textured Walls
Textured walls have a larger surface area compared to smooth walls, which means they require more paint to cover effectively. Whether you’re dealing with stucco, brick, or popcorn ceilings, it’s essential to account for the increased surface area when estimating your paint needs. As a general rule, consider buying approximately 20% more paint than you would for a smooth surface to ensure adequate coverage.
Textured surfaces demand additional paint due to their increased surface area; calculating an extra 20% is a good practice.
3. Step-by-Step Guide: Calculating Paint Needs
Calculating the amount of paint you need involves several steps to ensure accuracy. By following this guide, you can avoid underestimating or overestimating your paint requirements.
3.1. Measure the Room
Start by measuring the width and height of each wall in the room. Multiply these measurements to find the square footage of each wall. Add the square footage of all walls to get the total wall surface area.
3.2. Account for Windows and Doors
Measure the square footage of each window and door in the room. Subtract this total from the total wall surface area to determine the actual area you will be painting.
3.3. Include Trim and Ceilings
Calculate the square footage of trim and ceilings by multiplying their lengths and widths. Add these figures to the total area to be painted for a comprehensive estimate.
3.4. Determine the Number of Coats
Consider how many coats of paint you’ll need. For most projects, two coats are recommended for optimal coverage and a professional finish. If you’re painting over a similar color or using a high-quality paint, one coat might suffice. However, for significant color changes or porous surfaces, multiple coats may be necessary.
3.5. Use a Paint Calculator
For convenience, use a paint calculator to simplify the process. These tools take your measurements and other variables into account to provide a more accurate estimate. Several online paint calculators are available to help you determine how much paint to buy.
3.6. Estimating Paint Coverage for Different Types of Paint
Different types of paint offer varying levels of coverage due to their composition and intended use. Understanding these differences can help you make more informed decisions and achieve better results.
3.6.1. Interior Paints
Interior paints are formulated for use on indoor surfaces and are typically available in various finishes, such as matte, eggshell, satin, semi-gloss, and gloss. Each finish offers different levels of durability and sheen, which can affect coverage.
| Finish | Coverage | Ideal For |
|---|---|---|
| Matte | Good coverage, hides imperfections well | Low-traffic areas, ceilings, bedrooms |
| Eggshell | Decent coverage, slightly more durable than matte | Living rooms, hallways |
| Satin | Good coverage, easy to clean, slight sheen | Kitchens, bathrooms, children’s rooms |
| Semi-Gloss | Excellent coverage and durability, high sheen | Trim, doors, cabinets |
| Gloss | Maximum coverage and durability, very high sheen, shows imperfections | High-use areas, decorative accents |
3.6.2. Exterior Paints
Exterior paints are designed to withstand harsh weather conditions and are more durable than interior paints. They are available in similar finishes to interior paints but are formulated to resist fading, cracking, and peeling.
| Finish | Coverage | Ideal For |
|---|---|---|
| Matte | Good coverage, hides imperfections | Siding, walls |
| Satin | Excellent coverage, resists mildew and fading | Trim, doors, siding |
| Semi-Gloss | Maximum coverage and durability, easy to clean | Shutters, doors, trim |
3.6.3. Specialty Paints
Specialty paints are designed for specific purposes, such as painting furniture, metal, or concrete. These paints often have unique formulations that provide enhanced adhesion and durability.
| Paint Type | Coverage | Ideal For |
|---|---|---|
| Furniture Paint | Excellent coverage, self-priming options available | Chairs, tables, dressers |
| Metal Paint | Good coverage, rust-resistant properties | Gates, railings, metal furniture |
| Concrete Paint | Excellent coverage, resists moisture and chemicals | Garage floors, patios, basements |
3.7. Expert Tips for Accurate Measurement and Estimation
To ensure you get the most accurate paint estimate, consider these expert tips:
- Use a Laser Measure: Laser measuring tools provide precise measurements, reducing the risk of errors.
- Round Up: Always round up your measurements to the nearest foot to avoid running short on paint.
- Account for Waste: Add an extra 10% to your estimate to account for spills, drips, and brush or roller saturation.
- Read Paint Labels: Check the paint can for the manufacturer’s recommended coverage area per gallon.
- Test a Small Area: Before painting the entire room, test the paint in a small, inconspicuous area to ensure the color and coverage are satisfactory.
4. Maximizing Paint Coverage: Techniques and Best Practices
Achieving optimal paint coverage involves more than just buying the right amount of paint. Using proper techniques and best practices can significantly improve the outcome of your painting project.
4.1. Surface Preparation
Proper surface preparation is crucial for maximizing paint coverage and achieving a professional finish. Start by cleaning the surface thoroughly to remove dirt, dust, grease, and mildew. Repair any cracks, holes, or imperfections with spackle or joint compound. Sand the surface smooth and prime as needed.
4.1.1. Cleaning the Surface
Use a mixture of mild soap and water to clean the surface. For greasy or oily surfaces, use a degreasing cleaner. Rinse thoroughly with clean water and allow the surface to dry completely before proceeding.
4.1.2. Repairing Imperfections
Fill any cracks, holes, or imperfections with spackle or joint compound. Allow the compound to dry completely, then sand it smooth with fine-grit sandpaper. Remove any dust or debris before priming.
4.1.3. Sanding and Priming
Sanding helps create a smooth surface for the paint to adhere to. Use fine-grit sandpaper to lightly sand the entire surface. Remove any dust or debris with a tack cloth. Apply primer as needed to seal the surface and improve paint adhesion.
4.2. Choosing the Right Tools
Selecting the right tools can make a significant difference in the quality and efficiency of your painting project.
4.2.1. Paint Rollers
Choose a high-quality paint roller with the appropriate nap length for your surface. For smooth surfaces, use a short-nap roller (1/4 to 3/8 inch). For textured surfaces, use a longer-nap roller (3/8 to 3/4 inch).
4.2.2. Paint Brushes
Use high-quality paint brushes for cutting in edges and painting trim. Choose brushes with synthetic bristles for latex paints and natural bristles for oil-based paints.
4.2.3. Paint Sprayers
Paint sprayers can provide a smooth, even finish and are ideal for large projects or textured surfaces. Choose an airless sprayer for thicker paints or an HVLP (high volume, low pressure) sprayer for thinner paints.
4.3. Application Techniques
Proper application techniques are essential for achieving optimal paint coverage and a professional finish.
4.3.1. Rolling
Load the roller evenly with paint and roll it onto the surface in a “W” pattern. Overlap each stroke slightly to ensure even coverage. Avoid applying too much pressure, which can cause the paint to drip or splatter.
4.3.2. Brushing
Dip the brush into the paint about one-third of the way up the bristles. Tap off any excess paint and apply it to the surface in smooth, even strokes. Overlap each stroke slightly to avoid leaving brush marks.
4.3.3. Spraying
Hold the sprayer about 12 inches from the surface and move it in smooth, even strokes. Overlap each stroke slightly to ensure even coverage. Avoid spraying too much paint in one area, which can cause runs or drips.
4.4. Environmental Factors
Environmental conditions can affect the drying time and coverage of paint. Avoid painting in direct sunlight or high humidity, as these conditions can cause the paint to dry too quickly or unevenly. Maintain a consistent temperature and humidity level for best results.
5. Optimizing Paint Application for Different Surfaces
Different surfaces require specific techniques to ensure optimal paint adhesion and coverage. Understanding these techniques can help you achieve a flawless finish on any surface.
5.1. Wood Surfaces
Wood surfaces require thorough preparation to ensure proper paint adhesion. Start by sanding the wood smooth and filling any imperfections with wood filler. Prime the surface with a high-quality wood primer before painting.
5.1.1. Sanding
Use medium-grit sandpaper to sand the wood smooth, then follow with fine-grit sandpaper for a smooth finish. Remove any dust or debris with a tack cloth.
5.1.2. Priming
Apply a high-quality wood primer to seal the surface and improve paint adhesion. Allow the primer to dry completely before painting.
5.1.3. Painting
Apply the paint in smooth, even strokes, following the grain of the wood. Use multiple thin coats for best results.
5.2. Metal Surfaces
Metal surfaces require special preparation to prevent rust and ensure proper paint adhesion. Start by cleaning the metal thoroughly and removing any rust with a wire brush. Prime the surface with a rust-inhibiting primer before painting.
5.2.1. Cleaning and Rust Removal
Clean the metal surface with a degreasing cleaner and remove any rust with a wire brush or sandpaper.
5.2.2. Priming
Apply a rust-inhibiting primer to protect the metal from corrosion and improve paint adhesion. Allow the primer to dry completely before painting.
5.2.3. Painting
Apply the paint in thin, even coats, using a brush, roller, or sprayer. Allow each coat to dry completely before applying the next.
5.3. Plaster Surfaces
Plaster surfaces can be challenging to paint due to their porosity and tendency to crack. Start by repairing any cracks or imperfections with plaster compound. Prime the surface with a high-quality plaster primer before painting.
5.3.1. Repairing Cracks
Fill any cracks or imperfections with plaster compound. Allow the compound to dry completely, then sand it smooth with fine-grit sandpaper.
5.3.2. Priming
Apply a high-quality plaster primer to seal the surface and improve paint adhesion. Allow the primer to dry completely before painting.
5.3.3. Painting
Apply the paint in smooth, even strokes, using a brush, roller, or sprayer. Use multiple thin coats for best results.
5.4. Concrete Surfaces
Concrete surfaces require special preparation to ensure proper paint adhesion and prevent moisture damage. Start by cleaning the concrete thoroughly and repairing any cracks or imperfections with concrete patch. Prime the surface with a concrete primer before painting.
5.4.1. Cleaning and Repairing
Clean the concrete surface with a pressure washer and repair any cracks or imperfections with concrete patch. Allow the patch to dry completely before priming.
5.4.2. Priming
Apply a concrete primer to seal the surface and improve paint adhesion. Allow the primer to dry completely before painting.
5.4.3. Painting
Apply the paint in thin, even coats, using a brush, roller, or sprayer. Allow each coat to dry completely before applying the next.
6. Understanding Paint Drying Times and Recoating
Proper drying and recoating are essential for achieving a durable and professional paint finish. Understanding the factors that affect drying time and following the manufacturer’s recommendations can help you achieve optimal results.
6.1. Factors Affecting Drying Time
Several factors can affect the drying time of paint, including:
- Temperature: Higher temperatures can accelerate drying time, while lower temperatures can slow it down.
- Humidity: High humidity can increase drying time, while low humidity can decrease it.
- Ventilation: Good ventilation can help speed up drying time by removing moisture from the air.
- Paint Type: Different types of paint have different drying times. Latex paints typically dry faster than oil-based paints.
- Surface Porosity: Porous surfaces can absorb paint and cause it to dry faster, while non-porous surfaces may slow down drying time.
6.2. Recommended Drying Times
The manufacturer’s recommendations for drying time are typically listed on the paint can. In general, latex paints may be dry to the touch in as little as one hour, while oil-based paints may take several hours. However, it’s essential to allow the paint to dry completely before recoating.
6.3. Recoating Best Practices
Recoating too soon can cause the paint to peel, blister, or crack. Allow the paint to dry completely before applying the next coat. Use a light touch when recoating to avoid disturbing the underlying layer. Follow the manufacturer’s recommendations for recoating time, which may vary depending on the paint type and environmental conditions.
6.4. Troubleshooting Drying Issues
If the paint is not drying properly, consider the following troubleshooting tips:
- Increase Ventilation: Open windows or use fans to improve ventilation and speed up drying time.
- Lower Humidity: Use a dehumidifier to reduce humidity levels.
- Increase Temperature: Use a space heater to increase the temperature in the room.
- Apply a Thin Coat: Avoid applying thick coats of paint, which can take longer to dry.
- Use a Drying Additive: Consider using a paint drying additive to accelerate the drying process.
7. Choosing the Right Paint Finish
The finish of your paint can significantly impact the look and feel of your space. Understanding the different types of paint finishes and their ideal uses can help you make the right choice for your project.
7.1. Matte Finish
Matte finish paints have a low sheen and are ideal for hiding imperfections on walls and ceilings. They are best suited for low-traffic areas, such as bedrooms and living rooms.
7.2. Eggshell Finish
Eggshell finish paints have a slight sheen and are more durable than matte finishes. They are suitable for medium-traffic areas, such as hallways and dining rooms.
7.3. Satin Finish
Satin finish paints have a higher sheen than eggshell finishes and are easy to clean. They are ideal for high-traffic areas, such as kitchens and bathrooms.
7.4. Semi-Gloss Finish
Semi-gloss finish paints have a high sheen and are very durable and easy to clean. They are best suited for trim, doors, and cabinets.
7.5. Gloss Finish
Gloss finish paints have the highest sheen and are the most durable and easiest to clean. They are ideal for high-use areas and decorative accents.
8. The Impact of Paint Color on Room Perception
Paint color can have a significant impact on the perception of a room. Lighter colors can make a room appear larger and brighter, while darker colors can make a room feel cozier and more intimate. Understanding the psychology of color can help you choose the right paint colors for your space.
8.1. Warm Colors
Warm colors, such as red, orange, and yellow, can create a sense of energy and excitement. They are often used in living rooms and dining rooms to create a welcoming atmosphere.
8.2. Cool Colors
Cool colors, such as blue, green, and purple, can create a sense of calmness and relaxation. They are often used in bedrooms and bathrooms to create a serene environment.
8.3. Neutral Colors
Neutral colors, such as white, gray, and beige, can create a sense of simplicity and elegance. They are versatile and can be used in any room to create a neutral backdrop for other colors and décor.
9. Storing and Disposing of Paint Properly
Proper storage and disposal of paint are essential for protecting the environment and preventing accidents. Follow these guidelines to ensure that your paint is stored and disposed of safely.
9.1. Storing Paint
Store paint in a cool, dry place away from direct sunlight and extreme temperatures. Seal the paint can tightly to prevent the paint from drying out. Label the can with the date and color to make it easier to identify later.
9.2. Disposing of Paint
Do not pour paint down the drain or into the trash. Instead, allow the paint to dry completely by leaving the lid off the can. Once the paint is dry, you can dispose of the can in the trash. Alternatively, you can take the paint to a local hazardous waste disposal facility.
10. Common Painting Mistakes and How to Avoid Them
Even experienced painters can make mistakes. Knowing common pitfalls and how to avoid them can help you achieve a flawless finish and avoid costly errors.
10.1. Skipping Surface Preparation
Failing to properly prepare the surface is one of the most common painting mistakes. Always clean, repair, and prime the surface before painting to ensure proper paint adhesion and a smooth finish.
10.2. Using the Wrong Tools
Using the wrong tools can make the painting process more difficult and result in a poor-quality finish. Choose high-quality brushes, rollers, and sprayers that are appropriate for your project.
10.3. Applying Too Much Paint
Applying too much paint can cause runs, drips, and uneven coverage. Apply the paint in thin, even coats, allowing each coat to dry completely before applying the next.
10.4. Neglecting Environmental Factors
Painting in direct sunlight, high humidity, or extreme temperatures can affect the drying time and coverage of the paint. Avoid painting in these conditions and maintain a consistent temperature and humidity level for best results.
10.5. Not Allowing Enough Drying Time
Recoating too soon can cause the paint to peel, blister, or crack. Allow the paint to dry completely before applying the next coat. Follow the manufacturer’s recommendations for drying time, which may vary depending on the paint type and environmental conditions.
Navigating the complexities of paint coverage can be challenging, but with the right knowledge and techniques, you can ensure a successful and satisfying painting project.
11. Consulting with Experts at HOW.EDU.VN for Personalized Advice
For more personalized advice and guidance on your specific painting project, consider consulting with the experts at HOW.EDU.VN. Our team of experienced professionals can provide tailored recommendations based on your unique needs and circumstances.
11.1. Benefits of Expert Consultation
Consulting with experts offers numerous benefits, including:
- Accurate Estimates: Receive precise paint estimates based on your room dimensions and surface conditions.
- Product Recommendations: Get advice on the best types of paint and primers for your project.
- Technique Guidance: Learn professional painting techniques to achieve optimal coverage and finish.
- Troubleshooting: Address any painting challenges with expert solutions.
- Time and Cost Savings: Avoid costly mistakes and ensure efficient project completion.
11.2. How HOW.EDU.VN Can Help
At HOW.EDU.VN, we connect you with top experts who can provide personalized solutions for all your painting needs. Our team includes experienced interior designers, professional painters, and material specialists who can offer valuable insights and guidance.
- Personalized Consultations: Get one-on-one advice tailored to your specific project.
- Detailed Planning: Develop a comprehensive plan that covers all aspects of your painting project.
- Material Selection: Choose the best paints, primers, and tools for your needs.
- Technique Training: Learn professional painting techniques to achieve optimal results.
- Ongoing Support: Receive continuous support throughout your project to address any issues that may arise.
11.3. Accessing Expert Advice
Accessing expert advice from HOW.EDU.VN is easy. Simply visit our website and fill out a consultation request form. Provide details about your project, including room dimensions, surface types, and any specific concerns you may have. Our team will match you with the most suitable expert for your needs.
11.4. Success Stories from Satisfied Clients
Many of our clients have benefited from expert consultations at HOW.EDU.VN. Here are a few success stories:
- John, Homeowner: “I was struggling to estimate the amount of paint I needed for my living room. The expert at HOW.EDU.VN provided a precise estimate and recommended the perfect paint for my walls. The project turned out beautifully.”
- Sarah, Interior Designer: “I often consult with the experts at HOW.EDU.VN for complex painting projects. Their insights on material selection and application techniques are invaluable.”
- Michael, Contractor: “The detailed planning and ongoing support from HOW.EDU.VN have helped me complete numerous painting projects efficiently and effectively.”
12. FAQs About Paint Coverage
Understanding paint coverage can be tricky, so we’ve compiled a list of frequently asked questions to help you navigate the process.
12.1. How much area does a gallon of paint typically cover?
A gallon of paint typically covers 350 to 400 square feet, but this can vary depending on the surface texture and porosity.
12.2. Does the type of paint affect coverage?
Yes, different types of paint have different coverage rates. High-quality paints often provide better coverage per gallon.
12.3. How do textured walls affect paint coverage?
Textured walls require more paint due to the increased surface area. Plan to buy about 20% more paint for textured surfaces.
12.4. Is priming necessary for paint coverage?
Yes, priming is essential, especially on new or unpainted surfaces, to reduce porosity and improve paint adhesion.
12.5. How many coats of paint are typically needed?
Two coats of paint are generally recommended for optimal coverage and a professional finish.
12.6. Can I use a paint calculator for estimating paint needs?
Yes, paint calculators can simplify the process and provide more accurate estimates based on your specific measurements.
12.7. What should I do if I run out of paint mid-project?
Stop painting and purchase more paint from the same batch to ensure color consistency.
12.8. How can I maximize paint coverage on a budget?
Proper surface preparation, priming, and using high-quality tools can help maximize paint coverage and reduce the amount of paint needed.
12.9. How does painting over dark colors affect paint coverage?
Painting over dark colors often requires additional coats. Using a high-quality primer designed to block dark colors can help reduce the number of coats needed.
12.10. Where can I find expert advice on paint coverage?
Consult with the experts at HOW.EDU.VN for personalized advice and guidance on your specific painting project.
Planning a painting project involves many considerations, but understanding how much paint a gallon covers is one of the most important. Accurate estimation prevents waste and ensures you have enough paint for a professional finish. For personalized advice and expert guidance, don’t hesitate to contact our team of experienced professionals at HOW.EDU.VN. We can help you navigate every step of the process, from initial planning to final touch-ups.
Ready to transform your space with confidence? Connect with our team of over 100 renowned PhDs at HOW.EDU.VN for personalized solutions and expert guidance.
Address: 456 Expertise Plaza, Consult City, CA 90210, United States
WhatsApp: +1 (310) 555-1212
Website: how.edu.vn
Let us help you bring your vision to life and achieve the perfect finish for your next painting project.