Is your bumper marred by unsightly scratches and dents? Discover the costs associated with bumper paint repair in 2024 and explore the best options available to restore your vehicle’s appearance with HOW.EDU.VN. This guide will not only inform you about the expenses involved in painting your bumper but also empower you to make a choice that aligns with your budget and aesthetic goals. We will cover everything from DIY paint jobs to premium paint jobs, single-stage paint to basecoat and clear coat, and labor costs to additional costs for custom finishes and specialty paints.
1. Understanding Bumper Paint Repair Costs
Bumper paint repair is a detailed process that requires careful consideration. The cost of painting a bumper can vary based on several factors, including the paint type, vehicle make and model, and the extent of the damage. Here’s what you need to know to make an informed decision, whether you’re considering a DIY project or a professional auto body shop.
1.1. Professional Bumper Painting Costs: What to Expect
When it comes to professional bumper painting, costs can range widely based on the quality of the job and the level of damage. On average, painting a front or rear bumper by professionals is estimated to be between $300 and $500. However, this cost can vary significantly from one auto body shop to another. Here’s a breakdown to help you navigate your options:
- Average Cost: Expect to pay anywhere from $300 to $500 for a professional paint job on your bumper. This estimate serves as a starting point before delving into the specifics.
- Labor Rates: Auto body shops typically have labor rates ranging from $50 to $200 per hour. The complexity of the job and the shop’s reputation can influence this rate.
- Materials: The use of high-quality paints and materials is crucial for a lasting finish, contributing a few hundred dollars more to the overall expense.
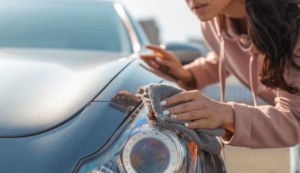 Car bumper after a professional paint repair
1.2. Budget vs. Premium Paint Jobs Cost
Choosing between a budget and premium paint job involves considering both your aesthetic expectations and financial constraints. Premium services, while more costly, ensure a finish that matches the rest of your vehicle and withstands the test of time, offering better value in the long run.
- Budget Repaints: For those looking to minimize expenses, budget paint jobs are available between $200 and $300. Be aware that these may involve lower-quality paints, potentially leading to mismatched colors and less satisfaction.
- Premium Paint Jobs: For a durable, professional finish, prices range from $500 to $1,000. This option is advisable for bumpers with extensive damage requiring additional bodywork, with costs possibly exceeding $2,000 for comprehensive repairs.
1.3. Vehicle Make and Model Impact
The make and model of your vehicle can significantly impact the cost of painting a bumper. Luxury vehicles or those with specialized paint finishes often require more expensive materials and labor. Here’s a general idea of what you might expect to pay, but keep in mind that these are just estimates and can vary based on location and the specific shop:
| Vehicle Make | Estimated Cost |
|---|---|
| Toyota | $100 to $500 |
| Ford | $150 to $600 |
| Chevrolet | $150 to $700 |
| Honda | $200 to $600 |
| Nissan | $200 to $700 |
| Audi | $500 to $2,500 |
| BMW | $600 to $1,000 |
| Lexus | $600 to $1,100 |
| Tesla | $700 to $1,500 |
| Mercedes | $700 to $2,000 |
| Land Rover | $800 to $2,000 |
1.4. DIY Bumper Painting Cost
For minor chips, scratches, or scuff marks, a DIY bumper painting might be a cost-effective solution. Automotive paint and accessories can be sourced from online retailers. Bumper paint kits for light touch-ups start at around $80, and more comprehensive kits are available for about $100. This includes sandpaper, base coat, clear coat, primer, latex gloves, drop cloths, protective goggles, and a mask.
2. Key Factors Affecting Bumper Painting Costs
The expense of getting a bumper painted is influenced by many factors, each playing a crucial role in the final price tag. Here’s a breakdown of what affects bumper painting costs, guiding you toward making an informed decision whether you’re considering a DIY approach or professional service.
2.1. Choosing the Right Auto Body Paint Shop
The quality of the paint shop you choose is paramount. It’s essential to consult multiple experts to align your project’s specific needs with their offerings, ensuring the chosen shop meets your requirements for quality and durability. According to a survey by the American Automobile Association (AAA), the quality of auto body shops can vary significantly, emphasizing the importance of thorough research and customer reviews.
2.2. Type of Paint: Single-Stage vs. Basecoat and Clear Coat
The choice of paint plays a significant role in the cost:
- Single-Stage Paint: Combines color and protection in a single layer, making it quick to apply and budget-friendly. Ideal for a classic look on older vehicles, it has a lower initial cost due to simpler application and fewer materials. However, without a protective clear coat, it’s more prone to fading, oxidation, and damage, especially in harsh weather. While it’s cheaper upfront, it may require more maintenance in the long run, adding to overall costs.
- Basecoat and Clear Coat: Uses two layers—a base coat for color and a clear coat for protection. The clear coat shields the paint from UV rays, moisture, and debris, keeping the color vibrant and glossy over time. Although it has a higher initial cost due to additional materials and labor, it offers greater durability and UV protection, reducing the need for frequent maintenance. This makes it a preferred choice for a long-lasting, high-quality finish.
2.3. Extent of Damage
The severity and extent of the bumper damage directly impact the price. Minor damages requiring no bodywork can be fixed at a lower cost. Conversely, extensive damage demanding significant bodywork will escalate the expenses.
2.4. Location of Repair
Where the repair work is carried out also influences the cost. Professional auto body shops equipped with specialized tools and skilled technicians generally charge more than a DIY garage setup due to the higher quality of work and guarantees they offer.
2.5. Labor Costs
The labor involved in repainting a bumper — from removal and surface preparation to painting and reinstallation — contributes significantly to the overall cost. Professional services account for these steps with a detailed labor charge.
3. Additional Costs for Custom Finishes and Specialty Paints
Opting for custom finishes or specialty paints can significantly increase the cost. For example:
- Tri-Coat Paints: More expensive due to a three-layer application, offering depth and luster. Costs typically range from $750 to $2,500 depending on the color and vehicle size.
- Custom Colors: Higher costs arise from unique paint mixing and the labor-intensive application process. Prices for custom color paint jobs generally fall between $500 and $2,000, depending on the complexity and color selection.
- Metallic and Pearl Finishes: These finishes come with added costs due to reflective particles and the specialized application required. Both metallic and pearlescent finishes typically average around $500.
- Matte Finishes: Costlier due to the need for non-reflective special paints and meticulous application, often requiring complete disassembly of parts. A factory matte finish typically costs between $2,000 and $6,000, with aftermarket applications potentially costing more.
- Protective Coatings: Increases price for added durability against scratches and UV damage. Paint protection film (PPF) ranges from $600 to $8,000, with typical packages costing $1,100 to $2,200. Ceramic coatings generally range from $750 to $2,000, depending on the vehicle size and surfaces coated.
4. How Long Would It Take to Paint Your Car Bumper?
When contemplating a bumper paint job, understanding the expected timeline is crucial. Generally, painting a car bumper can be completed within two to three days, factoring in preparation, painting, drying, and reattachment. Here’s a more detailed breakdown:
- Day 1: Preparation Day: The initial day is usually dedicated to preparation, which includes sanding, cleaning, and any necessary bodywork to ensure the bumper surface is smooth and ready for painting. This stage is crucial and can vary in length depending on the condition of the bumper but typically takes a few hours.
- Day 2: Painting and Drying: The actual painting process, including applying the base coat, color coat, and clear coat, can often be completed in one day. Modern paints dry relatively quickly between coats, typically within 15-20 minutes, allowing for multiple layers to be applied in a short period. High-end shops with facilities to bake the paint can expedite the drying process, achieving a durable and high-quality finish rapidly.
- Day 3: Reattachment and Finishing Touches: The following day is generally reserved for reattaching the bumper, reconnecting any hardware (such as wires, lights, and cameras), and performing final inspections. This phase usually takes a couple of hours.
4.1. Considerations Influencing Duration
Several factors can influence the duration of a bumper paint job:
- Type of Paint: Single-stage paints are quicker to apply and dry than two-stage or three-stage paints, which require more layers and consequently more drying time.
- Environmental Conditions: Humidity and temperature significantly affect paint drying times. Low humidity and warmer temperatures can shorten drying times, whereas high humidity and cooler temperatures can prolong it.
- Preparation Required: The amount of prep work needed, such as filling dents or sanding down scratches, directly impacts the overall timeline. More extensive preparation extends the project duration.
- Shop Workload: The current workload of the auto body shop can also influence how quickly your bumper paint job can be completed. A busy shop may take longer to start and finish your project.
- Painting Technique: The decision to remove the bumper for painting or mask around it can affect the time required. Not removing the bumper saves several hours but may compromise the quality of the job in some cases.
5. Exploring the Nuances of Auto Body Paint
Diving deeper into the world of auto body paint uncovers a spectrum of options, each with unique characteristics that impact both cost and performance. Understanding these nuances can help you make a more informed decision when budgeting for a bumper paint job.
5.1. The Chemical Composition of Auto Paint
Auto paint is a complex mixture of several key components:
- Pigments: These provide the color and opacity of the paint.
- Resins (Binders): These hold the pigments together and provide adhesion to the vehicle surface.
- Solvents: These act as a carrier for the pigments and resins, allowing the paint to be applied smoothly.
- Additives: These enhance the paint’s properties, such as UV resistance, flexibility, and gloss.
The quality and type of these components significantly affect the paint’s durability, appearance, and cost.
5.2. Types of Auto Paint
There are several types of auto paint commonly used in the industry:
- Lacquer: This was one of the earliest types of auto paint and is known for its fast drying time and smooth finish. However, it is not very durable and is prone to chipping and fading.
- Enamel: This is a more durable option than lacquer and is resistant to chipping and scratching. It is also available in a wider range of colors.
- Acrylic: This is a popular choice for modern vehicles due to its durability, UV resistance, and wide range of colors. It is also relatively easy to apply and maintain.
- Urethane: This is the most durable type of auto paint and is resistant to chemicals, scratches, and UV damage. It is also more expensive than other types of paint.
5.3. The Role of Primer and Clear Coat
Primer and clear coat are essential components of a high-quality paint job:
- Primer: This is applied to the bare metal surface before the paint. It provides a smooth, uniform surface for the paint to adhere to and helps to prevent corrosion.
- Clear Coat: This is applied over the base coat of paint. It provides a protective layer that enhances the paint’s gloss and durability.
5.4. Environmental Considerations
The auto paint industry is increasingly focused on developing environmentally friendly products. Waterborne paints, which use water as a solvent instead of harmful chemicals, are becoming more popular. These paints have lower VOC (volatile organic compound) emissions and are safer for both the environment and the people applying them.
6. DIY vs. Professional Bumper Painting: A Detailed Comparison
Deciding whether to paint your car bumper yourself or hire a professional involves weighing several factors, including cost, time, skill level, and desired quality. Here’s a detailed comparison to help you make the right choice.
6.1. DIY Bumper Painting: Pros and Cons
Pros:
- Cost Savings: The most significant advantage of DIY bumper painting is the potential for cost savings. You’ll avoid labor costs and only pay for materials.
- Flexibility: You can work on your own schedule and at your own pace.
- Learning Experience: DIY projects can be a rewarding learning experience, allowing you to develop new skills.
Cons:
- Time Commitment: DIY bumper painting can be time-consuming, especially if you’re not experienced.
- Skill Required: Achieving a professional-looking finish requires a certain level of skill and attention to detail.
- Equipment and Tools: You’ll need to invest in the necessary equipment and tools, such as sandpaper, primer, paint, clear coat, and spray gun.
- Potential for Mistakes: If you make mistakes, you may end up with a subpar finish that requires professional correction.
6.2. Professional Bumper Painting: Pros and Cons
Pros:
- High-Quality Finish: Professional auto body shops have the expertise, equipment, and materials to deliver a high-quality finish that matches the original paint.
- Time Savings: Hiring a professional saves you time and effort.
- Warranty: Many auto body shops offer a warranty on their work, providing peace of mind.
- Convenience: You can drop off your car and pick it up when the job is complete.
Cons:
- Higher Cost: Professional bumper painting is more expensive than DIY due to labor costs.
- Scheduling: You’ll need to schedule an appointment with the auto body shop.
- Potential for Inconvenience: You may need to arrange for alternative transportation while your car is being painted.
6.3. Factors to Consider When Choosing
- Budget: How much are you willing to spend on the bumper paint job?
- Skill Level: Do you have the skills and experience to achieve a professional-looking finish?
- Time Availability: How much time do you have to dedicate to the project?
- Desired Quality: What level of quality are you looking for in the finished product?
- Equipment and Tools: Do you have the necessary equipment and tools?
7. The Importance of Proper Surface Preparation
Proper surface preparation is crucial for achieving a durable and aesthetically pleasing bumper paint job. Neglecting this step can lead to a variety of problems, such as poor adhesion, uneven finish, and premature paint failure.
7.1. Cleaning the Surface
The first step in surface preparation is to thoroughly clean the bumper to remove any dirt, grease, wax, or other contaminants. This can be done using a wax and grease remover or a mild detergent.
7.2. Sanding the Surface
Sanding the surface creates a rough texture that allows the primer and paint to adhere properly. Start with a coarse grit sandpaper (e.g., 180-grit) to remove any rust or old paint. Then, gradually move to finer grit sandpaper (e.g., 320-grit, 400-grit) to smooth out the surface.
7.3. Applying Body Filler (if necessary)
If the bumper has any dents or imperfections, you’ll need to apply body filler to smooth them out. Follow the manufacturer’s instructions for mixing and applying the body filler. Once the filler has dried, sand it down to match the surrounding surface.
7.4. Masking the Surrounding Areas
Mask off any areas that you don’t want to be painted, such as the headlights, taillights, and trim. Use masking tape and paper to protect these areas.
7.5. Applying Primer
Apply a coat of primer to the prepared surface. Primer helps to create a uniform surface for the paint to adhere to and helps to prevent corrosion. Allow the primer to dry completely before moving on to the next step.
8. The Art of Color Matching: Achieving a Seamless Finish
One of the most challenging aspects of painting a car bumper is achieving a seamless color match. If the new paint doesn’t match the existing paint, the repair will be obvious and detract from the vehicle’s appearance.
8.1. Obtaining the Correct Paint Code
The first step in color matching is to obtain the correct paint code for your vehicle. This code can usually be found on a sticker or plate located in the door jamb, glove box, or engine compartment.
8.2. Using a Paint Mixing System
Auto body shops use sophisticated paint mixing systems to create custom paint colors that match the vehicle’s original paint. These systems use a database of paint formulas and a computerized mixing machine to ensure accuracy.
8.3. Blending the Paint
Even with a perfect color match, it’s important to blend the new paint with the existing paint to create a seamless transition. This involves gradually feathering the new paint into the surrounding area.
8.4. Considering Fading and Oxidation
Over time, the paint on a vehicle can fade and oxidize due to exposure to the sun and elements. This can make it difficult to achieve a perfect color match. In some cases, it may be necessary to repaint the entire panel to ensure a uniform appearance.
9. The Finishing Touches: Clear Coat, Polishing, and Waxing
Once the paint has dried, there are several finishing touches that can enhance its appearance and durability.
9.1. Applying Clear Coat
A clear coat is a transparent layer of paint that is applied over the base coat. It protects the base coat from UV damage, scratches, and other environmental factors. It also enhances the paint’s gloss and shine.
9.2. Wet Sanding (Optional)
Wet sanding is a technique used to remove any imperfections in the clear coat, such as orange peel or dust nibs. This involves using a fine-grit sandpaper (e.g., 2000-grit) and water to smooth out the surface.
9.3. Polishing
Polishing removes any swirl marks or scratches from the clear coat and enhances its gloss. This is done using a polishing compound and a polishing machine.
9.4. Waxing
Waxing protects the paint from the elements and enhances its shine. Apply a coat of wax to the polished surface using a soft cloth.
10. Maintaining Your Bumper Paint Job
Proper maintenance is essential for preserving the appearance and durability of your bumper paint job.
10.1. Washing Your Car Regularly
Wash your car regularly to remove dirt, grime, and other contaminants that can damage the paint. Use a mild detergent and a soft cloth or sponge.
10.2. Avoiding Harsh Chemicals
Avoid using harsh chemicals, such as bleach or ammonia, to clean your car. These chemicals can damage the paint and clear coat.
10.3. Protecting Your Car from the Sun
Park your car in the shade or use a car cover to protect it from the sun’s harmful UV rays. UV rays can cause the paint to fade and oxidize.
10.4. Repairing Scratches and Chips Promptly
Repair any scratches or chips promptly to prevent them from spreading and causing further damage. Use a touch-up paint kit to fill in the scratches or chips.
11. Common Mistakes to Avoid When Painting a Bumper
Painting a bumper can be a challenging task, and it’s easy to make mistakes that can compromise the quality of the finished product. Here are some common mistakes to avoid:
11.1. Not Preparing the Surface Properly
As mentioned earlier, proper surface preparation is crucial for achieving a durable and aesthetically pleasing paint job. Don’t skip this step or cut corners.
11.2. Using the Wrong Type of Paint
Using the wrong type of paint can lead to a variety of problems, such as poor adhesion, uneven finish, and premature paint failure. Make sure to use a paint that is specifically designed for automotive use.
11.3. Applying Too Much Paint
Applying too much paint can cause runs and sags. Apply several thin coats of paint instead of one thick coat.
11.4. Not Allowing the Paint to Dry Properly
Allow the paint to dry completely between coats and before applying the clear coat. This will prevent the paint from running or sagging.
11.5. Not Wearing Protective Gear
Always wear protective gear, such as gloves, a mask, and eye protection, when painting. This will protect you from harmful chemicals and fumes.
12. The Future of Auto Body Paint Technology
The auto body paint industry is constantly evolving, with new technologies and innovations emerging all the time. Here are some of the trends that are shaping the future of auto body paint:
12.1. Self-Healing Paints
Self-healing paints are designed to repair minor scratches and swirl marks automatically. These paints contain microscopic capsules that release a healing agent when the paint is scratched.
12.2. Color-Changing Paints
Color-changing paints can change color depending on the viewing angle or temperature. These paints use special pigments that reflect light differently depending on the conditions.
12.3. 3D-Printed Paints
3D-printed paints can be used to create custom textures and designs on vehicle surfaces. This technology allows for a high degree of customization and personalization.
12.4. Sustainable Paints
Sustainable paints are made from renewable resources and have lower VOC emissions than traditional paints. These paints are better for the environment and safer for the people applying them.
13. Expert Insights: Tips from Professional Auto Body Technicians
To provide you with the best possible advice, we’ve consulted with several professional auto body technicians to gather their insights and tips on painting a bumper.
13.1. Invest in Quality Materials
“Don’t skimp on materials,” says John, a technician with 20 years of experience. “Using high-quality sandpaper, primer, paint, and clear coat will make a big difference in the final result.”
13.2. Take Your Time
“Painting a bumper is not a race,” says Maria, a technician specializing in color matching. “Take your time and pay attention to detail. The more time you spend on preparation and application, the better the results will be.”
13.3. Practice Makes Perfect
“If you’re new to painting, practice on a scrap piece of metal before tackling your bumper,” says David, a technician specializing in custom paint jobs. “This will give you a feel for the spray gun and help you develop your technique.”
13.4. Don’t Be Afraid to Ask for Help
“If you’re not sure about something, don’t be afraid to ask for help,” says Sarah, a technician specializing in collision repair. “There are plenty of online resources and forums where you can get advice from experienced professionals.”
14. The Role of Advanced Technology in Modern Auto Painting
Modern auto painting relies heavily on advanced technology to achieve precise color matching, flawless finishes, and efficient workflows.
14.1. Spectrophotometers
Spectrophotometers are used to measure the color of a vehicle’s paint and create a precise formula for matching it. These devices use light to analyze the paint’s spectral reflectance and identify its unique color characteristics.
14.2. Computerized Paint Mixing Systems
Computerized paint mixing systems use the data from spectrophotometers to automatically mix the correct paint color. These systems ensure accuracy and consistency, reducing the risk of errors.
14.3. Spray Booths with Advanced Filtration Systems
Spray booths provide a controlled environment for painting, with advanced filtration systems that remove dust, dirt, and other contaminants from the air. This helps to ensure a clean and flawless finish.
14.4. Infrared Drying Systems
Infrared drying systems use infrared light to quickly and efficiently dry the paint. This reduces the drying time and allows for faster turnaround times.
15. Understanding Insurance Coverage for Bumper Paint Repair
If your bumper was damaged in an accident, your insurance may cover the cost of the paint repair. However, the extent of coverage will depend on your policy and the circumstances of the accident.
15.1. Comprehensive Coverage
Comprehensive coverage typically covers damage to your vehicle that is not caused by a collision, such as damage from vandalism, weather, or theft.
15.2. Collision Coverage
Collision coverage typically covers damage to your vehicle that is caused by a collision with another vehicle or object.
15.3. Deductible
Most insurance policies have a deductible, which is the amount you have to pay out of pocket before your insurance coverage kicks in.
15.4. Filing a Claim
If you need to file an insurance claim for bumper paint repair, contact your insurance company and provide them with the details of the accident. They will guide you through the claims process.
16. Frequently Asked Questions (FAQs) About Bumper Painting
Here are some frequently asked questions about bumper painting:
16.1. How much does it cost to paint a bumper?
The cost to paint a bumper can range from $200 to $1,000 or more, depending on the factors discussed in this article.
16.2. Can I paint a bumper myself?
Yes, you can paint a bumper yourself, but it requires skill, time, and the right equipment.
16.3. How long does it take to paint a bumper?
Painting a bumper typically takes two to three days.
16.4. What type of paint should I use to paint a bumper?
Use a paint that is specifically designed for automotive use, such as acrylic or urethane.
16.5. Do I need to apply clear coat to a bumper?
Yes, clear coat is recommended to protect the paint and enhance its shine.
16.6. How can I match the paint color on my car?
Obtain the paint code for your vehicle and use a paint mixing system to create a custom color match.
16.7. What is the best way to prepare a bumper for painting?
Clean the surface, sand it down, apply body filler (if necessary), and mask off the surrounding areas.
16.8. How can I prevent runs and sags when painting a bumper?
Apply several thin coats of paint instead of one thick coat.
16.9. How can I maintain my bumper paint job?
Wash your car regularly, avoid harsh chemicals, protect your car from the sun, and repair scratches and chips promptly.
16.10. Does insurance cover bumper paint repair?
It depends on your insurance policy and the circumstances of the damage.
17. Why Choose HOW.EDU.VN for Expert Advice?
Navigating the complexities of automotive repair can be daunting. At HOW.EDU.VN, we connect you with a network of over 100 renowned PhDs and specialists, offering tailored advice and solutions for all your vehicle-related queries.
- Access to Top Experts: Gain insights from leading professionals in automotive engineering, paint technology, and collision repair.
- Personalized Consultations: Receive customized advice based on your specific vehicle, budget, and aesthetic preferences.
- Reliable and Secure: Ensure the confidentiality and accuracy of your consultations.
Ready to restore your bumper to its original glory? Contact our team of experts at HOW.EDU.VN today.
18. Call to Action
Don’t let a damaged bumper detract from your vehicle’s appearance. Whether you’re considering a DIY project or a professional paint job, the experts at HOW.EDU.VN can provide you with the guidance and support you need to make an informed decision.
Contact us today for a consultation:
- Address: 456 Expertise Plaza, Consult City, CA 90210, United States
- WhatsApp: +1 (310) 555-1212
- Website: HOW.EDU.VN
Let HOW.EDU.VN help you achieve a flawless bumper paint job that enhances your vehicle’s value and appearance. Our team of experts is ready to assist you with any questions or concerns you may have. With the help of how.edu.vn, you can confidently restore your bumper to its original glory and enjoy a vehicle that looks its best. Connect with our experts today and experience the difference that professional guidance can make.
