Changing margins in Google Docs is straightforward and can significantly enhance the visual appeal and readability of your documents, and HOW.EDU.VN is here to guide you through it. By adjusting the page margins, you control the space between your text and the edges of the page, allowing for better formatting and a more professional look. Whether you need to increase margins for annotations or decrease them to fit more content, mastering margin adjustments can improve your document layout, contributing to better overall document management.
1. What Are Margins in Google Docs and Why Adjust Them?
Margins in Google Docs define the blank space around the text on a page. Adjusting them affects how text and other elements are positioned. There are several reasons why you might want to change margins:
- Aesthetic Appeal: Adjusting margins can improve the overall look and feel of your document.
- Readability: Wider margins can make text less dense and easier to read.
- Content Accommodation: Smaller margins allow you to fit more text on a page, which can be useful for documents with strict length requirements.
- Printing Requirements: Certain printers or publication guidelines may require specific margin settings.
- Professional Presentation: Consistent and appropriate margins give a document a polished, professional appearance.
2. How to Change Margins in Google Docs Using Page Setup
One of the primary methods for adjusting margins in Google Docs is through the Page Setup dialog box. This method provides precise control over each margin.
2.1. Step-by-Step Guide to Using Page Setup
- Open Your Document: Launch Google Docs and open the document you wish to modify.
- Access Page Setup:
- Click on File in the top menu.
- Select Page Setup from the dropdown menu.
- Adjust Margins:
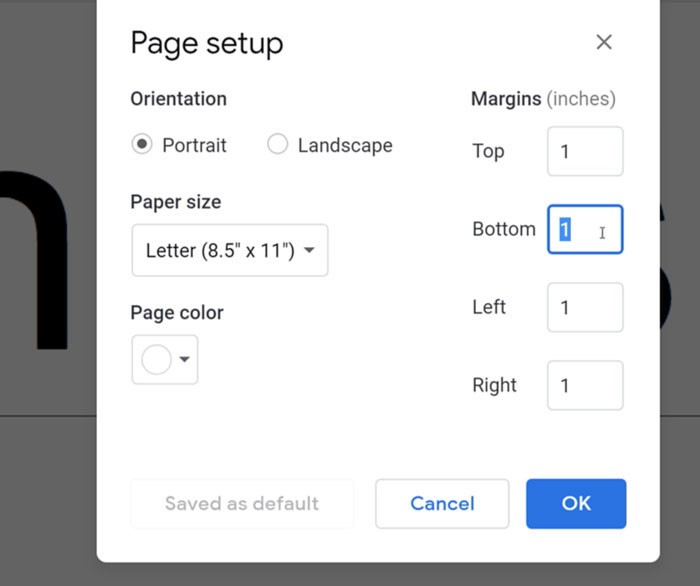
- In the Page Setup dialog box, you’ll see fields for Top, Bottom, Left, and Right margins.
- Click on each box and enter the desired measurement in inches. For example, you might set all margins to 1.5 inches.
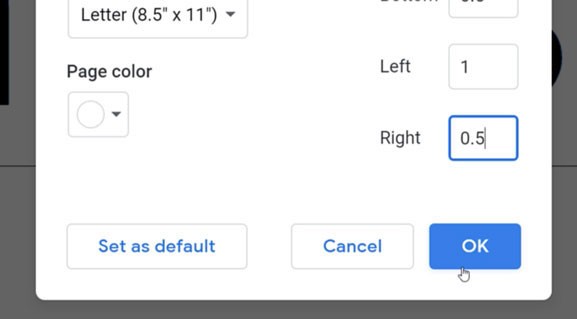
- Apply Changes:
- Click OK to apply the new margin settings to your document.
- Click OK to apply the new margin settings to your document.
2.2. Setting Default Margins
If you frequently use specific margin settings, you can set them as the default for all new documents.
- Follow Steps 1-3 Above: Open Page Setup and adjust the margins to your preferred settings.
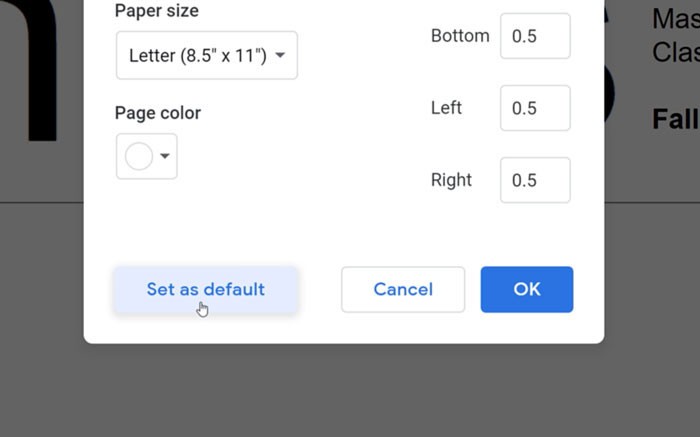
- Set as Default:
- Click the Set as Default button in the Page Setup dialog box.
- Click the Set as Default button in the Page Setup dialog box.
- Confirm: This will apply these settings to all new documents you create in Google Docs. Note that it won’t affect existing documents.
2.3. Considerations When Using Page Setup
- Units of Measurement: Google Docs typically uses inches as the default unit. Ensure you are entering values in the correct unit.
- Preview: Changes are applied immediately after clicking OK, so you can quickly see the effect on your document.
- Document Length: Adjusting margins can affect the overall length of your document, so review the content to ensure it still meets your requirements.
3. How to Change Margins in Google Docs Using the Ruler
The ruler in Google Docs offers a visual and intuitive way to adjust margins. This method is particularly useful for making quick adjustments and seeing the changes in real-time.
3.1. Step-by-Step Guide to Using the Ruler
- Open Your Document: Open the Google Docs document you want to adjust.
- Show the Ruler:
- If the ruler is not visible, click on View in the top menu.
- Select Show ruler from the dropdown menu.
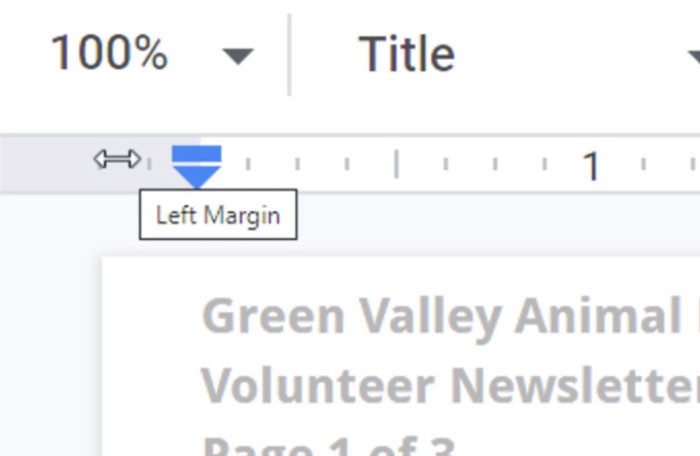
- Identify Margin Markers:
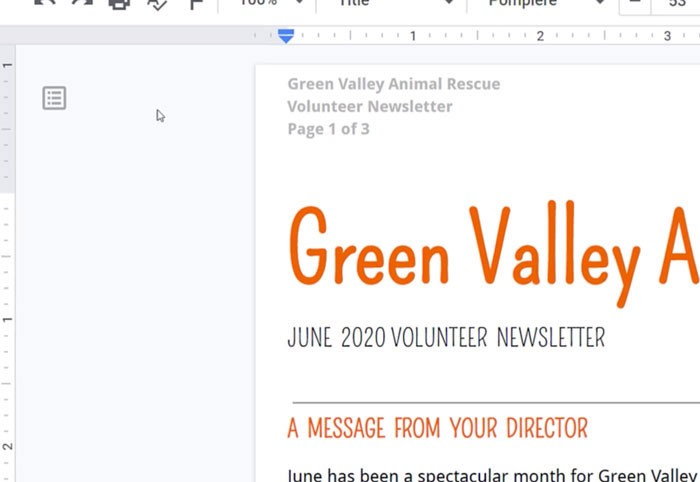
- The ruler appears at the top and left of your document.
- The gray areas on either end of the ruler represent the margins.
- Adjust Margins:
- Hover your cursor over the boundary between the gray and white areas on the ruler.
- Your cursor will change into a double-headed arrow.
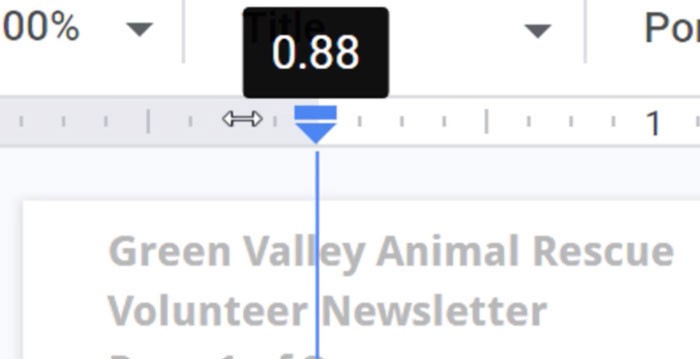
- Click and drag the marker to adjust the margin. Dragging left increases the margin; dragging right decreases it.
- Observe Changes: As you drag the marker, the text in your document will shift in real-time, allowing you to see the effect of your adjustments immediately.
3.2. Tips for Precise Adjustments with the Ruler
- Zoom In: For finer control, zoom in on your document. This makes it easier to see and manipulate the margin markers on the ruler.
- Use Guides: If you need specific margin measurements, use the ruler’s markings as a guide.
- Consistency: Ensure margins are consistent across the document for a professional look.
3.3. Limitations of Using the Ruler
- No Numerical Precision: The ruler does not display exact numerical measurements as you adjust the margins. For precise settings, the Page Setup method is preferable.
- Simultaneous Adjustment: The ruler adjusts margins for the entire document. You cannot set different margins for individual pages using this method.
4. Common Issues and Troubleshooting
While adjusting margins in Google Docs is generally straightforward, you may encounter some common issues. Here are some solutions:
4.1. Margins Not Changing
- Ensure Ruler is Visible: Double-check that the ruler is enabled in the View menu.
- Correct Marker: Make sure you are clicking and dragging the correct margin marker on the ruler.
- Page Setup Override: Check the Page Setup to ensure there isn’t a conflicting setting overriding your ruler adjustments.
4.2. Inconsistent Margins
- Manual Adjustments: If you’ve made adjustments on different pages manually, they might not be consistent. Use the Page Setup to set uniform margins across the entire document.
- Section Breaks: If your document has section breaks, margins might be different in each section. Adjust the margins for each section separately.
4.3. Default Margins Not Applying
- Existing Documents: Changing the default settings does not affect existing documents. You need to adjust margins in those documents individually.
- Browser Cache: Sometimes, browser cache can interfere with settings. Clear your browser’s cache and cookies, then restart Google Docs.
4.4. Text Overflowing
- Reduce Margins: If text is overflowing, try reducing the margins to create more space.
- Adjust Font Size: Consider reducing the font size slightly to fit more text on each page.
- Check Line Spacing: Ensure line spacing is appropriate. Excessive line spacing can cause text to overflow even with adequate margins.
5. Advanced Margin Techniques
For more advanced document formatting, consider these techniques:
5.1. Using Section Breaks for Variable Margins
Google Docs doesn’t directly support different margins on different pages within the same section. However, you can use section breaks to achieve this effect.
- Insert Section Breaks: Place section breaks (Insert > Break > Section Break) at the beginning of each section where you want different margins.
- Adjust Margins for Each Section: After inserting the breaks, adjust the margins for each section individually using the Page Setup.
5.2. Working with Headers and Footers
Headers and footers can affect the available space for your main content. Adjusting margins in conjunction with header and footer settings can optimize your document layout.
- Access Headers and Footers: Double-click the top or bottom of the page to access the header or footer area.
- Adjust Header/Footer Margins: You can often adjust the distance of the header or footer from the top or bottom edge of the page, which indirectly affects the main content area.
5.3. Creating Space for Binding
If your document will be bound, you might need to add extra space to the left margin to accommodate the binding.
- Adjust Left Margin: Increase the left margin to create additional space for binding.
- Consider Mirror Margins: If you are printing double-sided, you might want to use mirror margins (where the left and right margins are mirrored on facing pages) to ensure consistent binding space.
6. The Impact of Margins on Document Readability and Aesthetics
The right margins can greatly enhance a document’s readability and aesthetic appeal. Here’s how:
6.1. Enhancing Readability
- White Space: Adequate margins provide necessary white space, preventing the text from appearing cramped and overwhelming. This is especially important for readers with visual impairments or those who simply prefer a less dense reading experience.
- Eye Strain Reduction: Properly set margins reduce eye strain by giving the reader’s eyes a break. The white space allows the eyes to track lines more easily, improving reading speed and comprehension.
- Focus: Appropriate margins help focus the reader’s attention on the content. Text that is too close to the edge of the page can be distracting.
6.2. Improving Aesthetics
- Professional Look: Consistent margins give a document a polished and professional appearance. This is crucial for business reports, academic papers, and other formal documents.
- Balance: Margins help create a sense of balance on the page. Well-proportioned margins make the document look more visually appealing and harmonious.
- Visual Hierarchy: Margins contribute to the visual hierarchy of the document. They help separate the main content from the edges of the page, making it easier for readers to navigate the information.
6.3. Example Margin Settings for Different Document Types
Here are some typical margin settings for various types of documents:
| Document Type | Top Margin | Bottom Margin | Left Margin | Right Margin |
|---|---|---|---|---|
| Standard Essay | 1 inch | 1 inch | 1 inch | 1 inch |
| Business Report | 1 inch | 1 inch | 1.25 inches | 1 inch |
| Legal Document | 1 inch | 1 inch | 1.5 inches | 1 inch |
| Magazine Article | 0.75 inch | 0.75 inch | 0.75 inch | 0.75 inch |
| Book Manuscript | 1 inch | 0.75 inch | 1.25 inches | 1 inch |
| Letter | 1 inch | 1 inch | 1 inch | 1 inch |

7. Maximizing Google Docs for Professional Document Layout
To create professional documents in Google Docs, consider these best practices:
7.1. Consistent Formatting
- Styles: Use Google Docs styles feature to ensure consistent formatting throughout your document. Styles allow you to define specific settings for headings, paragraphs, and other elements, and apply them uniformly.
- Templates: Leverage Google Docs templates for pre-designed layouts that include consistent margins, fonts, and styles.
- Format Painter: Use the format painter tool to copy formatting from one section of the document to another, ensuring consistency.
7.2. Effective Use of White Space
- Margins: Set appropriate margins to create sufficient white space around the text.
- Line Spacing: Adjust line spacing to improve readability. Single or 1.15 spacing is generally suitable for most documents, but you might increase it for better readability.
- Paragraph Spacing: Add space before or after paragraphs to create visual separation between blocks of text.
7.3. Optimizing for Printing and Digital Viewing
- Print Preview: Always use the print preview feature to see how your document will look when printed. This helps you identify any potential issues with margins, layout, or formatting.
- PDF Export: When sharing your document, export it as a PDF to preserve the formatting. PDFs ensure that the document looks the same regardless of the device or software used to view it.
- Mobile Optimization: If your document will be viewed on mobile devices, ensure that the margins and font sizes are appropriate for smaller screens.
7.4. Leveraging Add-ons and Extensions
- Document Formatting Add-ons: Explore Google Docs add-ons for advanced formatting capabilities, such as automated table of contents generation, citation management, and more.
- Grammar and Style Checkers: Use grammar and style checking add-ons to ensure your document is error-free and well-written.
8. Real-World Examples of Margin Adjustments
Let’s look at some real-world scenarios where adjusting margins can be particularly useful:
8.1. Academic Papers
In academic papers, specific margin requirements are often mandated by universities or journals. For example, many institutions require 1-inch margins on all sides. Correctly setting these margins ensures compliance and can affect the grade or acceptance of the paper.
8.2. Business Reports
Business reports often benefit from slightly wider margins to enhance readability. A 1.25-inch left margin can provide extra space for binding, while standard 1-inch margins on the other sides maintain a professional appearance.
8.3. Legal Documents
Legal documents frequently require larger left margins to accommodate stamps and annotations. A 1.5-inch left margin is common in legal settings.
8.4. Creative Writing
Creative writers might experiment with different margin sizes to create a particular mood or effect. Narrower margins can make a document feel more intense, while wider margins can create a more relaxed and spacious feel.
8.5. Newsletters and Brochures
Newsletters and brochures often use custom margin settings to fit content into columns and create visually appealing layouts. Understanding how to adjust margins is crucial for designing these types of documents effectively.
9. How HOW.EDU.VN Can Help with Your Document Formatting Needs
At HOW.EDU.VN, we understand the importance of well-formatted documents. Whether you’re working on an academic paper, a business report, or any other type of document, our team of experienced professionals is here to provide expert guidance and support.
9.1. Expert Consultations
Connect with our network of over 100 renowned Ph.D. experts across various fields. They can provide personalized advice on document formatting, including margin adjustments, layout design, and overall document presentation.
9.2. Customized Solutions
We offer tailored solutions to meet your specific needs. Whether you need help with setting up a document template, ensuring compliance with specific formatting guidelines, or optimizing your document for readability and aesthetics, we’ve got you covered.
9.3. Time and Cost Savings
Avoid the time-consuming process of trial and error. Our experts can quickly identify the best margin settings and formatting options for your document, saving you valuable time and effort.
9.4. Confidential and Reliable Advice
We prioritize the confidentiality and reliability of our services. You can trust us to provide accurate, trustworthy advice that you can rely on.
9.5. Practical Tips and Solutions
Receive practical, actionable tips and solutions that you can implement immediately. Our experts provide clear, concise guidance that you can easily follow.
10. Frequently Asked Questions (FAQ) About Margins in Google Docs
10.1. How do I change the margins in Google Docs?
You can change margins in Google Docs using the Page Setup dialog box (File > Page Setup) or by dragging the margin markers on the ruler.
10.2. Can I set different margins for different pages in Google Docs?
No, Google Docs does not directly support different margins on different pages within the same section. However, you can use section breaks to achieve this effect.
10.3. How do I set default margins in Google Docs?
To set default margins, go to File > Page Setup, adjust the margins to your preferred settings, and click the “Set as Default” button.
10.4. Why are my margins not changing in Google Docs?
Ensure that the ruler is visible (View > Show ruler) and that you are dragging the correct margin markers. Also, check the Page Setup to ensure there isn’t a conflicting setting.
10.5. What are the default margins in Google Docs?
The default margins in Google Docs are typically 1 inch on all sides.
10.6. How do I create space for binding in Google Docs?
Increase the left margin to create additional space for binding. Consider using mirror margins if you are printing double-sided.
10.7. How do I show the ruler in Google Docs?
To show the ruler, click on “View” in the top menu and select “Show ruler.”
10.8. Can I use centimeters instead of inches for margins in Google Docs?
Google Docs typically uses inches as the default unit. You may need to convert your measurements if you prefer using centimeters.
10.9. How do headers and footers affect margins in Google Docs?
Headers and footers can affect the available space for your main content. Adjusting margins in conjunction with header and footer settings can optimize your document layout.
10.10. Where can I get expert help with document formatting in Google Docs?
At HOW.EDU.VN, we offer expert consultations with experienced professionals who can provide personalized advice and support for all your document formatting needs.
Adjusting margins in Google Docs is a fundamental skill that can greatly enhance the appearance and readability of your documents. Whether you use the Page Setup dialog box or the ruler, understanding how to manipulate margins allows you to create professional, visually appealing documents that meet your specific requirements. For expert guidance and support, don’t hesitate to contact our team of Ph.D. experts at HOW.EDU.VN. Let us help you create documents that make a lasting impression.
Are you struggling to get your Google Docs looking just right? Do you need expert advice on document formatting? Contact HOW.EDU.VN today for personalized consultations and solutions. Our team of Ph.D. experts is ready to assist you. Reach out to us at:
- Address: 456 Expertise Plaza, Consult City, CA 90210, United States
- WhatsApp: +1 (310) 555-1212
- Website: HOW.EDU.VN
Let how.edu.vn help you achieve document perfection with expert margin and layout assistance, improving document presentation and overall formatting techniques.