Are you dealing with water damage around your home’s foundation, siding stains, or basement leaks? Installing gutters is the answer. At HOW.EDU.VN, we provide expert guidance on How To Install Gutters properly, ensuring your home is protected from water damage. Our step-by-step instructions, along with expert tips, will help you tackle this project with confidence. By the end of this guide, you’ll know how to install rain gutters, choose the right materials, and maintain your new system for years to come, ensuring effective rain water management and preventing costly repairs.
1. Understanding the Importance of Gutters
Gutters are essential for protecting your home from water damage. They collect rainwater from the roof and direct it away from the foundation, siding, and landscaping. Without gutters, water can erode the soil around the foundation, splash dirt onto the siding, and potentially leak into the basement or crawlspace. This can lead to costly repairs and structural damage over time.
1.1. Why Are Gutters Necessary?
Gutters are necessary for several reasons:
- Protecting the Foundation: Rainwater runoff can saturate the soil around your home’s foundation, leading to cracks and structural issues. Gutters channel water away, preventing this saturation.
- Preventing Soil Erosion: Without gutters, rainwater can wash away topsoil, damaging your landscaping and creating uneven ground around your home.
- Preserving Siding and Trim: Water splashing onto your siding can cause stains, mold growth, and wood rot. Gutters help keep your siding clean and dry.
- Avoiding Basement Flooding: Water pooling around the foundation can seep into the basement, causing flooding and water damage. Gutters direct water away, reducing this risk.
- Maintaining Property Value: By preventing water damage, gutters help maintain the structural integrity and aesthetic appeal of your home, preserving its value.
According to a study by the American Society of Civil Engineers, proper water management systems, including gutters, can reduce the risk of foundation damage by up to 50%.
1.2. Identifying the Need for New Gutters
Before diving into how to install gutters, it’s essential to assess whether you need new gutters or if your existing ones can be repaired. Here are some signs that indicate you may need to replace your gutters:
- Visible Damage: Look for cracks, holes, rust, or sagging in your existing gutters.
- Leaks: Check for leaks along the seams or at the corners of the gutters.
- Clogging: If your gutters are constantly clogged with leaves and debris, even after cleaning, it may be time to replace them.
- Water Damage: Look for water stains on your siding, foundation, or around the base of your home.
- Age: If your gutters are more than 20 years old, they may be nearing the end of their lifespan and should be inspected for replacement.
1.3. Types of Gutters
When considering how to install gutters, understanding the different types available is crucial. Here are some common types of gutters:
- K-Style Gutters: These are the most popular type of gutters, known for their decorative shape that resembles the letter “K.” They are durable, efficient, and can hold a large volume of water.
- Half-Round Gutters: These gutters have a simple, semicircular shape and are often used on older homes. They are easy to clean but may not handle as much water as K-style gutters.
- Box Gutters: These are built into the structure of the roof and are typically found on commercial buildings or historic homes.
- Fascia Gutters: These gutters are integrated into the fascia board, providing a seamless look.
- Copper Gutters: Known for their durability and aesthetic appeal, copper gutters are a premium option that can last for decades.
- Aluminum Gutters: A popular and cost-effective choice, aluminum gutters are lightweight, rust-resistant, and available in various colors.
- Vinyl Gutters: These are the most affordable option and are easy to install. However, they may not be as durable as other types of gutters.
- Steel Gutters: Steel gutters are strong and durable, but they can be susceptible to rust if not properly coated.
Each type has its pros and cons, so it’s essential to consider your budget, the style of your home, and the amount of rainfall in your area when choosing the right gutters.
2. Planning Your Gutter Installation Project
Proper planning is essential for a successful gutter installation project. This involves assessing your home’s needs, choosing the right materials, and gathering the necessary tools.
2.1. Assessing Your Home’s Gutter Needs
Before you start how to install gutters, take the time to assess your home’s specific needs. Consider the following factors:
- Roof Size and Slope: The size and slope of your roof will determine the amount of water that needs to be managed. Larger roofs and steeper slopes require larger gutters and more downspouts.
- Rainfall: If you live in an area with heavy rainfall, you’ll need gutters that can handle a high volume of water.
- Landscaping: Consider the landscaping around your home. If you have trees that drop a lot of leaves, you may want to invest in gutter guards to prevent clogging.
- Aesthetic Considerations: Choose gutters that complement the style of your home. Consider the color, shape, and material of the gutters to ensure they blend in with the overall look of your home.
2.2. Choosing the Right Gutter Materials
The material you choose for your gutters will affect their durability, cost, and appearance. Here are some factors to consider when selecting gutter materials:
- Durability: Consider the lifespan of the material and its resistance to damage from weather, impact, and corrosion.
- Cost: Gutter materials range in price from affordable vinyl to premium copper.
- Maintenance: Some materials require more maintenance than others. For example, steel gutters may need to be painted to prevent rust.
- Appearance: Choose a material and color that complements the style of your home.
2.3. Gathering the Necessary Tools and Materials
Before you start how to install gutters, make sure you have all the necessary tools and materials. Here’s a list of essential items:
- Gutters: Purchase the appropriate length and type of gutters for your home.
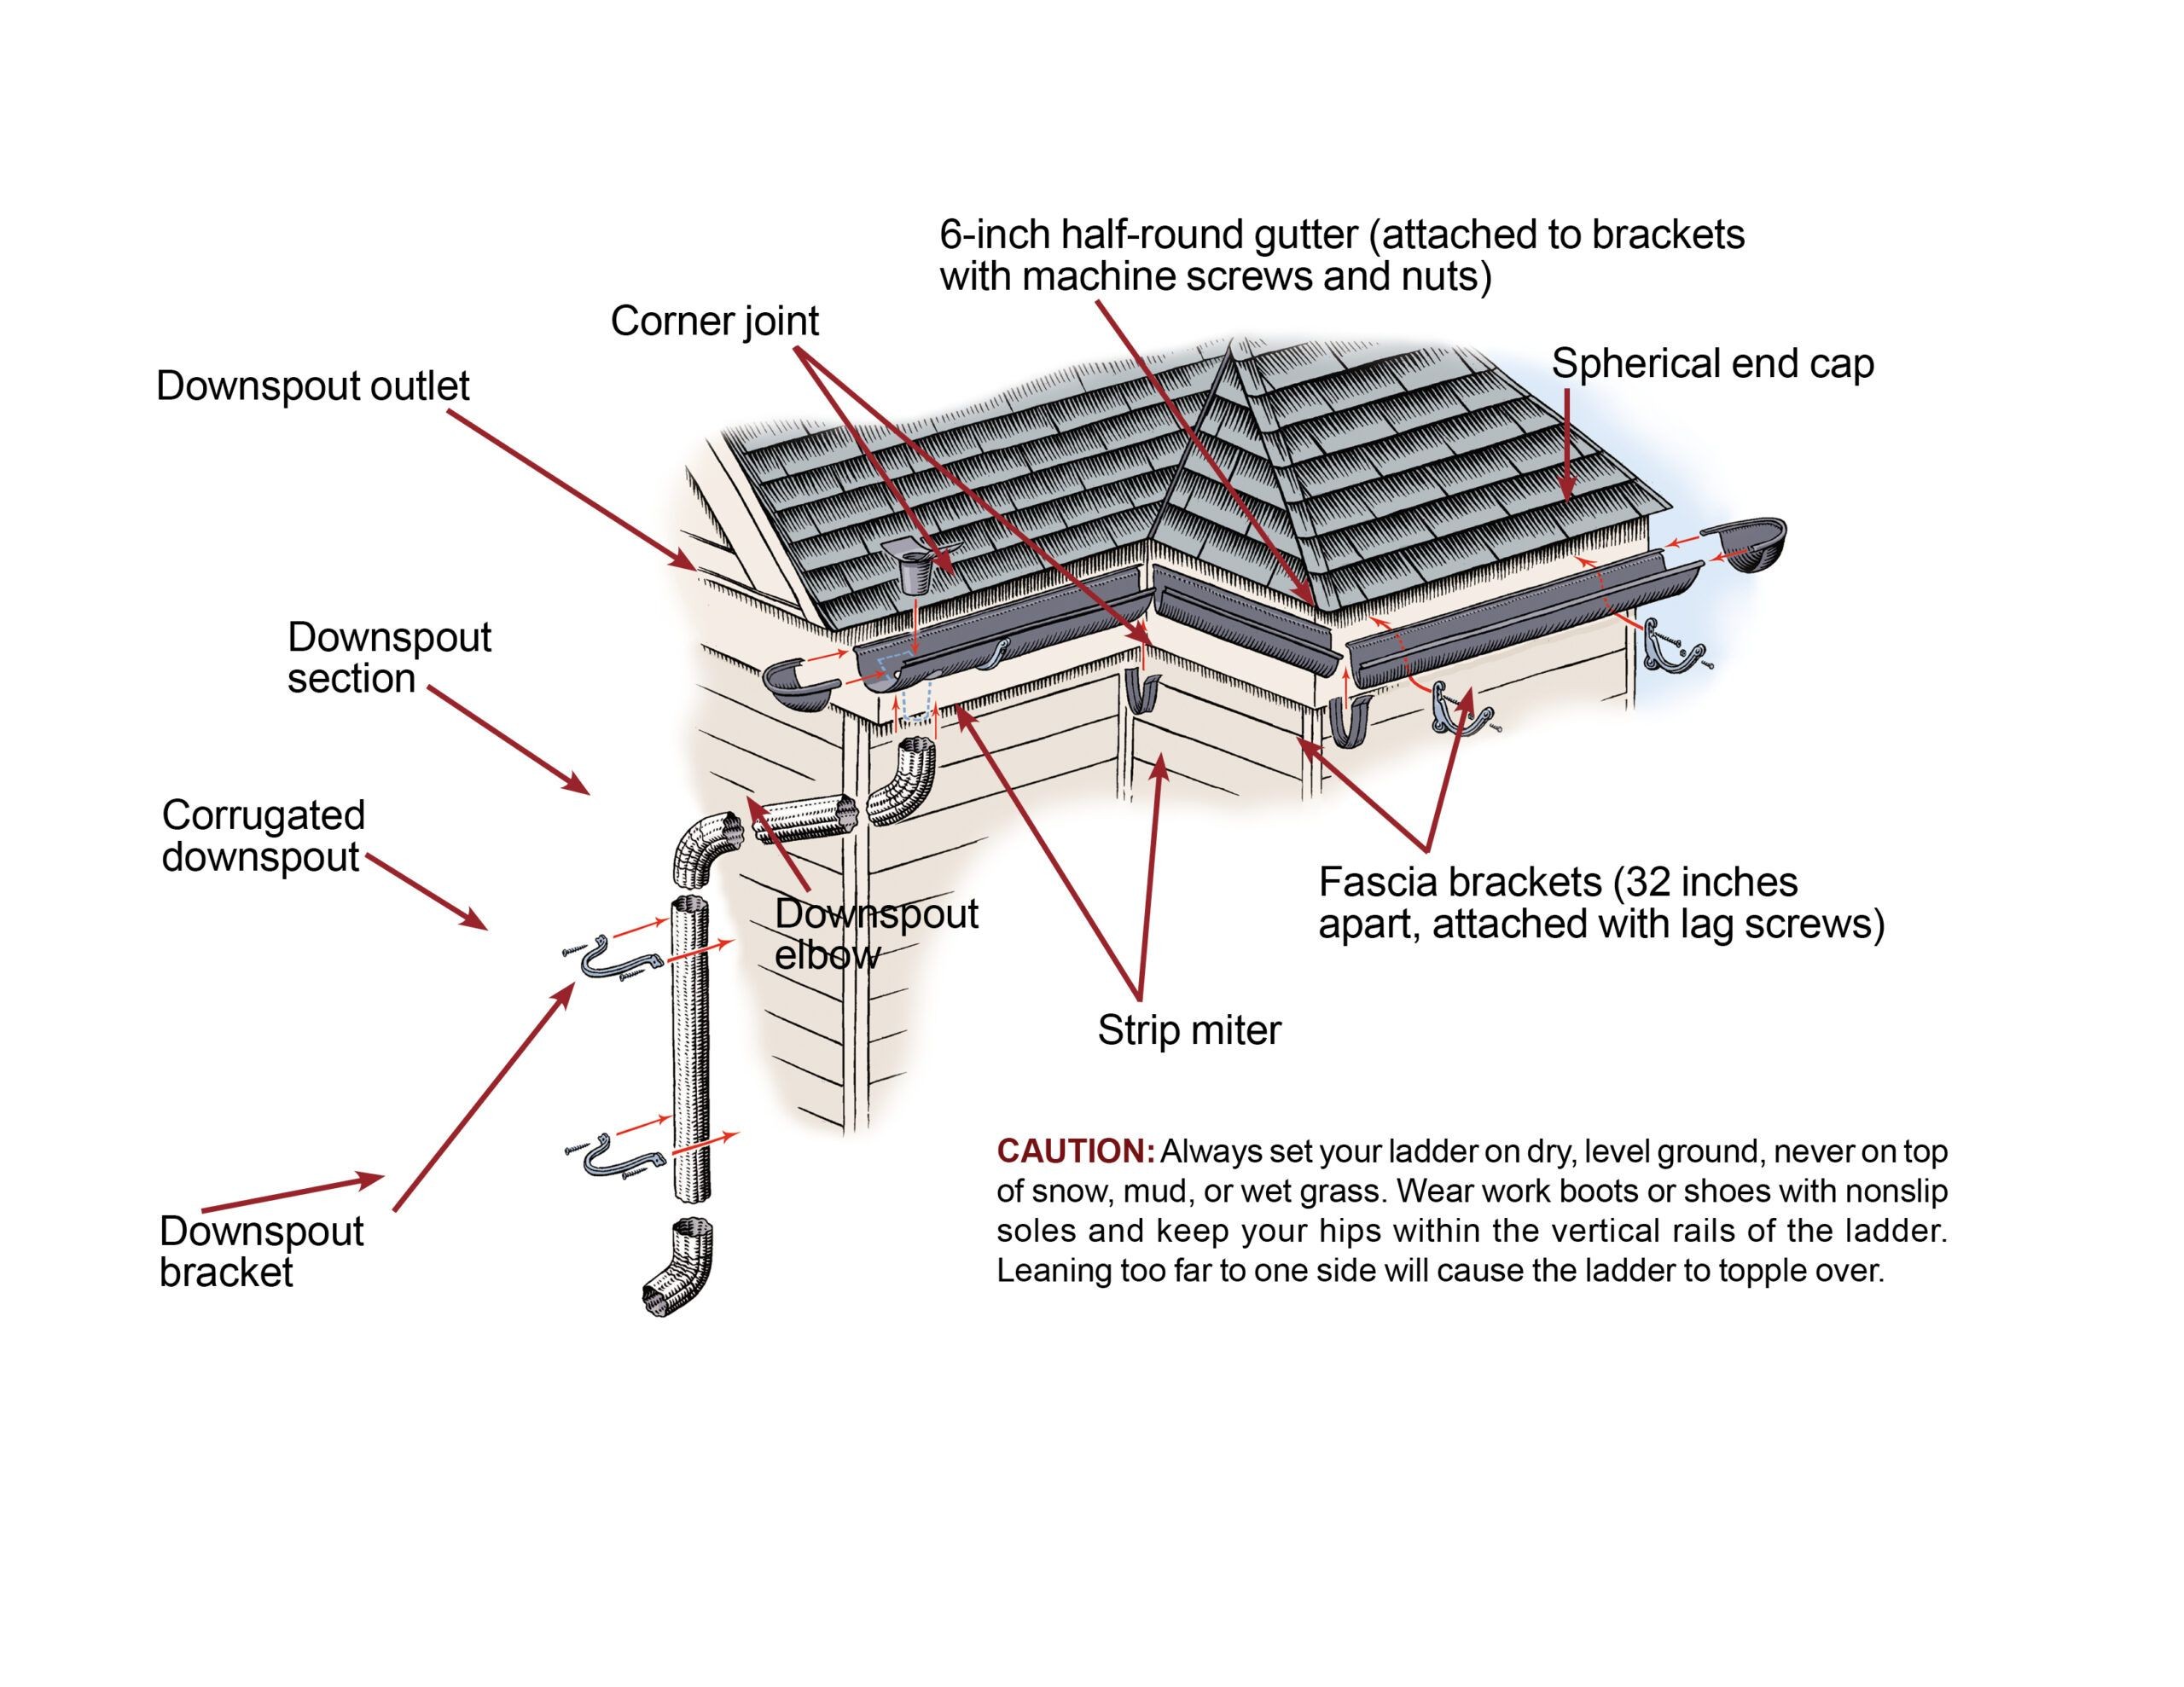
- Downspouts: Choose downspouts that match the size and style of your gutters.
- End Caps: These are used to seal the ends of the gutters.
- Outlets: These connect the gutters to the downspouts.
- Brackets or Hangers: These are used to attach the gutters to the fascia board.
- Screws or Rivets: Use stainless steel screws or aluminum rivets to connect the gutter components.
- Sealant: Apply a high-quality sealant to all seams and joints to prevent leaks.
- Measuring Tape: Use a measuring tape to accurately measure the length of the gutters and downspouts.
- Level: Use a level to ensure the gutters are properly sloped for drainage.
- Hacksaw or Miter Saw: Use a hacksaw or miter saw to cut the gutters and downspouts to the correct length.
- Drill: Use a drill to create pilot holes and attach the gutter components.
- Riveter: If using rivets, you’ll need a riveter to attach the gutter components.
- Ladder: Use a sturdy ladder to safely reach the roof and fascia board.
- Safety Glasses and Gloves: Protect your eyes and hands with safety glasses and gloves.
- Chalk Line: Use a chalk line to mark a straight line for the gutter installation.
Having all the necessary tools and materials on hand will make the installation process smoother and more efficient.
3. Step-by-Step Guide on How to Install Gutters
Now that you’ve planned your project and gathered your materials, it’s time to learn how to install gutters. Follow these step-by-step instructions for a successful installation:
3.1. Step 1: Prepare the Fascia Board
The fascia board is the vertical board that runs along the edge of your roof. It’s where you’ll attach the gutter brackets or hangers. Before installing the gutters, inspect the fascia board for any signs of rot or damage. Repair or replace any damaged sections to ensure a solid surface for attaching the gutters.
- Inspect the Fascia: Check the fascia board for rot, cracks, or other damage. Use a screwdriver to probe any suspicious areas. If the wood is soft or crumbly, it’s likely rotted and needs to be replaced.
- Repair or Replace Damaged Sections: If you find any damaged sections, remove them and replace them with new wood. Use pressure-treated lumber for added protection against rot.
- Clean the Fascia: Remove any dirt, debris, or old paint from the fascia board. Use a scraper or wire brush to remove any loose material.
- Apply a Primer: Apply a coat of primer to the fascia board to protect it from moisture and improve adhesion for the gutter brackets.
- Paint the Fascia: Paint the fascia board to match your home’s trim. This will not only improve the appearance of your home but also provide an extra layer of protection against the elements.
3.2. Step 2: Mark the Gutter Slope
Gutters need to be sloped slightly to ensure proper drainage. The recommended slope is ¼ inch per 10 feet of gutter. Use a chalk line to mark the slope on the fascia board.
- Determine the High Point: Start by determining the high point of the gutter run. This is typically at the opposite end of the downspout.
- Calculate the Slope: Calculate the amount of slope needed based on the length of the gutter run. For example, if the gutter run is 30 feet, the slope should be ¾ inch (30 feet / 10 feet x ¼ inch).
- Mark the Low Point: Measure down from the high point and mark the low point on the fascia board.
- Snap a Chalk Line: Use a chalk line to snap a straight line between the high point and the low point. This line will serve as a guide for installing the gutter brackets.
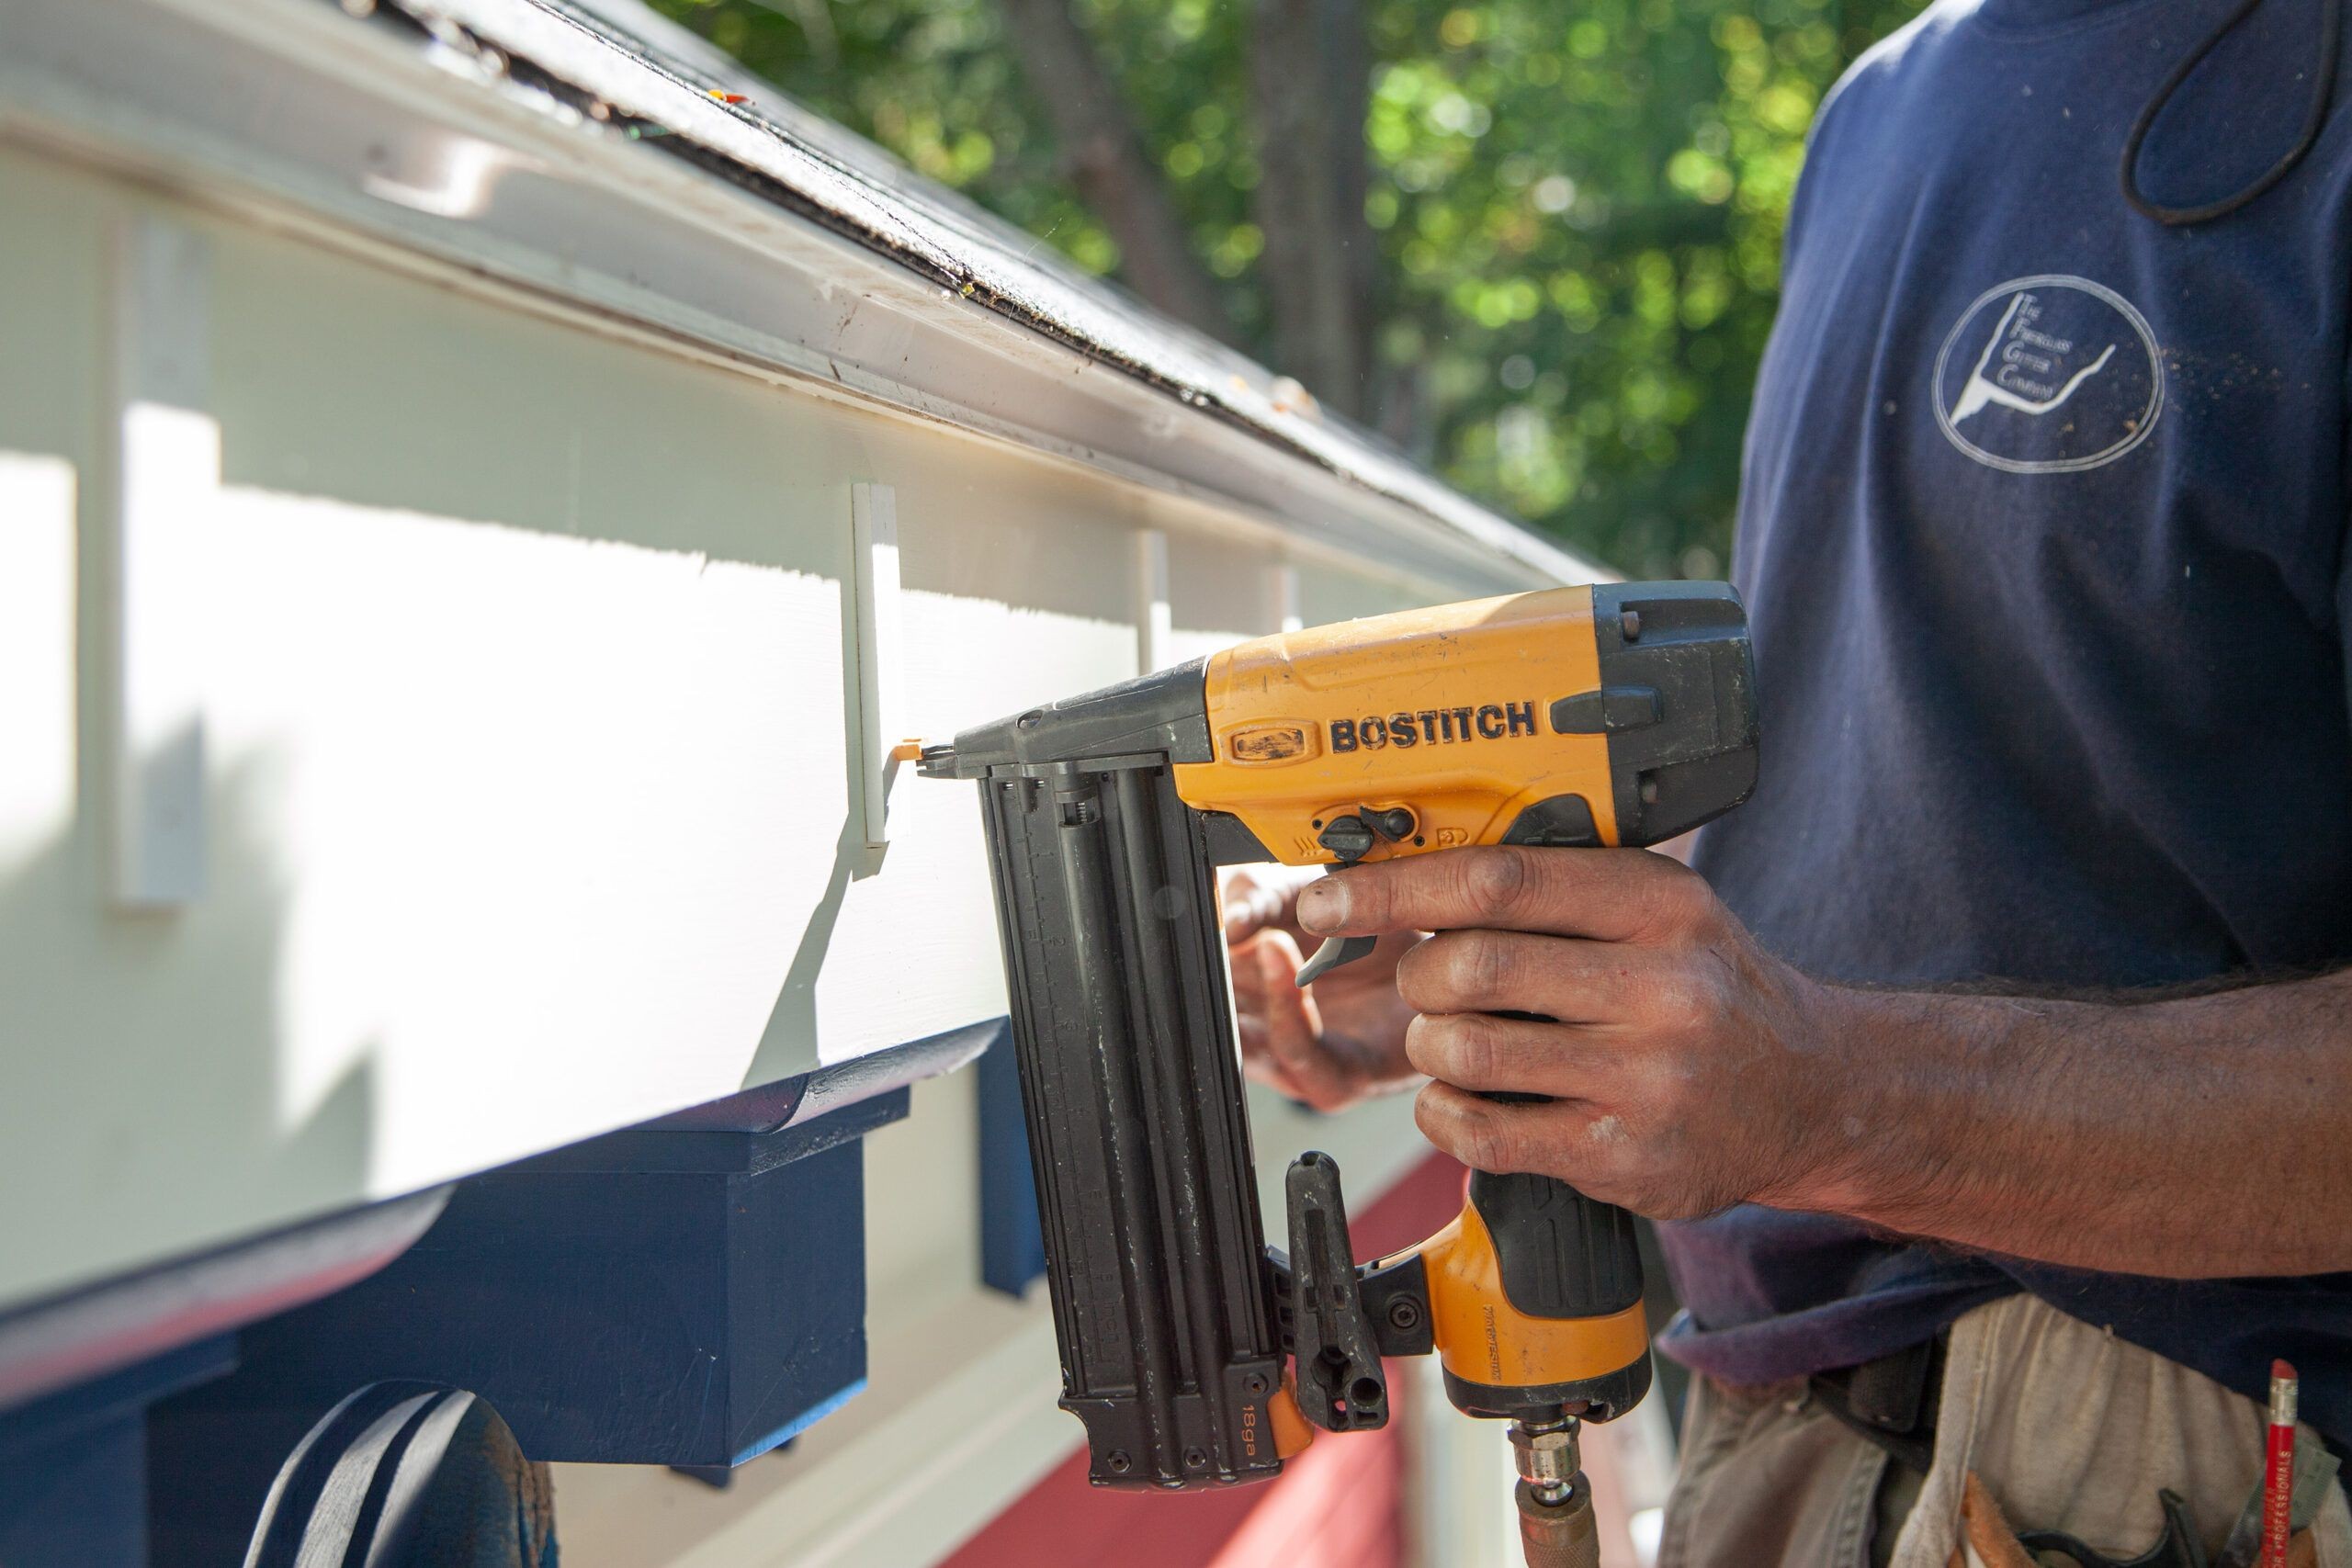
3.3. Step 3: Install the Gutter Brackets or Hangers
Gutter brackets or hangers are used to attach the gutters to the fascia board. The spacing between the brackets will depend on the type of gutters and the amount of rainfall in your area. As a general rule, space the brackets every 24 to 36 inches.
- Mark the Bracket Locations: Mark the locations for the gutter brackets along the chalk line. Use a measuring tape to ensure consistent spacing between the brackets.
- Attach the Brackets: Attach the brackets to the fascia board using screws or nails. Make sure the brackets are securely fastened to the fascia board.
- Check the Alignment: Use a level to check the alignment of the brackets. Make sure the brackets are aligned with the chalk line and are level with each other.
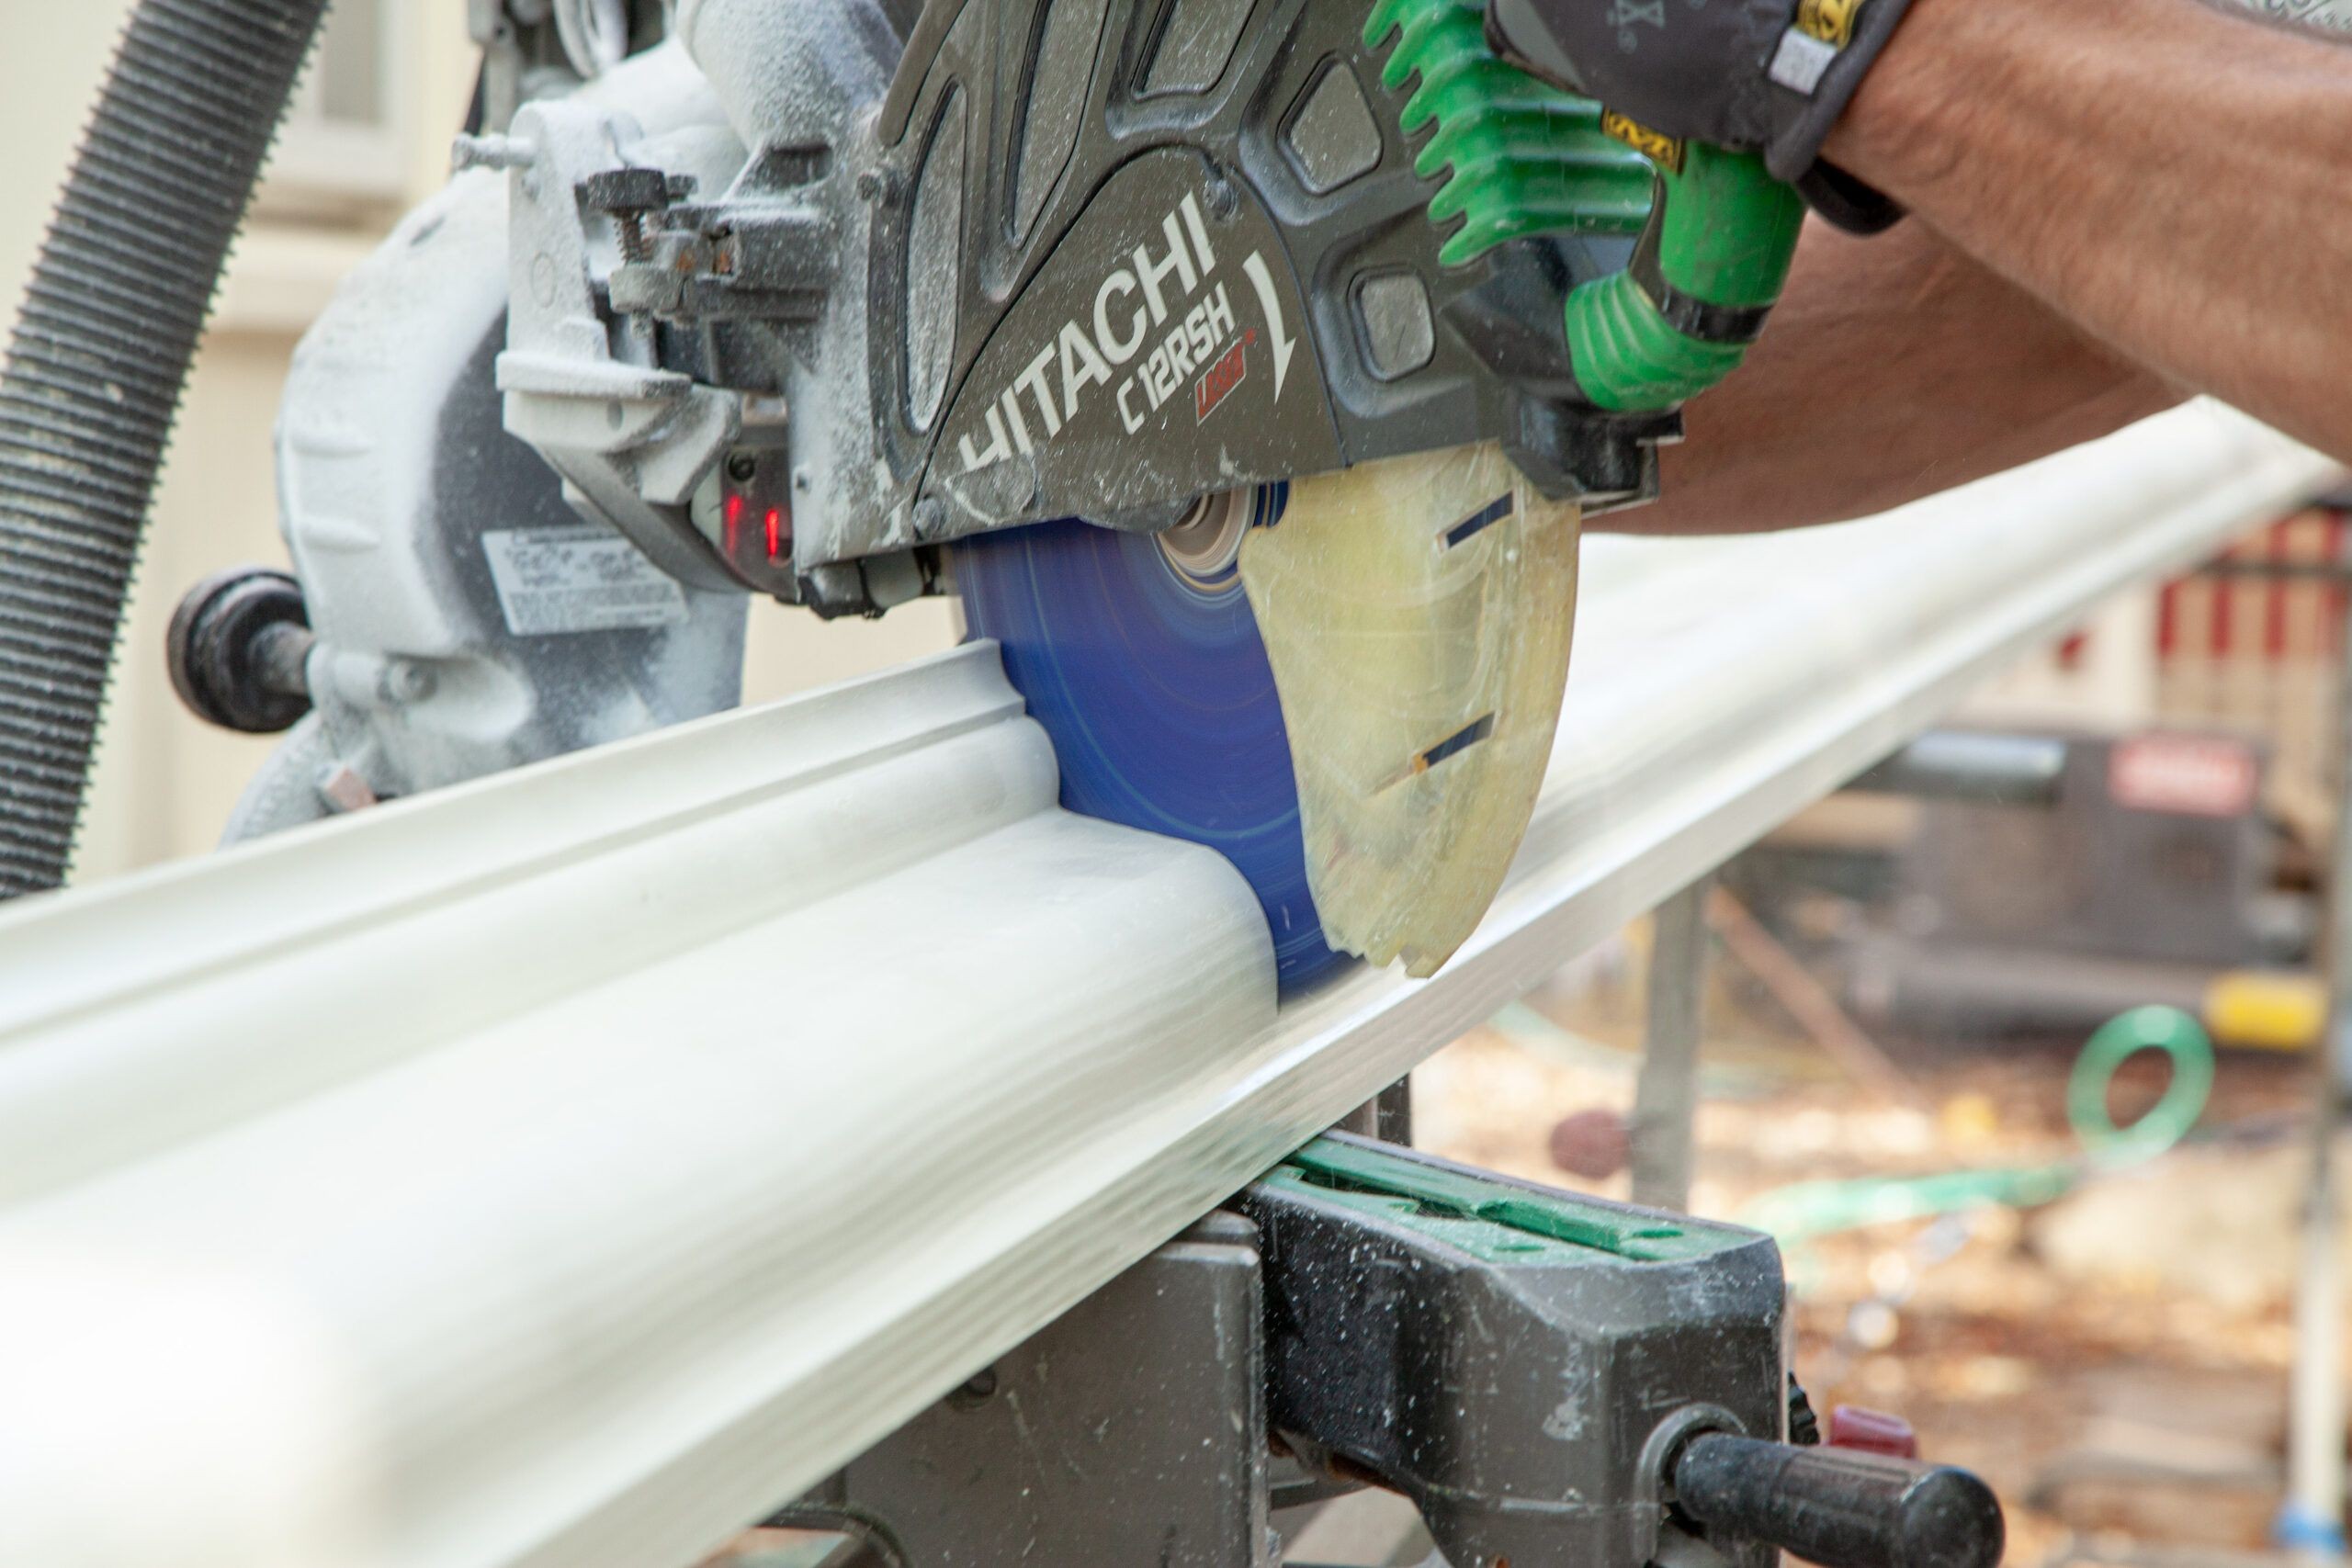
3.4. Step 4: Cut the Gutters to Length
Measure the length of the gutter runs and cut the gutters to the correct length using a hacksaw or miter saw. Be sure to cut the gutters slightly longer than the measured length to allow for overlap at the seams.
- Measure the Gutter Runs: Measure the length of each gutter run using a measuring tape.
- Cut the Gutters: Cut the gutters to the correct length using a hacksaw or miter saw. Be sure to cut the gutters straight and clean.
- Deburr the Edges: Use a file or sandpaper to deburr the edges of the gutters. This will prevent sharp edges from cutting your hands.
3.5. Step 5: Attach the End Caps
Attach end caps to the ends of the gutters to prevent water from escaping. Use sealant and rivets or screws to secure the end caps to the gutters.
- Apply Sealant: Apply a bead of sealant to the inside of the end caps.
- Attach the End Caps: Press the end caps onto the ends of the gutters.
- Secure the End Caps: Secure the end caps to the gutters using rivets or screws. Make sure the end caps are tightly sealed to prevent leaks.
3.6. Step 6: Install the Gutters
Lift the gutters into place and slide them into the brackets or hangers. Make sure the gutters are properly aligned and securely attached to the brackets.
- Lift the Gutters: Lift the gutters into place and position them on the brackets or hangers.
- Align the Gutters: Align the gutters with the chalk line and make sure they are properly sloped for drainage.
- Secure the Gutters: Secure the gutters to the brackets or hangers using screws or clips. Make sure the gutters are securely attached to the brackets.
3.7. Step 7: Cut the Downspout Holes
Use a hole saw to cut the downspout holes in the gutters. Position the holes at the low end of the gutter runs, where the downspouts will be located.
- Mark the Downspout Locations: Mark the locations for the downspout holes on the gutters.
- Drill a Pilot Hole: Drill a pilot hole in the center of the marked locations.
- Cut the Downspout Holes: Use a hole saw to cut the downspout holes in the gutters. Make sure the holes are clean and free of burrs.
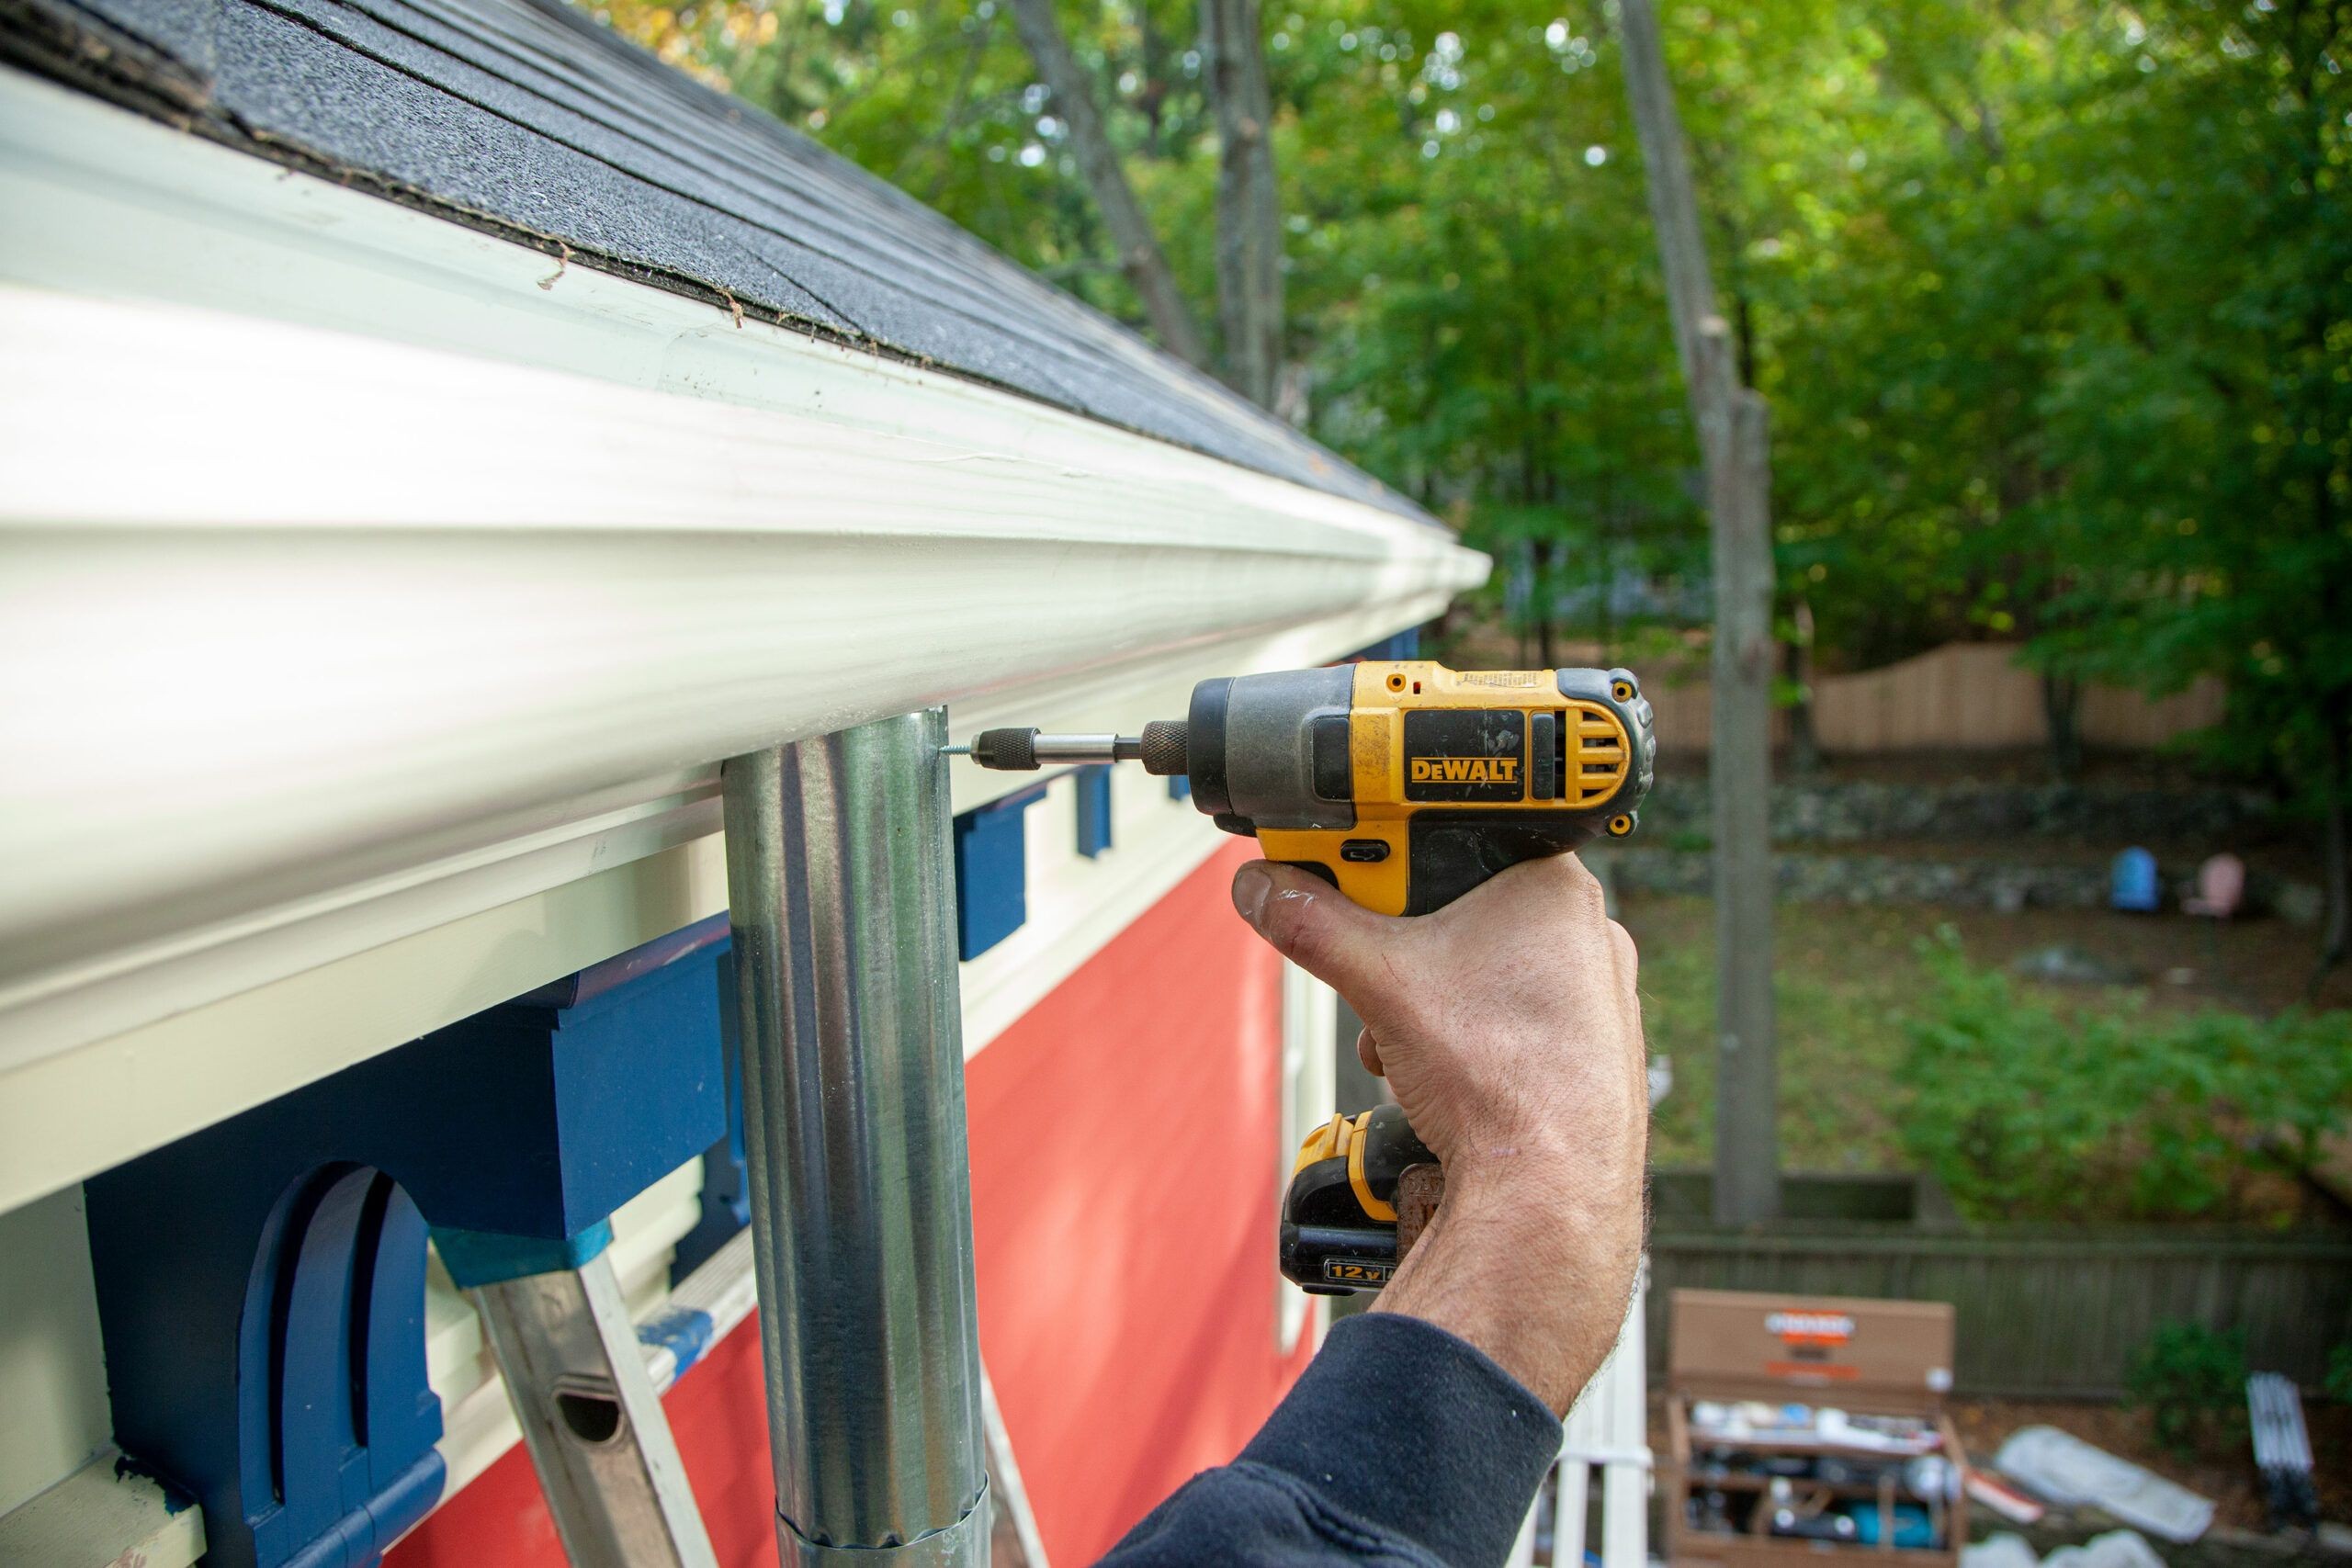
3.8. Step 8: Install the Downspouts
Attach the downspouts to the gutters using downspout elbows and connectors. Secure the downspouts to the wall using downspout brackets.
- Attach the Downspout Elbows: Attach the downspout elbows to the downspout holes in the gutters.
- Connect the Downspouts: Connect the downspouts to the downspout elbows using connectors.
- Secure the Downspouts: Secure the downspouts to the wall using downspout brackets. Make sure the downspouts are properly aligned and securely attached to the wall.
3.9. Step 9: Seal the Seams and Joints
Apply sealant to all seams and joints in the gutters and downspouts to prevent leaks.
- Clean the Seams and Joints: Clean the seams and joints with a damp cloth to remove any dirt or debris.
- Apply Sealant: Apply a bead of sealant to all seams and joints in the gutters and downspouts.
- Smooth the Sealant: Use your finger or a putty knife to smooth the sealant and ensure a watertight seal.
3.10. Step 10: Test the Gutters
After installing the gutters, test them by running water through them. Check for leaks and make sure the water is draining properly.
- Run Water Through the Gutters: Use a garden hose to run water through the gutters.
- Check for Leaks: Check for leaks along the seams and joints. If you find any leaks, apply more sealant to the affected areas.
- Ensure Proper Drainage: Make sure the water is draining properly through the downspouts. If the water is not draining properly, check for clogs or obstructions in the gutters or downspouts.
By following these step-by-step instructions, you can successfully install gutters and protect your home from water damage.
4. Gutter Maintenance and Care
Once you’ve learned how to install gutters, proper maintenance and care are essential to ensure they function effectively and last for years. Regular cleaning, inspection, and repairs can prevent costly damage and keep your gutters in top condition.
4.1. Regular Cleaning
Cleaning your gutters regularly is crucial to prevent clogs and maintain proper drainage. Clogged gutters can cause water to back up and overflow, leading to water damage to your home’s foundation, siding, and landscaping.
- Frequency: Clean your gutters at least twice a year, in the spring and fall. If you live in an area with many trees, you may need to clean them more frequently.
- Tools: Use a ladder, gloves, a bucket, and a gutter scoop or garden trowel to remove leaves, twigs, and other debris from the gutters.
- Technique: Start at one end of the gutter and work your way to the other, scooping out the debris and placing it in the bucket.
- Flushing: After removing the debris, flush the gutters with a garden hose to remove any remaining dirt and ensure the downspouts are clear.
4.2. Inspecting for Damage
Regularly inspect your gutters for any signs of damage, such as cracks, leaks, or sagging. Addressing these issues promptly can prevent them from escalating into more significant problems.
- Frequency: Inspect your gutters at least twice a year, in the spring and fall.
- Check for Cracks: Look for cracks in the gutters, especially at the seams and joints.
- Check for Leaks: Check for leaks by running water through the gutters and observing any drips or leaks.
- Check for Sagging: Look for sagging in the gutters, which can indicate that the brackets are loose or damaged.
- Check the Downspouts: Inspect the downspouts for any clogs or damage.
4.3. Repairing Common Gutter Problems
Addressing common gutter problems promptly can prevent them from escalating into more significant issues. Here are some common gutter problems and how to repair them:
- Leaks: Seal leaks with a high-quality sealant. Clean the area around the leak, apply the sealant, and allow it to dry completely.
- Sagging: Tighten or replace loose or damaged brackets. If the fascia board is damaged, repair or replace it before reattaching the brackets.
- Clogs: Remove clogs from the gutters and downspouts. Use a garden hose to flush out any remaining debris.
- Damage: Use a hacksaw and aviation snips, or with a 12-inch power miter saw fitted with a carbide-tipped finish blade
By following these maintenance and care tips, you can keep your gutters in top condition and protect your home from water damage.
5. When to Call a Professional
While many homeowners can successfully learn how to install gutters themselves, there are certain situations where it’s best to call a professional.
5.1. Complex Installations
If your home has a complex roofline or multiple stories, the gutter installation may be more challenging than a simple DIY project. Professional installers have the experience and equipment to handle complex installations safely and efficiently.
5.2. Safety Concerns
Working at heights can be dangerous, especially if you’re not comfortable on a ladder. Professional installers have the training and safety equipment to work safely on roofs and ladders.
5.3. Warranty Protection
Many professional gutter installers offer warranties on their work. If you install the gutters yourself, you may not have any warranty protection if something goes wrong.
5.4. Time Constraints
If you don’t have the time or patience to install the gutters yourself, hiring a professional can save you time and hassle. Professional installers can complete the job quickly and efficiently, allowing you to focus on other tasks.
5.5. Expertise and Experience
Professional gutter installers have the expertise and experience to ensure the gutters are installed correctly and will function properly. They can also provide advice on the best type of gutters for your home and the best way to maintain them.
6. Enhancing Gutter Performance with Gutter Guards
Gutter guards are a great way to enhance the performance of your gutters and reduce the need for frequent cleaning. They prevent leaves, twigs, and other debris from entering the gutters, keeping them clear and free-flowing.
6.1. Types of Gutter Guards
There are several types of gutter guards available, each with its own advantages and disadvantages. Here are some common types of gutter guards:
- Mesh Gutter Guards: These are the most popular type of gutter guards, consisting of a fine mesh screen that prevents debris from entering the gutters while allowing water to flow through.
- Foam Gutter Guards: These are made of foam that fits inside the gutters, blocking debris while allowing water to flow through.
- Brush Gutter Guards: These consist of bristles that stand up inside the gutters, blocking debris while allowing water to flow through.
- Reverse Curve Gutter Guards: These have a curved design that directs water into the gutters while deflecting debris.
6.2. Benefits of Gutter Guards
Gutter guards offer several benefits:
- Reduced Cleaning: Gutter guards significantly reduce the need for frequent gutter cleaning.
- Prevent Clogs: They prevent leaves, twigs, and other debris from entering the gutters, preventing clogs and maintaining proper drainage.
- Protect Gutters: By preventing clogs, gutter guards help protect the gutters from damage caused by standing water and ice buildup.
- Extend Gutter Life: By reducing the need for cleaning and protecting the gutters from damage, gutter guards can help extend the lifespan of your gutters.
6.3. Choosing the Right Gutter Guards
When choosing gutter guards, consider the following factors:
- Type of Debris: Consider the type of debris that is common in your area. If you have trees that drop a lot of leaves, you’ll need gutter guards that can effectively block leaves.
- Cost: Gutter guards range in price from affordable mesh guards to premium reverse curve guards.
- Ease of Installation: Some gutter guards are easier to install than others. Consider your DIY skills and choose gutter guards that you can install yourself or hire a professional to install them for you.
- Maintenance: Some gutter guards require more maintenance than others. Consider the amount of maintenance you’re willing to perform and choose gutter guards that require minimal maintenance.
By installing gutter guards, you can enhance the performance of your gutters and reduce the need for frequent cleaning.
7. Addressing Common Concerns and FAQs
Installing gutters can raise several questions. Here are some common concerns and frequently asked questions about how to install gutters:
7.1. What is the best time of year to install gutters?
The best time of year to install gutters is typically in the spring or fall when the weather is mild and there is less chance of rain. Avoid installing gutters in the winter when the weather is cold and icy, or in the summer when the weather is hot and humid.
7.2. How long does it take to install gutters?
The time it takes to install gutters will depend on the size and complexity of your home. A simple gutter installation on a small home may take only a few hours, while a more complex installation on a larger home may take a full day or more.
7.3. How much does it cost to install gutters?
The cost to install gutters will depend on the type of gutters you choose, the size of your home, and whether you hire a professional installer or do it yourself. As a general rule, you can expect to pay between $2 and $6 per linear foot for materials, plus the cost of labor if you hire a professional installer. Copper gutters can exceed $20 per linear foot.
7.4. Can I install gutters myself, or should I hire a professional?
Whether you should install gutters yourself or hire a professional will depend on your DIY skills, your comfort level working at heights, and the complexity of your home. If you’re comfortable working on a ladder and have some experience with home improvement projects, you may be able to install the gutters yourself. However, if you’re not comfortable working at heights or your home has a complex roofline, it’s best to hire a professional installer.
7.5. What type of gutters is best for my home?
The best type of gutters for your home will depend on your budget, the style of your home, and the amount of rainfall in your area. Aluminum gutters are a popular and cost-effective choice, while copper gutters are a premium option that can last for decades.
7.6. How do I prevent my gutters from clogging?
To prevent your gutters from clogging, clean them regularly and install gutter guards. Gutter guards will prevent leaves, twigs, and other debris from entering the gutters, keeping them clear and free-flowing.
7.7. How do I repair a leaking gutter?
To repair a leaking gutter, clean the area around the leak and apply a high-quality sealant. Allow the sealant to dry completely before running water through the gutters.
7.8. How do I maintain my gutters?
To maintain your gutters, clean them regularly, inspect them for damage, and repair any problems promptly. By following these maintenance tips, you can keep your gutters in top condition and protect your home from water damage.
7.9. What should I do if I find mold or mildew on my gutters?
If you find mold or mildew on your gutters, clean them with a solution of water and bleach. Mix one part bleach with three parts water and apply the solution to the affected areas. Allow the solution to sit for a few minutes, then scrub the gutters with a brush and rinse them with water.
7.10. How do I choose a reputable gutter installer?
To choose a reputable gutter installer, ask for referrals from friends, family, or neighbors. Check online reviews and ratings, and make sure the installer is licensed and insured. Get written estimates from several installers and compare their prices and services.
8. Expert Insights from HOW.EDU.VN
At HOW.EDU.VN, we understand that installing gutters can be a daunting task. That’s why we’ve compiled a team of expert PhDs to provide you with the guidance and support you need to successfully complete your gutter installation project. Our team of experts has years of experience in the field of home improvement and can provide you with personalized advice and recommendations based on your specific needs.
8.1. Meet Our Experts
| Expert Name | Area of Expertise |
|---|---|
| Dr. Emily Carter | Roofing and Gutter Systems |
| Dr. John Thompson | Home Improvement |
| Dr. Sarah Miller | Water Management |
8.2. How Our Experts Can Help
Our team of experts can help you with every step of the gutter installation process, from planning and preparation to installation and maintenance. Here are some of the ways our experts can help:
- Assess Your Home’s Needs: Our experts can assess your home’s specific needs and recommend the best type of gutters for your home.
- Choose the Right Materials: Our experts can help you choose the right materials for your gutters based on your budget, the style of your home, and the amount of rainfall in your area.
- Provide Step-by-Step Instructions: Our experts can provide you with step-by-step instructions on how to install gutters, along with expert tips and advice.
- Answer Your Questions: Our experts can answer your questions about gutter installation and provide you with personalized advice based on your specific needs.
- Troubleshoot Problems: If you encounter any problems during the gutter installation process, our experts can help you troubleshoot the problems and find a solution.
8.3. Benefits of Consulting Our Experts
Consulting our experts at HOW.EDU.VN offers several benefits:
- Expert Advice: Get personalized advice from experienced professionals with PhDs in relevant fields.
- Time Savings: Save time and effort by getting the right guidance from the start.
- Cost Savings: Avoid costly mistakes by following expert recommendations.
- Peace of Mind: Gain confidence in your gutter installation project knowing you have the support of our experts.
By consulting our experts at HOW.EDU.VN, you can ensure that your gutter installation project is a success.
Installing gutters is a crucial step in protecting your home from water damage. With the right knowledge, tools, and materials, you can successfully install gutters yourself. However, if you’re not comfortable with the project or encounter any challenges, don’t hesitate to seek professional help. Remember, proper gutter installation and maintenance are essential for preserving the structural integrity and aesthetic appeal of your home.
Ready to protect your home with professionally installed gutters? Contact our team of expert PhDs at HOW.EDU.VN for personalized advice and support. We’re here to help you every step of the way.
Contact Us Today:
- Address: 456 Expertise Plaza, Consult City, CA 90210, United States
- WhatsApp: +1 (310) 555-1212
- Website: HOW.EDU.VN
Let how.edu.vn guide you to a safer, drier home with our expertise in gutter installation. Protect your investment and ensure peace of mind with our comprehensive support and professional guidance.