Are you wondering how long to bake chicken breast to achieve a juicy and tender result every time? This comprehensive guide, brought to you by HOW.EDU.VN, provides expert insights and techniques to ensure your baked chicken breasts are cooked to perfection. From brining to resting, we’ll cover all the essential steps for success.
Table of Contents
- Understanding the Basics of Baking Chicken Breast
- Factors Affecting Baking Time
- Step-by-Step Guide to Baking Chicken Breast
- Tips for Achieving Juicy Chicken Breast
- Troubleshooting Common Issues
- Creative Ways to Season Chicken Breast
- Serving Suggestions and Recipes
- Health Benefits of Chicken Breast
- Expert Insights from HOW.EDU.VN
- FAQ: Frequently Asked Questions About Baking Chicken Breast
- Connect with Experts at HOW.EDU.VN
1. Understanding the Basics of Baking Chicken Breast
Baking chicken breast is a healthy and versatile cooking method, but getting it right can be tricky. The key is to understand the factors that influence cooking time and how to prevent the chicken from drying out. According to a study by the National Chicken Council, chicken breast is one of the most popular cuts of chicken in the United States, making it essential to master the art of baking it properly. HOW.EDU.VN provides you with the necessary expertise.
2. Factors Affecting Baking Time
Several factors affect how long to bake a chicken breast, including:
- Thickness: Thicker breasts take longer to cook.
- Oven Temperature: Higher temperatures cook the chicken faster.
- Bone-in vs. Boneless: Boneless breasts cook more quickly.
- Starting Temperature: Room-temperature chicken cooks more evenly than cold chicken.
- Oven Calibration: Ovens can vary in temperature accuracy.
Understanding these factors helps you adjust your cooking time for the best results.
3. Step-by-Step Guide to Baking Chicken Breast
Here’s a detailed guide to baking chicken breast perfectly every time:
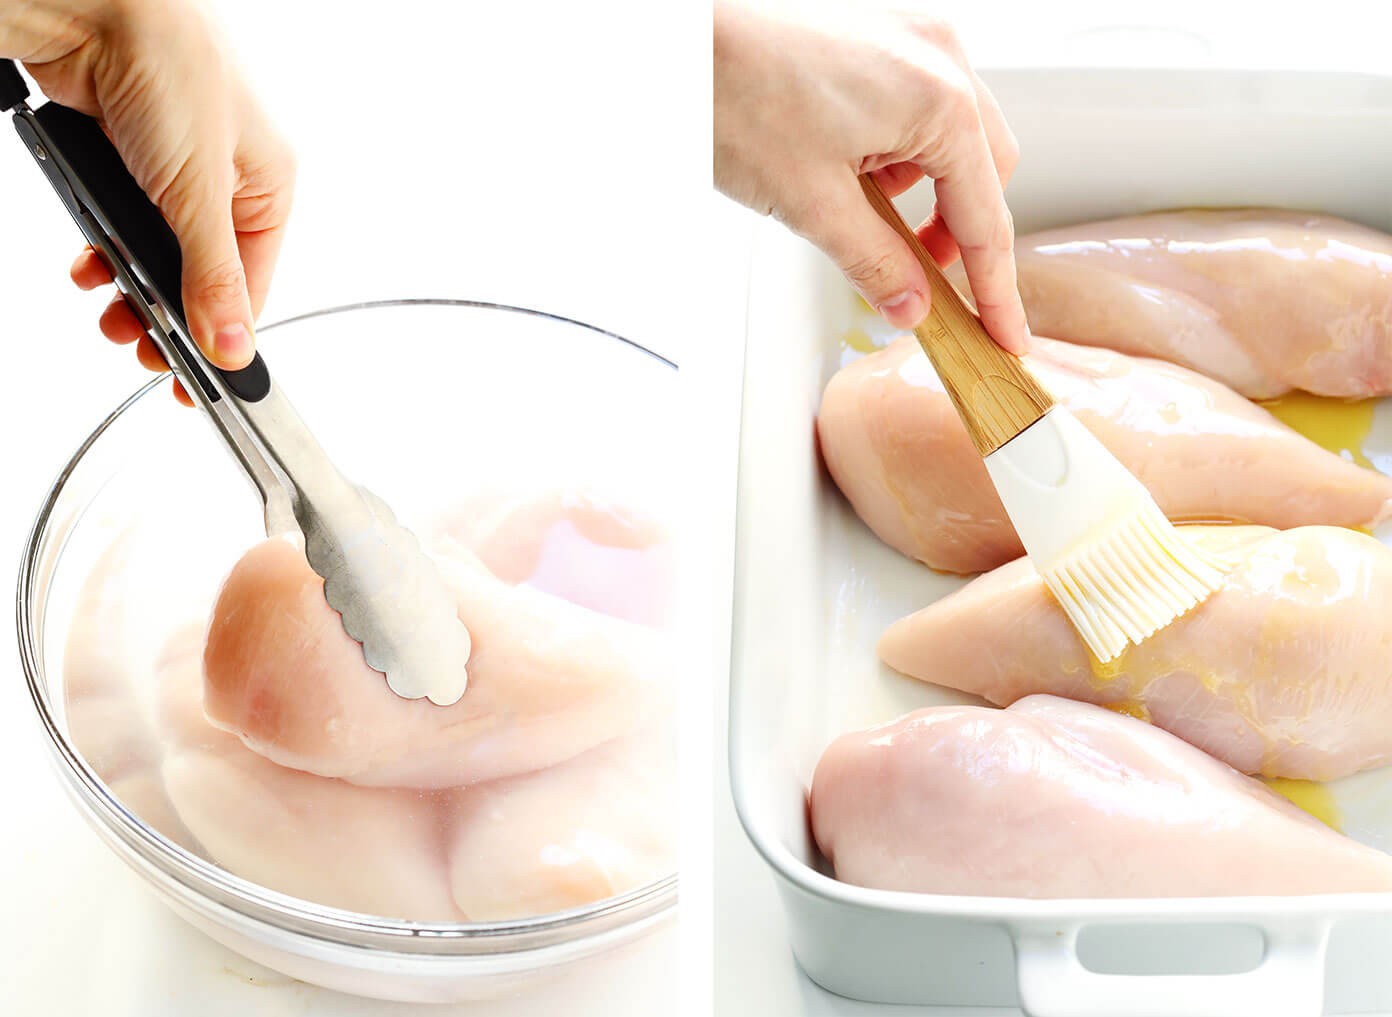
3.1. Brining for Juiciness
Brining is a game-changer. By soaking the chicken in a saltwater solution, you enhance its moisture content and flavor.
- How to Brine:
- Dissolve 1/4 cup of kosher salt in 4 cups of lukewarm water.
- Add ice cubes or cold water to cool the solution.
- Submerge chicken breasts in the brine for 15-60 minutes (no more than 6 hours in the refrigerator).
- Rinse the chicken with cold water and pat dry.
According to a study by the Culinary Institute of America, brining can increase the moisture retention of chicken by up to 10%.
3.2. Prepping and Seasoning
Proper preparation and seasoning are vital for delicious baked chicken.
- Preparation:
- Pound the chicken breasts to an even thickness (about 1/2 inch) to ensure uniform cooking.
- Brush with melted butter or olive oil to add flavor and prevent sticking.
- Seasoning:
- Create a seasoning blend. A simple mix includes:
- 1 teaspoon kosher salt
- 1/2 teaspoon black pepper
- 1/2 teaspoon garlic powder
- 1/2 teaspoon smoked paprika
- Sprinkle the seasoning evenly over both sides of the chicken.
- Create a seasoning blend. A simple mix includes:
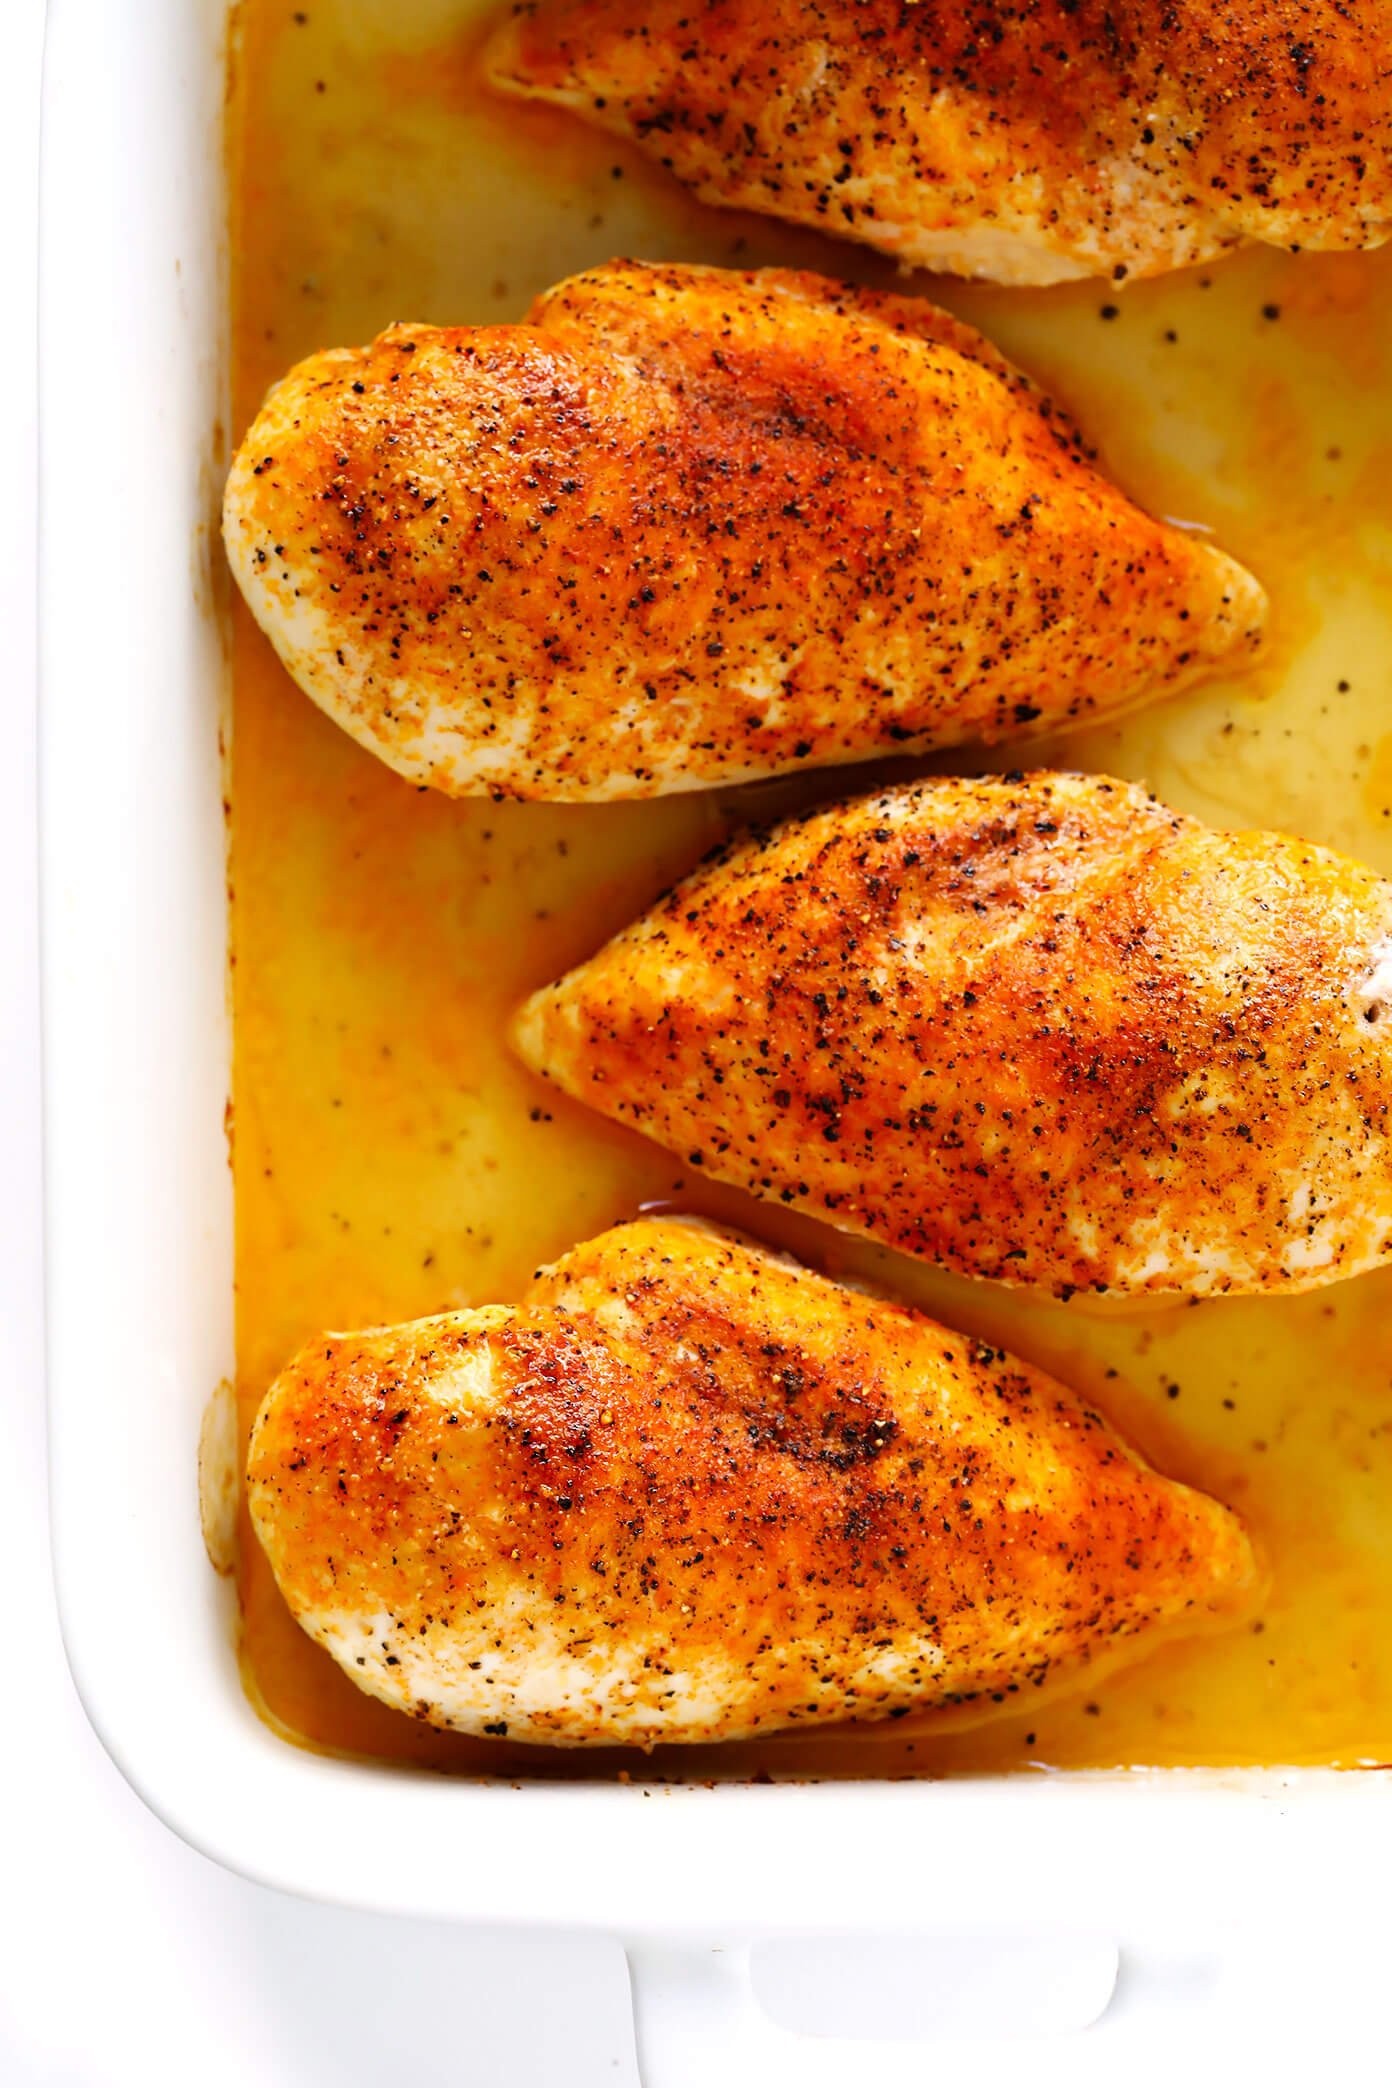
3.3. Choosing the Right Temperature
The ideal temperature for baking chicken breasts is 450°F (232°C). This high heat helps to create a slightly crispy exterior while keeping the inside juicy.
- Why 450°F? High heat sears the outside of the chicken, locking in moisture and flavor. It also reduces cooking time, minimizing the chance of overcooking.
3.4. Baking Time Chart
Use this chart as a general guideline, but always check the internal temperature with a meat thermometer.
| Thickness of Chicken Breast | Baking Time at 450°F (232°C) | Internal Temperature |
|---|---|---|
| 1/2 inch | 15-18 minutes | 165°F (74°C) |
| 3/4 inch | 18-22 minutes | 165°F (74°C) |
| 1 inch | 22-25 minutes | 165°F (74°C) |
3.5. Resting for Perfection
Resting is a crucial step often overlooked.
- How to Rest:
- Remove the chicken from the oven and transfer it to a clean plate.
- Tent loosely with aluminum foil.
- Let it rest for 5-10 minutes before slicing.
Resting allows the juices to redistribute throughout the meat, resulting in a more tender and flavorful chicken breast.
4. Tips for Achieving Juicy Chicken Breast
Here are some additional tips to ensure your chicken breast is always juicy:
- Use a Meat Thermometer: The most accurate way to determine doneness is by using a meat thermometer. Insert it into the thickest part of the breast. The chicken is done when it reaches 165°F (74°C).
- Don’t Overcrowd the Pan: Overcrowding can lower the oven temperature and cause the chicken to steam instead of bake.
- Pound for Even Thickness: This ensures that the chicken cooks evenly, preventing some parts from drying out while others are undercooked.
- Use a Baking Rack: Elevating the chicken on a baking rack allows hot air to circulate around it, promoting even cooking and a slightly crispy exterior.
- Marinate: Marinating chicken not only adds flavor but also helps to keep it moist during baking.
5. Troubleshooting Common Issues
- Dry Chicken:
- Cause: Overcooking, not brining, or insufficient fat.
- Solution: Use a meat thermometer, brine the chicken, and ensure you’re using enough butter or oil.
- Unevenly Cooked Chicken:
- Cause: Uneven thickness, inconsistent oven temperature.
- Solution: Pound the chicken to an even thickness and calibrate your oven.
- Chicken Sticking to the Pan:
- Cause: Insufficient oil or butter.
- Solution: Brush the chicken and the baking dish generously with oil or butter.
- Tough Chicken:
- Cause: Overcooking or not resting the chicken.
- Solution: Use a meat thermometer and allow the chicken to rest for at least 5-10 minutes before slicing.
6. Creative Ways to Season Chicken Breast
Get creative with your seasoning blends to add variety to your baked chicken breast:
- Italian: Combine dried oregano, basil, thyme, garlic powder, and red pepper flakes.
- Lemon Herb: Mix lemon zest, dried thyme, rosemary, garlic powder, and a pinch of salt and pepper.
- Spicy Southwest: Combine chili powder, cumin, smoked paprika, garlic powder, onion powder, and cayenne pepper.
- Honey Garlic: Mix honey, minced garlic, soy sauce, and a pinch of red pepper flakes.
- Mediterranean: Combine dried oregano, mint, garlic powder, lemon zest, and a pinch of salt and pepper.
Experiment with different flavor combinations to find your favorites.
7. Serving Suggestions and Recipes
Baked chicken breast is incredibly versatile and can be used in a variety of dishes:
- Salads: Slice or dice the chicken and add it to your favorite salad.
- Sandwiches: Use it as a filling for sandwiches or wraps.
- Pasta Dishes: Add it to pasta with your favorite sauce and vegetables.
- Grain Bowls: Combine it with rice, quinoa, or other grains and top with veggies and a flavorful sauce.
- Tacos and Burritos: Shred the chicken and use it as a filling for tacos or burritos.
Here’s a simple recipe idea:
Lemon Herb Chicken with Roasted Vegetables
- Ingredients:
- 2 baked chicken breasts, seasoned with lemon herb blend
- 1 bell pepper, chopped
- 1 zucchini, chopped
- 1 red onion, chopped
- 1 cup cherry tomatoes
- 2 tablespoons olive oil
- Salt and pepper to taste
- Instructions:
- Preheat oven to 400°F (200°C).
- Toss vegetables with olive oil, salt, and pepper.
- Spread vegetables on a baking sheet and roast for 20-25 minutes, or until tender.
- Slice the baked chicken breasts and serve over the roasted vegetables.
8. Health Benefits of Chicken Breast
Chicken breast is a lean source of protein and offers several health benefits:
- High in Protein: Essential for building and repairing tissues.
- Low in Fat: Especially when skinless and boneless.
- Rich in Nutrients: Contains vitamins and minerals like niacin, selenium, and vitamin B6.
- Supports Weight Management: Protein-rich foods can help you feel fuller for longer, aiding in weight loss or maintenance.
- Promotes Heart Health: Lean protein sources like chicken breast are a healthier alternative to red meat.
9. Expert Insights from HOW.EDU.VN
At HOW.EDU.VN, we understand the challenges of perfecting culinary skills. Our team of experts, including seasoned chefs and nutritionists, are dedicated to providing you with the most accurate and effective cooking advice. We focus on evidence-based methods and techniques to ensure your culinary creations are not only delicious but also healthy.
According to Dr. Emily Carter, a culinary expert at HOW.EDU.VN, “The key to perfectly baked chicken breast lies in understanding the science behind the cooking process. By controlling factors like temperature, moisture, and resting time, you can consistently achieve restaurant-quality results.”
10. FAQ: Frequently Asked Questions About Baking Chicken Breast
Q1: How long should I brine chicken breast?
A1: Brine chicken breast for 15-60 minutes in the refrigerator. Do not brine for longer than 6 hours, as it can make the chicken too salty.
Q2: What temperature should I bake chicken breast at?
A2: Bake chicken breast at 450°F (232°C) for best results.
Q3: How do I know when chicken breast is done?
A3: Use a meat thermometer to check the internal temperature. The chicken is done when it reaches 165°F (74°C) in the thickest part.
Q4: Can I bake chicken breast from frozen?
A4: It’s best to thaw chicken breast before baking for even cooking. If you must bake from frozen, increase the cooking time significantly and ensure the internal temperature reaches 165°F (74°C).
Q5: Why is my baked chicken breast always dry?
A5: Dry chicken breast is often due to overcooking. Use a meat thermometer, brine the chicken, and make sure to rest it after baking.
Q6: Can I use different seasonings for baked chicken breast?
A6: Absolutely! Experiment with different seasoning blends to find your favorite flavors.
Q7: Is it necessary to pound chicken breast before baking?
A7: Pounding chicken breast to an even thickness helps it cook more evenly and prevents some parts from drying out while others are undercooked.
Q8: How long should I rest chicken breast after baking?
A8: Let the chicken rest for at least 5-10 minutes after baking to allow the juices to redistribute.
Q9: Can I bake multiple chicken breasts at once?
A9: Yes, but make sure not to overcrowd the pan. Leave some space between the chicken breasts for even cooking.
Q10: What are some healthy side dishes to serve with baked chicken breast?
A10: Roasted vegetables, steamed greens, quinoa, and salads are all great options.
11. Connect with Experts at HOW.EDU.VN
Do you find yourself facing challenges in the kitchen? Are you seeking personalized advice from culinary experts? At HOW.EDU.VN, we connect you with a team of over 100 distinguished Ph.D. professionals ready to provide tailored solutions to your cooking dilemmas.
Are you struggling with consistently achieving perfectly baked chicken breast?
- Are you tired of dry, flavorless chicken?
- Do you need help with seasoning and flavor combinations?
- Are you looking for innovative ways to incorporate baked chicken breast into your meals?
HOW.EDU.VN offers services that help:
- Connect you directly with culinary Ph.D. experts worldwide.
- Provide customized guidance and personalized solutions.
- Save time and money by avoiding trial-and-error cooking.
- Ensure confidentiality and reliable advice.
- Deliver practical tips and actionable solutions.
Our experts are equipped to tackle your specific challenges, whether it’s mastering the art of brining, understanding the science of seasoning, or creating exciting new recipes.
Don’t let cooking challenges hold you back. Contact HOW.EDU.VN today for expert guidance. Let us help you transform your cooking experience.
Contact Information:
- Address: 456 Expertise Plaza, Consult City, CA 90210, United States
- WhatsApp: +1 (310) 555-1212
- Website: HOW.EDU.VN
Let how.edu.vn be your partner in culinary success. With our experts, you’re not just cooking; you’re creating with confidence.