Milkshakes are the quintessential dessert drink, perfect for cooling down on a hot day or indulging in a sweet treat any time of year. These creamy concoctions are surprisingly easy to make at home, requiring just a few simple ingredients and minimal effort. If you’ve ever wondered How To Make A Milkshake that rivals your favorite ice cream parlor, you’ve come to the right place. This guide will walk you through the process step-by-step, ensuring you achieve milkshake nirvana every time. Get ready to master the art of milkshake making and impress your friends and family with your newfound skills!
What You Need to Make the Perfect Milkshake
Creating a truly exceptional milkshake comes down to quality ingredients and the right technique. Fortunately, you don’t need a long list of items to get started. Here’s what you’ll need:
- High-Quality Ice Cream: This is the star of the show, so choose wisely! Full-fat ice cream is key to achieving that rich, creamy texture we all crave. Opt for your favorite flavor – vanilla is classic and versatile, but don’t hesitate to experiment with chocolate, strawberry, or even more adventurous options. Avoid “frozen desserts” made with vegetable oils; real dairy ice cream delivers the best results.
- Milk: Milk adds the necessary liquid to bring your milkshake together and adjust the consistency. Whole milk will give you the richest, creamiest milkshake, but you can use 2% or even skim milk if you prefer a lighter version. For an extra layer of flavor, consider using flavored milk like chocolate or strawberry milk to complement your ice cream choice.
- Blender: A blender is essential for achieving a smooth, lump-free milkshake. While high-powered blenders work wonders, even a basic blender will get the job done. If you don’t have a blender, don’t worry, we’ll discuss alternatives later on.
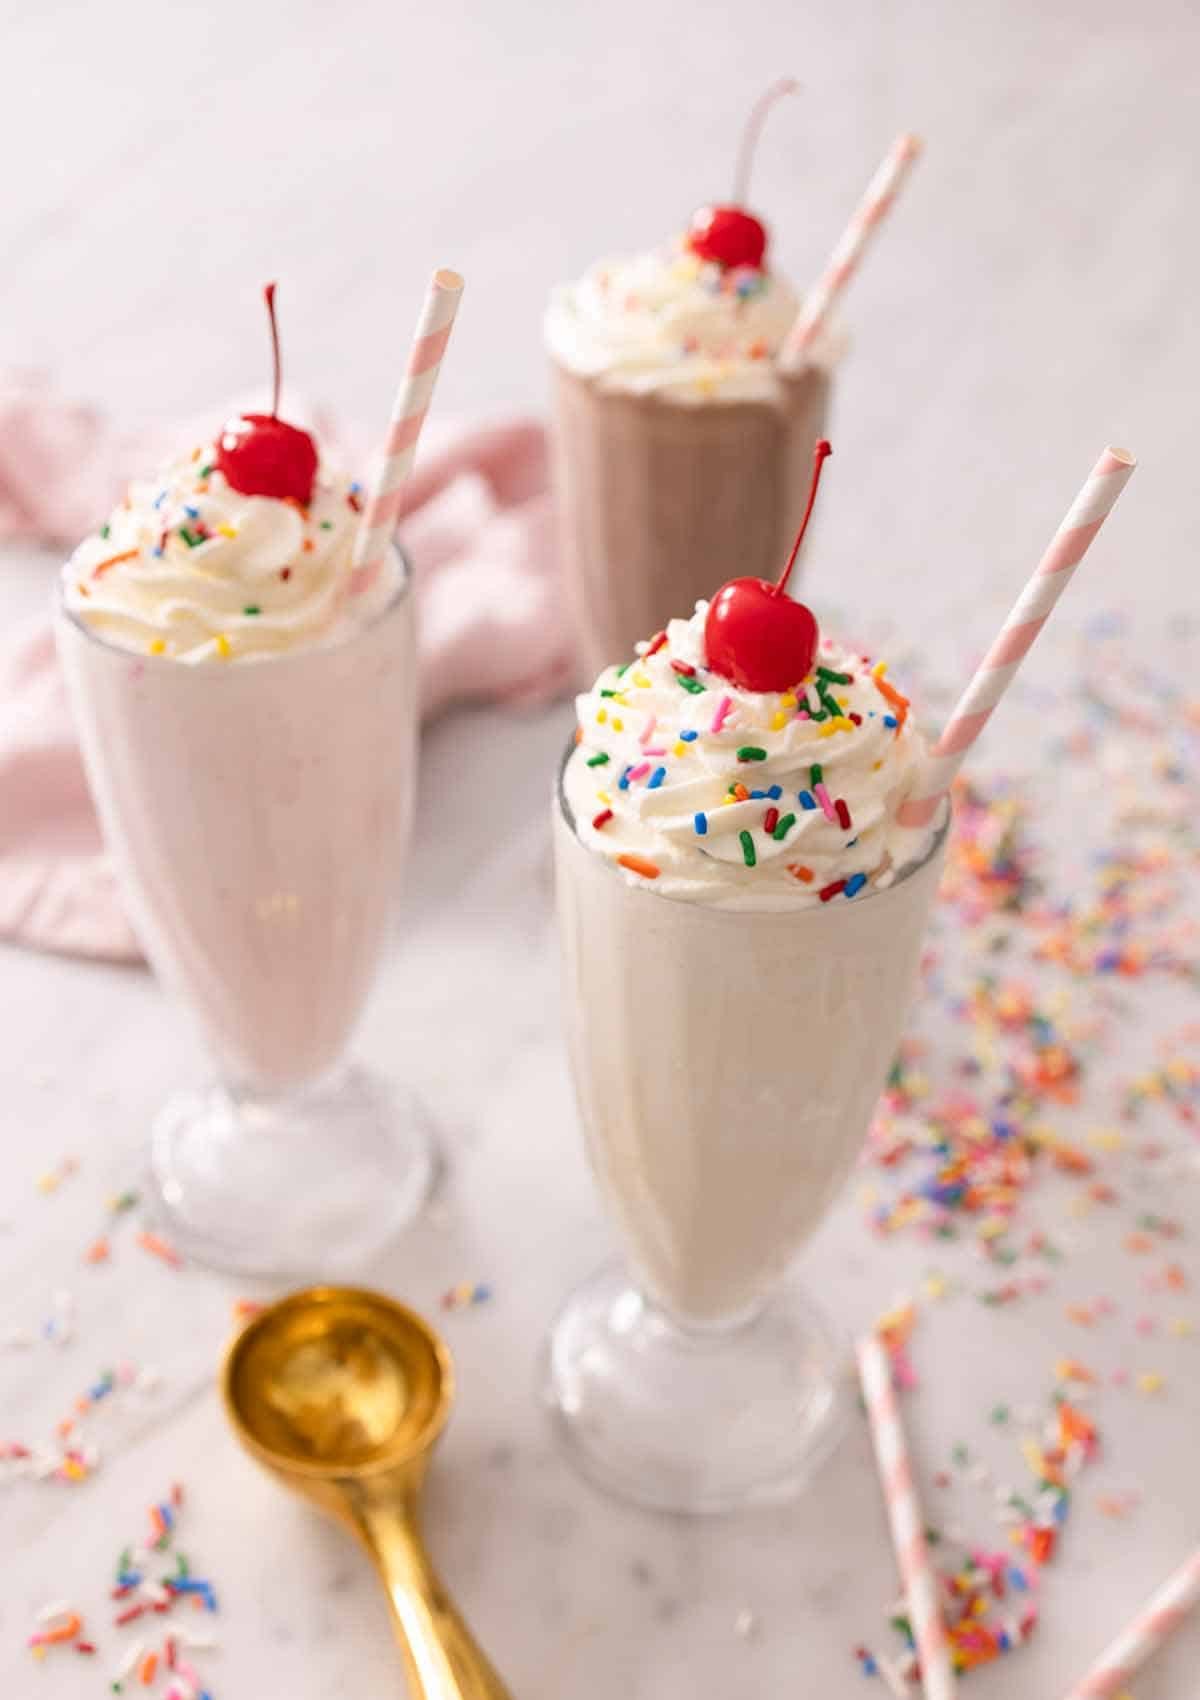
- Toppings (Optional but Recommended): This is where you can really let your creativity shine! Classic toppings like whipped cream, sprinkles, and cherries are always a hit. For a more decadent milkshake, consider chocolate syrup, caramel sauce, crushed cookies, fresh fruit, or nuts.
Step-by-Step Guide: How to Make a Milkshake
Now that you have your ingredients and equipment ready, let’s dive into the simple steps to create your perfect milkshake:
- Soften Your Ice Cream (Slightly): Hard-as-a-rock ice cream can be difficult to blend and may result in a milkshake that’s too thick or icy. Let your ice cream sit at room temperature for about 5 minutes to soften slightly. This will make it easier to scoop and blend smoothly.
- Add Ice Cream to the Blender: Scoop your softened ice cream into the blender. The general rule of thumb is about 5 scoops of ice cream per milkshake, but you can adjust this based on your desired thickness and serving size.
- Pour in the Milk: Pour milk into the blender over the ice cream. Start with about ¼ cup of milk per milkshake. You can always add more milk later to reach your preferred consistency.
- Blend Until Smooth: Secure the lid on your blender and start blending on a low speed. Gradually increase the speed until the milkshake is smooth and creamy, with no ice cream chunks remaining. Be careful not to over-blend, as this can result in a thinner, less desirable texture.
- Check the Consistency: Once blended, check the milkshake’s consistency. If it’s too thick, add a splash more milk and blend briefly. If it’s too thin, add another scoop of ice cream and blend again.
- Pour and Garnish: Pour your perfect milkshake into a chilled glass. Now for the fun part – toppings! Add a generous swirl of whipped cream, a sprinkle of colorful sprinkles, and a classic maraschino cherry on top. Get creative and add any other toppings you desire to personalize your milkshake masterpiece.
Pro Tips for the Best Homemade Milkshakes
Want to take your milkshake game to the next level? Here are some expert tips to ensure milkshake perfection every time:
- For Extra Creaminess: Replace some or all of the milk with heavy cream for an incredibly rich and decadent milkshake. A little heavy cream goes a long way!
- Chill Your Glasses: To keep your milkshake cold for longer, place your glasses in the freezer for about 15-20 minutes before pouring. This simple step makes a big difference, especially on warm days.
- Don’t Add Ice: Avoid the temptation to add ice to your milkshake. Ice will water down the flavor and consistency, resulting in a less creamy and enjoyable drink. If you want a colder milkshake, chill your glasses or use slightly frozen milk cubes instead of regular ice.
- Customize Your Flavors: The possibilities are endless when it comes to milkshake flavors! Experiment with different ice cream flavors, add extracts like vanilla or almond, or incorporate fresh or frozen fruit for a fruity twist. You can also add flavorings like chocolate syrup, caramel sauce, or peanut butter for even more variety.
- Homemade Whipped Cream: For an extra special touch, make your own homemade whipped cream. It’s surprisingly easy and tastes far superior to store-bought versions.
Frequently Asked Questions About Milkshakes
How can I make different milkshake flavors?
Creating different flavored milkshakes is incredibly easy! Start with a vanilla ice cream base and add flavorings like chocolate syrup, strawberry puree, or even coffee extract. You can also use different flavored ice creams as your base, such as chocolate ice cream for a chocolate milkshake or strawberry ice cream for a strawberry milkshake. Get creative with extracts, spices, and sauces to create your own signature milkshake flavors.
What are some good milkshake toppings?
Toppings are a fantastic way to personalize your milkshake and add extra flavor and texture. Classic options include whipped cream, sprinkles, and maraschino cherries. For more indulgent toppings, consider chocolate syrup, caramel sauce, hot fudge, crushed cookies (like Oreos or chocolate chip cookies), chopped nuts, fresh fruit slices (like bananas or strawberries), or even candy pieces. Don’t be afraid to experiment and create your own unique topping combinations!
What if I don’t have a blender?
If you don’t have a blender, you can still make a milkshake, although it will require a bit more effort. A food processor can work in a pinch, although it may not create as smooth a texture as a blender. Alternatively, you can try the “hand-mixing” method: soften the ice cream significantly, then mash it together with milk in a bowl using a fork or whisk until you reach a smooth, drinkable consistency. This method will result in a thicker, less smooth milkshake, but it’s a viable option if you’re blender-less.
Can I make milkshakes ahead of time?
While it’s technically possible to make milkshakes ahead of time, it’s not recommended for optimal quality. Milkshakes are best enjoyed immediately after making them, as they can separate and lose their creamy texture if stored for too long. If you must make them ahead, store them in the freezer in airtight containers for a short period (no more than an hour or two) and re-blend briefly before serving to restore the texture. However, for the freshest and most delicious milkshake experience, make them right before you plan to enjoy them.
Enjoy Your Homemade Milkshake!
Congratulations, you’re now a milkshake-making pro! With just a few simple steps and quality ingredients, you can whip up delicious, creamy milkshakes at home anytime you crave a sweet treat. So gather your favorite ice cream and toppings, and get blending! Whether you stick to classic vanilla or create your own custom flavor combinations, homemade milkshakes are guaranteed to bring smiles and satisfy your sweet tooth.