Making marshmallows at home can seem daunting, but it’s surprisingly simple and incredibly rewarding. How To Make Marshmallows that are light, fluffy, and bursting with flavor? At HOW.EDU.VN, we provide you with expert tips and techniques to make homemade marshmallows that far surpass anything you can buy in a store. You’ll discover how to customize your marshmallows with various flavors and textures, creating treats that are perfect for s’mores, hot chocolate, or just a sweet snack. Whether you’re a seasoned baker or a kitchen novice, our comprehensive guide will walk you through every step of the process, ensuring marshmallow success every time. Get ready to elevate your confectionery skills and impress your friends and family with gourmet homemade marshmallows that are as fun to make as they are to eat.
1. Why Bother Making Homemade Marshmallows?
Homemade marshmallows offer a superior taste and texture compared to store-bought ones.
Store-bought marshmallows often lack that pure, irresistible marshmallow flavor and melt-in-your-mouth fluffiness that homemade versions possess. When used in s’mores, homemade marshmallows exhibit a desirable melting quality that their commercial counterparts simply can’t match.
1.1. What Are The Benefits Of Homemade Marshmallows?
Here are some benefits to making marshmallows at home:
- Customizable: You can make marshmallows in any size and shape you want.
- Control Over Ingredients: You have complete control over what goes into your marshmallows, avoiding artificial flavors and preservatives.
- Long Shelf Life: When stored in an airtight container, homemade marshmallows can last a long time due to their low moisture content.
- Easy to Make: Despite their gourmet appeal, homemade marshmallows are relatively simple to make, even for beginner bakers.
1.2. Expert Insight From HOW.EDU.VN
At HOW.EDU.VN, our team of expert food scientists and seasoned chefs emphasizes the importance of quality ingredients and precise techniques to achieve the best results. By following our detailed instructions, you can avoid common pitfalls and create marshmallows that are consistently perfect in texture and flavor.
2. What Ingredients Do You Need To Make Marshmallows?
The basic ingredients for making marshmallows include sugar, water, gelatin, and flavoring.
Understanding the role of each ingredient is crucial for achieving the perfect marshmallow texture and flavor.
2.1. Types Of Sugar
While white cane sugar is generally recommended, you can experiment with other types of sugar.
- White Cane Sugar: Provides a clean, sweet taste and is the most commonly used type of sugar for marshmallows.
- Granulated White Sugar: An acceptable alternative, though cane sugar is often preferred for its superior taste.
- Unrefined Raw Sugar: Can be used, but it may impart a slightly different flavor and color to the marshmallows.
- Brown Sugar: Adds a caramel-like flavor, resulting in richer, more complex marshmallows.
- Maple Syrup/Honey: Can be used as substitutes, but they have a higher water content, requiring adjustments to the recipe.
2.2. Gelatin Or Agar?
Gelatin is the traditional setting agent for marshmallows, but agar can be used for vegan versions.
- Gelatin: Provides the classic, bouncy texture of marshmallows.
- Agar: A vegan alternative derived from seaweed; however, it may result in a slightly different texture.
2.2.1. Important Considerations When Using Gelatin
Gelatin can lose its setting properties at high temperatures, so it’s essential to let the sugar syrup cool slightly before adding it to the gelatin. Weighing the gelatin is also preferable to using packets, as packet weights can vary.
2.3. Corn Syrup And Substitutes
Corn syrup is often used to prevent sugar crystallization, but it can be omitted or substituted.
- Corn Syrup: Helps prevent sugar from crystallizing, ensuring a smooth marshmallow texture.
- Agave Syrup: A good substitute for corn syrup, offering a similar function in preventing crystallization.
- Golden Syrup: Adds a subtle flavor while also preventing crystallization.
- Maple Syrup/Honey: Can be used, but be mindful of their higher water content, which can affect the recipe.
2.4. Flavorings
Flavorings are added at the end of the process to enhance the taste of the marshmallows.
- Vanilla Extract: A classic choice that provides a warm, comforting flavor.
- Peppermint Extract: Adds a refreshing, minty twist, perfect for holiday treats.
- Almond Extract: Imparts a delicate, nutty flavor.
- Lemon/Orange Extract: Provides a citrusy zing, creating bright and flavorful marshmallows.
- Alcohol-Flavored Extracts: Rum or bourbon essence can be added for a boozy kick.
2.5. Egg Whites
Egg whites are sometimes added to create a lighter, fluffier texture.
- Whisked Egg Whites: Make the marshmallows extra light and fluffy, and can make the mixture easier to pipe.
However, marshmallows made with egg whites have a shorter shelf life and may not be suitable for pregnant women or young children due to the risk of salmonella.
2.6. Expert Insights From HOW.EDU.VN
According to Dr. Emily Carter, a food science expert at HOW.EDU.VN, the balance of sugar and gelatin is crucial. Too much sugar can lead to overly sweet marshmallows, while too little gelatin can result in a mixture that doesn’t set properly. “Always measure your ingredients precisely and follow the recipe closely for the best results,” she advises.
3. What Equipment Do You Need To Make Marshmallows?
Having the right equipment can make the marshmallow-making process much smoother and more efficient.
Essential equipment includes a saucepan, stand mixer, sugar thermometer, and prepared pan.
3.1. Saucepan
A heavy-bottomed saucepan is ideal for making the sugar syrup.
- Heavy-Bottomed Pan: Ensures even heat distribution, preventing hot spots that can cause the sugar to burn.
3.2. Stand Mixer
A stand mixer is highly recommended for whipping the marshmallow mixture.
- Stand Mixer with Whisk Attachment: Essential for whipping the gelatin and sugar mixture to the right consistency.
3.3. Sugar Thermometer
A sugar thermometer is necessary for monitoring the temperature of the sugar syrup.
- Sugar Thermometer (Candy Thermometer): Helps ensure the sugar syrup reaches the correct temperature (240-245°F), which is crucial for the marshmallow’s texture.
3.4. Prepared Pan
The pan needs to be properly prepared to prevent the marshmallows from sticking.
- Square 8×8 inch pan or quarter sheet pan (9×13 inch pan): The choice of pan depends on the desired thickness of the marshmallows.
- Shortening, solidified coconut oil, or butter: Used to grease the pan, preventing the marshmallows from sticking.
- Parchment Paper (Optional): Can be used to line the pan for extra insurance against sticking.
3.5. Additional Tools
Other useful tools include a pastry brush, silicone spatulas, and knives or scissors.
- Pastry Brush: Used to brush down sugar crystals on the side of the pan.
- Silicone Spatulas: Used for stirring and scraping the marshmallow mixture.
- Knives or Scissors: Used for cutting the marshmallows into desired shapes.
3.6. Expert Insights From HOW.EDU.VN
Chef Michael Rodriguez, a pastry expert at HOW.EDU.VN, recommends investing in high-quality equipment for the best results. “A good stand mixer and sugar thermometer are essential for achieving the perfect marshmallow texture. Don’t skimp on these items,” he advises.
4. How To Make Marshmallows: A Step-By-Step Guide
Making homemade marshmallows involves several key steps, including preparing the sugar syrup, blooming the gelatin, and whipping the mixture to the right consistency.
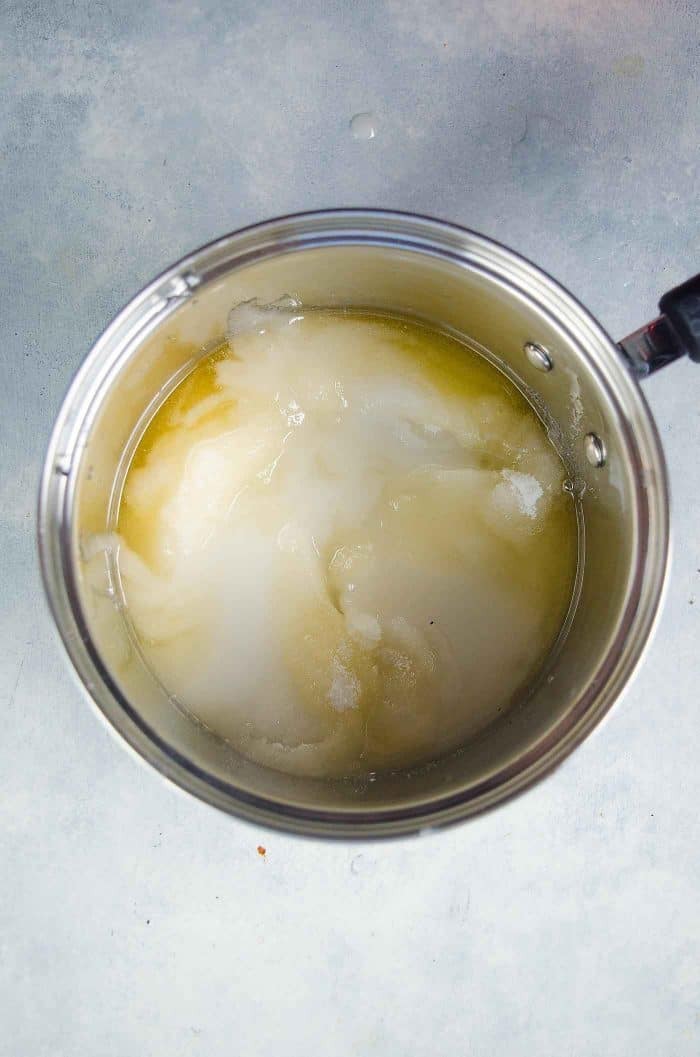
4.1. Step 1: Preparing The Sugar Syrup
Combine sugar, corn syrup (or a substitute), and water in a saucepan.
- Combine Ingredients: Mix the sugar, corn syrup (or agave syrup), and water in a saucepan.
- Dissolve Sugar: Stir until the sugar is moistened and mixed with the water.
- Heat the Mixture: Heat over medium-high heat until the sugar syrup comes to a boil. Gently swirl the pan to evenly distribute the heat.
- Cover and Cook: Cover the saucepan with a lid and lower the heat to medium. Let the syrup cook for 2 minutes to dissolve any sugar crystals on the side of the pan.
- Remove Lid and Check: After 2 minutes, remove the lid and check for sugar crystals. If there are crystals, cover the saucepan for another minute.
- Monitor Temperature: Clip the sugar thermometer to the side of the saucepan and set the temperature between 242-245°F. Let the sugar syrup cook until it reaches this temperature. If you don’t have a sugar thermometer, check the sugar stage every 5 minutes until it reaches the firm-ball stage (see recipe notes).
4.2. Step 2: Blooming The Gelatin
Mix gelatin with cold water and let it bloom for at least 10 minutes.
- Combine Water and Gelatin: Place ½ cup of water in the mixer bowl. Add the gelatin to the water and mix to moisten the gelatin.
- Let it Bloom: Set aside to allow the gelatin to bloom while the sugar syrup is cooking (at least 10 minutes). Place the bowl in your mixer, with the whisk attachment.
4.3. Step 3: Whipping The Marshmallow Mixture
Slowly pour the hot sugar syrup into the bloomed gelatin while mixing on low speed, then increase the speed and whip until the mixture is thick and fluffy.
- Pour Sugar Syrup: When the sugar syrup reaches the right stage, remove it from the heat and let the bubbles subside. While the mixer is running on medium-low speed, pour the sugar syrup into the gelatin along the wall of the bowl to prevent scorching.
- Add Salt: Add a pinch of salt to balance the sweetness.
- Increase Speed: Increase the speed to medium-high and whisk for 3-5 minutes until the marshmallow base is doubling in size and is white, fluffy, and smooth.
- Whip Further: Mix for another 3-5 minutes on high speed, allowing the marshmallow to volumize more (up to 3 times). Do not mix if the marshmallow base is already cooled down, as this will create tough marshmallows.
4.4. Step 4: Adding Flavor And Egg Whites (Optional)
Add vanilla extract and whisked egg whites (if using) to the marshmallow base and mix until combined.
- Add Flavorings: Add vanilla extract (or any other flavoring) to the marshmallow base.
- Add Egg Whites (Optional): If using egg whites, whisk them in a clean metal bowl until you have stiff peaks.
- Combine Ingredients: Whisk for another minute on high speed to combine the vanilla (and egg whites).
4.5. Step 5: Setting The Marshmallow
Pour the marshmallow mixture into a prepared pan, sieve confectioner’s sugar over the top, and let it set for at least 6 hours.
- Prepare the Pan: Rub an 8×8 inch pan with shortening or butter (or line with parchment paper). Grease all utensils with the same fat.
- Pour Mixture: Scrape the marshmallow base into the prepared pan using an oiled cake spatula or flexible scraper.
- Spread Evenly: Spread the marshmallow evenly in the pan using the oiled spatula.
- Dust with Sugar: Sieve confectioner’s sugar over the top of the marshmallow.
- Let it Set: Allow the marshmallow to set for at least 6 hours (or overnight).
4.6. Step 6: Cutting And Storing The Marshmallows
Turn the set marshmallow out onto a work surface dusted with dusting powder, cut into desired shapes, and store in an airtight container.
- Turn Out Marshmallow: Turn the set marshmallow out onto a work surface dusted with dusting powder.
- Cut Marshmallows: Cut the marshmallows with an oiled knife or a pair of scissors.
- Toss in Sugar: Toss the marshmallows in the dusting powder.
- Store Properly: Store in an airtight container at room temperature.
4.7. Expert Insights From HOW.EDU.VN
According to Dr. Sarah Johnson, a culinary expert at HOW.EDU.VN, the setting time is crucial for achieving the right texture. “Don’t rush the setting process. Allowing the marshmallows to set properly ensures they are easier to cut and have the perfect springy texture,” she advises.
5. Tips And Tricks For Making Perfect Marshmallows
Achieving marshmallow perfection requires attention to detail and a few key techniques.
5.1. Use Corn Syrup Or A Substitute
Using corn syrup or a substitute can prevent sugar crystallization and ensure a smooth texture.
- Prevent Crystallization: Corn syrup or substitutes like agave syrup help prevent the sugar syrup from crystallizing, ensuring a smooth marshmallow texture.
5.2. Ensure Sugar Syrup Reaches The Right Temperature
The sugar syrup must reach the firm-ball stage (240-245°F) for the marshmallows to set properly.
- Use a Sugar Thermometer: Monitor the temperature of the sugar syrup with a sugar thermometer to ensure it reaches the firm-ball stage.
- Cold Water Test: If you don’t have a sugar thermometer, drop a small amount of the sugar syrup into a bowl of cold water. If it forms a cohesive shape that can be formed into a firm, pliable ball, it has reached the right stage.
5.3. Prepare Gelatin Properly
Blooming the gelatin ensures it dissolves evenly and prevents undissolved clumps in the marshmallow mixture.
- Bloom Gelatin: Mix the gelatin with cold water and let it bloom for at least 10 minutes before adding it to the sugar syrup.
5.4. Avoid Overmixing
Overmixing the marshmallow base after it has cooled down can result in tough marshmallows.
- Mix Properly: Mix the marshmallow base until it is fluffy, white, and has tripled in volume. Avoid overmixing after it has cooled down.
5.5. Prepare The Pan And Utensils
Greasing the pan and utensils prevents the marshmallows from sticking, making them easier to remove and cut.
- Grease Thoroughly: Rub the pan and all utensils with shortening, solidified coconut oil, or butter to prevent sticking.
5.6. Expert Insights From HOW.EDU.VN
According to Chef Emily Thompson, a pastry expert at HOW.EDU.VN, patience is key when making marshmallows. “Allow the marshmallows to set for at least 6 hours, or preferably overnight, to ensure they have the right texture. Rushing the setting process can result in sticky, misshapen marshmallows,” she advises.
6. Flavor Variations To Elevate Your Marshmallows
Experiment with different flavors to create unique and delicious marshmallows.
6.1. Chocolate Marshmallows
Add cocoa powder to the marshmallow base for a rich, chocolatey flavor.
- Add Cocoa Powder: Mix cocoa powder into the marshmallow base for a chocolate flavor.
6.2. Lemon Marshmallows
Add lemon zest to the sugar syrup and substitute some of the water with lemon juice for a citrusy twist.
- Add Lemon Zest and Juice: Add lemon zest to the sugar syrup and substitute 1/4 cup of the water with strained lemon juice.
6.3. Peppermint Marshmallows
Add peppermint extract to the marshmallow base for a refreshing, minty flavor.
- Add Peppermint Extract: Mix peppermint extract into the marshmallow base.
6.4. Butterscotch Marshmallows
Add butterscotch flavoring or buttered rum flavoring to the marshmallow base for a rich, caramel-like flavor.
- Add Butterscotch Flavoring: Mix butterscotch flavoring or buttered rum flavoring into the marshmallow base.
6.5. Chocolate Chip Mint Marshmallows
Add grated milk chocolate and peppermint extract to the marshmallow base for a decadent treat.
- Add Chocolate and Mint: Mix grated milk chocolate and peppermint extract into the marshmallow base.
6.6. Unicorn Marshmallows
Divide the marshmallow base into portions and color each portion with pink, blue, and purple. Swirl the colors together for a whimsical treat.
- Color and Swirl: Divide the marshmallow base into portions and color each portion with pink, blue, and purple. Swirl the colors together in the pan.
6.7. Expert Insights From HOW.EDU.VN
According to Dr. James Wilson, a food scientist at HOW.EDU.VN, the key to successful flavor variations is to balance the flavors properly. “When adding flavorings, be mindful of the intensity of the flavor. Start with a small amount and add more to taste, ensuring the flavor complements the sweetness of the marshmallow,” he advises.
7. How To Store Marshmallows
Proper storage is essential for maintaining the texture and freshness of homemade marshmallows.
7.1. Air-Tight Container
Store marshmallows in an air-tight container at room temperature.
- Use Air-Tight Container: Place the marshmallows in an air-tight container to prevent them from drying out.
7.2. Room Temperature
Store marshmallows at room temperature, as refrigerating them can cause them to harden.
- Avoid Refrigeration: Store marshmallows at room temperature to maintain their soft, fluffy texture.
7.3. Confectioner’s Sugar
Add some confectioner’s sugar into the container to keep the marshmallows lightly coated and prevent them from sticking together.
- Coat with Sugar: Lightly coat the marshmallows with confectioner’s sugar to prevent them from sticking together.
7.4. Shelf Life
Marshmallows made without egg whites can last for at least 6 months when stored properly. Marshmallows made with egg whites will last for about 5-7 days.
- Long Shelf Life: Marshmallows made without egg whites have a longer shelf life than those made with egg whites.
7.5. Expert Insights From HOW.EDU.VN
According to Chef Sarah Martinez, a pastry expert at HOW.EDU.VN, proper storage is crucial for maintaining the quality of homemade marshmallows. “Always store your marshmallows in an air-tight container at room temperature. This will help them retain their soft, fluffy texture and prevent them from becoming sticky or hard,” she advises.
8. Frequently Asked Questions (FAQ) About Making Marshmallows
Here are some frequently asked questions about making marshmallows, along with expert answers from HOW.EDU.VN.
8.1. What Is The Best Way To Prevent Sugar Crystallization When Making Marshmallows?
Using corn syrup or a substitute like agave syrup can help prevent sugar crystallization. Also, avoid stirring the sugar syrup excessively while it is cooking.
8.2. Can I Make Marshmallows Without A Sugar Thermometer?
Yes, you can. Use the cold water test to check the sugar stage. Drop a small amount of the sugar syrup into a bowl of cold water. If it forms a cohesive shape that can be formed into a firm, pliable ball, it has reached the firm-ball stage.
8.3. Why Are My Marshmallows Sticky?
Sticky marshmallows can be caused by not allowing them to set long enough or by using too much moisture in the recipe. Ensure you let the marshmallows set for at least 6 hours and measure your ingredients accurately.
8.4. Can I Make Vegan Marshmallows?
Yes, you can. Substitute gelatin with agar, a vegan alternative derived from seaweed. Be aware that the texture may be slightly different.
8.5. How Can I Add Flavor To My Marshmallows?
You can add flavorings like vanilla extract, peppermint extract, lemon zest, or cocoa powder to the marshmallow base. Add the flavorings at the end of the whipping process to preserve their flavor.
8.6. Why Are My Marshmallows Tough?
Tough marshmallows can be caused by overmixing the marshmallow base or by cooking the sugar syrup to too high a temperature. Avoid overmixing and use a sugar thermometer to monitor the temperature of the sugar syrup.
8.7. How Long Do Homemade Marshmallows Last?
Marshmallows made without egg whites can last for at least 6 months when stored properly in an airtight container. Marshmallows made with egg whites will last for about 5-7 days.
8.8. Can I Freeze Marshmallows?
Freezing marshmallows is not recommended, as it can change their texture. They may become hard and lose their fluffy consistency.
8.9. What Is The Purpose Of Blooming Gelatin?
Blooming gelatin ensures it dissolves evenly and prevents undissolved clumps in the marshmallow mixture. Mix the gelatin with cold water and let it bloom for at least 10 minutes before adding it to the sugar syrup.
8.10. How Do I Prevent Marshmallows From Sticking To The Pan?
Grease the pan thoroughly with shortening, solidified coconut oil, or butter. You can also line the pan with parchment paper for extra insurance against sticking.
9. Connect With Experts At HOW.EDU.VN
Making perfect marshmallows requires the right knowledge, techniques, and attention to detail. At HOW.EDU.VN, we are dedicated to providing you with expert guidance and support to help you achieve culinary success.
9.1. Access Expert Advice
Connect with our team of over 100 renowned Ph.D. experts across various fields to get personalized advice and solutions for all your culinary challenges.
9.2. Personalized Consultations
Receive tailored guidance and actionable solutions for your specific issues, saving you time and resources.
9.3. Trustworthy Information
Benefit from secure and confidential consultations, ensuring the privacy of your information.
9.4. Convenient Support
Get the expert support you need, all in one place. Our platform is designed to provide you with the tools and resources necessary to tackle any challenge.
9.5. Improve Your Skills
Enhance your skills and knowledge in confectionery by learning from the best in the field. Our experts provide insights and techniques that can transform your cooking abilities.
Don’t struggle with your marshmallow-making endeavors alone. Contact HOW.EDU.VN today and let our experts guide you to success. For personalized assistance and to connect with our team of Ph.D. experts, reach out to us at:
- Address: 456 Expertise Plaza, Consult City, CA 90210, United States
- WhatsApp: +1 (310) 555-1212
- Website: HOW.EDU.VN
Let how.edu.vn be your partner in achieving marshmallow perfection.